> ## Documentation Index
> Fetch the complete documentation index at: https://docs.sezzle.com/llms.txt
> Use this file to discover all available pages before exploring further.
# Shift4Shop
This guide explains how to add Sezzle as a payment option on your Shift4Shop website, enabling customers to use Sezzle at checkout.
Only 3D Cart legacy merchants can use Sezzle at the moment.
### Install the Sezzle Shift4Shop Extension
1. Log in to your website's Shift4Shop admin
2. Get the [app](https://apps.shift4shop.com/sezzle)
3. Copy and paste your Store URL into the input area, then click `Proceed`
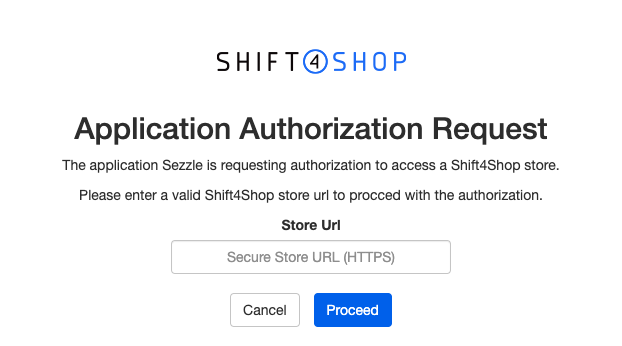 4. Check the PCI Compliance box, then click `Acknowledge and Authorize the App` to start the installation
### Admin Configuration
1. In your Shift4Shop admin, go to Settings > Payment
2. Click Select Payment Methods
4. Check the PCI Compliance box, then click `Acknowledge and Authorize the App` to start the installation
### Admin Configuration
1. In your Shift4Shop admin, go to Settings > Payment
2. Click Select Payment Methods
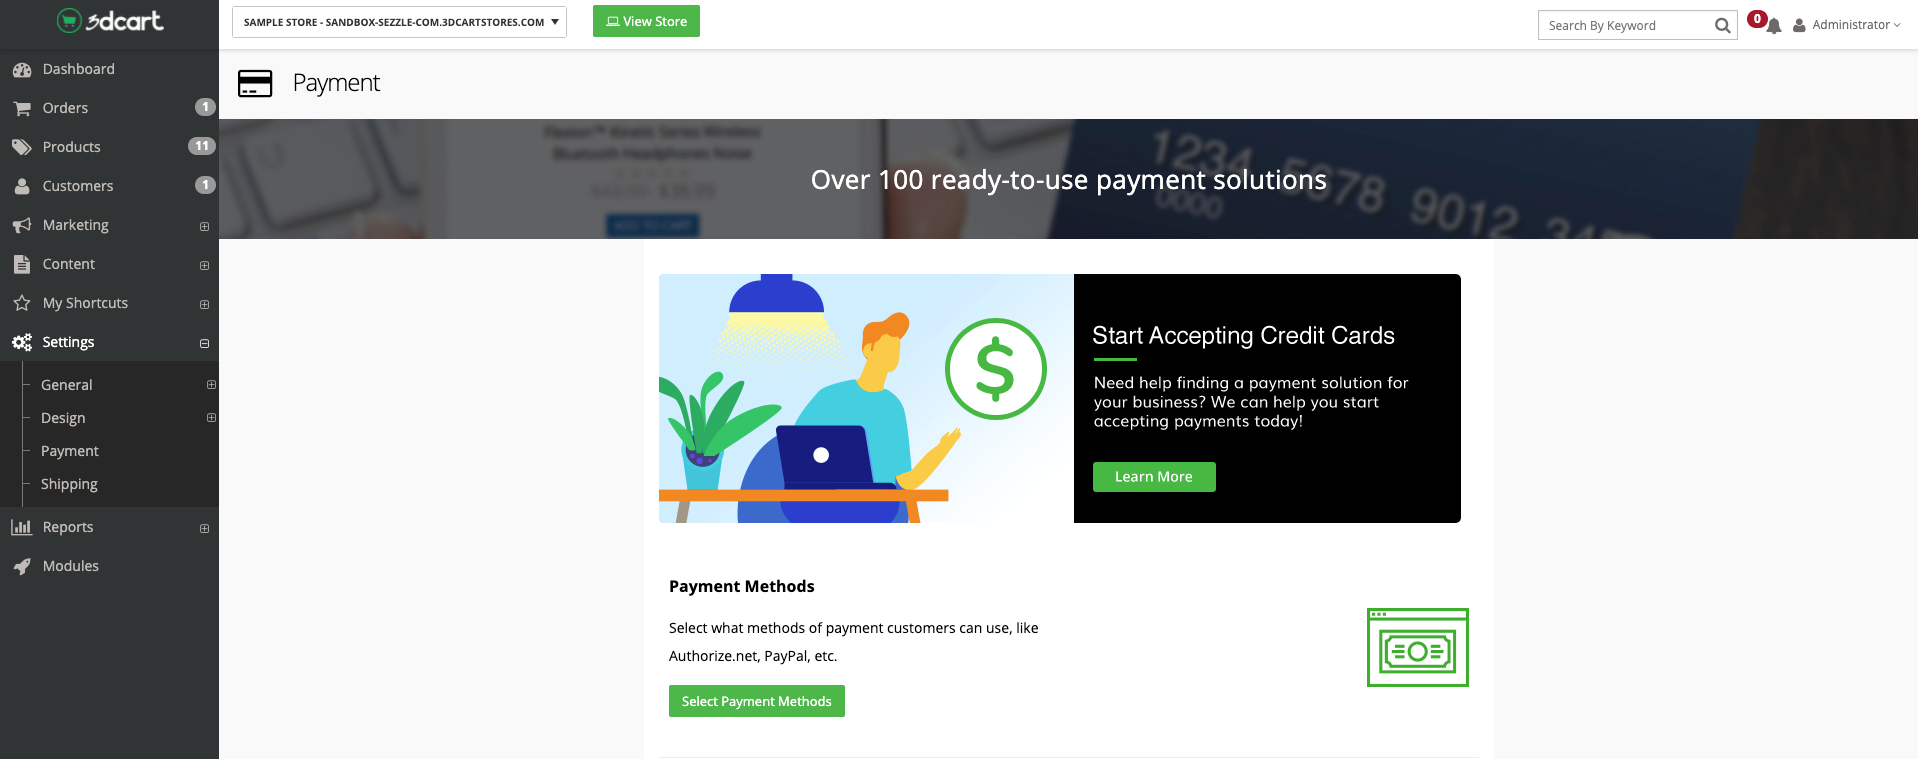 3. Turn the `Sezzle` switch to `On`
4. Copy your Public Key from your [Sezzle Merchant Dashboard](https://dashboard.sezzle.com/merchant/settings/apikeys)
* Paste it into the corresponding field in the Sezzle configuration page of your Shift4Shop admin
5. Next to Private Key, click `Change`
6. Copy your Private Key from your [Sezzle Merchant Dashboard](https://dashboard.sezzle.com/merchant/settings/apikeys)
* Paste it into the corresponding field in the Sezzle configuration page of your Shift4Shop admin
7. Click `Save`
3. Turn the `Sezzle` switch to `On`
4. Copy your Public Key from your [Sezzle Merchant Dashboard](https://dashboard.sezzle.com/merchant/settings/apikeys)
* Paste it into the corresponding field in the Sezzle configuration page of your Shift4Shop admin
5. Next to Private Key, click `Change`
6. Copy your Private Key from your [Sezzle Merchant Dashboard](https://dashboard.sezzle.com/merchant/settings/apikeys)
* Paste it into the corresponding field in the Sezzle configuration page of your Shift4Shop admin
7. Click `Save`
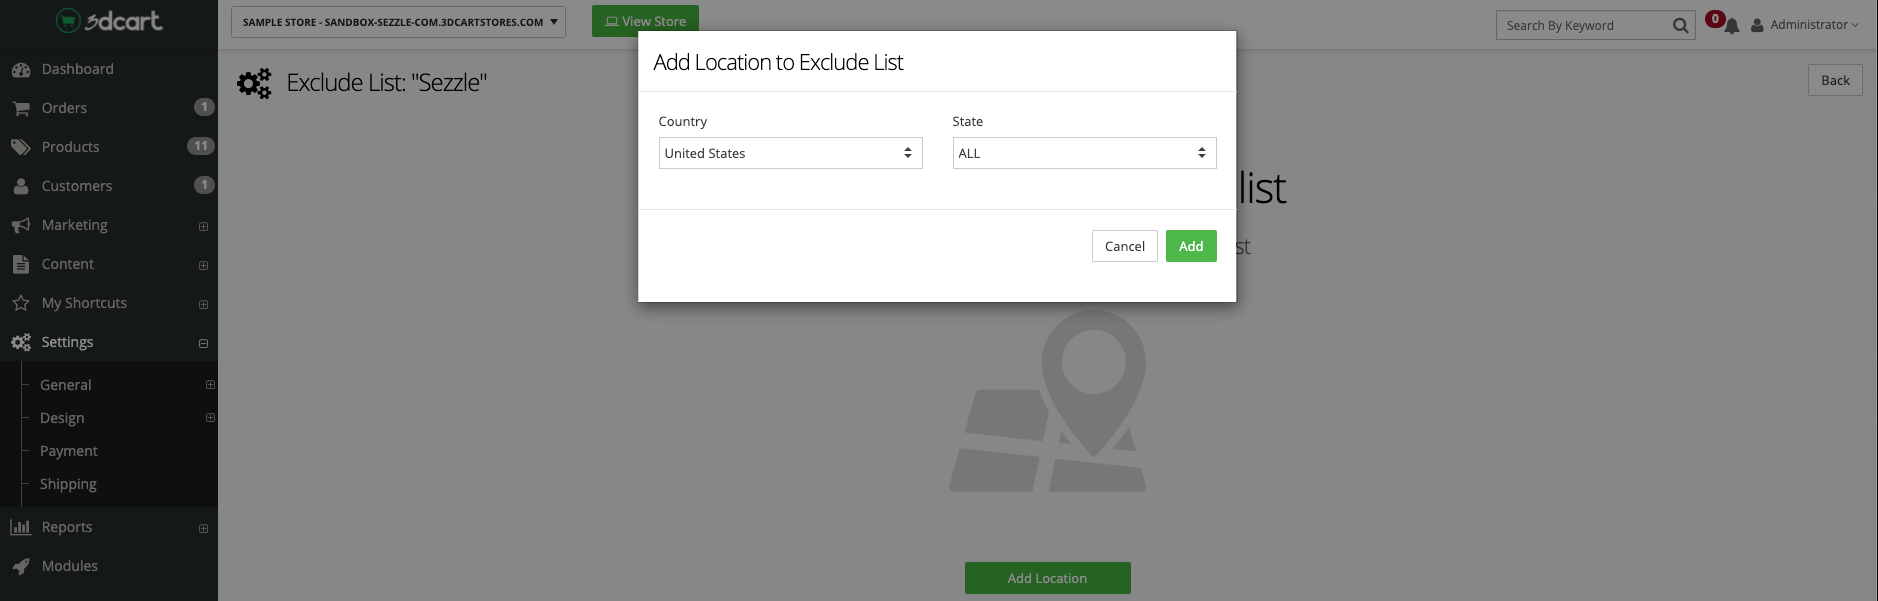
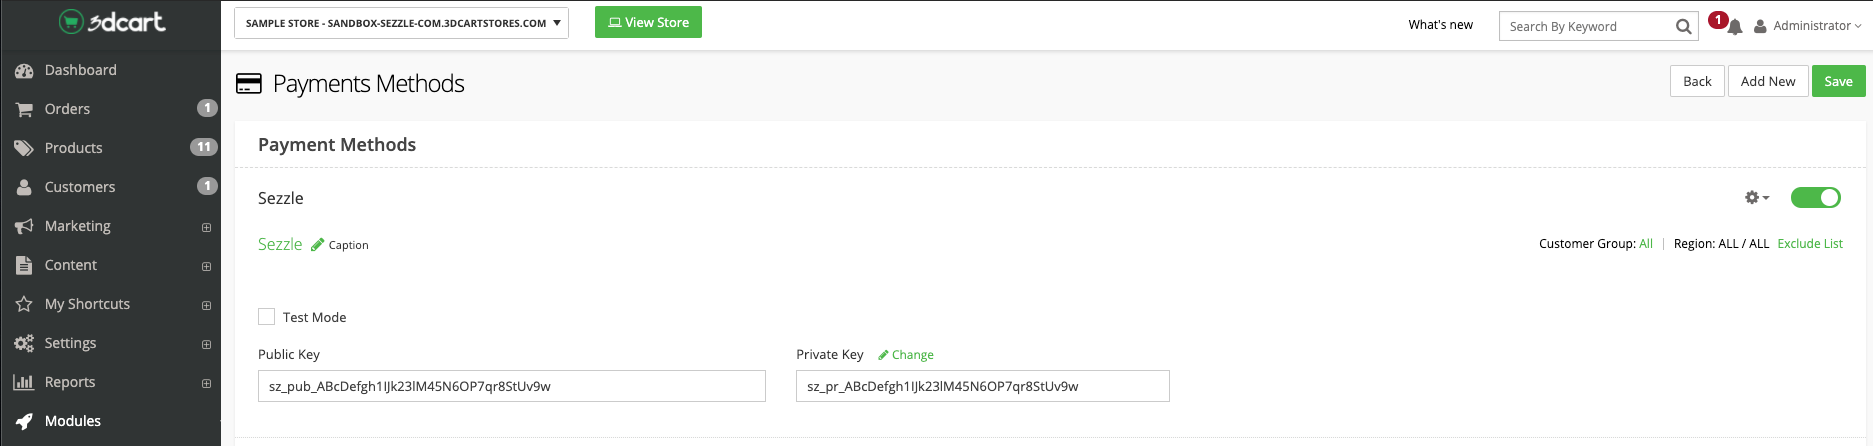 8. To restrict Sezzle usage by country, click the `Exclude List` hyperlink under the `Sezzle` switch
9. Click `Add Location`
10. Select the desired country, then click `Add`
8. To restrict Sezzle usage by country, click the `Exclude List` hyperlink under the `Sezzle` switch
9. Click `Add Location`
10. Select the desired country, then click `Add`
 Installation is complete!
### Validate
Step through a [test checkout](/docs/api/test-cards#checkout-testing) to validate the integration is properly installed.
### Troubleshooting
If testing was unsuccessful, review the following:
1. Sezzle Shift4Shop extension is the most updated version
2. Sezzle payment method is enabled
3. [API Keys](https://dashboard.sezzle.com/merchant/settings/apikeys) were entered correctly
It is recommended to use the Copy icon in the [Sezzle Merchant Dashboard](https://dashboard.sezzle.com/merchant/settings/apikeys) to avoid typos or extra spaces
4. If you have multiple accounts with Sezzle, the merchant ID and API Keys are tied to only one URL
5. Sezzle on-site messaging widget script is present on your website and reflects the Merchant ID from your [Sezzle Merchant Dashboard](https://dashboard.sezzle.com/merchant/settings/business)
1. Go to a product page on your website
2. Right-click then select `Inspect`
3. In the `Elements` tab, search for `widget.sezzle`
### Manual Theme Integration
If the Shift4Shop app fails to maintain the widget script on the product pages, or to add the script manually for additional pages, complete the following steps:
1. From your Shift4Shop admin, go to `Settings` > `Design` > `Themes & Styles`
2. In your Current Theme, click the button labeled `More` then select `Edit Template (HTML)`
3. Find the copy of your theme under `Go to Folder`
4. Click the gear icon next to the `product_items.html` file, then click `Edit`
5. When the dashboard asks if you want to edit your theme files, click the `Edit Theme Files` button
6. In the Source Code text area, copy and paste the script at the very beginning of the file
7. Click `Save`
### Insert Script into Webpage
Template:
```
```
Update `{sezzle_merchant_uuid}` in the above script template to reflect your site’s Merchant ID (removing the curly brackets), which can be found in the [Sezzle Merchant Dashboard](https://dashboard.sezzle.com/merchant/settings/business).
Example:
```
```
* Instructions may vary slightly depending on your active plug-ins.
* For assistance with widget configuration, click `Request Addition of Widgets` in the widget step of your [Sezzle Merchant Dashboard Setup Checklist](https://dashboard.sezzle.com/merchant/checklist).
### Uninstall Steps
1. Go to `Settings` > `Payment`
2. Click `Select Payment Methods`
3. Under the Sezzle App, click the gear icon then click `Delete`
Installation is complete!
### Validate
Step through a [test checkout](/docs/api/test-cards#checkout-testing) to validate the integration is properly installed.
### Troubleshooting
If testing was unsuccessful, review the following:
1. Sezzle Shift4Shop extension is the most updated version
2. Sezzle payment method is enabled
3. [API Keys](https://dashboard.sezzle.com/merchant/settings/apikeys) were entered correctly
It is recommended to use the Copy icon in the [Sezzle Merchant Dashboard](https://dashboard.sezzle.com/merchant/settings/apikeys) to avoid typos or extra spaces
4. If you have multiple accounts with Sezzle, the merchant ID and API Keys are tied to only one URL
5. Sezzle on-site messaging widget script is present on your website and reflects the Merchant ID from your [Sezzle Merchant Dashboard](https://dashboard.sezzle.com/merchant/settings/business)
1. Go to a product page on your website
2. Right-click then select `Inspect`
3. In the `Elements` tab, search for `widget.sezzle`
### Manual Theme Integration
If the Shift4Shop app fails to maintain the widget script on the product pages, or to add the script manually for additional pages, complete the following steps:
1. From your Shift4Shop admin, go to `Settings` > `Design` > `Themes & Styles`
2. In your Current Theme, click the button labeled `More` then select `Edit Template (HTML)`
3. Find the copy of your theme under `Go to Folder`
4. Click the gear icon next to the `product_items.html` file, then click `Edit`
5. When the dashboard asks if you want to edit your theme files, click the `Edit Theme Files` button
6. In the Source Code text area, copy and paste the script at the very beginning of the file
7. Click `Save`
### Insert Script into Webpage
Template:
```
```
Update `{sezzle_merchant_uuid}` in the above script template to reflect your site’s Merchant ID (removing the curly brackets), which can be found in the [Sezzle Merchant Dashboard](https://dashboard.sezzle.com/merchant/settings/business).
Example:
```
```
* Instructions may vary slightly depending on your active plug-ins.
* For assistance with widget configuration, click `Request Addition of Widgets` in the widget step of your [Sezzle Merchant Dashboard Setup Checklist](https://dashboard.sezzle.com/merchant/checklist).
### Uninstall Steps
1. Go to `Settings` > `Payment`
2. Click `Select Payment Methods`
3. Under the Sezzle App, click the gear icon then click `Delete`