> ## Documentation Index
> Fetch the complete documentation index at: https://docs.sezzle.com/llms.txt
> Use this file to discover all available pages before exploring further.
# WooCommerce
Sezzle [Express Checkout](#express-checkout) now available on `Sezzle Woocommerce Payments` plugin version 6.1.x or later.
This guide explains how to add Sezzle as a payment option on your WooCommerce website, enabling customers to use Sezzle at checkout.
### Install the Sezzle WooCommerce Extension
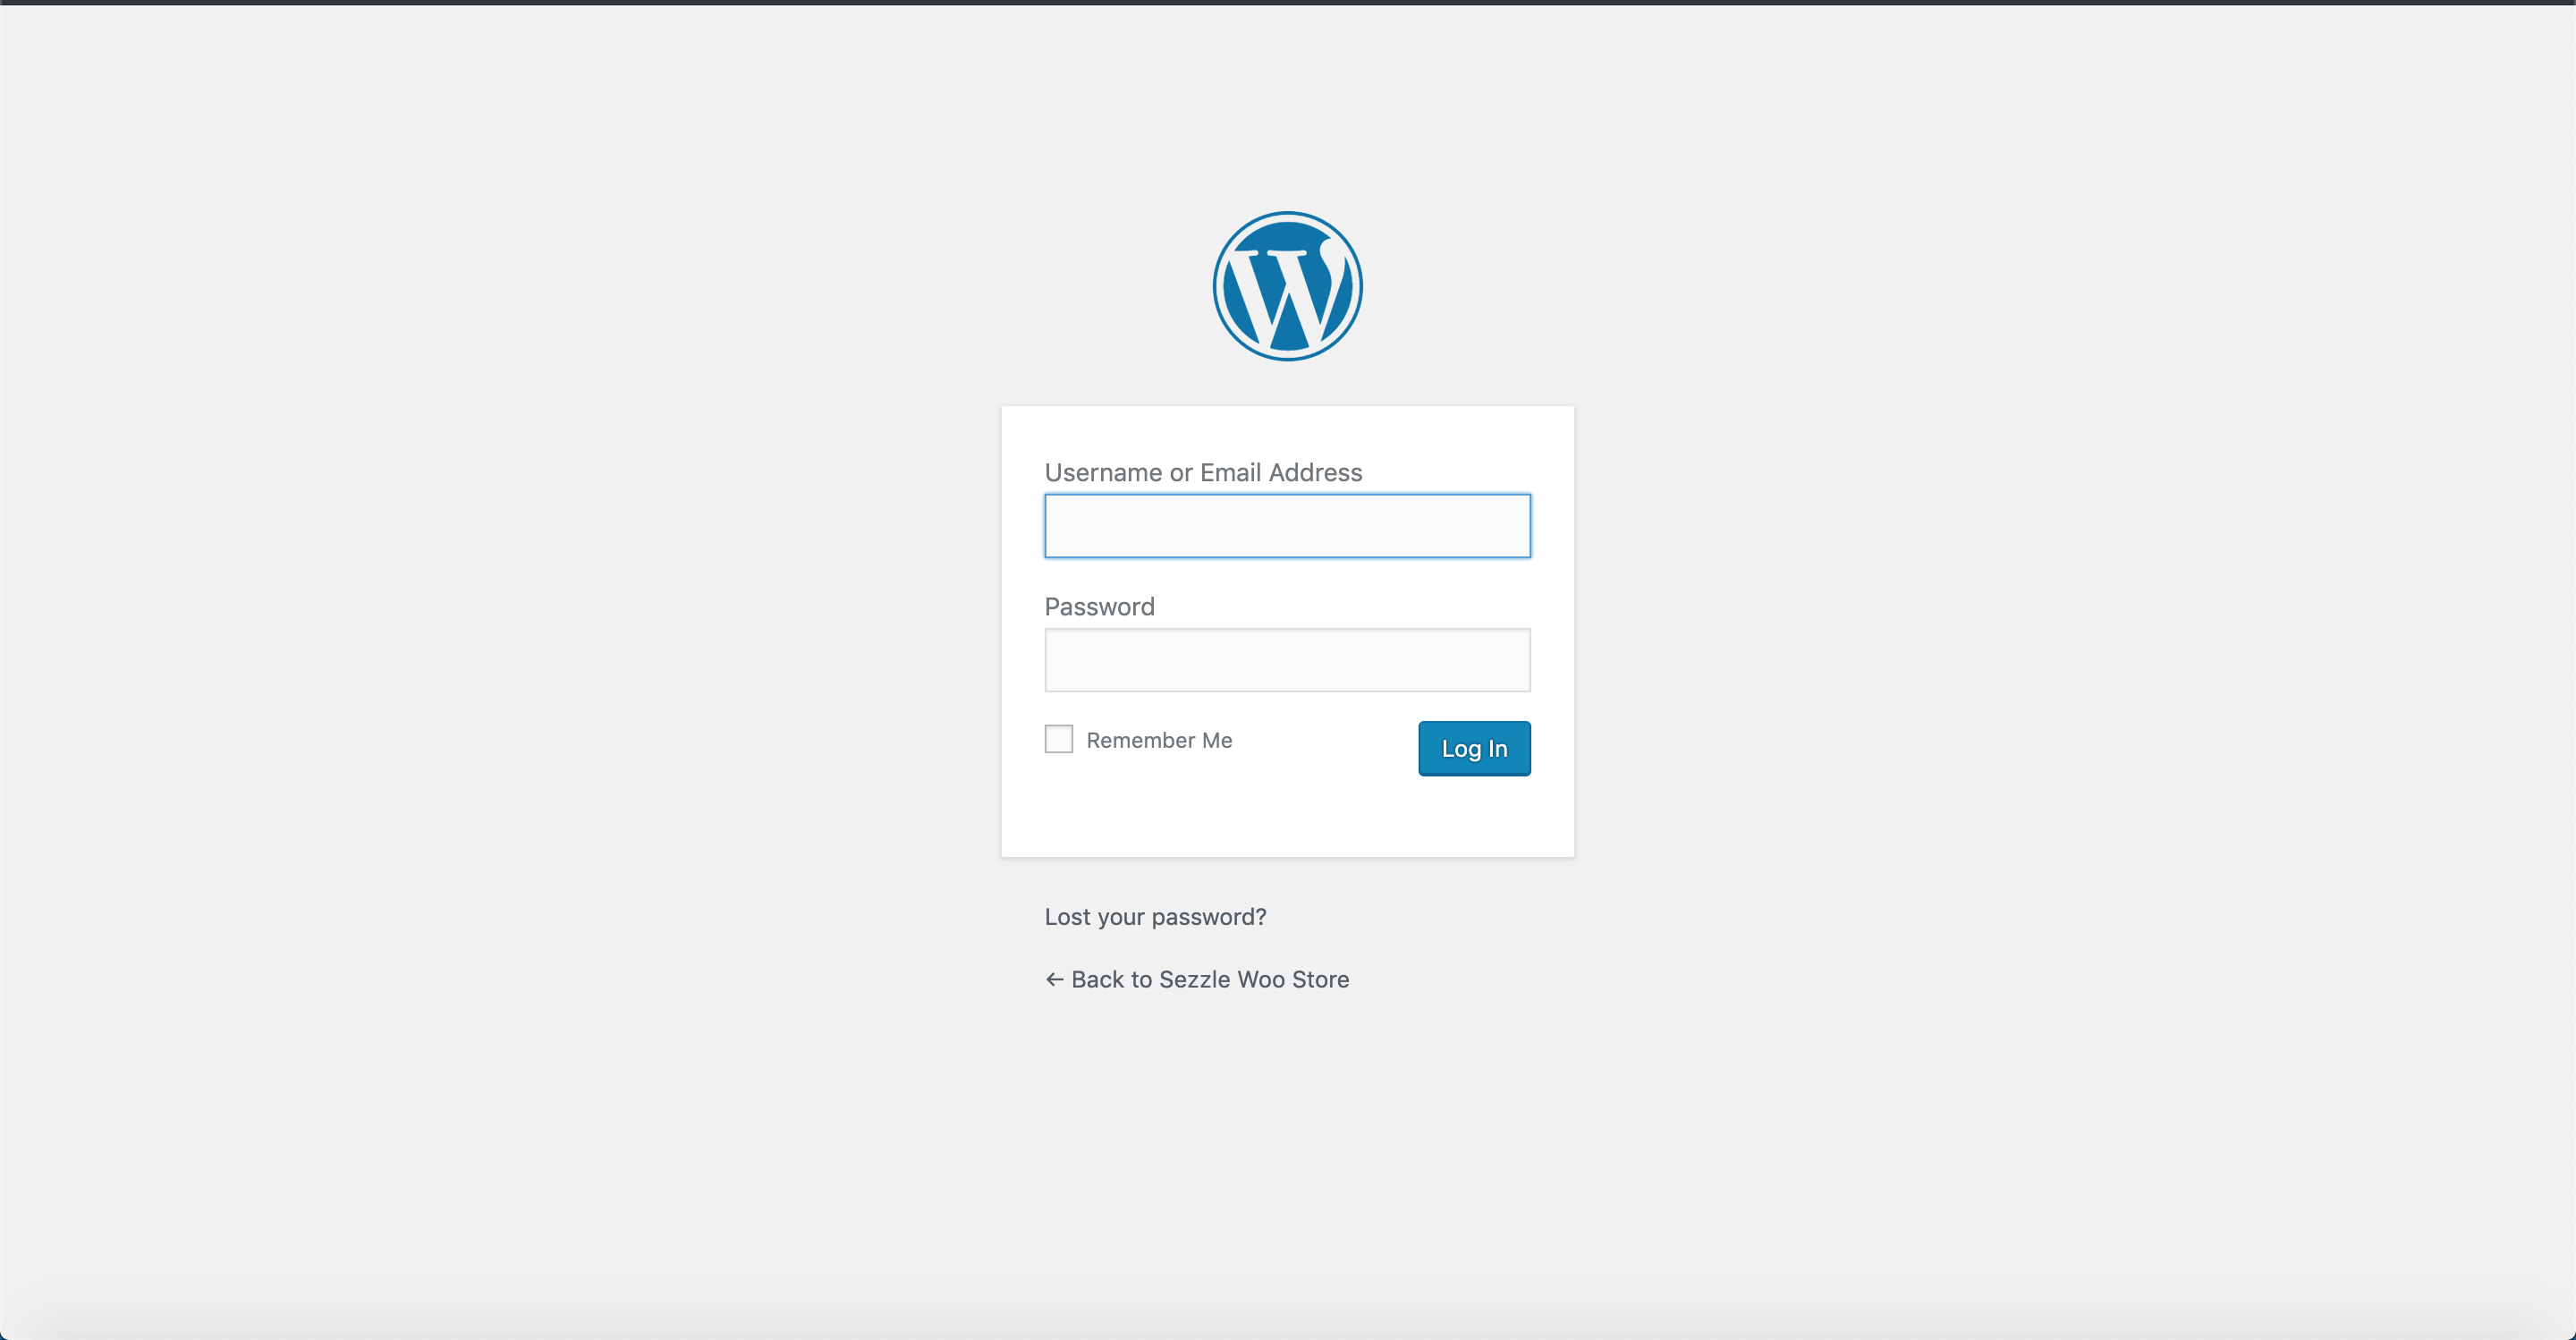
1. Log in to your website's Wordpress admin
* Ex: `your-website.com/wp-admin`
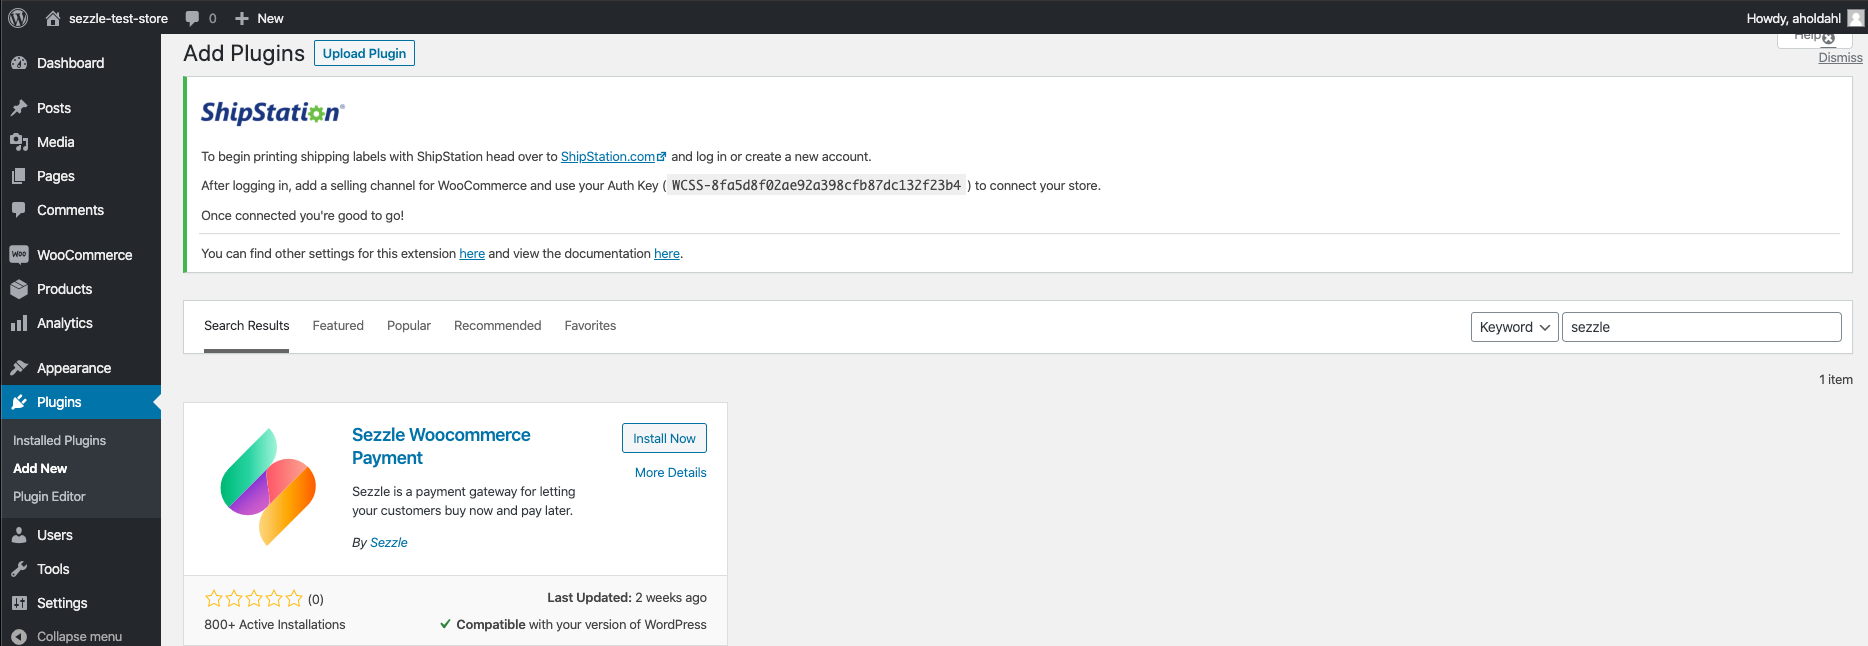
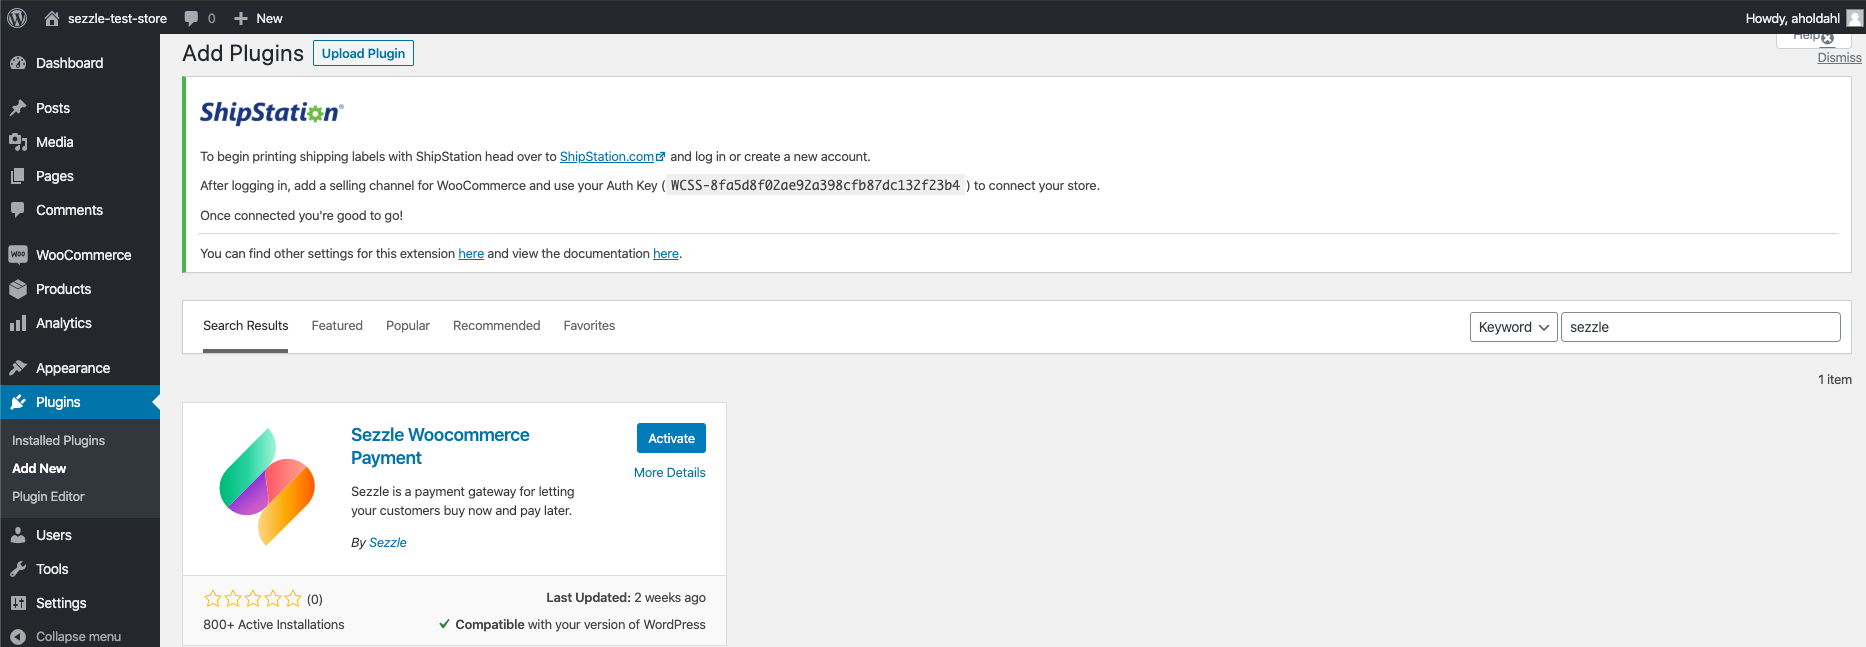
2. In the left sidebar, click `Plugins` > `Add New`
3. Search for `Sezzle`
4. Click `Install Now`
5. Click `Activate`
### Admin Configuration
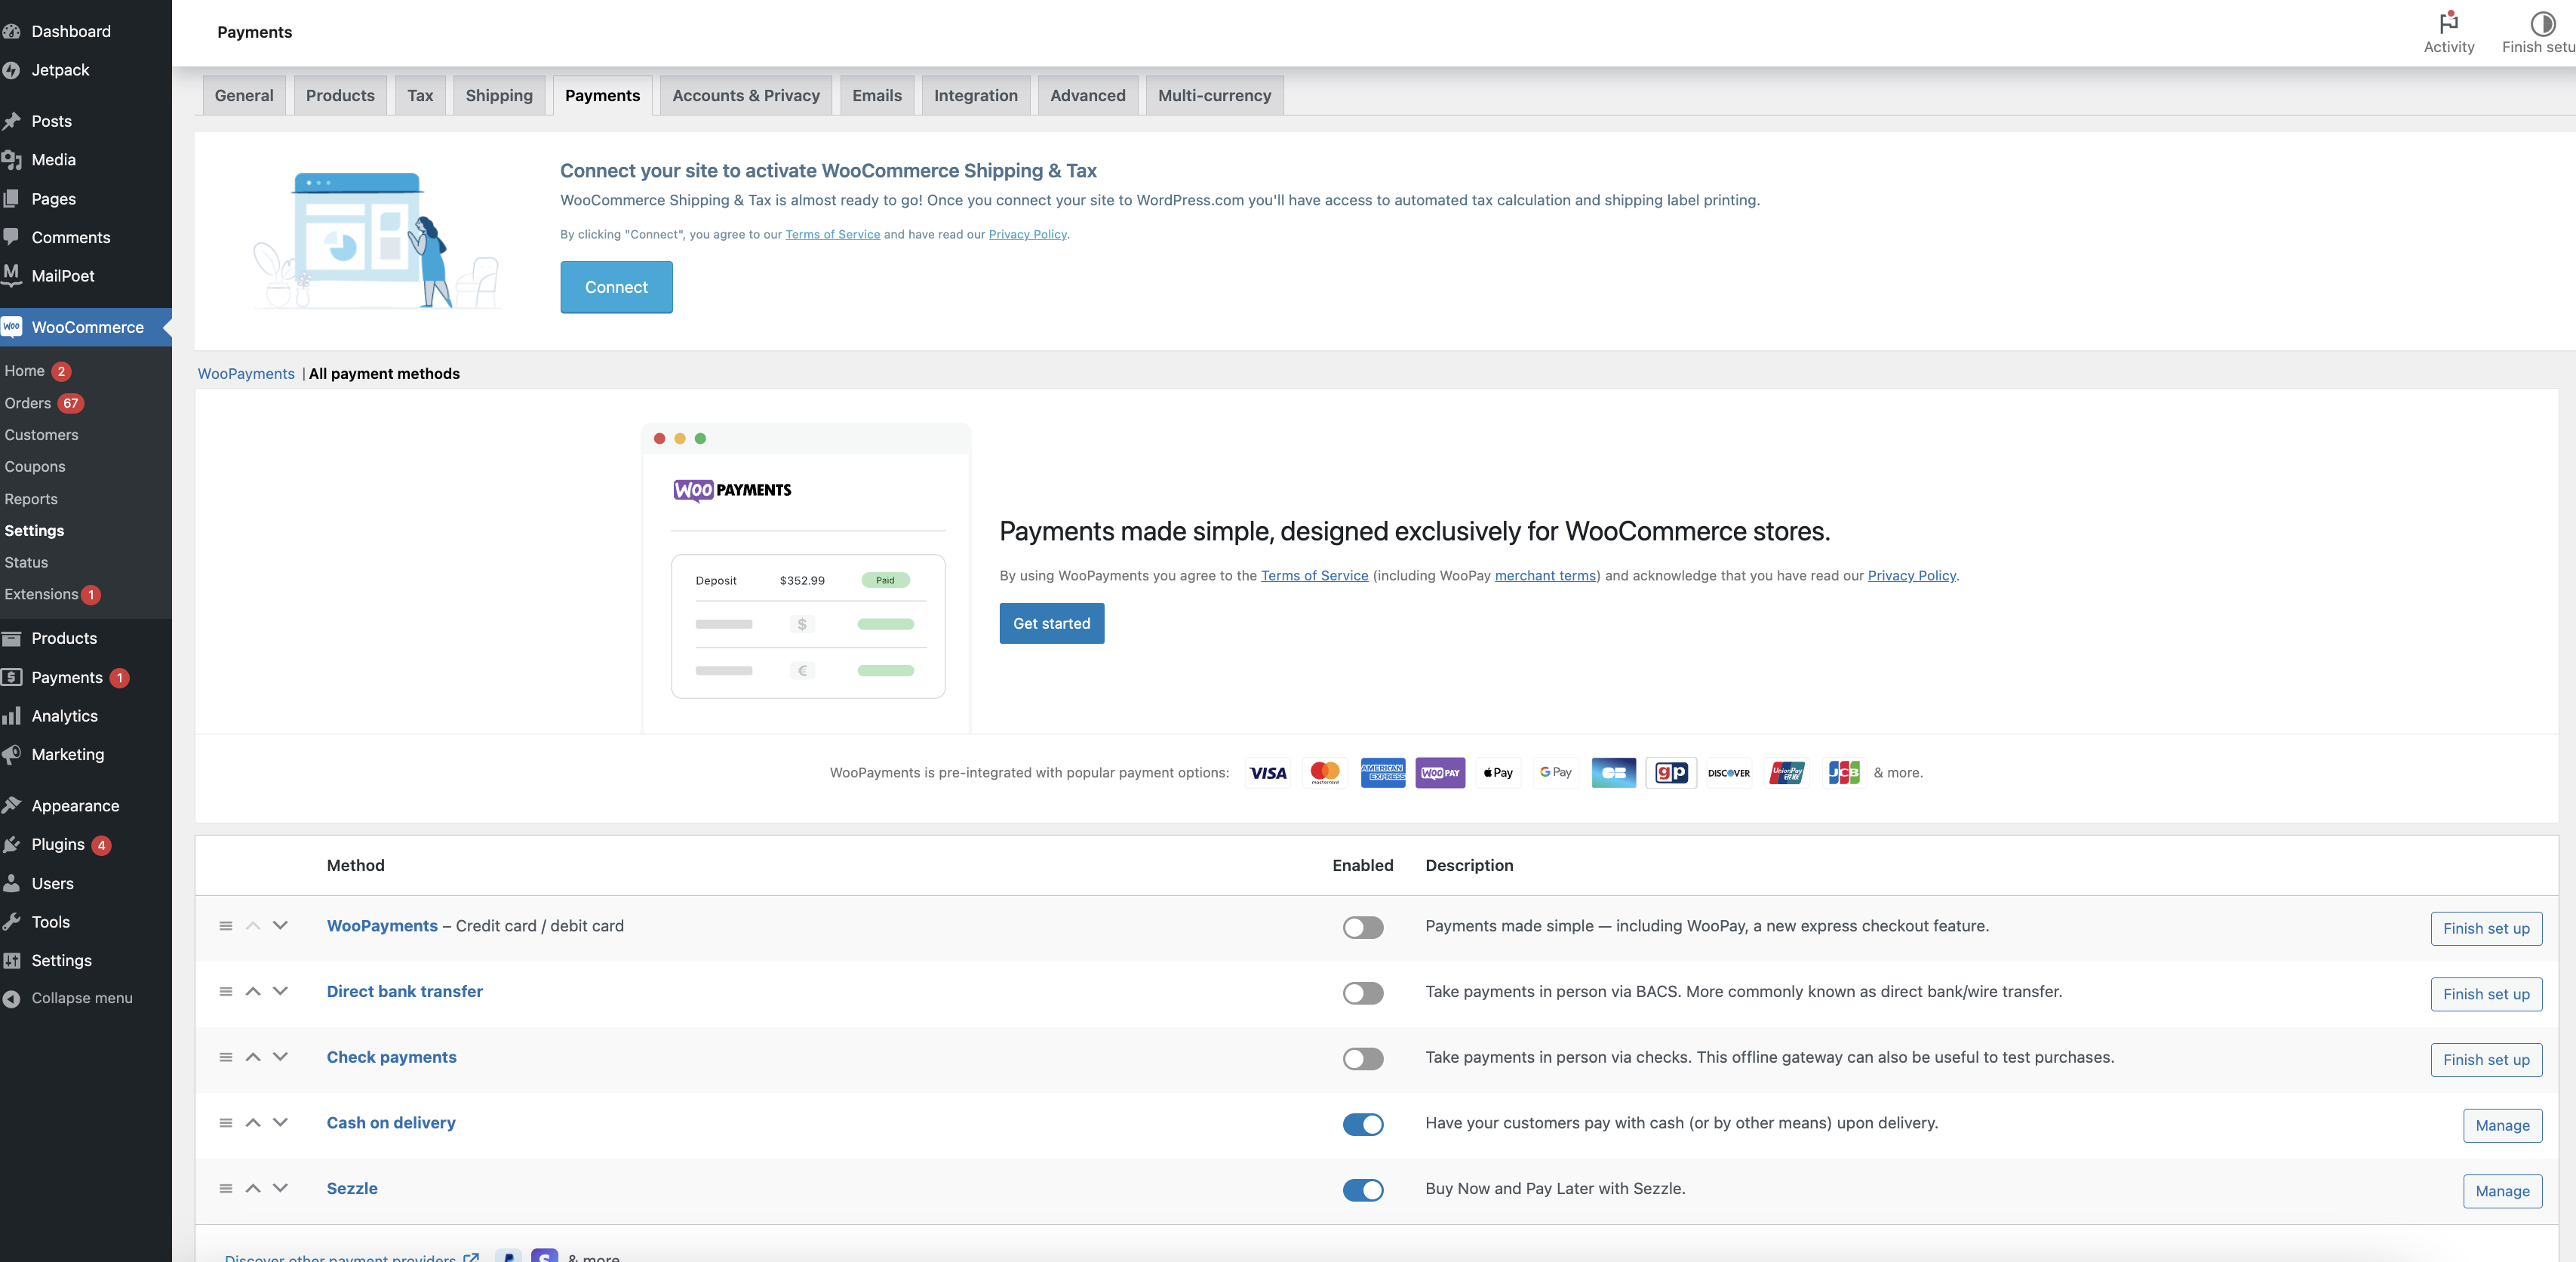
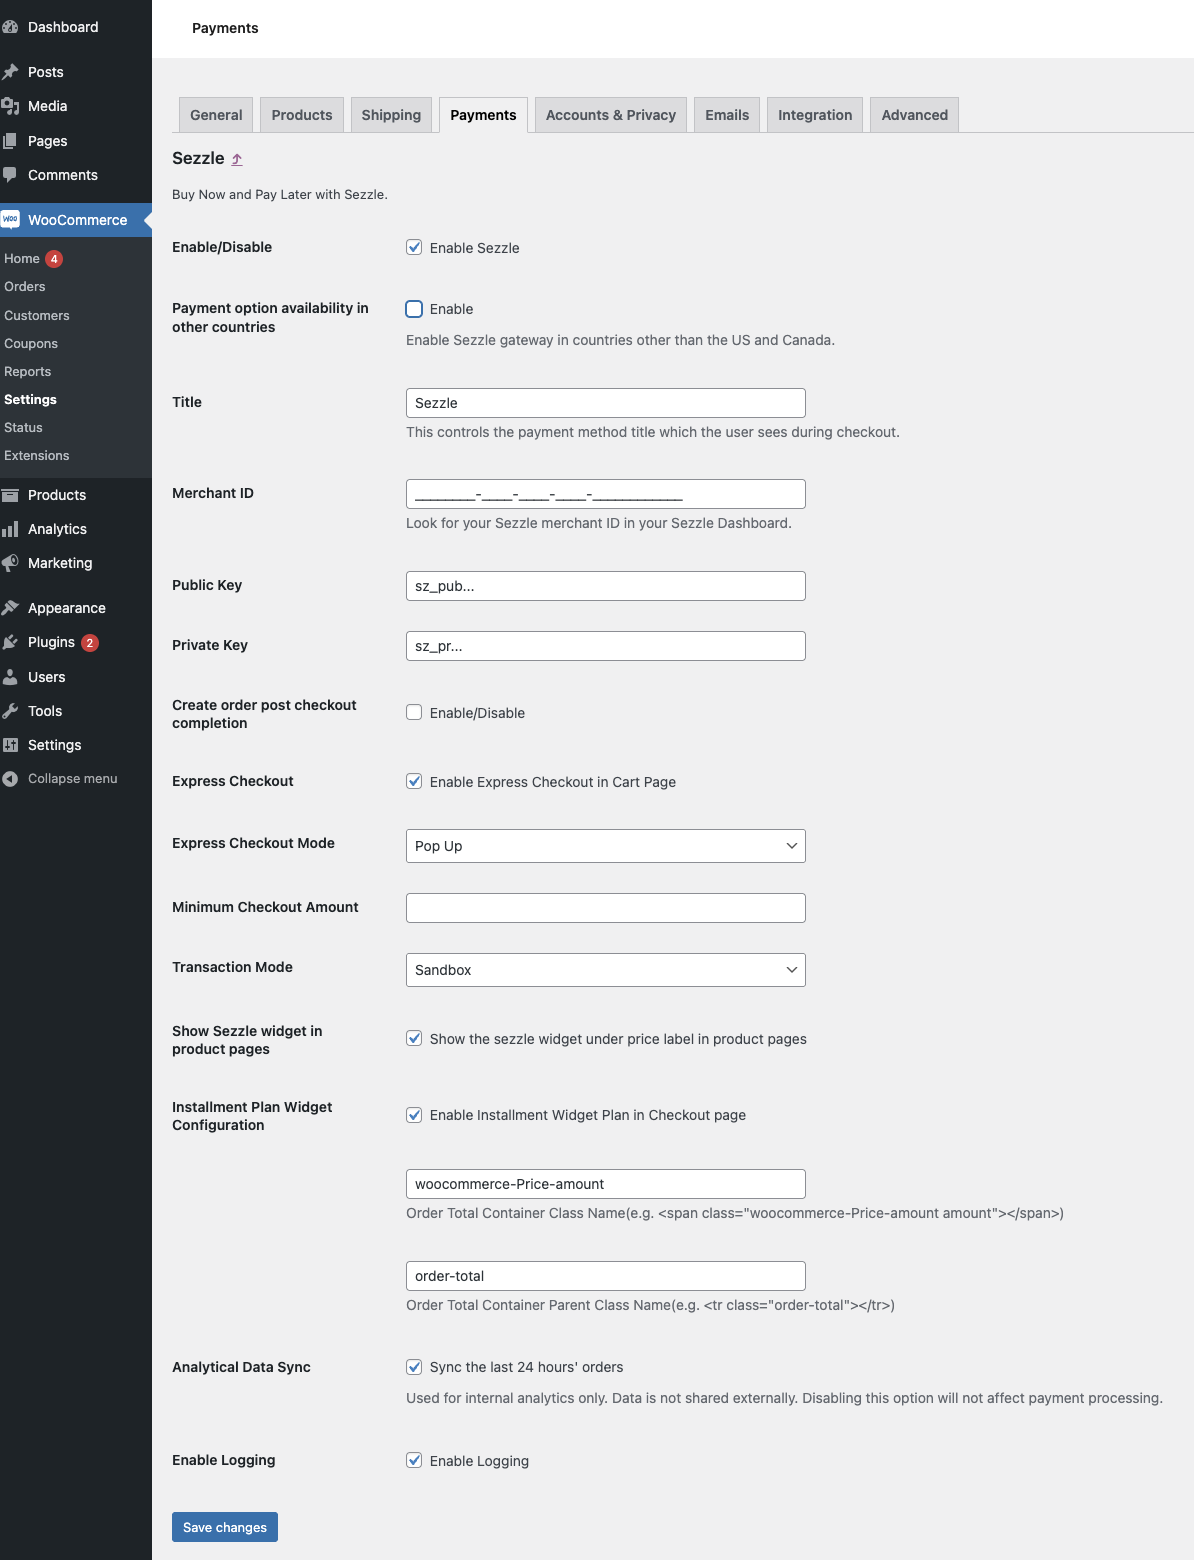
1. In the left sidebar, click `WooCommerce` > `Settings`
2. Select the `Payments` tab
3. Click the `Manage` button for Sezzle
4. Check the `Enable/Disable` checkbox for enabling Sezzle
5. Please ensure only US and Canada are selected as Sezzle operates only in `US` and `Canada`
* Sezzle operates only in `US` and `Canada`
* Be sure to check this option
6. Set Merchant ID as received from the Business section of [Sezzle Merchant Dashboard](https://dashboard.sezzle.com/merchant)
7. Copy your Private Key and Public Key from your [Sezzle Merchant Dashboard](https://dashboard.sezzle.com/merchant/settings/apikeys), and paste them into the corresponding fields
8. Optional: Check the `Create order post checkout completion` checkbox for enabling WooCommerce order creation only after Sezzle checkout is successfully completed
This will only work with standard classic checkout, not with checkout blocks
Enabling this feature may result in higher uncaptured orders, especially if your store offers add-ons such as shipping insurance. Please refer to the [Order Fulfillment](#important-note-on-order-fulfillment) section for more information.
9. Set `Minimum Checkout Amount` if you want to restrict Sezzle based on a minimum order total
10. Set the `Transaction Mode` as `Live` for production and `Sandbox` for sandbox testing mode
11. Check the `Show Sezzle widget in product pages` checkbox for adding widget script in the Product Display Page, which allows enabling Sezzle Widget Modal in PDP
* After saving if you don't see the widget in PDP, contact [merchantsupport@sezzle.com](mailto:merchantsupport@sezzle.com). If you are using Elementor, you may need to [install the script manually](#manual-widget-installation)
12. Configure the installment plan widget under Installment Plan Widget Configuration settings
13. Check the `Enable Installment Widget Plan in Checkout page` checkbox for enabling installment widget plan
14. Set the `Order Total Container Class Name`
* Default is `woocommerce-Price-amount`
15. Set the `Order Total Container Parent Class Name`
* Default is `order-total`
16. Check the `Enable Logging` checkbox for logging Sezzle checkout related data
* This is helpful for debugging issues, if encountered. See (logs)\[#logs] for more details.
17. Click `Save Changes`
### Express Checkout
Currently, the Express Checkout feature is only available for select merchant IDs. Please contact Sezzle Merchant Support if you wish to participate in the beta testing.
Merchant ID and API keys must be entered and saved before this feature will become visible in your Sezzle settings.
Express checkout is currently only compatible with standard/classic checkout, and requires your store to have a minimum of 1 shipping option configured for all US and Canada zones.
It is not currently compatible with:
* checkout blocks
* stores who are any combination of the following:
* digital products only
* in-person products only
* buy-online-pick-up-in-store (BOPIS) only
* Shipping protection or other selection that would alter order total during checkout
* Upsell app that would alter order total post-checkout
Note: coupon codes can still be used with Express Checkout, but must be applied on the merchant's site before the shopper proceeds to Sezzle.
1. Check the `Enable Express Checkout in Cart Page` checkbox to enable Sezzle express checkout on your cart page and mini-cart.
2. Optional: Select the desired `Express Checkout Mode`: `Pop Up` or `IFrame`
**popup** mode will work out-of-the-box. No additional configuration is required to use **popup**. Sezzle currently recommends **popup** mode.
**iframe** mode will not work properly without first contacting Sezzle. For security reasons, Sezzle must enable **iframe** for your domain(s). To have it enabled, please submit a request with your Sezzle Merchant UUID and a list of domains to be allowed per environment (production and sandbox). For example, [*please enable uat1.mysite.com, uat2.mysite.com in sandbox and www.mysite.com, mysite.com in production*](http://www.mysite.com).
The integration for **popup** and **iframe** are identical, aside from the mode. Using **popup** mode will expedite your development. Upon completing the integration, if **iframe** is a requirement, then contact Sezzle to enable your domain(s) and switch the mode to **iframe**.
### Validate
Step through a [test checkout](/docs/api/test-cards#checkout-testing) to validate the integration is properly installed.
### Important Note on Order Fulfillment
After the shopper completes checkout, orders will be validated to ensure the Sezzle authorized total matches the order total in Woocommerce prior to payment capture. Uncaptured orders should remain in the `Pending Payment` stage in WooCommerce. However before shipping the order, ensure that the Order in the WooCommerce interface show the order status is `Processing` and reflects the Note `Payment approved by Sezzle`. When these notes exist, Sezzle successfully captured the payment and you will be paid for the order.
Do not fulfill orders where the Sezzle payment was not captured. Please provide the (logs)\[#logs] to Sezzle Merchant Support for further investigation.
### Logs
1. From your WP admin, go to WooCommerce > Status
2. Click the Logs tab
3. In the `All Sources` dropdown, select `sezzlepay` then click `Filter`
4. Select the files for all dates for the investigation
5. In the `Bulk Actions` dropdown, select `Download` then click `Apply`
### A Guide to Order Reference IDs
| Setting | Format | Description |
| ------------------------------------------------------------------ | -------------------------------- | -------------------------------------- |
| Standard checkout with`Create Order Post Checkout Completion`: ON | 6903bd4e9a370 | unique ID; order ID # not yet assigned |
| Standard checkout with`Create Order Post Checkout Completion`: OFF | 6903bd072eef3-103 | unique ID + order ID # |
| Express checkout with`Create Order Post Checkout Completion`: ON | 7373a6360061102dcc43e03fc473da28 | Cart Hash; Order Key not yet assigned |
| Express checkout with`Create Order Post Checkout Completion`: OFF | wc\_order\_rq9mAmVMhMfdh | Order Key |
### Manual Widget Installation
#### Using Elementor?
Within the Elementor Page Builder, drag and drop the Custom HTML block type into the site footer, adding the widget script snippet into the code box, then save and publish changes.
1. In your WooCommerce account, go to `Appearance`, and then `Theme Editor`
2. Click `Theme Footer` to the right of the page
3. In the Content text area, insert the script on the last line of the code, and click `Update File`
* The script below is what you will need to insert:
```
```
* You will need to update the in the above script to reflect your store’s UUID.
* You can find your UUID in your Sezzle dashboard, under `Settings`, and then `Business`.
* When you enter your UUID, please make sure that you remove the surrounding it.
### Troubleshooting
If testing was unsuccessful, review the following:
1. Sezzle WooCommerce extension is the most updated version
1. Go to `Plugins` > `Installed Plugins`
2. Click `View Details` next to the `Sezzle WooCommerce Payment`
3. If there is an option to upgrade, do so now
2. Sezzle extension is activated
1. Go to `WooCommerce` > `Settings`
2. Ensure the switch is turned `On`
3. Merchant ID was entered correctly
4. API Keys were entered correctly
It is recommended to use the Copy icon in the [Sezzle Merchant Dashboard](https://dashboard.sezzle.com/merchant/settings/apikeys) to avoid typos or extra spaces
5. If you have multiple accounts with Sezzle, the merchant ID and API Keys are tied to only one URL
6. Show Sezzle widget in product pages box is checked
7. Widget script is present on your website and reflects the Merchant ID from your [Sezzle Merchant Dashboard](https://dashboard.sezzle.com/merchant/settings/business)
1. Go to a product page on your website
2. Right-click then select `Inspect`
3. In the `Elements` tab, search for `widget.sezzle`
### Uninstall Steps
1. Go to `Plugins` > `Installed Plugins`
2. Under `Sezzle WooCommerce Payment`, click `Deactivate` then click `Delete`
 2. In the left sidebar, click `Plugins` > `Add New`
3. Search for `Sezzle`
4. Click `Install Now`
2. In the left sidebar, click `Plugins` > `Add New`
3. Search for `Sezzle`
4. Click `Install Now`
 5. Click `Activate`
 ### Admin Configuration
1. In the left sidebar, click `WooCommerce` > `Settings`
2. Select the `Payments` tab
### Admin Configuration
1. In the left sidebar, click `WooCommerce` > `Settings`
2. Select the `Payments` tab
 3. Click the `Manage` button for Sezzle
 4. Check the `Enable/Disable` checkbox for enabling Sezzle
5. Please ensure only US and Canada are selected as Sezzle operates only in `US` and `Canada`
4. Check the `Enable/Disable` checkbox for enabling Sezzle
5. Please ensure only US and Canada are selected as Sezzle operates only in `US` and `Canada`