# Get a bearer authentication token
Source: https://docs.sezzle.com/docs/api/core/authentication/postauthentication
post /v2/authentication
# Get interest account activity
Source: https://docs.sezzle.com/docs/api/core/interest/getv2activity
get /v2/interest/activity
# Get interest account balance
Source: https://docs.sezzle.com/docs/api/core/interest/getv2balance
get /v2/interest/balance
# Delete checkout by order
Source: https://docs.sezzle.com/docs/api/core/orders/deletev2deletecheckoutbyorder
delete /v2/order/{order_uuid}/checkout
# Get order details
Source: https://docs.sezzle.com/docs/api/core/orders/getv2order
get /v2/order/{order_uuid}
# Payment Flow
Source: https://docs.sezzle.com/docs/api/core/orders/index
1. Merchant calls `/v2/session` with order and intent of `AUTH` or `CAPTURE`. Optionally, the merchant can send customer information
2. Sezzle returns order uuid and checkout URL.
3. Merchant redirects customer to Sezzle checkout URL.
4. Customer completes the Sezzle checkout and is redirected to the session complete URL.
* If the intent was to `CAPTURE`, Sezzle will capture the total order amount.
* If the intent was to `AUTH`, Sezzle will only authorize the total order amount and the merchant can call `/v2/order` later to release or capture amounts using the order uuid.
## Supported Methods
# Update order
Source: https://docs.sezzle.com/docs/api/core/orders/patchv2checkout
patch /v2/order/{order_uuid}
# Update checkout by order
Source: https://docs.sezzle.com/docs/api/core/orders/patchv2updatecheckoutbyorder
patch /v2/order/{order_uuid}/checkout
This endpoint should be used with our express checkout offering. It is not intended for the direct integration flow.
# Capture amount by order
Source: https://docs.sezzle.com/docs/api/core/orders/postv2capturebyorder
post /v2/order/{order_uuid}/capture
# Reauthorize amount by order
Source: https://docs.sezzle.com/docs/api/core/orders/postv2reauthorizebyorder
post /v2/order/{order_uuid}/reauthorize
Please note the following when reauthorizing an order.
* A new order will be created
* The intent will be set to AUTH
* The reference\_id will be the same as the original order
* The reauthorized amount will be a new installment plan for the customer
Reauthorizations are not guaranteed to be approved. It is extremely important to note this API will return a 200 success if the request to reauthorize is successful (i.e. no errors) but the customer was not approved.
Please be sure to check the authorization **approved** value in the response to determine if the reauthorization order was created.
# Refund amount by order
Source: https://docs.sezzle.com/docs/api/core/orders/postv2refundbyorder
post /v2/order/{order_uuid}/refund
# Release amount by order
Source: https://docs.sezzle.com/docs/api/core/orders/postv2releasebyorder
post /v2/order/{order_uuid}/release
# Get session status
Source: https://docs.sezzle.com/docs/api/core/sessions/getv2session
get /v2/session/{session_uuid}
# Create a session
Source: https://docs.sezzle.com/docs/api/core/sessions/postv2session
post /v2/session
# Get card data by token
Source: https://docs.sezzle.com/docs/api/core/sessions/virtual/carddatabytoken
get /v2/session/card/token/{token}
**Security Rules** Data is only available for 24 hours and requires an
authorization token. Once accessed the token is deleted which cannot be
undone.
# Create a card session
Source: https://docs.sezzle.com/docs/api/core/sessions/virtual/postv2sessioncard
post /v2/session/card
This endpoint should be used with our virtual card offering. It is not intended for the direct integration flow.
# Update a card session
Source: https://docs.sezzle.com/docs/api/core/sessions/virtual/setorderid
patch /v2/session/{session_id}/card
# Get summary
Source: https://docs.sezzle.com/docs/api/core/settlements/getv2summary
get /v2/settlements/summaries
If your store accepts multiple currencies, you will need to request settlement summaries for each supported currency. If currency code is not provided in the request, the default currency will be USD.
# Get details
Source: https://docs.sezzle.com/docs/api/core/settlements/getv2summarydetail
get /v2/settlements/details/{payout_uuid}
## Payout Summary (rows 1-2)
### Summary Headers (row 1)
| Column Header | Description |
| --------------------------------------------- | ----------------------------------------------------------------------------------------------------------------------------------- |
| Total order amount | The sum of all orders on this payout. |
| Total refund amount | The sum of all refunds on this payout. |
| Total fee amount | The sum of all fees on this payout. |
| Total returned fee amount | The sum of all returned fees on this payout. |
| Total chargeback amount | The sum of all chargebacks on this payout. |
| Total chargeback reversal amount | The sum of all chargeback reversals on this payout. |
| Total interest transfer amount | The sum of all interest transfers on this payout. If you are not participating in the interest program, this field will be omitted. |
| Total correction amount | The sum of all corrections on this payout. |
| Total referral revenue transfer amount | The sum of all referral revenue transfers on this payout. |
| Total bank account withdrawal amount | The sum of all bank account withdrawals. |
| Total bank account withdrawal reversal amount | The sum of all bank account withdrawal reversals, which reflect a bank account withdrawal that has failed. |
| Forex fees | The cost of foreign exchange fees associated with this payout. |
| Net settlement amount | Net amount of settlement. |
| Payment uuid | The UUID for this payout. |
| Settlement currency | The currency in which this payout was sent. |
| Payout date | The date this payout was sent. |
| Payout status | The current status of this payout. |
## Line Items (rows 3-n)
### Line Item Headers (row 3)
| Column Header | Description |
| --------------------------------------- | ----------------------------------------------------------------------------------------------------------------------------------------------------------------------------- |
| [Type](#line-item-type) | Describes the type of event (Order, Fee, Refund, etc.). |
| Order capture date | The date at which the order was captured. This field is empty if the order has not yet been captured. |
| Order created at | The date at which the order was created. |
| Event date | The date at which the event took place. |
| Order uuid | The uuid associated with the order. |
| Customer order id | The customer's order number. |
| External reference id | The external reference ID submitted with the order. |
| Order Amount | The order amount for the ORDER event |
| Amount | The amount of the event. |
| Posting currency | The customer's currency code. |
| Type code | A numeric code that corresponds with the Type field. |
| Chargeback code | A numeric code that corresponds with the type of chargeback submitted. |
| Sezzle order ID | The internal ID Sezzle has assigned to this order. |
| [Product type](#line-item-product-type) | Describes the type of merchant product (Affiliate, Gift card, Standard\_checkout, etc.) |
| Merchant identification number (MID) | The ID that identifies the merchant and the legitimacy of the business and facilitates the movement of funds from the customer’s bank account to the merchant’s bank account. |
| Card Network Auth Ref | A unique numeric or alphanumeric identifier assigned to credit card transactions, making it easier to locate and identify an individual credit card transaction. |
#### Line Item Type
| Type | Description | Type Code |
| ----------------------------------- | ----------------------------------------------------------------------------- | --------- |
| ORDER | A completed order with Sezzle. | 001 |
| REFUND | An order that has been refunded. | 002 |
| FEE | The fee assessed by Sezzle for a given order. | 003 |
| RETURNED\_FEE | A fee refunded by Sezzle. | 004 |
| CHARGEBACK | A chargeback resulting from a disputed order. | 005 |
| CHARGEBACK\_REVERSAL | A reversal of a chargeback resulting from a disputed order. | 006 |
| CORRECTION | A manual correction to a payout. | 007 |
| INTEREST\_TRANSFER | A transfer from the Sezzle interest account. | 008 |
| REFERRAL\_REVENUE\_TRANSFER | A payment earned from Sezzle's merchant referral program. | 009 |
| BANK\_ACCOUNT\_WITHDRAWAL | A withdrawal of funds from your bank to cover a negative balance with Sezzle. | 010 |
| BANK\_ACCOUNT\_WITHDRAWAL\_REVERSAL | A failed BANK\_ACCOUNT\_WITHDRAWAL. | 011 |
| CAPTURE | An order that has been captured. | 012 |
#### Line Item Product Type
| Type | Description |
| ------------------- | ------------------------------------------------- |
| standard\_checkout | Standard pay in four checkout |
| four\_pay\_monthly | 4 pay monthly order |
| six\_pay\_monthly | 6 pay monthly order |
| long\_term\_lending | Base long term lending product with no promotions |
| virtual\_card | Virtual card order |
# Delete webhooks
Source: https://docs.sezzle.com/docs/api/core/webhooks/deletev2webhooks
delete /v2/webhooks/{webhooks_uuid}
This action cannot be undone, use with extreme caution
# List webhooks
Source: https://docs.sezzle.com/docs/api/core/webhooks/getv2webhooks
get /v2/webhooks
### Valid Webhook Events
We accept the following Webhook events
| Event | Trigger |
| :--------------------------------- | :------------------------------------------------------------------ |
| `customer.tokenized` | A customer is tokenized |
| `order.authorized` | An order is authorized by Sezzle |
| `order.captured` | An order is captured by Sezzle |
| `order.refunded` | An order is refunded by Sezzle |
| `dispute.merchant_input_requested` | A dispute is filed by a shopper and merchant input is required |
| `dispute.deadline_approaching` | A dispute is moved to final notice by Sezzle |
| `dispute.closed.customer_win` | The shopper wins the dispute and the order is refunded |
| `dispute.closed.merchant_win` | The merchant wins the dispute and it is resolved in their favor |
| `dispute.closed.neutral` | No clear winner is determined and the dispute is resolved neutrally |
# Webhook Signature, Acceptance and Retries
Source: https://docs.sezzle.com/docs/api/core/webhooks/infov2webhooks
## Webhook Signature
* Secured with HMAC-SHA256 signature.
* Sezzle-Signature header contains a hash of the webhook body, generated using the merchant private key.
* Always verify the signature matches the webhook data to confirm it originates from Sezzle.
## Webhook Event Payload
Unique identifier for the webhook event.
Timestamp (ISO 8601) when the event was generated.
Type of the event
Available options: `customer.tokenized`, `order.authorized`, `order.captured`, `order.refunded`, `dispute.merchant_input_requested`, `dispute.deadline_approaching`, `dispute.closed.customer_win`, `dispute.closed.merchant_win`, `dispute.closed.neutral`
Type of data associated with the event.
Available options: `customer`, `order`, `dispute`
Payload data specific to the event type. See options in the applicable accordion below.
```json theme={"system"}
{
"uuid": string,
"created_at": string,
"event": string,
"data_type": string,
"data": {
"token": string,
"expiration": string,
"customer": {
"uuid": string,
"created_at": string,
"expiration": string
}
}
}
```
### Examples per Event
```json theme={"system"}
{
"uuid": "e41c32d5-687d-414f-b5c6-d089bea52e7d",
"created_at": "2025-04-12T00:11:01.749261Z",
"event": "customer.tokenized",
"data_type": "tokenize",
"data": {
"token": "ce56604a-5dfd-489a-80e9-753d0325dd46",
"expiration": "2025-04-12T00:41:01.745145Z",
"customer": {
"uuid": "e0003e6a-7234-4440-9265-61906e8b8879",
"created_at": "2025-04-12T00:11:01.745145Z",
"expiration": "2026-04-12T00:11:01.745145Z"
}
}
}
```
```json theme={"system"}
{
"uuid": "fdb263a1-a1dd-4feb-8749-c8a447977ebb",
"created_at": "2025-04-12T00:15:39.281826Z",
"event": "order.authorized",
"data_type": "order",
"data": {
"uuid": "f36605a0-4a96-46d1-9d01-a0b17140dc57",
"authorization": {
"uuid": "28ef487d-8398-43bb-8354-5ebdd1eb7b40",
"created_at": "2025-04-12T00:15:39.276841Z",
"authorization_amount": {
"amount_in_cents": 5000,
"currency": "USD"
},
"approved": true,
"expiration": "2025-04-12T00:45:39.276841Z"
}
}
}
```
```json theme={"system"}
{
"uuid": "6ee025c6-8acf-48fe-a6d6-b51693d64c60",
"created_at": "2025-04-12T00:20:07.44668Z",
"event": "order.captured",
"data_type": "order",
"data": {
"uuid": "b87305a1-6be3-4877-bcf0-2b5b7dfaeaf0",
"capture": {
"uuid": "b69b1ba8-e977-4f26-9253-06f14d941696",
"created_at": "2025-04-12T00:20:07.438365Z",
"amount": {
"amount_in_cents": 3000,
"currency": "USD"
}
}
}
}
```
Note on the `source` field:
* If the value is `"dashboard"`, it's initiated from the merchant dashboard
* If the value is `"gateway"`, it's via the gateway API
```json theme={"system"}
{
"uuid": "ed89f046-f55e-4fdd-9f65-ec3d8e961f99",
"created_at": "2025-04-12T00:24:39.809499Z",
"event": "order.refunded",
"data_type": "order",
"data": {
"uuid": "b69f882d-06c3-4f2e-b6e3-ce7a6c46e455",
"refund": {
"uuid": "479e9d25-d0a5-49df-a2d3-6ca1d75b8c57",
"created_at": "2025-04-12T00:24:39.805651Z",
"source": "dashboard",
"amount": {
"amount_in_cents": 500,
"currency": "USD"
}
}
}
}
```
The following applies to the following webhooks:
* `dispute.merchant_input_requested`
* `dispute.deadline_approaching`
* `dispute.closed.customer_win`
* `dispute.closed.merchant_win`
* `dispute.closed.neutral`
```json theme={"system"}
{
"uuid": "79f1e9cd-f1ef-42fa-b7b4-2ed8d9e9fae8",
"created_at": "2025-04-11T17:22:22.717757Z",
"event": "dispute.merchant_input_requested",
"data_type": "dispute",
"data": {
"customer_name": "John Doe",
"order_uuid": "e17280f3-d575-4bc2-99ff-ff881df7b137",
"order_reference_id": "order-reference-id-123",
"sezzle_order_id": "d2s7t-281qj-rf6ra-dqfcg",
"order_date": "2024-08-20",
"dispute_type": "No Product Or Service",
"dispute_due_date": "2025-04-08",
"dispute_id": 132,
"dispute_amount_in_cents": 2500,
"dispute_currency": "USD",
"dispute_status": "Closed All Win"
}
}
```
## Webhook Acceptance and Retries
* Considered delivered upon receiving an HTTP 200 Status OK response.
* Non-200 responses trigger retries:
* Multiple attempts in the first hour.
* A few attempts throughout the day.
* Final attempts one day and three days later, spanning five days total.
* If the final retry fails, the webhook subscription is deleted for all events.
* To resume receiving webhooks, recreate the webhook.
* Webhooks may not arrive in chronological order, as new ones can be sent before retries of older ones.
* Retried webhooks use the current merchant private key for signing, so the signature may differ from the original if the key has changed.
# Create webhooks
Source: https://docs.sezzle.com/docs/api/core/webhooks/postv2webhooks
post /v2/webhooks
### Valid Webhook Events
We accept the following Webhook events
| Event | Trigger |
| :--------------------------------- | :------------------------------------------------------------------ |
| `customer.tokenized` | A customer is tokenized |
| `order.authorized` | An order is authorized by Sezzle |
| `order.captured` | An order is captured by Sezzle |
| `order.refunded` | An order is refunded by Sezzle |
| `dispute.merchant_input_requested` | A dispute is filed by a shopper and merchant input is required |
| `dispute.deadline_approaching` | A dispute is moved to final notice by Sezzle |
| `dispute.closed.customer_win` | The shopper wins the dispute and the order is refunded |
| `dispute.closed.merchant_win` | The merchant wins the dispute and it is resolved in their favor |
| `dispute.closed.neutral` | No clear winner is determined and the dispute is resolved neutrally |
# Trigger a test webhook
Source: https://docs.sezzle.com/docs/api/core/webhooks/postv2webhooktest
post /v2/webhooks/test
### Valid Webhook Events
We accept the following Webhook events
| Event | Trigger |
| :--------------------------------- | :------------------------------------------------------------------ |
| `customer.tokenized` | A customer is tokenized |
| `order.authorized` | An order is authorized by Sezzle |
| `order.captured` | An order is captured by Sezzle |
| `order.refunded` | An order is refunded by Sezzle |
| `dispute.merchant_input_requested` | A dispute is filed by a shopper and merchant input is required |
| `dispute.deadline_approaching` | A dispute is moved to final notice by Sezzle |
| `dispute.closed.customer_win` | The shopper wins the dispute and the order is refunded |
| `dispute.closed.merchant_win` | The merchant wins the dispute and it is resolved in their favor |
| `dispute.closed.neutral` | No clear winner is determined and the dispute is resolved neutrally |
# Environments
Source: https://docs.sezzle.com/docs/api/environments
Before going live, you may test your integration with Sezzle using the Sezzle sandbox test environment, rather than the live production environment.
Only one environment's dashboard session can be active at a time. If a user is logged in to production then logs in to sandbox on another tab, the production session will end, and vice versa.
## **Accessing Sandbox Environments**
* A merchant who registers for a Sezzle production account automatically receives a matching sandbox account upon approval
* Default admin users for the production dashboard are imported to the sandbox dashboard upon creation.
As with production, sandbox Admin users on can invite additional staff [here](https://sandbox.dashboard.sezzle.com/merchant/invite-user).
* Merchants can create a standalone sandbox account without a production account, ideal for testing production features without becoming a Sezzle merchant (e.g., during system integration)
1. [Sign up for Sandbox](https://sandbox.dashboard.sezzle.com/merchant/signup)
* Phone number and email address must be valid, all other information can be fake
2. Complete email verification and security setup
3. Complete `Personal Information` and `Business Information` sections of the Setup Checklist, then click `Submit for Approval`
* This information can also be fake
* In Production environment, `Credit or Debit Card` and `Bank Account` steps must also be completed before API keys can be generated.
4. Contact your account manager or [Sezzle Support](https://dashboard.sezzle.com/merchant/contact) for account approval
When starting with a standalone account, you must complete a Production merchant signup separately and manually. The two accounts will not be linked in these cases.
## Testing Your Integration
1. Log in to your [sandbox](https://sandbox.dashboard.sezzle.com/merchant) account
* Production account users: Log in using the same credentials as production Merchant Dashboard
* OTP will always be `123123` for Sandbox
2. In the left toolbar, go to `Settings` > `API Keys`
3. Click the button labeled `create API key`
* API keys for sandbox and production are not interchangeable:
* Sandbox API keys cannot be used in the production dashboard.
* Production API keys cannot be used in the sandbox.
* The sandbox gateway URL is [https://sandbox.gateway.sezzle.com](https://sandbox.gateway.sezzle.com).
4. Complete the `Add Sezzle as a payment option at your checkout` step of the setup checklist, enabling Test Mode
* Bank account and currency settings can be skipped
5. Start a checkout on your store website
6. Select `Sezzle` as the payment method
7. Complete the Sezzle checkout using the [test data](/docs/api/test-cards)
8. Verify that the order is successful
Refer to [Postman Setup section](./postman-setup.mdx) on how to programmatically create orders and more leveraging [Sezzle Core API](/docs/api/core).
If you wish to test **widgets** in Sandbox environment, you must use Production URL and merchant UUID. If you do not have a Production account, please contact Sezzle Support for options.
# Errors
Source: https://docs.sezzle.com/docs/api/errors
Endpoints will return an array of standardized error objects on failures.
We attempt to keep these errors as consistent as possible, and will announce any changes in advance if they are required.
## Error Response
```json theme={"system"}
[
{
"code": string,
"location": string,
"message": string,
"debug_uuid": string
}
]
```
```json theme={"system"}
[
{
"code": "invalid",
"location": "order.amount.amount_in_cents",
"message": "Order amount must be greater than $35",
"debug_uuid": "919f40d0-874b-4d98-810d-ed2246a8ad77"
}
]
```
Error code
Where the error occurred
Message describing why error occured
UUID identifying error
# Introduction
Source: https://docs.sezzle.com/docs/api/intro
* Sezzle supports individually-authorized transactions for single purchases, with the latest version enabling customer tokenization for future transactions.
* Integration options include:
* Direct API integration
* Lightweight JavaScript SDK
* Integrations with popular eCommerce platforms
* [Contact the Sezzle team](https://merchant-help.sezzle.com/hc/en-us/requests/new) for API-related questions.
* An approved Sezzle account is required to start integration; [sign up](https://dashboard.sezzle.com/merchant/signup) if you don’t have one.
Assume that all API methods require an [Authorization bearer token](./core/authentication/postauthentication#authenticated-call-http-header).
## Direct Integration Quick Start
1. Use API keys to obtain an [authentication token](./core/authentication/postauthentication)
2. [Create a session](./core/sessions/postv2session) with an [order object](./core/sessions/postv2session#body-order)
3. Redirect user to Sezzle checkout URL
4. User completes Sezzle checkout
5. Sezzle redirects user back to [merchant complete URL](./core/sessions/postv2session#body-complete-url)
6. Manage the order with the [Order API](./core/orders/getv2order)
## Open API Specification
* The [OpenAPI Specification (OAS)](https://swagger.io/specification/) offers a standard, language-independent interface for RESTful APIs, allowing humans and machines to understand service capabilities without source code, documentation, or network traffic analysis.
* Access the [Sezzle v2 OpenAPI Specification](https://gateway.sezzle.com/v2api.yaml) for integration details.
* Import the Sezzle v2 OpenAPI Specification into the [Swagger Editor](https://editor.swagger.io/?url=https://gateway.sezzle.com/v2api.yaml) to generate a Sezzle client in multiple programming languages.
* For languages unsupported by Swagger, use [OpenAPI Generator](https://openapi-generator.tech/) as an alternative tool.
# Postman Setup
Source: https://docs.sezzle.com/docs/api/postman-setup
The Sezzle team has prepared a public Postman collection so merchants can quickly create customers (Sezzle users), sessions, and orders for sandbox testing.
### Download and Install Postman
1. Go to [postman.com/downloads](https://www.postman.com/downloads)
2. Click `Download the App`
3. When the installation file has finished downloading, click the file to install the application
4. Follow installation prompts on the screen
### Add Sezzle Gateway Collection
When installation is complete, follow these steps to add the Sezzle Gateway collection to Postman.
1. [Download the Postman collection](https://god.gw.postman.com/run-collection/9737967-e6ff8257-718a-4206-b6f0-7540e3b97060?action=collection%2Ffork\&collection-url=entityId%3D9737967-e6ff8257-718a-4206-b6f0-7540e3b97060%26entityType%3Dcollection%26workspaceId%3Dcf7fd793-2599-4aed-9b55-0871e7b27e1a)
2. In the Web page that opens, select your operating system
3. Click `Open Postman` if prompted
4. In Postman, the Sezzle Gateway collection is now displayed in the Collections tab
### Edit environment variables
The collection is prepared with `SezzleGatewayURL`, `SezzlePrivateAPIKey`, and `SezzlePublicAPIKey` saved to the collection variables. However, it is recommended to save these as Environment variables instead so you can easily toggle between Sandbox and Production, and to keep API keys secret.
1. In the left toolbar, click Environments
2. If you have never used Environment variables before, click the `+` icon and name the new environment `Sandbox`
3. Create the new variables as follows:
| Variable | Type | Initial value |
| ------------------- | ------- | ------------------------------------------------------------------------ |
| SezzleGatewayURL | default | [https://sandbox.gateway.sezzle.com](https://sandbox.gateway.sezzle.com) |
| SezzlePrivateAPIKey | secret | sz\_pr... |
| SezzlePublicAPIKey | secret | sz\_pub... |
4. Next, copy your API Keys from the Sezzle Sandbox Dashboard into Postman.
1. To access your credentials, log in to the [Sezzle Sandbox Dashboard](https://sandbox.dashboard.sezzle.com/merchant/)
2. Go to `Settings` > `API Keys` - your sandbox credentials are [here](https://sandbox.dashboard.sezzle.com/merchant/settings/apikeys)
3. In Postman, paste your credentials into `CURRENT VALUE`
* Do this for both `SezzlePublicAPIKey` and `SezzlePrivateAPIKey`
5. Repeat for Environment `Production`, with `SezzleGatewayURL` as `https://gateway.sezzle.com` and API keys from [Sezzle Production Dashboard](https://dashboard.sezzle.com/merchant/)
API Keys do not translate across environments, i.e. Production API Keys will not work in Sandbox testing.
Only one environment’s dashboard session can be active in the browser at a time. If a user is logged in to production then logs in to sandbox on another tab, the production session will end, and vice versa.
6. In the left toolbar, click Collections
7. Click Sezzle Gateway. On the Variables tab, delete the variables we just created in Environments
The other predefined collection variables will be automatically assigned values by the applicable responses and applied to subsequent requests.
### Using the collection
1. In the upper-right corner of Postman, select the desired environment (i.e. Sandbox)
2. Open the applicable folder for your API version (default V2)
3. Refer to the below diagrams for request sequencing
3. Once a session is created, you must visit the checkout\_url in the response and complete the checkout before testing most other Orders endpoints.
* Log in at sandbox.dashboard.sezzle.com/customer
* The customer account does not need to match the customer details given in the session payload
* The phone number for the customer account must be real, but other personal information can be fake
* OTP will be `123123`
# Test Data
Source: https://docs.sezzle.com/docs/api/test-cards
Test data is important to use in our Sandbox environment because it offers a way to use reliable forced responses.
## Phone and Personal Information
* Use any valid US or CA phone number, real or fake
* The expected OTP is `123123`
* Personal information does not need to be real
## Test Credit Cards
| Brand | Number | CVC | Expiration |
| ---------- | ---------------- | ------------ | --------------- |
| Visa | 4242424242424242 | Any 3 digits | Any future date |
| Mastercard | 5555555555554444 | Any 3 digits | Any future date |
| Amex | 371449635398431 | Any 4 digits | Any future date |
| Amex | 378282246310005 | Any 4 digits | Any future date |
| Discover | 6011111111111117 | Any 3 digits | Any future date |
## Checkout Testing
* Use your [sandbox API keys](https://sandbox.dashboard.sezzle.com/merchant/settings/apikeys) when testing in a test environment
* Use your [production API keys](https://dashboard.sezzle.com/merchant/settings/apikeys) when testing in a live environment
1. On your website, add an item to your cart, then proceed to Checkout and select `Sezzle` as the payment method
2. Click `Place Order`
If you are redirected to the Sezzle checkout page, your integration is complete.
3. In sandbox, use the above test data to complete the Sezzle checkout and you should be redirected back to your website
In production, **BE CAREFUL** when completing the Sezzle checkout, as you will be charged. You can identify the Sezzle environment by observing if "sandbox" is included in the Sezzle checkout URL.
# Delete a customer
Source: https://docs.sezzle.com/docs/api/tokenization/customers/deletev2token
delete /v2/customer/{customer_uuid}
# Get a customer
Source: https://docs.sezzle.com/docs/api/tokenization/customers/getv2customer
get /v2/customer/{customer_uuid}
# Get a list of customers
Source: https://docs.sezzle.com/docs/api/tokenization/customers/getv2customerlist
get /v2/customer
# Create order by customer
Source: https://docs.sezzle.com/docs/api/tokenization/customers/postv2customerorder
post /v2/customer/{customer_uuid}/order
It is extremely important to note this API will return a 200 success if the request to create an order is successful (i.e. no errors) but the customer could not be approved for the order.
**Note:** If you plan to tokenize a customer for the purpose of creating orders by a customer, please be advised that these orders will not include any financing options.
# Preapprove amount by customer
Source: https://docs.sezzle.com/docs/api/tokenization/customers/preapprovev2token
post /v2/customer/{customer_uuid}/preapprove
# Introduction
Source: https://docs.sezzle.com/docs/api/tokenization/intro
Customer tokenization allows merchants to store Sezzle as a payment method for future orders without customer interaction, ideal for subscriptions like semi-annual charges.
All tokenized orders will be processed as Pay in Full.
The approval URL was deprecated in April 2025. Now, the only way for customers to authorize you to process future transactions on tokenized orders is by selecting that option in the initial checkout process.
To obtain that authorization:
1. Initiate and tokenize the order in a single session
2. Redirect the customer to the checkout URL
For detailed instructions, view the Tokenization Process below.
## Tokenization Process
1. Tokenize Customer via Checkout
* The merchant calls `/v2/session` with `tokenize: true`, optionally including customer details to speed up registration for new Sezzle users.
* Sezzle returns a session `tokenize` token.
2. Merchant Redirects User to Checkout URL
* Customer sees option to allow merchant to process payments from their Sezzle account for future transactions.
* The customer may decide to allow this permission before completing their checkout.
The only way for customers to authorize you to process future transactions on tokenized orders is by selecting that option in the initial checkout process.
* If agreed, Sezzle redirects back to the merchant’s session complete URL, appending a `customer-uuid` query parameter.
* Alternatively, the merchant can call `/v2/token` with the session tokenize token to retrieve the UUID.
3. Charge Customer
* The merchant uses the `customer-uuid` to create orders via `/v2/customer/{customer_uuid}/order`.
* If the authorization is approved, the merchant can manage the order (release, capture, or refund) using `/v2/order` endpoints.
## Notes
* Tokenization is optional, recommended only for charging via Sezzle outside standard checkouts.
* Orders created via customer UUID are treated the same as those from a standard Sezzle checkout.
## Customers
Use the customers endpoints to:
* [Delete](/docs/api/tokenization/customers/deletev2token) a customer
* [Get](/docs/api/tokenization/customers/getv2customer) details on an existing customer
* [Get](/docs/api/tokenization/customers/getv2customerlist) a list of customers
* [Create](/docs/api/tokenization/customers/postv2customerorder) an order for a customer
* [Preapprove](/docs/api/tokenization/customers/preapprovev2token) an amount for the customer
Customers are only those Sezzle users that have agreed to be tokenized by the merchant. A customer is unique to a merchant. This API does not include all Sezzle users.
# Get session tokenization
Source: https://docs.sezzle.com/docs/api/tokenization/session/getv2sessiontoken
get /v2/token/{token}/session
# Complete a Checkout
Source: https://docs.sezzle.com/docs/api/v1/complete-a-checkout
post /v1/checkouts/{order_reference_id}/complete
You are viewing Version 1 of the Sezzle API. Check out the [current version](/docs/api/intro)!
# Create a Checkout
Source: https://docs.sezzle.com/docs/api/v1/create-a-checkout
post /v1/checkouts
You are viewing Version 1 of the Sezzle API. Check out the [current version](/docs/api/intro)!
# Interest Account Activity Request
Source: https://docs.sezzle.com/docs/api/v1/interest-account-reports/interest-account-activity-request
get /v1/interest/activity
You are viewing Version 1 of the Sezzle API. Check out the [current version](/docs/api/intro)!
# Interest Account Balance Request
Source: https://docs.sezzle.com/docs/api/v1/interest-account-reports/interest-account-balance-request
get /v1/interest/balance
You are viewing Version 1 of the Sezzle API. Check out the [current version](/docs/api/intro)!
# Obtain Authentication Token
Source: https://docs.sezzle.com/docs/api/v1/obtain-authentication-token
post /v1/authentication
You are viewing Version 1 of the Sezzle API. Check out the [current version](/docs/api/intro)!
# Orders
Source: https://docs.sezzle.com/docs/api/v1/orders
get /v1/orders/{order_reference_id}
You are viewing Version 1 of the Sezzle API. Check out the [current version](/docs/api/intro)!
# Refund Request
Source: https://docs.sezzle.com/docs/api/v1/refund-request
post /v1/orders/{order_reference_id}/refund
You are viewing Version 1 of the Sezzle API. Check out the [current version](/docs/api/intro)!
# Setting Your Configuration
Source: https://docs.sezzle.com/docs/api/v1/setting-your-configuration
post /v1/configuration
You are viewing Version 1 of the Sezzle API. Check out the [current version](/docs/api/intro)!
## Webhooks
### Order Webhooks
* Sezzle handles most of the consumer checkout process on its pages, using webhooks to notify your system about:
* Checkout updates
* Completions
* Refunds
* Use the instructions in this page to subscribe to Webhooks
* When a webhook event occurs, Sezzle will send the below Webhook object to the URL provided in the configuration
### Order Webhook Object
```json theme={"system"}
{
"time": string,
"uuid": string,
"type": string,
"event": string,
"object_uuid": string,
"refund_id": string,
"refund_amount": {
"amount_in_cents": number,
"currency": string
}
}
```
```json theme={"system"}
{
"time": "2017-10-19T00:33:10.548372055Z",
"uuid": "02c5a2a0-8394-4b45-80b3-52d40c494322",
"type": "order_update",
"event": "order_complete",
"object_uuid": "Ref123456789",
"refund_id": "szl-a0293Pn-3948-80b3-ao34JAia39zQ",
"refund_amount": {
"amount_in_cents": 500,
"currency": "USD"
}
}
```
The time (UTC) at which the Webhook was generated.
A unique identifier for the webhook.
The high-level category.
Available options: `order_update` (coming soon)
The ID for the Checkout/Order.
Available options: `order_complete`, `order_refund`
The ID for the Checkout/Order. For order update webhooks, the `object_uuid` returned is the reference ID provided during checkout creation by the merchant
Unique ID for a refund. Included if the webhook event is order\_refund
Price object. Included if the webhook event is order\_refund.
The amount in cents
The 3 character currency code as defined by ISO 4217
# Settlement Details Request
Source: https://docs.sezzle.com/docs/api/v1/settlement-reports/settlement-details-request
get /v1/settlements/details/{payout_uuid}
You are viewing Version 1 of the Sezzle API. Check out the [current version](/docs/api/intro)!
The settlement details response contains two sections. The first two rows are a summary of the payout. The remaining rows contain the individual line items that contributed to the payout.
### Summary Column Definitions
| Column Header | Description |
| ----------------------------------------------- | ----------------------------------------------------------------------------------------------------------------------------------- |
| `Total order amount` | The sum of all orders on this payout. |
| `Total refund amount` | The sum of all refunds on this payout. |
| `Total fee amount` | The sum of all fees on this payout. |
| `Total returned fee amount` | The sum of all returned fees on this payout. |
| `Total chargeback amount` | The sum of all chargebacks on this payout. |
| `Total chargeback reversal amount` | The sum of all chargeback reversals on this payout. |
| `Total interest transfer amount` | The sum of all interest transfers on this payout. If you are not participating in the interest program, this field will be omitted. |
| `Total correction amount` | The sum of all corrections on this payout. |
| `Total referral revenue transfer amount` | The sum of all referral revenue transfers on this payout. |
| `Total bank account withdrawal amount` | The sum of all bank account withdrawals. |
| `Total bank account withdrawal reversal amount` | The sum of all bank account withdrawal reversals, which reflect a bank account withdrawal that has failed. |
| `Forex fees` | The cost of foreign exchange fees associated with this payout. |
| `Net settlement amount` | Net amount of settlement. |
| `Payment uuid` | The UUID for this payout. |
| `Settlement currency` | The currency in which this payout was sent. |
| `Payout date` | The date this payout was sent. |
| `Payout status` | The current status of this payout. |
### Line Item Column Definitions
| Column Header | Description |
| ----------------------- | ----------------------------------------------------------------------------------------------------- |
| `Type` | Describes the type of event (Order, Fee, Refund, etc.). |
| `Order capture date` | The date at which the order was captured. This field is empty if the order has not yet been captured. |
| `Order created at` | The date at which the order was created. |
| `Event date` | The date at which the event took place. |
| `Order uuid` | The uuid associated with the order. |
| `Customer order id` | The customer's order number. |
| `External reference id` | The external reference ID submitted with the order. |
| `Amount` | The amount of the event. |
| `Posting currency` | The customer's currency code. |
| `Type code` | A numeric code that corresponds with the Type field. |
| `Chargeback code` | A numeric code that corresponds with the type of chargeback submitted. |
| `Sezzle order ID` | The internal ID Sezzle has assigned to this order. |
### Line Item Event Type Definitions
| Type | Description | Type Code |
| ---------------------------------- | ----------------------------------------------------------------------------- | --------- |
| `ORDER` | A completed order with Sezzle. | 001 |
| `REFUND` | An order that has been refunded. | 002 |
| `FEE` | The fee assessed by Sezzle for a given order. | 003 |
| `RETURNED_FEE` | A fee refunded by Sezzle. | 004 |
| `CHARGEBACK` | A chargeback resulting from a disputed order. | 005 |
| `CHARGEBACK_REVERSAL` | A reversal of a chargeback resulting from a disputed order. | 006 |
| `CORRECTION` | A manual correction to a payout. | 007 |
| `INTEREST_TRANSFER` | A transfer from the Sezzle interest account. | 008 |
| `REFERRAL_REVENUE_TRANSFER` | A payment earned from Sezzle's merchant referral program. | 009 |
| `BANK_ACCOUNT_WITHDRAWAL` | A withdrawal of funds from your bank to cover a negative balance with Sezzle. | 010 |
| `BANK_ACCOUNT_WITHDRAWAL_REVERSAL` | A failed BANK\_ACCOUNT\_WITHDRAWAL. | 011 |
# Settlement Summaries Request
Source: https://docs.sezzle.com/docs/api/v1/settlement-reports/settlement-summaries-request
get /v1/settlements/summaries
You are viewing Version 1 of the Sezzle API. Check out the [current version](/docs/api/intro)!
# v1 Overview
Source: https://docs.sezzle.com/docs/api/v1/v1
You are viewing Version 1 of the Sezzle API. Check out the [current version](/docs/api/intro)!
* Sezzle API v1 is designed for merchants wanting to accept Sezzle as a payment option.
* The Sezzle [Integration Flow](#integration-flow) outlines the user payment interaction process.
* Sezzle supports individually authorized transactions for single purchases of goods or services.
* An approved Sezzle account is required to begin integration; visit the [signup page](https://dashboard.sezzle.com/merchant/signup) to create one if needed.
## Testing
While you are working on the integration, you should test it in a sandbox environment before going live.
### Sandbox
**API Endpoint** `https://sandbox.gateway.sezzle.com/v1`\
**Sandbox Dashboard** `https://sandbox.dashboard.sezzle.com/merchant`
Credentials to log in to the sandbox dashboard are the same ones you use to log in to the Sezzle Merchant Dashboard. You can create your test API keys in the [sandbox dashboard](https://sandbox.dashboard.sezzle.com/merchant/settings/apikeys).
### Test Data
You can use the following test data to test your integration:
| Bank | Username | Password |
| ----------- | -------- | -------- |
| `Test Bank` | `demo` | `go` |
| Card Number | CVV/CVC | Expiration Data | Name | Address |
| ------------------ | ----------------- | --------------- | ----- | ------- |
| `4242424242424242` | `any (3 numbers)` | `any` | `any` | `any` |
### Phone and other information
* Please use any valid phone number
* The expected `OTP` is `123123`
* Personal information does not need to be real
## Open API Specification
* The [OpenAPI Specification (OAS)](https://swagger.io/specification/) offers a standard, language-independent interface for RESTful APIs, allowing humans and machines to understand service capabilities without source code, documentation, or network traffic analysis.
* Access the [Sezzle v2 OpenAPI Specification](https://gateway.sezzle.com/v2api.yaml) for integration details.
* Import the Sezzle v2 OpenAPI Specification into the [Swagger Editor](https://editor.swagger.io/?url=https://gateway.sezzle.com/v2api.yaml) to generate a Sezzle client in multiple programming languages.
* For languages unsupported by Swagger, use [OpenAPI Generator](https://openapi-generator.tech/) as an alternative tool.
## Integration Flow
### Payment Flow Explanation
1. Merchant calls `/v1/checkouts` to send cart data to Sezzle
2. Sezzle returns URL to redirect consumer to make payment at Sezzle checkout
3. Merchant redirects the consumer to Sezzle
4. When the consumer completes the Sezzle checkout flow, they are redirected back to merchant's website
5. Alternatively, on approval, the consumer is redirected from Sezzle checkout to merchant's website and merchant captures the order by calling `/v1/complete`
### Refund Request
| Parameter | Type | Description |
| ---------------- | ------- | ------------------------------------------------------------------------------------------------------------------------------------------------------------------------------------------------------------------------------------------------------------------------- |
| `amount*` | object | A price object that defines the amount to be refunded. Amount may not be 0, negative, or exceed the total order amount. Currency must either be the order's currency or the customer's paying currency. This field is optional if the `is_full_refund` parameter is true. |
| `refund_id` | string | UUID for the Refund. Must be unique to a Merchant. |
| `refund_reason` | string | A reason for the refund. |
| `is_full_refund` | boolean | Overrides `amount`. If true, the order will be fully refunded. If omitted, will default to false |
## Javascript SDK
The Javascript SDK is documented in the latest [API v2 documentation](/#javascript-sdk). It is supported for users of the v1 API using the same loadable page script.
When using the Javascript SDK with v1, use apiVersion: "v1" in the Checkout constructor.
### Create a Checkout
```javascript theme={"system"}
checkout.startCheckout({
checkout_payload: {
"amount_in_cents": 12999,
"currency_code": "USD",
"order_reference_id": "Ref123456789",
"order_description": "Order #1800",
}
});
```
* Using the Javascript SDK with v1:
* Create a checkout with the Checkout Object.
* Complete the checkout using the Complete a Checkout endpoint.
* The v1 endpoint:
* Captures the total order amount.
* Does not require a request body.
* Do not use the payload object shown in the example capture for v1.
### Complete a Checkout
```javascript theme={"system"}
checkout.capturePayment("Ref123456789");
```
## Widget SDK
* The Widget SDK loads Sezzle sales widgets onto web pages.
* Widgets require a config to be provided before the script loads, or they will not display.
* The project repository is available at [https://github.com/sezzle/sezzle-js](https://github.com/sezzle/sezzle-js).
* Refer to the latest documentation for widget configuration details.
# About Sezzle Page
Source: https://docs.sezzle.com/docs/guides/about-sezzle
Including a dedicated page about Sezzle on your website helps customers understand how Sezzle works and highlights the benefits of using it as a payment option. We provide a pre-made HTML template to simplify the process. To get started:
1. Select your website platform
2. Copy the code from the "Code Snippets" section and integrate it into your site to create the page
To see a sample of what the page looks like, click [here](https://sezzle-test.myshopify.com/pages/how-sezzle-works).
## Shopify Process
To set up the page on Shopify, follow the steps below.
1. Log in to your Shopify Store
2. Navigate to `Online Store` > `Themes`
3. On the theme you want to edit, select `Actions` and then `Edit Code`
4. Under the `Templates` folder, click `Add New Template`, select template for `Page`, template type `liquid`, and name the page `Sezzle`, then click `Create Template`
5. Select the theme that best fits your store from the tabs listed
6. Copy the code and paste it under `{{page.content}}` on the Shopify page
7. Save
8. Navigate to `Pages`
9. Add a new page, and give it a title - we recommend something like `How Sezzle Works` or `How to use Sezzle`
10. Under `Theme Template` (in the bottom-right), select `sezzle`
11. Save and view the page
## Add the page to your navigation
1. Go to `Online Store` > `Navigation`
2. Select the menu where you would like the Sezzle link to appear (ex: Main menu)
3. Click `Add menu item`
4. Enter the text you wish to appear (ex: How Sezzle Works)
5. Click the second box, select `Pages` then the page you just created
6. Click `Add`
7. Click `Save Menu`
## Other Platforms
To set up the page on any other platform, please work with your web developer and/or follow the steps below.
1. Create a new page in your theme
2. Copy and paste the code into your website's page
3. Click save and/or publish!
## Code Snippet
Insert the following code into your HTML file:
```html expandable theme={"system"}
```
```html expandable theme={"system"}
```
Your merchant ID which is of the format: `xxxxxxxx-xxxx-xxxx-xxxx-xxxxxxxxxxxx` [Find it here](https://dashboard.sezzle.com/merchant/settings/business).
Renders the page design in dark or light mode
Available options: `dark`, `light`
Controls the translation of the page content
Available options: `en`, `fr` , `es`
# AI Assistance
Source: https://docs.sezzle.com/docs/guides/ai-assistance
All of our documentation pages are hosted in a variety of markdown formats to make it easier for you to feed our docs into large language models (LLMs) for specific information retrieval.
## Supported formats
We support industry standards such as [/llms.txt](https://llmstxt.org) as well as additional markdown formats.
* A markdown file of a structured index of our docs is hosted at [https://docs.sezzle.com/llms.txt](https://docs.sezzle.com/llms.txt).
A markdown file of our docs content is hosted at [https://docs.sezzle.com/llms-full.txt](https://docs.sezzle.com/llms-full.txt).
# Authorize & Capture
Source: https://docs.sezzle.com/docs/guides/auth-and-capture
Merchants integrating Sezzle into their eCommerce platform can choose between two payment settings: `Authorize Only` or `Authorize and Capture`. This page provides a detailed explanation of the differences between these options to help you select the best setting for your needs.
### **Authorize Only**
* Payment will only be automatically authorized, not captured, after a successful checkout
* In the History section of order details, the `Captured` field displays 0, and `Not Captured` displays the order amount
* If `Authorize Only` is set, you must capture the order amount manually before the auth is expired in order to mark the payment as paid
### **Authorize and Capture**
* Payment is captured automatically after a successful checkout.
* In the `History`section of order details, the `Captured` field displays the order amount, and `Not Captured` displays 0
### Notes
* The default authorization expiration is 30 minutes for all merchants except Shopify, whose default is 7 days
* You can extend this up to a maximum of 7 days
* Once the authorization expires, capturing is denied, and any uncaptured amount is released
* If the order total is not captured before expiration, the order is deleted
* Payment is considered paid only when the amount is captured
* If the order amount shows `Not Captured` and the `Captured` value in the `History` section of the Merchant Dashboard is 0, the order amount has not been captured
* If the amount remains uncaptured before the authorization expires, the order will be deleted
### How to Change Authorization Expiration in Merchant Dashboard
1. Log in to your Merchant Dashboard account
2. Go to the `Settings` > `Payment Captures` > `Authorization Expiration Period` and click `update`
3. Set the value for days, hours, and minutes and click `confirm`
# Using Direct Javascript SDK
Source: https://docs.sezzle.com/docs/guides/direct/integration
The Javascript SDK can be used for a simple, lightweight integration, but it also includes an in-context mode which will host the Sezzle checkout in a modal iframe or pop-up window.
Create checkouts and capture payments with Sezzle.
Checkout in an iframe, pop-up window, or redirect to Sezzle.
Handle payment success, failure, or cancel with your Sezzle orders.
Render the Sezzle checkout button on your store.
## Include SDK code
Include the following script in the `` section of the page.
```html theme={"system"}
```
## Checkout Configuration
The first requirement to get started with the direct JavaScript SDK is to configure a new Checkout object.
### Configuration Options
```javascript theme={"system"}
const checkoutSdk = new Checkout({
mode: string,
publicKey: string,
apiMode: string,
apiVersion: string,
});
```
```javascript theme={"system"}
const checkoutSdk = new Checkout({
mode: "popup",
publicKey: "sz_pub_...",
apiMode: "sandbox",
apiVersion: "v2",
});
```
Available options: `popup`, `iframe`, `redirect`
**popup** mode will work out-of-the-box. No additional configuration is required to use **popup**. Sezzle currently recommends **popup** mode. **iframe** mode will not work properly without first contacting Sezzle. For security reasons, Sezzle must enable **iframe** for your domain(s). To have it enabled, please submit a request with your Sezzle Merchant UUID and a list of domains to be allowed per environment (production and sandbox). For example, [*please enable uat1.mysite.com, uat2.mysite.com in sandbox and www.mysite.com, mysite.com in production*](http://www.mysite.com). The integration for **popup** and **iframe** are identical, aside from the mode. Using **popup** mode will expedite your development. Upon completing the integration, if **iframe** is a requirement, then contact Sezzle to enable your domain(s) and switch the mode to **iframe**.
Used when creating a checkout or capturing payment. Find your API keys at [https://dashboard.sezzle.com/merchant/settings/apikeys](https://dashboard.sezzle.com/merchant/settings/apikeys)
Environment in which the checkout is to be completed
Available options: `live`, `sandbox`
Sezzle Checkout SDK Version
Available options: `v2`
## Payment Option
This section covers how to present Sezzle as a payment method at checkout. Depending on your webpage's design, you might wish to display Sezzle as an alternative payment method (APM) button, a radio option in a list of payment methods, and/or as an alternative submission button. Below are some examples of how to implement the front-end component.
If you wish to use a different design from the options displayed below, please refer to our [Co-Branded Guidelines](https://sezzle.com/brand-assets/) for Approved Messaging and Sezzle logo acceptable use.
### Sezzle in Payment Methods Table
Below is an example of Sezzle as a payment method radio.
*This example snippet is for informational use only. Please follow the established HTML format of your existing payment methods.*
```html theme={"system"}
```
### Sezzle Button
The button option is available as a component of this SDK library. It is comprised of two parts: the configurable element plcaeholder and the render function.
#### Sezzle Button Configuration
Place the element snippet from the Template tab where you wish the Sezzle Button to be rendered on the page, then update the Options attributes as needed.
Sezzle as a button alongside other APMs
Sezzle as a Submit button as alternative to default button
```html theme={"system"}
```
```html theme={"system"}
```
Text to appear inside the button. Use `%%logo%%` inside the text to display the Sezzle image
The theme corresponds to your site's background color. If `theme`: `dark`, the button will be white with dark text. Else, the button will be dark purple with white text.
Available options: `dark`, `light`
Available options: `square`, `semi-rounded`
Custom classes to be applied
Negative space between top of content and edge of button
Negative space between bottom of content and edge of button
Negative space between left side of content and edge of button
Negative space between right side of content and edge of button
Width of the Sezzle logo within the button
Position of the Sezzle logo from top.
Position of the Sezzle logo from bottom.
Position of the Sezzle logo from left.
Position of the Sezzle logo from right.
Spacing between the templateText letter.
Width of the button
Height of the button.
#### Render the Sezzle Button
Add the following function to render the button when it is appropriate, such as when payment methods section loads, or when Sezzle is selected as a payment method. The parameter corresponds to the element created in the previous step.
```javascript theme={"system"}
checkoutSdk.renderSezzleButton("sezzle-smart-button-container");
```
## Initialize the Checkout
### Event Handlers
The SDK requires the following event handlers that can be used to extend features in your application.
```javascript theme={"system"}
checkoutSdk.init({
onClick: function () {
event.preventDefault();
checkoutSdk.startCheckout({...});
},
onComplete: function (event) {
console.log(event.data);
},
onCancel: function () {
console.log("Checkout cancelled.");
},
onFailure: function () {
console.log("Checkout failed.");
},
});
```
```javascript expandable theme={"system"}
checkoutSdk.init({
onClick: function () {
event.preventDefault();
checkoutSdk.startCheckout({
checkout_payload: {
order: {
intent: "AUTH",
reference_id: "543645yg5tg5675686",
description: "sezzle-store - #12749253509255",
order_amount: {
amount_in_cents: 10000,
currency: "USD",
},
},
},
});
},
onComplete: function (event) {
console.log(event.data);
},
onCancel: function () {
console.log("Checkout cancelled.");
},
onFailure: function () {
console.log("Checkout failed.");
},
});
```
Sezzle Button is clicked by the user.
See [Checkout Initialization](#checkout-initialization) section for payload options.
Sezzle payment is successfully completed. A successfully completed Sezzle checkout will trigger an event to the `onComplete` handler. The event should include a data object with data relevant to the start checkout input parameter.
Sezzle payment is cancelled. If the user exits the Sezzle checkout for any reason, the `onCancel` handler will be executed.
Sezzle payment has failed. If there is an error loading the Sezzle checkout page, the `onFailure` handler will be executed.
### Checkout Initialization
```javascript theme={"system"}
checkoutSdk.startCheckout({
checkout_payload: {
order: {
intent: string,
reference_id: string,
description: string,
order_amount: {
amount_in_cents: integer,
currency: string,
},
},
},
});
```
```javascript theme={"system"}
checkoutSdk.startCheckout({
checkout_payload: {
order: {
intent: "AUTH",
reference_id: "543645yg5tg5675686",
description: "sezzle-store - #12749253509255",
order_amount: {
amount_in_cents: 10000,
currency: "USD",
},
},
},
});
```
The order for this session
If your checkout flow requires the user to confirm their checkout on your site after being approved by Sezzle, use “AUTH” as your intent. If you prefer the checkout be captured immediately, use “CAPTURE”.
Available options: `AUTH`, `CAPTURE`
Your reference ID for this order (must contain only alphanumeric characters, dashes (-), and underscores (\_))
Your description for this order
The total amount of the order
The amount of the item in cents
The 3 character currency code as defined by ISO 4217
Alternatively, start checkout by URL:
```javascript theme={"system"}
checkout.startCheckout({
checkout_url: "https://checkout.sezzle.com/?id=example",
});
```
Start checkout should be implemented in the checkout `onClick` handler. There are two methods for hosting a checkout.
**Use a checkout payload as detailed in the Session Object**
* The cancel and complete URLs are not required for `iframe` and `popup` mode.
**Use an existing checkout URL**
* The `mode` used when configuring the SDK checkout must match the `checkout_mode` when [creating a session](/docs/api/core/sessions/postv2session).
* The parent window `origin` must be provided in the cancel and complete urls when the `checkout_mode` is `iframe` or `popup`.
**Customer Tokenization** This is not supported in the `onComplete` event. To receive a customer UUID, subscribe to the [customer.tokenized](/docs/api/core/webhooks/postv2webhooks#valid-webhook-events) event.
### Checkout completed by Payload
```javascript theme={"system"}
function onCompleteHandler(event) {
var data = event.data || Object.create(null);
console.log("session data:", data.session_uuid, data.order_uuid);
}
checkout.init({
onComplete: onCompleteHandler,
});
```
### Checkout completed by URL
```javascript theme={"system"}
function onCompleteHandler(event) {
var data = event.data || Object.create(null);
console.log("checkout data:", data.checkout_uuid);
}
checkout.init({
onComplete: onCompleteHandler,
});
```
### Capture Payment
Capturing an order is not required if the `CAPTURE` intent was used when creating the checkout.
```javascript theme={"system"}
var payload = {
capture_amount: {
amount_in_cents: integer,
currency: string,
},
};
checkout.capturePayment(data.order_uuid, payload);
```
```javascript theme={"system"}
var payload = {
capture_amount: {
amount_in_cents: 5000,
currency: "USD",
},
};
checkout.capturePayment(data.order_uuid, payload);
```
The capture payment method requires two parameters, the `order_uuid` and the payload as detailed in the [Capture Amount By Order Object](/docs/api/core/orders/postv2capturebyorder).
The amount to capture on this order
The amount in cents
The 3 character currency code as defined by ISO 4217
## Installment Plan
```javascript theme={"system"}
const checkout = new Checkout({});
checkout.getInstallmentPlan(1000);
```
```json theme={"system"}
{
"schedule": string,
"totalInCents": integer,
"installments": [
{
"installment": integer,
"amountInCents": integer,
"dueDate": string
}
]
}
```
```json theme={"system"}
{
"schedule": "bi-weekly",
"totalInCents": 1000,
"installments": [
{
"installment": 1,
"amountInCents": 250,
"dueDate": "2020-10-14"
},
{
"installment": 2,
"amountInCents": 250,
"dueDate": "2020-10-28"
},
{
"installment": 3,
"amountInCents": 250,
"dueDate": "2020-11-11"
},
{
"installment": 4,
"amountInCents": 250,
"dueDate": "2020-11-25"
}
]
}
```
Payment cadence for installment plan
Total order amount in cents
Breakdown of each payment due
Number of installment in series
Installment amount in cents
Due date of the installment
This function will provide the installment details based on an amount in cents. An existing [checkout](#checkout-initialization) can be used, or a `checkout` without any configuration can also be used to quickly get installment details.
# Introduction
Source: https://docs.sezzle.com/docs/guides/direct/introduction
## Direct Integration Order Flow
1. Request Payment Session Creation
* The Merchant Server sends a request to the Sezzle API to create a payment session for the customer’s order, including details like the order amount, items, and customer information.
2. Generate Session and Redirect URL
* The Sezzle API processes the request, creates a session linked to the order, and generates a redirect URL for the customer to access the Sezzle UI for payment processing.
3. Receive Redirect URL from Sezzle API
* The Sezzle API sends the generated redirect URL to the Merchant Server, allowing the merchant to proceed with customer redirection.
4. Redirect Customer to Sezzle UI
* Using the redirect URL, the Merchant Server directs the customer to the Sezzle UI to complete the payment process.
5. Process Customer Checkout in Sezzle UI
* The customer reviews the order in the Sezzle UI and completes the checkout.
* Sezzle assesses the customer’s financing eligibility (e.g., via a credit check), approving or denying the transaction.
* If denied, the customer must use an alternative payment method.
6. Redirect Customer Back to Merchant Site (Optional)
* After checkout (approved or denied), Sezzle redirects the customer to the Merchant Site.
* The merchant may display a confirmation page showing the order status (e.g., “Order Confirmed” or “Payment Failed”).
* This step is optional based on the merchant’s preference.
7. Request Fund Capture
* Upon payment approval, the Merchant Server sends a request to the Sezzle API to capture the order funds, either in full or partially (e.g., for partial shipments).
8. Receive Transaction Status from Sezzle API
* The Sezzle API processes the capture request and returns the transaction status to the Merchant Server.
* The status indicates whether the funds were captured successfully or if issues occurred (e.g., insufficient funds).
* The merchant updates their system and notifies the customer accordingly.
# Manual Integration
Source: https://docs.sezzle.com/docs/guides/direct/manual
The [Javascript SDK](./integration) is a great way to get started but if not available for your implementation you can perform all necessary actions on your own.
## Quick Start Guide
1. Use API keys to obtain an [authentication](/docs/api/core/authentication/postauthentication) token
2. Create a [session](/docs/api/core/sessions/postv2session) with an order object
3. Redirect user to Sezzle checkout URL
4. User completes Sezzle checkout
5. Sezzle redirects user back to merchant complete URL
6. Manage the order with the [Orders API](/docs/api/core/orders/getv2order)
7. Subscribe to all necessary [Webhook Events](/docs/api/core/webhooks/postv2webhooks)
# Configuration
Source: https://docs.sezzle.com/docs/guides/express/express-checkout
The Sezzle Express checkout button is a powerful tool for custom platform merchants. Integrated directly into the cart page, the button allows shoppers to select Sezzle as their payment method with a single click, leveraging their Sezzle account for a seamless payment experience. This feature is designed to reduce cart abandonment, increase conversion rate, and enhance customer satisfaction.
## Installation
### Include SDK code
Include the following script in the `` section of the page.
```html theme={"system"}
```
### Checkout Configuration
#### Configuration Options
```javascript theme={"system"}
const checkoutSdk = new Checkout({
mode: string,
publicKey: string,
apiMode: string,
apiVersion: string,
});
```
```javascript theme={"system"}
const checkoutSdk = new Checkout({
mode: "popup",
publicKey: "sz_pub_...",
apiMode: "live",
apiVersion: "v2",
});
```
Available options: `popup`, `iframe`, `redirect`
**popup** mode will work out-of-the-box. No additional configuration is required to use **popup**. Sezzle currently recommends **popup** mode.
**iframe** mode will not work properly without first contacting Sezzle. For security reasons, Sezzle must enable **iframe** for your domain(s). To have it enabled, please submit a request with your Sezzle Merchant UUID and a list of domains to be allowed per environment (production and sandbox). For example, [*please enable uat1.mysite.com, uat2.mysite.com in sandbox and www.mysite.com, mysite.com in production*](http://www.mysite.com).
The integration for **popup** and **iframe** are identical, aside from the mode. Using **popup** mode will expedite your development. Upon completing the integration, if **iframe** is a requirement, then contact Sezzle to enable your domain(s) and switch the mode to **iframe**.
Used when creating a checkout or capturing payment. Find your API keys at [https://dashboard.sezzle.com/merchant/settings/apikeys](https://dashboard.sezzle.com/merchant/settings/apikeys)
Environment in which the checkout is to be completed
Available options: `live`, `sandbox`
Sezzle Checkout SDK Version
Available options: `v2`
### Sezzle Button
#### Sezzle Button Configuration
Create a placeholder element for the Sezzle Button to be rendered on the page(s).
```html theme={"system"}
```
```html theme={"system"}
```
Text to appear inside the button. Use `%%logo%%` inside the text to
display the Sezzle image
Available options: `square`, `semi-rounded`
Custom classes to be applied
Negative space between top of content and edge of button
Negative space between bottom of content and edge of button
Negative space between left side of content and edge of button
Negative space between right side of content and edge of button
Width of the Sezzle logo within the button
Position of the Sezzle logo from top.
Position of the Sezzle logo from bottom.
Position of the Sezzle logo from left.
Position of the Sezzle logo from right.
Spacing between the templateText letter.
Width of the button
Height of the button.
#### Render the Sezzle Button
Requires having the checkout object created from above to render the button. Call renderSezzleButton passing the id of the placeholder element defined in Button Configuration, above.
```javascript theme={"system"}
await checkoutSdk.renderSezzleButton("sezzle-smart-button-container");
```
### Initialize the Checkout
#### Event Handlers
The SDK requires the following event handlers that can be used to extend features in your application.
```javascript expandable theme={"system"}
checkoutSdk.init({
onClick: function () {
event.preventDefault();
checkoutSdk.startCheckout({...});
},
onComplete: function (response) {
checkoutSdk
.capturePayment(response.data.order_uuid, {...})
.then((r) => {
console.log(r);
});
},
onCancel: function () {
alert("Transaction cancelled.");
},
onFailure: function () {
alert("Transaction failed.");
},
onCalculateAddressRelatedCosts: async function (
shippingAddress,
order_uuid
) {
// Call authentication endpoint
const response = await fetch(
"https://gateway.sezzle.com/v2/authentication",
{
method: "POST",
headers: {
"Content-Type": "application/json",
},
body: JSON.stringify({
public_key: string,
private_key: string,
}),
}
);
const data = await response.json();
const token = data.token;
const updateResponse = await fetch(
`https://gateway.sezzle.com/v2/order/${order_uuid}/checkout`,
{
method: "PATCH",
headers: {
"Content-Type": "application/json",
Authorization: `Bearer ${token}`,
},
body: JSON.stringify({
currency_code: string,
address_uuid: shippingAddress.uuid,
shipping_options: [
{
name: string,
description: string,
shipping_amount_in_cents: integer,
tax_amount_in_cents: integer,
final_order_amount_in_cents: integer
}
]
}),
}
);
const updateStatus = updateResponse.ok;
return {
ok: updateStatus,
};
},
});
```
```javascript expandable theme={"system"}
checkoutSdk.init({
onClick: function () {
event.preventDefault();
checkoutSdk.startCheckout({
checkout_payload: {
// "cancel_url":{
// "href": "http://localhost:44300/demo/v2checkout.html"
// },
// "complete_url":{
// "href": "http://localhost:44300/demo/v2checkout.html"
// },
express_checkout_type: "multi-step",
order: {
intent: "AUTH",
reference_id: "543645yg5tg5675686",
description: "sezzle-store - #12749253509255",
requires_shipping_info: true,
items: [
{
name: "widget",
sku: "sku123456",
quantity: 1,
price: {
amount_in_cents: 1000,
currency: "USD",
},
},
],
discounts: [
{
name: "20% off",
amount: {
amount_in_cents: 1000,
currency: "USD",
},
},
],
metadata: {
location_id: "123",
store_name: "Downtown Minneapolis",
store_manager: "Jane Doe",
},
order_amount: {
amount_in_cents: 10000,
currency: "USD",
},
},
},
});
},
onComplete: function (response) {
alert("Completed transaction. Capture started.");
checkoutSdk
.capturePayment(response.data.order_uuid, {
capture_amount: {
amount_in_cents: 10000,
currency: "USD",
},
partial_capture: false,
})
.then((r) => {
console.log(r);
});
},
onCancel: function () {
alert("Transaction cancelled.");
},
onFailure: function () {
alert("Transaction failed.");
},
onCalculateAddressRelatedCosts: async function (
shippingAddress,
order_uuid
) {
// Call authentication endpoint
const response = await fetch(
"https://gateway.sezzle.com/v2/authentication",
{
method: "POST",
headers: {
"Content-Type": "application/json",
},
body: JSON.stringify({
private_key: sz_pr_...
public_key: sz_pub_...
}),
}
);
const data = await response.json();
const token = data.token;
const updateResponse = await fetch(
`https://gateway.sezzle.com/v2/order/${order_uuid}/checkout`,
{
method: "PATCH",
headers: {
"Content-Type": "application/json",
Authorization: `Bearer ${token}`,
},
body: JSON.stringify({
currency_code: "USD",
address_uuid: shippingAddress.uuid,
shipping_options: [
{
name: "Standard Shipping",
description: "3-5 business days",
shipping_amount_in_cents: 2000,
tax_amount_in_cents: 3000,
final_order_amount_in_cents: 10200
},
{
name: "Express Shipping",
description: "1-2 business days",
shipping_amount_in_cents: 2000,
tax_amount_in_cents: 3000,
final_order_amount_in_cents: 10200
}
]
}),
}
);
const updateStatus = updateResponse.ok;
return {
ok: updateStatus,
};
},
});
```
Sezzle Button is clicked by the user.
See [Checkout Initialization](#checkout-initialization) section for payload options.
Sezzle payment is successfully completed. A successfully completed Sezzle checkout will trigger an event to the `onComplete` handler. The event should include a data object with data relevant to the start checkout input parameter.
See [capturePayment](#capture-payment) section for payload options.
Sezzle payment is cancelled. If the user exits the Sezzle checkout for any reason, the `onCancel` handler will be executed.
Sezzle payment has failed. If there is an error loading the Sezzle checkout page, the `onFailure` handler will be executed.
Required if `express_checkout_type` is `single-step` or `multi-step`. Once shopper has provided shipping address via Sezzle express checkout, this function should return tax and shipping costs to Sezzle.
#### Checkout Initialization
```javascript expandable theme={"system"}
checkoutSdk.startCheckout({
checkout_payload: {
// "cancel_url":{
// "href": string
// },
// "complete_url":{
// "href": string
// },
express_checkout_type: string,
order: {
intent: string,
reference_id: string,
description: string,
requires_shipping_info: boolean,
items: [
{
name: string,
sku: string,
quantity: integer,
price: {
amount_in_cents: integer,
currency: string,
},
},
],
discounts: [
{
name: string,
amount: {
amount_in_cents: integer,
currency: string,
},
},
],
metadata: {
some_property: string,
some_other_property: string
},
order_amount: {
amount_in_cents: integer,
currency: string,
},
},
},
});
```
```javascript theme={"system"}
checkoutSdk.startCheckout({
checkout_payload: {
// "cancel_url":{
// "href": "http://localhost:44300/demo/v2checkout.html"
// },
// "complete_url":{
// "href": "http://localhost:44300/demo/v2checkout.html"
// },
express_checkout_type: "multi-step",
order: {
intent: "AUTH",
reference_id: "543645yg5tg5675686",
description: "sezzle-store - #12749253509255",
requires_shipping_info: true,
items: [
{
name: "widget",
sku: "sku123456",
quantity: 1,
price: {
amount_in_cents: 1000,
currency: "USD",
},
},
],
discounts: [
{
name: "20% off",
amount: {
amount_in_cents: 1000,
currency: "USD",
},
},
],
metadata: {
location_id: "123",
store_name: "Downtown Minneapolis",
store_manager: "Jane Doe",
},
order_amount: {
amount_in_cents: 10000,
currency: "USD",
},
},
},
});
```
The HTTP request information used to redirect the customer in the case of a cancellation
The URL used when redirecting a customer
The HTTP request information used to redirect the customer upon completion of the session
The URL used when redirecting a customer
* `single-step`: only one shipping method exists, or only use default shipping method for Sezzle express checkout flow
* `multi-step`: allow the user to select from merchant-supported shipping methods
* `no-shipping`: purchase contains no shippable items and shopper does not have option to select, such as digital download or buy online pick up in store (BOPIS)
For `single-step and `multi-step`, `requires\_shipping\_info`must be`true`. For `no-shipping`, `requires\_shipping\_info`must be`false\`
Available options: `single-step`, `multi-step`, `no-shipping`
The order for this session
If your checkout flow requires the user to confirm their checkout on your site after being approved by Sezzle, use “AUTH” as your intent. If you prefer the checkout be captured immediately, use “CAPTURE”.
Available options: `AUTH`, `CAPTURE`
Your reference ID for this order (must contain only alphanumeric characters, dashes (-), and underscores (\_))
Your description for this order
Flag to indicate if you would like us to collect shipping information for this checkout from the customer. If omitted, defaults to false.
If `express_checkout_type` is `single-step` or `multi-step`, `requires_shipping_info` must be `true`. For `express_checkout_type`: `no-shipping` and standard checkout, use `false`
The items being purchased
The name of the item
The sku identifier
The quantity purchased
The price object
The amount of the item in cents
The 3 character currency code as defined by ISO 4217
The discounts applied to this order. Must be included in total
The description of the discount
A price object
The amount of the item in cents
The 3 character currency code as defined by ISO 4217
Object for any custom data you want to submit with the checkout. You are not limited to the key-value pairs shown in the example, and you may use any key-value pairs you like
Custom metadata field
Custom metadata field
The taxes applied to this order. Must be included in the total. If `express_checkout_type` is `single-step` or `multi-step`, this can be omitted - it will be provided after shopper confirms shipping address.
The amount of the item in cents
The 3 character currency code as defined by ISO 4217
The total amount of the order
The amount of the item in cents
The 3 character currency code as defined by ISO 4217
Start checkout should be implemented in the checkout `onClick` handler. There are two methods for hosting a checkout.
**Use a checkout payload as detailed in the Session Object**
* The cancel and complete URLs are not required for `iframe` and `popup` mode.
**Use an existing checkout URL**
* The `mode` used when configuring the SDK checkout must match the `checkout_mode` when [creating a session](/docs/api/core/sessions/postv2session).
* The parent window `origin` must be provided in the cancel and complete urls when the `checkout_mode` is `iframe` or `popup`.
**Customer Tokenization** This is not supported in the `onComplete` event.
To receive a customer UUID, subscribe to the
[customer.tokenized](/docs/api/core/webhooks/postv2webhooks#valid-webhook-events)
event.
#### Capture Payment
Capturing an order is not required if the `CAPTURE` intent was used when
creating the checkout.
```javascript theme={"system"}
checkoutSdk
.capturePayment(response.data.order_uuid, {
capture_amount: {
amount_in_cents: integer,
currency: string,
},
partial_capture: boolean,
})
.then((r) => {
console.log(r);
});
```
```javascript theme={"system"}
checkoutSdk
.capturePayment(response.data.order_uuid, {
capture_amount: {
amount_in_cents: 10000,
currency: "USD",
},
partial_capture: false,
})
.then((r) => {
console.log(r);
});
```
The amount to capture on this order
The amount in cents
The 3 character currency code as defined by ISO 4217
#### onCalculateAddressRelatedCosts
For security purposes, authentication and checkout update must originate
from merchant's back-end code.
1. Get authentication token
* Call the [authentication](/docs/api/core/authentication/postauthentication) endpoint to obtain a bearer token
* You should have already set this up in your back-end for the standard integration
* Instead of pointing directly to Sezzle as in the below example, you can re-use your existing function
2. Update the order
* Call the Update Checkout endpoint to provide Sezzle with shipping option(s) and final tax and shipping amount based on shopper's shipping address
* See `Options` tab below for more details
Once `shipping_options` have been provided to Sezzle for a checkout, they cannot be edited unless the shopper changes their shipping address.
```javascript expandable theme={"system"}
onCalculateAddressRelatedCosts: async function (
shippingAddress,
order_uuid
) {
// Call authentication endpoint
const response = await fetch(
yourBackendAuthenticationURL,
{
method: "POST",
headers: {
"Content-Type": "application/json",
},
body: JSON.stringify({
public_key: string,
private_key: string,
}),
}
);
const data = await response.json();
const token = data.token;
const updateResponse = await fetch(
yourBackendUpdateOrderURL,
{
method: "PATCH",
headers: {
"Content-Type": "application/json",
Authorization: `Bearer ${token}`,
},
body: JSON.stringify({
currency_code: string,
address_uuid: shippingAddress.uuid,
shipping_options: [
{
name: string,
description: string,
shipping_amount_in_cents: integer,
tax_amount_in_cents: integer,
final_order_amount_in_cents: integer
}
]
}),
}
);
const updateStatus = updateResponse.ok;
return {
ok: updateStatus,
};
},
```
```javascript expandable theme={"system"}
onCalculateAddressRelatedCosts: async function (
shippingAddress,
order_uuid
) {
// All this must be done inside your backend endpoint and this should be replaced with your endpoint communication logic
// Call authentication endpoint
const response = await fetch(
`https://sandbox.gateway.sezzle.com/v2/authentication`,
{
method: "POST",
headers: {
"Content-Type": "application/json",
},
body: JSON.stringify({
private_key: sz_pr_...,
public_key: sz_pub_...,
}),
}
);
const data = await response.json();
const token = data.token;
// Calculate your shipping options based on the provided shippingAddress
const shipping_options = [
{
name: "Standard Shipping",
description: "3-5 business days",
shipping_amount_in_cents: 1000,
tax_amount_in_cents: 500,
final_order_amount_in_cents: 11500
},
{
name: "Express Shipping",
description: "1-2 business days",
shipping_amount_in_cents: 2000,
tax_amount_in_cents: 1000,
final_order_amount_in_cents: 13000
}
]
// Update your checkout with the calculated shipping options
const updateResponse = await fetch(
`https://sandbox.gateway.sezzle.com/v2/order/{order_uuid}/checkout`,
{
method: "PATCH",
headers: {
"Content-Type": "application/json",
Authorization: `Bearer ${token}`,
},
body: JSON.stringify({
currency_code: "USD",
address_uuid: shippingAddress.uuid,
shipping_options,
}),
}
);
const updateStatus = updateResponse.ok;
return {
ok: updateStatus,
};
}
```
The 3 character currency code as defined by ISO 4217
The address UUID for the order
The available shipping options for the order, in order of recommendation/preference
* If `express_checkout_type` is `multi-step` but only one method is provided, user experience will follow `single-step` flow from this point
* If `express_checkout_type` is `single-step` but multiple methods are provided, the shopper will be presented with an error.
* If `express_checkout_type` is `multi-step` or `single-step` and no methods are provided, the shopper will be asked to review their shipping address and try again.
The name of the shipping method
The description of the shipping method, such as number of business days
The shipping amount in cents for the order
The tax amount in cents for the order
The final total amount in cents for the order
##### Response
```json theme={"system"}
{
ok: boolean,
error: {
code: string
}
}
```
```json theme={"system"}
{
ok: false,
error: {
code: "merchant_unsupported_shipping_address"
}
}
```
Available options: `merchant_unsupported_shipping_address`, `merchant_error`
`merchant_unsupported_shipping_address` indicates that the merchant does not support the shipping address provided.
`merchant_error` is generic error returned by the merchant when something goes wrong on their end.
# Introduction
Source: https://docs.sezzle.com/docs/guides/express/introduction
Install the Sezzle Express Checkout button to increase conversion rates and enhance customer satisfaction.
Sezzle Express Checkout is only available for direct integration and [WooCommerce](/docs/plugins/woocommerce) merchants.
## Shopper Experience
Sezzle shoppers can skip the manual entry on the merchant checkout by using the contact info and card details on their Sezzle account. Simply sign in and confirm shipping address, avoiding up to 20 fields.
Shoppers click the Sezzle Express button to visit Sezzle’s checkout page.
The shopper signs in to Sezzle and confirms their shipping address.
The shopper selects their desired shipping method.
The shopper selects their preferred installment plan.
The shopper’s details are sent to the merchant.
The express checkout process minimizes friction by eliminating the need for shoppers to manually enter shipping and payment details, especially for returning Sezzle shoppers with saved information. The prefilled data, enabled by the merchant’s API integration, creates a seamless experience that reduces abandoned carts and boosts sales.
### Compare to Standard Checkout Flow
Without the Sezzle checkout button or prefilled information, the checkout process involves multiple steps, which can lead to cart abandonment due to complexity:
1. Add Items to Cart and Proceed to Checkout
* Shoppers select their desired products and initiate the checkout process on the merchant’s website
2. Enter Contact Information
* Shoppers manually input their name, email, and phone number
3. Enter Shipping Details
* Shoppers manually input their address
4. Select Shipping Method
* Shoppers manually select their shipping method
5. Select Sezzle as Payment Method
* Shoppers choose Sezzle from the available payment options and are redirected to Sezzle’s checkout page
6. Sign In and Complete Purchase
* On Sezzle’s site, shoppers sign in or create an account, confirm their payment plan (e.g., 25% upfront, three installments), and finalize the order
This multi-step process can deter shoppers, especially those who find entering information tedious or who abandon their carts due to lengthy forms.
## How It Works
## FAQs
No. Express Checkout is available to all Sezzle partners at no extra cost. You’ll just need a Merchant ID (MID) to activate it.
Sezzle Express Checkout is only available for direct integration and [**WooCommerce**](https://docs.sezzle.com/docs/plugins/woocommerce) merchants.
The button can be placed on product pages, the cart page, or within checkout to drive faster conversions. Our recommendation is to configure the button in all 3 locations to encourage quick and seamless purchases and to provide the best possible shopper experience.
Your website or app must already be set up to accept Sezzle payments before enabling Express Checkout.
Implementation is done via direct integration. Follow our[ Express Checkout Quick Guide](https://docs.sezzle.com/docs/guides/express/quick-guide) for step-by-step instructions. The implementation process should take no longer than 3-5 days.
Only essential order and customer information is used. This keeps the process secure, efficient, and privacy-first.
Yes. It can be offered alongside other payment buttons without disrupting your checkout flow.
Yes. The button’s style can be adjusted to align with your brand.
Express Checkout is available in all regions where Sezzle Payments are offered.
# Quick Guide
Source: https://docs.sezzle.com/docs/guides/express/quick-guide
Express Checkout option is only available for direct integration and [WooCommerce](/docs/plugins/woocommerce) merchants.
## Installation
1. Import Library
* Copy this script to the `` of your site code
```html theme={"system"}
```
2. Configure SDK
* Configure [Express Checkout](./express-checkout#configuration-options)
```diff theme={"system"}
const checkoutSdk = new Checkout({
mode: "popup",
+ publicKey: `${yourSezzleAPIKey}`,
apiMode: "live",
apiVersion: "v2",
});
```
3. Install Button
* Copy this placeholder element to where you wish the button to render on the page
* [See here for customization options](./express-checkout#sezzle-button-configuration)
```html theme={"system"}
```
* Load the button using Javascript
```javascript theme={"system"}
await checkoutSdk.renderSezzleButton("sezzle-smart-button-container");
```
4. Configure the [event listeners](./express-checkout#configuration-options)
```diff expandable theme={"system"}
checkoutSdk.init({
onClick: function () {
console.log("onClick");
event.preventDefault();
checkoutSdk.startCheckout({
checkout_payload: {
express_checkout_type: "multi-step",
is_express_checkout: true,
order: {
intent: "AUTH",
reference_id: "543645yg5tg5675686",
description: "sezzle-store - #12749253509255",
requires_shipping_info: true,
items: [
{
name: "widget",
sku: "sku123456",
quantity: 1,
price: {
amount_in_cents: 1000,
currency: "USD",
},
},
],
discounts: [
{
name: "20% off",
amount: {
amount_in_cents: 1000,
currency: "USD",
},
},
],
metadata: {
location_id: "123",
store_name: "Downtown Minneapolis",
store_manager: "Jane Doe",
},
order_amount: {
amount_in_cents: 10000,
currency: "USD",
},
},
},
});
},
onComplete: function (response) {
console.log("onComplete");
alert("Completed transaction");
},
onCancel: function () {
console.log("onCancel");
alert("Transaction cancelled.");
},
onFailure: function () {
console.log("onFailure");
alert("Transaction failed.");
},
onCalculateAddressRelatedCosts: async function (
shippingAddress,
order_uuid
) {
// All this must be done inside your backend endpoint and this should be replaced with your endpoint communication logic
// Call authentication endpoint
const response = await fetch(
`https://sandbox.gateway.sezzle.com/v2/authentication`,
{
method: "POST",
headers: {
"Content-Type": "application/json",
},
body: JSON.stringify({
private_key: sz_pr_...,
public_key: sz_pub_...,
}),
}
);
const data = await response.json();
const token = data.token;
// Calculate your shipping options based on the provided shippingAddress
const shipping_options = [
{
name: "Standard Shipping",
description: "3-5 business days",
shipping_amount_in_cents: 1000,
tax_amount_in_cents: 500,
final_order_amount_in_cents: 11500
},
{
name: "Express Shipping",
description: "1-2 business days",
shipping_amount_in_cents: 2000,
tax_amount_in_cents: 1000,
final_order_amount_in_cents: 13000
}
]
// Update your checkout with the calculated shipping options
const updateResponse = await fetch(
`https://sandbox.gateway.sezzle.com/v2/order/{order_uuid}/checkout`,
{
method: "PATCH",
headers: {
"Content-Type": "application/json",
Authorization: `Bearer ${token}`,
},
body: JSON.stringify({
currency_code: "USD",
address_uuid: shippingAddress.uuid,
shipping_options,
}),
}
);
const updateStatus = updateResponse.ok;
return {
ok: updateStatus,
};
},
});
```
## Example
```html theme={"system"}
Sezzle Express Checkout Test
Sezzle Test
```
# Sezzle Banner
Source: https://docs.sezzle.com/docs/guides/home-banner
Add a Sezzle banner to your online store to let customers know they can shop now and pay later.
## Installation
Select the implementation that fits your needs:
### Shopify:
* [Asset from CDN](#from-cdn)
* [Asset as Local File](#local-file)
* [Plain HTML](#install-as-html)
### All Platforms:
* [Asset from CDN](#from-cdn-2)
* [Asset as Local File](#local-file-2)
* [Plain HTML](#install-as-html-2)
***
## Shopify
### Install as Asset
#### From CDN
1. Log in to your Shopify Admin
2. Go to `Online Store` > `Themes`
3. Next to the applicable theme, click `Actions` then `Edit Code`
4. Paste the following snippet into the `sections/header.liquid` file where the banner should appear, update the `merchantUUID` value, then click `Save`
* Note: this is typically below the `header` or `sticky-header` closing tag. Open the file, then search (Cmd+F or Ctrl+F) for the word "sticky-header"
```html theme={"system"}
{{ "//checkout-sdk.sezzle.com/sezzle-home-banner.min.js" | script_tag }}
```
```html theme={"system"}
{{ "//checkout-sdk.sezzle.com/sezzle-home-banner.min.js" | script_tag }}
```
Your merchant ID which is of the format: `xxxxxxxx-xxxx-xxxx-xxxx-xxxxxxxxxxxx` [Find it here](https://dashboard.sezzle.com/merchant/settings/business).
Renders the page design with dark purple or black background
Available options: `indigo`, `black`
The placeholder or parent container where the banner should appear. Should be a unique `.class-name` or `#id-name`
#### Local File
1. Clone/pull down the [Static-Widgets](https://github.com/sezzle/static-widgets/) project, then run `npm run build-banner`
2. Log in to your Shopify Admin
3. Go to `Online Store` > `Themes`
4. Next to the applicable theme, click `Actions` then `Edit Code`
5. Scroll to the Assets folder, then click `Add A New Asset`
6. Click `Create a Blank File`, name the section `sezzle-home-banner`, select `.js` as the file type, then click `Add Asset`
7. In the Assets folder, select the asset you just created (you may need to scroll, files are not in alphabetical order).
8. Overwrite the asset template with the code contents here: `static-widgets/build/sezzle-home-banner.js`, then click `Save`.
9. Paste the following snippet into the `sections/header.liquid` file where the banner should appear, update the `merchantUUID` value, then click `Save`:
* Note: this is typically below the `header` or `sticky-header` closing tag. Open the file, then search (Cmd+F or Ctrl+F) for the word "sticky-header"
```html theme={"system"}
{{ "sezzle-home-banner.js" | asset_url | script_tag }}
```
```html theme={"system"}
{{ "sezzle-home-banner.js" | asset_url | script_tag }}
```
Your merchant ID which is of the format: `xxxxxxxx-xxxx-xxxx-xxxx-xxxxxxxxxxxx` [Find it here](https://dashboard.sezzle.com/merchant/settings/business).
Renders the page design with dark purple or black background
Available options: `indigo`, `black`
The placeholder or parent container where the banner should appear. Should be a unique `.class-name` or `#id-name`
### Install as HTML
1. Log in to your Shopify Admin
2. Go to `Online Store` > `Themes`
3. Next to the applicable theme, click `Actions` then `Edit Code`
4. Paste the code snippet [here](https://github.com/sezzle/static-widgets/tree/production/src/sezzle-home-banner/sezzle-home-banner.html) into the `sections/header.liquid` file where the banner should appear, then click `Save`
* Note: this is typically below the `header` or `sticky-header` closing tag. Open the file, then search (Cmd+F or Ctrl+F) for the word "sticky-header"
#### Customization
* Update the wrapper element's class name to the theme color you desire (indigo or black)
* Update the Learn More href URL to point to your own [How Sezzle Works](/docs/guides/about-sezzle) page, if applicable
## Other Platforms
### From CDN
Paste the following where the banner should appear, such as below `` and update the `merchantUUID` value
```html theme={"system"}
```
```html theme={"system"}
```
Your merchant ID which is of the format: `xxxxxxxx-xxxx-xxxx-xxxx-xxxxxxxxxxxx` [Find it here](https://dashboard.sezzle.com/merchant/settings/business).
Renders the page design with dark purple or black background
Available options: `indigo`, `black`
The placeholder or parent container where the banner should appear. Should be a unique `.class-name` or `#id-name`
### Local File
Clone/pull down the [Static-Widgets](https://github.com/sezzle/static-widgets/) project, then run `npm run build-banner`
Create a new .js file and populate it with the code contents from here: `static-widgets/build/sezzle-home-banner.js`
Paste the following where the banner should appear, such as below ``, then update the file path and `merchantUUID` value
```html theme={"system"}
```
```html theme={"system"}
```
Your merchant ID which is of the format: `xxxxxxxx-xxxx-xxxx-xxxx-xxxxxxxxxxxx` [Find it here](https://dashboard.sezzle.com/merchant/settings/business).
Renders the page design with dark purple or black background
Available options: `indigo`, `black`
The placeholder or parent container where the banner should appear. Should be a unique `.class-name` or `#id-name`
### Install as HTML
Paste the code snippet [here](https://github.com/sezzle/static-widgets/tree/production/src/sezzle-home-banner/sezzle-home-banner.html) where the banner should appear, such as below ``
#### Customization
* Update the wrapper element's class name to the theme color you desire (indigo or black)
* Update the Learn More href URL to point to your own [How Sezzle Works](/docs/guides/about-sezzle) page, if applicable
# In-Store
Source: https://docs.sezzle.com/docs/guides/in-store
The Sezzle POS Checkout API allows merchants to send a Sezzle Checkout link to customers via text or email and receive real-time payment updates on their POS system upon checkout completion.
## Customer Experience
This is what the customer sees if they click the text message or email link.
The shopper enters their phone number and OTP.
The shopper adds a payment method.
The shopper selects their preferred installment plan.
The shopper completes their Sezzle order.
### Direct API Checkout
1. Merchant creates a [session](/docs/api/core/sessions/postv2session)
* Set order `intent` to `AUTH`
* The customer checkout is texted or emailed as set in `send_checkout_url`
2. Sezzle returns order uuid and checkout URL
3. Customer receives Sezzle URL via text or email to check out
4. Customer completes the Sezzle checkout
5. Merchant receives order-complete notification
* You can either [get order details](/docs/api/core/orders/getv2order) or subscribe to [webhooks](/docs/api/core/webhooks/postv2webhooks)
6. (optional) Update the [order reference](https://docs.sezzle.com/docs/guides/virtual/automated#set-order-reference-id)
7. [Capture](/docs/api/core/orders/postv2capturebyorder) the payment
8. (optional) Expire the checkout manually
* [Delete the checkout](/docs/api/core/orders/deletev2deletecheckoutbyorder) if the customer has not completed the checkout and the merchant has canceled the order
9. (optional) [Refund](/docs/api/core/orders/postv2refundbyorder) the order
# Introduction
Source: https://docs.sezzle.com/docs/guides/sezzle/introduction
Sezzle provides an effortless way to integrate flexible payment options into your checkout process. With a design focused on quick and efficient setup, our solution allows you to get started faster than you might anticipate.
## Get Started with Sezzle
Select the integration option that works best for your store.
Utilize our APIs to integrate Sezzle into your custom online store.
Integrations for Shopify, Magento 2, Wix, WooCommerce, and more.
* Accept Sezzle payments as credit card transactions.
Empower your customers to pay with Sezzle at your physical store location.
## Conversion Boosters
Increase sales with these additional Sezzle products.
Showcase Sezzle as a payment method on product pages.
Increase conversion rates and enhance customer satisfaction.
## Additional Resources
These will speed up your Sezzle integration.
Accept web and in-app payments through our expansive API integration.
Contact our Merchant Support team to get help with integrating Sezzle.
## How Sezzle Works
The shopper adds your product to their cart.
The shopper selects "Buy Now, Pay Later with Sezzle" at checkout.
The shopper selects their preferred installment plan.
The shopper completes their Sezzle order.
## Popular Integrations
# Using Virtual Card SDK
Source: https://docs.sezzle.com/docs/guides/virtual/automated
This is the fastest way to get started using the virtual card offering from Sezzle. A virtual card checkout implements the Card Session API to provide an easy to use, in-context solution for issuing and using a Sezzle virtual card as payment.
The Sezzle non-production environment does not provide a way to test the payment processing using your provider.
The origin domain needs to be allowlisted by Sezzle for Virtual Card SDK to function. Please contact your Account Manager and they can do this for you.
Virtual Card Checkout in an iframe or pop-up window.
Enable plain card details through message event or tokenization.
Handle payment success, failure, or cancel with your virtual card orders.
Render the Sezzle checkout button on your store.
## Include SDK code
Include the following script in the `` section of the page.
```html theme={"system"}
```
## Checkout Configuration
The first requirement to get started with the Virtual Card SDK is to configure a new Checkout object.
### Configuration Options
```javascript theme={"system"}
const checkoutSdk = new Checkout({
mode: string,
publicKey: string,
apiMode: string,
isVirtualCard: boolean,
});
```
```javascript theme={"system"}
const checkoutSdk = new Checkout({
mode: "popup",
publicKey: "sz_pub_...",
apiMode: "sandbox",
isVirtualCard: true,
});
```
Available options: `popup`, `iframe`, `redirect`
**popup** mode will work out-of-the-box. No additional configuration is required to use **popup**. Sezzle currently recommends **popup** mode.
**iframe** mode will not work properly without first contacting Sezzle. For security reasons, Sezzle must enable **iframe** for your domain(s). To have it enabled, please submit a request with your Sezzle Merchant UUID and a list of domains to be allowed per environment (production and sandbox). For example, [*please enable uat1.mysite.com, uat2.mysite.com in sandbox and www.mysite.com, mysite.com in production*](http://www.mysite.com).
The integration for **popup** and **iframe** are identical, aside from the mode. Using **popup** mode will expedite your development. Upon completing the integration, if **iframe** is a requirement, then contact Sezzle to enable your domain(s) and switch the mode to **iframe**.
Used when creating a checkout or capturing payment. Find your API keys at [https://dashboard.sezzle.com/merchant/settings/apikeys](https://dashboard.sezzle.com/merchant/settings/apikeys)
Environment in which the checkout is to be completed
Available options: `live`, `sandbox`
Use `true` to enable this feature
## Sezzle Button
### Sezzle Button Configuration
Create a placeholder element for the Sezzle Button to be rendered on the page(s).
```html theme={"system"}
```
```html theme={"system"}
```
Text to appear inside the button. Use `%%logo%%` inside the text to
display the Sezzle image
Available options: `square`, `semi-rounded`
Custom classes to be applied
Negative space between top of content and edge of button
Negative space between bottom of content and edge of button
Negative space between left side of content and edge of button
Negative space between right side of content and edge of button
Width of the Sezzle logo within the button
Position of the Sezzle logo from top.
Position of the Sezzle logo from bottom.
Position of the Sezzle logo from left.
Position of the Sezzle logo from right.
Spacing between the templateText letter.
Width of the button
Height of the button.
### Render the Sezzle Button
Requires having the `checkout` object created from above to render the button. Call `renderSezzleButton` passing the `id` of the placeholder element defined in Button Configuration, above.
```javascript theme={"system"}
checkoutSdk.renderSezzleButton("sezzle-smart-button-container");
```
## Initialize the Checkout
### Event Handlers
The SDK requires the following event handlers that can be used to extend features in your application.
```javascript theme={"system"}
checkoutSdk.init({
onClick: function () {
event.preventDefault();
checkoutSdk.startCheckout({...});
},
onComplete: function (event) {
console.log(event.data);
},
onCancel: function () {
console.log("Checkout cancelled.");
},
onFailure: function () {
console.log("Checkout failed.");
},
});
```
```javascript expandable theme={"system"}
checkoutSdk.init({
onClick: function () {
event.preventDefault();
checkoutSdk.startCheckout({
checkout_payload: {
amount_in_cents: 1000,
currency: "USD",
merchant_reference_id: "merchant-checkout-id-max-255",
customer: {
email: "test@test.com",
first_name: "John",
last_name: "Doe",
phone: "0987654321",
billing_address_street1: "3432 Terry Lane",
billing_address_street2: "12",
billing_address_city: "Katy",
billing_address_state: "TX",
billing_address_postal_code: "77449",
billing_address_country_code: "US",
},
items: [
{
name: "Blue tee",
sku: "sku123456",
quantity: 1,
price: {
amount_in_cents: 1000,
currency: "USD",
},
},
],
},
});
},
onComplete: function (event) {
console.log(event.data);
},
onCancel: function () {
console.log("Checkout cancelled.");
},
onFailure: function () {
console.log("Checkout failed.");
},
});
```
Sezzle Button is clicked by the user.
See [Checkout Initialization](#checkout-initialization) section for payload options.
Sezzle payment is successfully completed. A successfully completed Sezzle checkout will trigger an event to the `onComplete` handler. The event should include a data object with data relevant to the start checkout input parameter.
Sezzle payment is cancelled. If the user exits the Sezzle checkout for any reason, the `onCancel` handler will be executed.
Sezzle payment has failed. If there is an error loading the Sezzle checkout page, the `onFailure` handler will be executed.
### Checkout Initialization
```javascript expandable theme={"system"}
checkoutSdk.startCheckout({
checkout_payload: {
amount_in_cents: integer,
currency: string,
merchant_reference_id: string,
customer: {
email: string,
first_name: string,
last_name: string,
phone: string,
billing_address_street1: string,
billing_address_street2: string,
billing_address_city: string,
billing_address_state: string,
billing_address_postal_code: string,
billing_address_country_code: string,
},
items: [
{
name: string,
sku: string,
quantity: integer,
price: {
amount_in_cents: integer,
currency: string,
},
},
],
},
});
```
```javascript expandable theme={"system"}
checkoutSdk.startCheckout({
checkout_payload: {
amount_in_cents: 1000,
currency: "USD",
merchant_reference_id: "merchant-checkout-id-max-255",
customer: {
email: "test@test.com",
first_name: "John",
last_name: "Doe",
phone: "0987654321",
billing_address_street1: "3432 Terry Lane",
billing_address_street2: "12",
billing_address_city: "Katy",
billing_address_state: "TX",
billing_address_postal_code: "77449",
billing_address_country_code: "US",
},
items: [
{
name: "Blue tee",
sku: "sku123456",
quantity: 1,
price: {
amount_in_cents: 1000,
currency: "USD",
},
},
],
},
});
```
`checkout_payload` is optional but providing as much information as possible will improve customer experience.
The amount of the item in cents
The 3 character currency code as defined by ISO 4217
Typically a checkout or cart id, currently used for tracking only (must contain only alphanumeric characters, dashes (-), and underscores (\_))
Used only for troubleshooting. The Reference ID that shows in the Merchant Dashboard can be set using [Set Order Reference ID](#set-order-reference-id)
The customer for the order
The customer's email address
The customer's first name
The customer's last name
The customer's phone number
The street and number of the address
The apt or unit
The city
The 2 character state code
The postal delivery code
The 2 character country code
The items being purchased
The name of the item
The sku identifier
The quantity purchased
The price object
The amount of the item in cents
The 3 character currency code as defined by ISO 4217
### `onComplete` with card data
The `event.data` will contain a fully formed payload containing the customers payment method. This information is not the payment method used to pay Sezzle but one that can be used through your payment gateway (Cybersource, Stripe, Braintree, etc).
#### `event.data` response
```json expandable theme={"system"}
{
"session_id": string,
"card": {
"firstName": string,
"lastName": string,
"pan": string,
"cvv": string,
"expiryMonth": string,
"expiryYear": string
},
"holder": {
"email": string,
"phone": string,
"firstName": string,
"lastName": string,
"address1": string,
"address2": string,
"city": string,
"state": string,
"country": string,
"postalCode": string
}
}
```
```json expandable theme={"system"}
{
"session_id": "123",
"card": {
"firstName": "John",
"lastName": "Doe",
"pan": "1234",
"cvv": "123",
"expiryMonth": "02",
"expiryYear": "28"
},
"holder": {
"email": "john.doe@example.com",
"phone": "6125551234",
"firstName": "John",
"lastName": "Doe",
"address1": "123 W Lake St",
"address2": "Unit 104",
"city": "Minneapolis",
"state": "MN",
"country": "US",
"postalCode": "55408"
}
}
```
The first name on the card
The last name on the card
The 16 digit card number
The security code on back of the card
The expiration month on the card
The expiration year on the card
The customer's email address
The customer's phone number
The customer\`s first name
The customer\`s last name
The street and number of the address
The apt or unit
The city
The 2 character state code
The 2 character country code
The postal delivery code
### `onComplete` with tokenization
Tokenization is a feature developed for merchants who do not want the card information sent directly through the message event. Instead the payload to `onComplete` will contain a card token string.
#### Checkout initialization
```diff theme={"system"}
checkout.init({
onClick: function () {
event.preventDefault();
checkout.startCheckout({
checkout_payload: {
...
+ "card_response_format":"token"
}
});
},
onComplete: function (event) {
console.log(event.data)
},
onCancel: function() {
console.log("checkout canceled");
},
onFailure: function() {
console.log("checkout failed");
}
})
```
#### `event.data` response
```json theme={"system"}
{
"card": {
"token": string
}
}
```
```json theme={"system"}
{
"card": {
"token": "abc12345"
}
}
```
#### Get card data
The virtual card data can be obtained using the token above using the [Virtual Card Data](/docs/api/core/sessions/virtual/carddatabytoken) method.
## Set Order Reference ID
In many cases, the merchant order ID will not be generated until after the checkout is completed and an order is created. Call `setOrderReferenceID` to set the Sezzle Order Reference ID with the merchant order ID after the virtual card transaction has been successfully completed.
### Using SDK
```javascript theme={"system"}
checkoutSdk.setOrderReferenceID({
session_id: string,
order_id: string,
});
```
```javascript theme={"system"}
checkout.setOrderReferenceID({
session_id: "example-session-id",
order_id: "merchant-order-id",
});
```
### Using API
The [Update Card Session](/docs/api/core/sessions/virtual/setorderid) API endpoint exists where you are able to update the Order ID based.
# Introduction
Source: https://docs.sezzle.com/docs/guides/virtual/introduction
* Sezzle Virtual Card allows merchants to:
* Accept Sezzle payments as credit card transactions.
* Seamlessly integrate with existing credit card forms at checkout.
* For API-related questions, contact the Sezzle team via the [Merchant Help Request](https://merchant-help.sezzle.com/hc/en-us/requests/new) form.
* An approved Sezzle account is required to begin integration; [sign up](https://dashboard.sezzle.com/merchant/signup) if you don’t have one.
* Endpoints in this guide require an [authentication](/docs/api/core/authentication/postauthentication) token.
You can test your integration with Sezzle using [Sezzle sandbox test environment](/docs/api/environments).
This product is currently only available in the United States. Support for Canada coming soon.
The shopper selects "Make a purchase request" on the Virtual Card tab.
The shopper enters the amount they plan to spend.
The shopper reads the loan terms and continues if they agree.
The shopper uses the Virtual card at your checkout or terminal.
# Manual Integration
Source: https://docs.sezzle.com/docs/guides/virtual/manual
If the [Virtual Card SDK](./automated) is not a viable option, the manual integration will guide you through the steps to complete a virtual card session in your checkout.
## Overview
1. Create a [virtual card session](/docs/api/core/sessions/virtual/postv2sessioncard)
2. Add a window event listener with type `message` to the checkout page
3. Open the card session `dashboard_url` using the mode provided in the create card session request
4. Sezzle will post a message to the listener when the user has completed the card session
5. Verify message `event.data` exists
6. Verify `event.data.szl_source` `=` `v_card`
7. Verify `event.data.card` and `event.data.holder` both exist
* If they exist
* Use card and holder data to submit the order by credit card
* If they don't exist
* The user did not provide virtual card data
## Example Javascript
```javascript [expandable] theme={"system"}
window.addEventListener("message", function () {
var data = event.data || Object.create(null);
if (data.szl_source !== "v_card") {
console.log("invalid source");
return;
}
var card = data.card;
var holder = data.holder;
if (!card && !holder) {
console.log("failed virtual card session");
return;
}
console.log(
"card data:",
card.firstName,
card.lastName,
card.pan,
card.cvv,
card.expiryMonth,
card.expiryYear
);
console.log(
"holder data:",
holder.email,
holder.phone,
holder.firstName,
holder.lastName,
holder.address1,
holder.address2,
holder.city,
holder.state,
holder.country,
holder.postalCode
);
});
```
# Price Breakdown Widget
Source: https://docs.sezzle.com/docs/guides/widgets/sdk
## Purpose
Boost conversions and increase average order value by showcasing Sezzle’s financing options to shoppers as they browse your site.
## Overview
The Sezzle promotional messaging widget displays available financing options on product and cart pages, encouraging purchases. Follow the installation instructions below to add the widget to your website.
## Installation
* **One-Click Installation**: Many leading platforms offer one-click installation with Sezzle. [Check for compatibility with your platform](https://docs.sezzle.com/docs/plugins/).
* **Manual Installation**: If one-click installation is unavailable or incompatible with your theme, refer to the manual installation guide or contact [merchantsupport@sezzle.com](mailto:merchantsupport@sezzle.com) for assistance.
## Customization
Sezzle provides extensive configuration options to tailor the widget to your site’s needs. Our engineering team is available to ensure seamless integration with your website’s design and functionality.
### HTML required
```html theme={"system"}
```
Replace `{merchant_id}` with your 36-character value from your [Merchant Dashboard](https://dashboard.sezzle.com/merchant/settings/business).
## Merchant Configured
Configuration is required prior to invoking the price widget script.
## `document.sezzleConfig` Options
```html expandable theme={"system"}
```
```html expandable theme={"system"}
```
Allows multiple configurations for one store to suit different page types, layouts, or applications. View all available options for customization.
ID, class, or path to the element in the webpage where the product price text value will be detected.\
To indicate a path, subpaths are separated by '/', IDs are preceded by '#', classes by '.', and tag names are suffixed with index (`tagName-Index`). Indexes are zero-based.
e.g. '#ProductSection/.product-price/SPAN-1' would target the 2nd 'SPAN' element contained within elements that contain the 'product-price' class which are contained within the element with an ID of 'ProductSection'.
Path from `targetXPath` to the element after which the Sezzle widget should be rendered.\
Use '.' for sibling placement, '../' to move up to parents, and tag-index selectors to move down. Same syntax as `targetXPath`.
e.g. '../../BUTTON-0' would go to the grandparent element of the targetXPath and place the widget after the first button found within that container.
Specific word appearing in the URL of pages where the widget config should apply. Typical values are 'product' or 'cart'.
Updates the logo color to coordinate with different background colors. If not specified, the widget will attempt to detect the background color and apply a contrasting logo.
Available options: `dark`, `light`, `black-flat`, `white-flat`.
Custom styling to apply to the Sezzle widget container. Accepts CSS in JSON format. Keys must use camelCase, be wrapped in quotes, and separated by commas.
Key should be the CSS property you wish to set, in camelCase, value should be type string
Custom styling to apply to the Sezzle text within the widget. Accepts CSS in JSON format. Keys must use camelCase, be wrapped in quotes, and separated by commas.
Key should be the CSS property you wish to set, in camelCase, value should be type string
Custom styling to apply to the Sezzle logo within the widget. Accepts CSS in JSON format. Keys must use camelCase, be wrapped in quotes, and separated by commas.
Key should be the CSS property you wish to set, in camelCase, value should be type string
The path from the targetXPath to the observable element
Function receives two parameters. The first is the related element per `relatedPath`, the second is the widget that corresponds to this `targetXPath` element. Write a custom function to check condition on relatedPath, then perform an action on widget.
Direct child elements of `targetXPath` to be disregarded when detecting the price. Useful for handling variations between sale and regular-priced items.
Text strings within `targetXPath` to be disregarded when detecting the price and rendering the widget.
XPath of elements that should be hidden when Sezzle's widget is showing.\
Despite the name, this config accepts an array of XPaths.
e.g. \["#viabill-pricetag",".afterpay-paragraph","QUADPAYWIDGET-0"]
Alignment of the widget relative to the parent element.
Available options: `left`, `center`, `right`, `auto`
Screen width in pixels below which the alignment switches to `alignmentSwitchType`. Common breakpoint: 768px (for handheld vs desktop).
Alignment of the widget to apply when viewport width is narrower than `alignmentSwitchMinWidth`.
Available options: `left`, `center`, `right`, `auto`
Afterpay's logo is appended to widget content. When clicked, the competitor's modal will display.
Klarna's logo is appended to widget content. When clicked, the competitor's modal will display.
Minimum price in cents for which Sezzle can be selected at checkout. If the price at `targetXPath` is lower than this number, the widget will render with a note stating the minimum eligible price required. This configuration does not prevent a customer from checking out with Sezzle below this price. For more information on setting a gateway minimum, contact your Merchant Success representative or use the Contact Us section of the Sezzle Merchant Dashboard.
Maximum price in cents for which the widget should be rendered. If the price at `targetXPath` is higher than this number, the widget will not render on the page.
Language in which the widget text should be rendered. If the specified language is not supported, the translation will default to English.
Available options: `left`, `center`, `right`, `auto`
Can attach event listeners to DOM elements and re-initialize the widget.
The id or class of the element to observe
The event type for which to observe, upon which to re-render the widget
#### Simple Example
```html theme={"system"}
```
```html theme={"system"}
```
## Rendering the Widgets
After building the config, it is time to upload the widgets to your webpages! The SDK needs to be called in the HTML of the webpage for the widgets to be rendered. Place the config and the widget script at the bottom of the code file for the HTML page, and you should be all set!
A pre-populated snippet should be provided in your Sezzle Merchant Dashboard Setup Checklist.
When using this snippet to add the widget script to your site, you must replace `{merchant_id}` with the 36-character Sezzle Merchant ID found in the [Business Settings of your Sezzle Merchant Dashboard](https://dashboard.sezzle.com/merchant/settings/business) for the applicable store. Please do not re-use IDs across multiple URLs.
The script with the applicable merchant ID **must** be included *after* `document.sezzleConfig` is defined.
### HTML Needed
```html theme={"system"}
```
Replace `{merchant_id}` with your 36-character value from your Merchant Dashboard.
# Static Widget
Source: https://docs.sezzle.com/docs/guides/widgets/static
The Static Widget enables merchants to integrate the Sezzle widget into their website without direct communication with Sezzle’s servers. All widget code, custom configurations, images, and stylesheets are hosted locally within the merchant’s store theme. This approach offers:
* Faster Load Times
* Local hosting reduces dependency on external servers.
* Greater Control
* Merchants have full authority over the widget’s appearance and behavior, as the Sezzle team cannot modify it.
This local control means merchants are responsible for any updates or changes to the widget.
## Installation
Select the implementation that fits your needs:
* [NPM Package](#npm-implementation)
* [Code Snippet (Platform Agnostic)](#html-implementation)
* [Code Snippet (Shopify)](#shopify-implementation)
### NPM Implementation
If your website is built with React, please refer to the package and documentation [here](https://www.npmjs.com/package/@sezzle/sezzle-react-widget).
Using npm:
`npm install @sezzle/sezzle-static-widget@latest`
Within your product page, add the following code snippet where you want the widget to render, updating the path to node\_modules for your file structure:
```html theme={"system"}
```
Use the Configuration options below to customize the widget appearance as desired.
### HTML Implementation
Implementation varies greatly by platform, theme, etc. Below is a general overview of the process. The code snippets below are samples and may need to be modified to fit your site. For Shopify merchants, please proceed to the next section.
1. Create a new Javascript file within your site's code where appropriate
2. Copy and paste [this minified code](https://github.com/sezzle/static-widgets/blob/production/dist/bundle.js) into the newly created file
3. Import the new file into the page(s) where the Sezzle widget will be added
```html theme={"system"}
```
4. Create a placeholder element where the Sezzle widget should be rendered on the page(s), usually below the price container element
```html theme={"system"}
```
5. Add the following script below the placeholder element, updating the amount value to reflect your price variable which renders the current product price or cart total as applicable
```html theme={"system"}
```
6. Preview your changes to confirm the widget is displaying correctly in each of the following scenarios
* Use the Configuration options below to customize the widget appearance as desired:
* Regular Price
* Sale Price
* Variant Selection
* Desktop
* Mobile
### Shopify Implementation
1. Log into your Shopify store admin
2. Click `Online Store` > `Themes`
3. Next to the theme you wish to edit, click `Actions`, then select `Edit Code`
4. Under the `Assets` folder, click `Add a new asset`
5. On the `Create a Blank File` tab, name the file `sezzle-static-widget` and select `.js` as the file type, then click `Add Asset`
6. Copy the code from the [repository file](https://github.com/sezzle/static-widgets/blob/production/dist/bundle.js) and paste it into this new file, then click `Save`
7. Add the following lines of code wherever the widget should render on the product page within `templates/product.liquid` or `sections/product-template.liquid` as applicable
```html theme={"system"}
{{ 'sezzle-static-widget.js' | asset_url | script_tag }}
```
8. Add the following lines of code wherever the widget should render on the cart page within `templates/cart.liquid` or `sections/cart-template.liquid` as applicable
```html theme={"system"}
{{ 'sezzle-static-widget.js' | asset_url | script_tag }}
```
## Customizing the Configuration
Once the widget is rendering, additional configurations can be added to the AwesomeSezzle to change the appearance. Below is an example featuring all the options. However, amount is the only required value.
```html expandable theme={"system"}
```
```html theme={"system"}
```
The target price amount, in dollar format.\
Provide the product price variable as a template-literal.\
Shopify Liquid Example: `'{{ product.selected_or_first_available_variant.price | money }}'`
Provide the ID name or array of ID names that correspond to the widget placeholder elements where the widget should be rendered.
Updates the logo color to coordinate and contrast with different background
colors of websites. If `theme` is not specified, the widget will attempt to
detect the background color and apply the appropriate contrasting logo. Use
"light" or "black-flat" for light backgrounds, and "dark" or "white-flat"
for dark backgrounds.
Available options: `dark`, `light`, `black-flat`, `white-flat`
Maximum width of the widget element in pixels. Set to 200 to render the
widget nicely on 2 lines, or 120 for 3 lines.
Amount of space above the widget in pixels.
Amount of space below the widget in pixels.
Amount of space left of the widget in pixels.
Amount of space right of the widget in pixels.
Alignment of the widget relative to the parent element.
Available options: `left`,`center`, `right`, `auto`.
Screen width in pixels below which the alignment switches to
`alignmentSwitchType` instead of `alignment`. The most common breakpoint is
*768* (handheld vs desktop). `alignmentSwitchMinWidth` is typically only
necessary when alignment is not set to `auto`.
Alignment of the widget relative to the parent element to be applied when
the viewport width is narrower than `alignmentSwitchMinWidth`.
Available options: `left`,`center`, `right`, `auto`.
Color of the widget text. Accepts all CSS color formats: hex, rgb(), hsl(),
etc.
Font family of the widget text.
Font size of the widget text in pixels. Enter numbers only — do not include
units like `px`!
Boldness of the widget text. 100 is the lightest, 900 is the boldest.
Specifies the page category on which the widget is being rendered.
Avaialble options: `product-page`, `product-preview`, `cart`.
Sets the CSS value of fixed-height.
Ratio at which to scale the Sezzle logo. The space the logo occupies between
the widget text and the More Info link/icon is determined by the font size.
Custom styling to apply to the Sezzle logo within the widget. The object
accepts any CSS styling in JSON format. Keys must be camelCase.
Language in which the widget text should be rendered. If the specified language is not supported, the translation will
default to English.
Available options: `en`, `fr`, `es`, `de`.
Allows widget installment price to calculate and format correctly for
foreign currencies.
Available options: `default`, `comma`.
Allows widget to render the correct program details, depending on if the
merchant is enrolled through Sezzle North America or Sezzle Europe.
Available options: `North America`, `Europe`.
## Methods
The following functions are built into the static widget and are ready for use for your widget installation. Simply add the applicable snippet to your webpage code, updating the event listener and variables as necessary.
### `alterPrice(newPrice)`
Alters price on widget. Create an event listener after `renderSezzle.init()` that invokes this function where `newPrice` is the new price value of the selected variant. Example:
```javascript theme={"system"}
document.onchange = function () {
var newPrice = "${yourPriceVariableHere}";
renderSezzle.alterPrice(newPrice);
};
```
### `renderModalByfunction()`
Opens the Sezzle modal by a function. Create an event listener that invokes this function if the event location is other than the info icon.
```javascript theme={"system"}
var clickElement = document.querySelector("#yourClickableElementIdHere");
clickElement.addEventListener("click", function () {
renderSezzle.renderModalByfunction();
});
```
### `isMobileBrowser()`
Returns true on mobile browser. Use this event to show or hide the widget in different page locations based on device type.
```javascript theme={"system"}
document.onreadystatechange = function () {
if (renderSezzle.isMobileBrowser()) {
document.getElementById("sezzle-widget-mobile").style.display = "block";
document.getElementById("sezzle-widget").style.display = "none";
} else {
document.getElementById("sezzle-widget").style.display = "block";
document.getElementById("sezzle-widget-mobile").style.display = "none";
}
};
```
### `getElementToRender()`
Returns Element where the widget will be rendered. Create an event listener that invokes this function if the widget should appear when the event occurs.
```javascript theme={"system"}
document.body.insertBefore(
renderSezzle.getElementToRender(),
document.getElementById("price").nextElementSibling
);
```
# Before You Begin
Source: https://docs.sezzle.com/docs/plugins/before-you-begin
1. You should have a Sezzle merchant account
* Please visit our [signup page](https://dashboard.sezzle.com/merchant/signup) if you don't have an account
2. Make sure you know the following Sezzle details for your account
* [Merchant ID](https://dashboard.sezzle.com/merchant/settings/business)
* [Public API Key](https://dashboard.sezzle.com/merchant/settings/apikeys)
* [Private API Key](https://dashboard.sezzle.com/merchant/settings/apikeys)
3. Familiarize yourself with the [transaction flow](https://docs.sezzle.com/docs/guides/direct/introduction) when buying with Sezzle
# BigCommerce
Source: https://docs.sezzle.com/docs/plugins/big-commerce
This guide explains how to add Sezzle as a payment option on your BigCommerce website, enabling customers to use Sezzle at checkout.
This integration is only available with [BigCommerce's Optimized One Page
Checkout](https://support.bigcommerce.com/s/article/Optimized-Single-Page-Checkout?language=en_US).
### Enable Sezzle as an online payment method
[Get the app](https://www.bigcommerce.com/apps/sezzle/)
1. Go to `Store Setup` > `Payments`
2. Go to `Online Payment Methods`, find `Sezzle` and click `Set up`
3. Copy your Public Key and Private Key from your [Sezzle Merchant Dashboard](https://dashboard.sezzle.com/merchant/)
* Paste them into the corresponding fields
4. Select the `Transaction Type`
If you select `Authorize only`, payment will only be authorized and
will have to be captured later in BigCommerce.
5. Select the `Test Mode` (`No` (Recommended) or `Yes` for testing)
6. Click `Save`
### Install the Sezzle BigCommerce App
1. Log in to your website's BigCommerce store admin page
2. In the left sidebar, click `Apps > Marketplace`
3. Click `BigCommerce.com/Apps`
4. Search for `Sezzle`
5. Click `Sezzle`, then click `Get This App`
6. Click `Install`
7. Check the PCI Compliance box, then click `Confirm` to start the installation
### Widget Pre-Configuration
1. Make sure you have the Sezzle App installed in your store
2. Go to `Apps` > `Sezzle`
3. Copy your Merchant ID from your [Sezzle Merchant Dashboard](https://dashboard.sezzle.com/merchant/)
* Paste them into the corresponding fields in the Sezzle App of your BigCommerce admin
4. Check the Add Sezzle Widget Script box
* This will inject the widget script into the product and cart pages of your store
5. Save the configuration
### Validate
Step through a [test checkout](/docs/api/test-cards#checkout-testing) to validate the integration is properly installed.
### Troubleshooting
If testing was unsuccessful, review the following:
1. Site has Optimized One-Page Checkout enabled
* Go to `Advanced Settings` > `Checkout`
2. API Keys were entered correctly
* To avoid typos or extra spaces, use the Copy icon in the [Sezzle Merchant Dashboard](https://dashboard.sezzle.com/merchant/settings/apikeys)
3. If you have multiple accounts with Sezzle, each store has its own merchant ID and API Keys that are tied to the store's URL
4. Add Sezzle Widget Script box is checked
5. Widget script is present on your website and reflects the Merchant ID from your [Sezzle Merchant Dashboard](https://dashboard.sezzle.com/merchant/settings/business)
* Go to a product page on your website
* Right-click then select `Inspect`
* In the `Elements` tab, search for `widget.sezzle`
### Manual Theme Integration
If the Sezzle App fails to maintain the widget script on the product pages, or to add the script manually for additional pages, complete the following steps:
1. Go to `Storefront` > `Script Manager`
2. Click the `Create a Script` button
3. Set `Name of script` to `Sezzle Widget`
4. Set `Location on page` to `Footer`
5. Set `Select pages` where script will be added to `All pages`
6. Set `Script category` to `Essential`
7. Set `Script type` to `Script`
8. In the Script content area, copy and paste the script, then click `Save`
The script to be inserted into your webpage is as follows:
#### Template
```javascript theme={"system"}
```
Update `{sezzle_merchant_uuid}` in the above script template with your
site’s Merchant ID (removing the curly brackets), which can be found in the
[Sezzle Merchant
Dashboard](https://dashboard.sezzle.com/merchant/settings/business).
#### Example
```javascript theme={"system"}
```
Instructions may vary slightly depending on your active plug-ins. If the issue persists after completing the above steps, look for other available features that allow the addition of a custom HTML code snippet to the site footer. If no such feature is found, the below steps may be followed as a last resort:
1. Go to `Storefront` > `My Themes`
2. In your Current Theme, click `Advanced` then select `Edit Theme Files`
3. In the confirmation window, click `Edit Theme Files`
4. In the file list, go to `templates` > `pages`, then select `product.html`
5. Copy and paste the script into the very bottom of the file, then click `Save` and `Apply Files`
6. Repeat the previous step for the `cart.html` file
For any kind of assistance, reach out to
[**merchantsupport@sezzle.com**](mailto:merchantsupport@sezzle.com).
### Uninstall Steps
1. Go to `Apps` > `My Apps`
2. Under the Sezzle App, click `Uninstall`
3. Toggle the button against Sezzle under `Store Setup` > `Payments` > `Online Payment Methods` to disable Sezzle as a payment option
# BuyItLive
Source: https://docs.sezzle.com/docs/plugins/buy-it-live
This guide explains how to add Sezzle as a payment option on your BuyItLive website, enabling customers to use Sezzle at checkout.
### BuyItLive Admin Configuration
1. Log in to your website's BuyItLive admin
2. Click `Add Payment Provider`
3. Select `Connect with Sezzle`
4. Go to `Sezzle Payments` > `Tools`
5. Copy your Private Key and Public Key from your [Sezzle Merchant Dashboard](https://dashboard.sezzle.com/merchant/settings/apikeys)
* Paste them into the corresponding fields in the Sezzle configuration page of your BuyItLive admin
6. Click `Save Settings`
7. Go to `Cart Settings` and ensure the `Sezzle` switch is in the `On` position
Installation is complete!
### Validate
Step through a [test checkout](/docs/api/test-cards#checkout-testing) to validate the integration is properly installed.
# CommentSold
Source: https://docs.sezzle.com/docs/plugins/comment-sold
This guide explains how to add Sezzle as a payment option on your CommentSold website, enabling customers to use Sezzle at checkout.
### CommentSold Admin Configuration
[Get the app](https://commentsold.com/admin/setup/billing)
1. In your CommentSold admin, go to Setup
2. Click Payment Gateways
3. Copy your Private Key and Public Key from your [Sezzle Merchant Dashboard](https://dashboard.sezzle.com/merchant/settings/apikeys)
* Paste them into the corresponding fields in the Sezzle configuration page of your CommentSold admin
4. Click Update Keys
Installation is complete!
### Validate
Step through a [test checkout](/docs/api/test-cards#checkout-testing) to validate the integration is properly installed.
# Lightspeed
Source: https://docs.sezzle.com/docs/plugins/lightspeed
This guide explains how to add Sezzle as a payment option on your Lightspeed website, enabling customers to use Sezzle at checkout.
Sezzle's Lightspeed App is certified and available [here](https://www.lightspeedhq.com/ecommerce/store/apps/sezzle/) in the App Store.
### Install the Sezzle Lightspeed App
1. Log in to your Lightspeed back office
2. Navigate to `Apps` > `App Store`
3. Search for `Sezzle` in the search bar and click on the Sezzle app
4. Click `Install App` in the top right corner
5. On successful install, you will be redirected to Sezzle App
### Configure Sezzle
1. Navigate to the Sezzle App by clicking on `Go to App` located at `Apps` > `Purchased Apps` > `Sezzle`
2. Copy your Public Key and Private Key from your [Sezzle Merchant Dashboard](https://dashboard.sezzle.com/merchant/settings/apikeys)
* Paste them into the corresponding fields
3. Click on `link sezzle account` to link your Sezzle account with your Lightspeed store
The message `Account successfully linked` is displayed when the account is verified
### Settings
Toggle the `Sezzle at Checkout` checkbox to enable (`On`) or disable (`Off`) Sezzle as a payment option in the checkout page.
Toggle the `Sezzle Widgets` checkbox to enable (`On`) or disable (`Off`) Sezzle widget in the PDP and Cart pages.
### Payment Refund
1. In your Lightspeed back office, go to `Orders` > `Orders`
2. Select the order to be refunded
3. Click `Add Credit Invoice`
4. Select the item and enter the quantity
5. Ensure that `Status` `=` `Not Paid`
6. Click `Add`
7. Cancelling a Paid order will also refund the payments for the Paid Invoices
**On Successful Refund**
* An invoice with the status of `Not Paid` will be created in the `Orders > Invoices` section.
* The Order Status will be displayed as `Refunded` in your Sezzle Merchant Dashboard.
### Validate
A Lightspeed test store must be used for Sandbox testing.
Step through a [test checkout](/docs/api/test-cards#checkout-testing) to validate the integration is properly installed.
# Magento 2
Source: https://docs.sezzle.com/docs/plugins/magento-2
This guide explains how to add Sezzle as a payment option on your Magento 2 website, enabling customers to use Sezzle at checkout.
Sezzle's Magento 2 extension is certified in the [marketplace](https://commercemarketplace.adobe.com/sezzle-sezzlepay.html) and can be downloaded from GitHub.
All tokenized orders will be processed as Pay in Full.
## Install the Sezzle Magento 2 Extension
Follow the instructions [here](https://github.com/sezzle/sezzle-magento2/tree/production) to install the Sezzle extension to your Magento setup
## Configure Sezzle
1. Log in to your Magento admin site
2. Go to `Stores` > `Configuration` > `Sales` > `Payment Methods` > `Additional Payment Solutions`
3. Next to `Sezzle`, click `Configure`
4. Click `I've already setup Sezzle, I want to edit my settings`
If you have not already signed up for Sezzle, you must [do so now](https://dashboard.sezzle.com/merchant/signup) before proceeding
### General
1. Set `Enabled` to `Yes`
2. Enter Public Key and Private Key, as found in your [Sezzle Merchant Dashboard](https://dashboard.sezzle.com/merchant/settings/apikeys)
3. Select the `Payment Mode: Live`
* See [Sandbox Testing](#sandbox-testing) for more information
4. Set `Min Checkout Amount` to restrict Sezzle payment method below the given amount
5. Select the `Payment Action`
* `Authorize Only` will only authorize payment and requires that the payment be captured later
* See [Capture Payment](#capture-payment) for manual capture instructions
* `Authorize and Capture` will perform both in a single step
* See [Authorize Only vs Authorize and Capture](/docs/guides/auth-and-capture) for details
6. Select `Enable Customer Tokenization`
* `Yes` prompts the customer to allow their account to be tokenized
* See [Customer tokenization](#customer-tokenization-details) for details
7. Set `Sort Order` to manage the position of Sezzle in the checkout payment options list
### In-Context Settings
In-Context Solution opens Sezzle payment processing in an iframe or pop-up. When disabled, shoppers will be redirected to Sezzle for payment processing, then returned to the merchant site upon completion.
* Set `Enable In-Context Solution` to `Yes` to enable In-Context Checkout.
* Set `In-Context Checkout Mode`
* `IFrame` will open Sezzle in a modal over the merchant site
* For security reasons, Sezzle must whitelist site URL(s) wishing to use this option.
* `Pop Up` will open Sezzle in a new window
* This option works without additional configuration from Sezzle's end.
### Settlement Report Settings
1. Set `Enable Settlement Reports` to `Yes` to enable the Settlement Reports Dashboard
2. Set `Range` to a value based on which you want to fetch the Settlement Reports
3. Set `Enable Automatic Syncing` to fetch the Settlement Reports asynchronously
This requires `cron` to be enabled
4. Set `Schedule` and `Time of Day` for the automatic sync to run
### Widget Settings
1. Set `Enable Widget in PDP` to `Yes` to display Sezzle on-site messaging after the product price on the Product Detail Page
2. Set `Enable Widget in Cart Page` to `Yes` to display Sezzle on-site messaging after the cart total on the Cart Page
3. Set `Enable Installment Widget in Checkout Page` to `Yes` to show the Sezzle installment plan widget under the Sezzle payment option on the Checkout Page
4. Set `Path to Price Element` to define where in the Checkout Page the order total text value will be detected for the installment widget
5. Save the configuration and clear the cache
### Widget Support
If widgets do not appear on the PDP and/or cart page after enabling the `Widget Settings`, click the `Request` button in this section to contact the Sezzle Widget team for assistance.
### Developer Settings
1. Set Enable Log Tracker to Yes to trace the Sezzle checkout process
2. Set Send Logs to Sezzle to Yes to send the logs to Sezzle automatically
This requires `cron` to be enabled
3. You may download the latest logs any time by clicking on Developer Logs: Sezzle Log
4. Save the configuration and clear the cache
### Clearing the Cache
1. Navigate to `System` > `Cache Management`
2. Click `Flush Cache Storage`
* Your store is now ready to accept payments through Sezzle
## Sezzle Order Management
### Sandbox Testing
1. On your dev/staging site, go to `Stores` > `Configuration` > `Sales` > `Payment Methods` > `Additional Payment Solutions`
2. Next to `Sezzle`, click `Configure`
3. Under `General`, update `Payment Mode to Sandbox`
4. Replace Public Key and Private Key with the API keys from your [Sezzle Merchant Sandbox Dashboard](https://dashboard.sezzle.com/merchant/settings/apikeys)
5. Click `Save Config`
6. On your website, add an item to the cart, then proceed to checkout and select Sezzle as the payment method
1. If customer is not tokenized, click `Continue to Sezzle`
2. If customer is tokenized, click `Place Order`
3. If In-Context checkout, click `Pay with Sezzle`
7. Sign In to Sezzle or Sign Up to continue
8. Enter the payment details using [test data](https://docs.sezzle.com/docs/api/core/test-data/#checkout-testing), then proceed to the final page
9. Check the `Approve {Website Name}` to process payments from your Sezzle account for future transactions
You may revoke this authorization at any time in your Sezzle Dashboard to tokenize your account
10. If your account is already tokenized, order will be placed without redirection
11. After payment is completed at Sezzle, you will be directed to your site's Successful Payment page
Sandbox testing is complete. You may login to your Sezzle Merchant Sandbox Dashboard to see the test order you just placed.
### Capture Payment
* The capture will be performed instantly from the extension after the order is created and validated in Magento.
* You will need to capture the payment manually from the Magento admin using the following steps:
1. 1. Navigate to `Sales` > `Orders`, find the order to capture, and click `View`
2. 2. In the upper-right of the form, click `Invoice`
3. 3. Review the order details, then click `Submit Invoice`
This will automatically capture the payment in Sezzle
### Refund Payment
1. Navigate to `Sales` > `Orders`, find the order to refund, and click `View`
2. In the upper-right of the form, click `Credit Memo` then `OK` to confirm your action
3. Review the refund details, then click `Refund Offline`
This will automatically update the Sezzle Order Status in Sezzle Merchant Dashboard to Refunded or Partially Refunded as applicable
### Release Payment
1. Navigate to `Sales` > `Orders`, find the order to release, and click `View`
2. In the upper-right of the form, click `Cancel` then `OK` to confirm your action
The Void was formerly used, but will be deprecated in future versions
This will automatically update the Sezzle Order Status in Sezzle Merchant Dashboard to Deleted due to checkout not being captured before expiration, indicating the payment has been fully released. Magento does not support partial releases.
### Order Verification in Magento Admin
1. Log in to Magento admin
2. Navigate to `Sales` > `Orders`, find the order to verify, and click `View`
| Order Status | Total Paid | Description |
| :----------- | :------------------------- | :------------------------------------------ |
| Processing | Grand Total | Payment was successfully captured by Sezzle |
| Pending | Does not equal Grand Total | Payment is authorized but not captured yet |
| Closed | N/A | Payment has been refunded |
| Canceled | N/A | Payment has been released |
### Order Verification in Sezzle Merchant Dashboard
1. Log in to Sezzle Merchant Dashboard
2. Navigate to `Orders`, then find and click the order to verify
| Order Status | Description |
| :----------------------------------------------------------- | :----------------------------------------------------------------------------------------------------- |
| Approved | Payment was successfully captured by Sezzle |
| Authorized, uncaptured | Payment was authorized but not captured yet |
| Refunded | Payment was refunded |
| Deleted due to checkout not being captured before expiration | Either the payment was not captured before the authorization expired, or the payment has been released |
### Customer Tokenization Details
1. Navigate to `Customers` > `All Customers`
* Select the customer to view tokenization details
2. If the customer is tokenized, the Sezzle tab will appear
* The `Status`, `Token`, and `Token Expiration` will appear on the tab
### Settlement Reports
1. Navigate to `Reports` > `Sales` > `Sezzle Settlement`
* A list of recent Settlement Reports will be shown
2. To make a Quick Sync, enter the From and To Date and click `Sync`
3. To view details of a report, in the `Action` column, click `View`
4. To download a report, in the `Action` column, click `Download`
* You can download the Settlement Report in `CSV` or `Excel` format
## Troubleshooting
If testing was unsuccessful, review the following:
1. Sezzle-Magento2 extension is the latest version
2. Sezzle extension is enabled
1. Go to `Stores` > `Configuration` > `Sales` > `Payment Methods` > `Additional Payment Solutions`
2. Next to `Sezzle`, click `Configure`
3. Ensure `Enabled` is set to `Yes`
3. API Keys were entered correctly, and for the correct environment
It is recommended to use the Copy icon in the [Sezzle Merchant Dashboard](https://dashboard.sezzle.com/merchant/settings/apikeys) to avoid typos or extra spaces
4. Cache Storage was flushed
5. Widget script is present on your website and reflects the Merchant UUID from your [Sezzle Merchant Dashboard](https://dashboard.sezzle.com/merchant/settings/business)
1. Go to a product page on your website
2. Right-click then select `Inspect`
3. In the `Elements` tab, search for `widget.sezzle`
* If all the above checks failed, the merchant can forward the `/var/log/sezzlepay.log` to the Sezzle team at [**merchantsupport@sezzle.com**](mailto:merchantsupport@sezzle.com)
* It is always recommended to send the `system.log` and `exception.log `for better tracing of issues
# Mojo
Source: https://docs.sezzle.com/docs/plugins/mojo
This guide explains how to add Sezzle as a payment option on your Mojo website, enabling customers to use Sezzle at checkout.
### Add Payment Method
1. Log into your Mojo admin account and navigate to the Integrations tab
2. Select `Payment Systems` in the dropdown menu and click on `Sezzle` in the next window
3. Toggle `Enable` to `ON`
4. Toggle `Test Mode` to `OFF` unless you are testing your integration in Sandbox
5. Enter your Sezzle Public and Private Key within the appropriate fields
6. Ensure consistency between your webpage offers and payment options upon final checkout
* Navigate to your Site Settings to enable or disable those features that you want enabled with Sezzle
The `Hide pay-over-time solutions` switch will be automatically hidden for those customers that choose the multi-pay order option.
7. Once satisfied with your transaction flow, click the blue `Save Changes` button
* Mojo will use customer tokenization for upsells
* See [customer tokenization](http://localhost:3000/docs/api/tokenization/intro) or contact Mojo for more information
### Validate
Step through a [test checkout](/docs/api/test-cards#checkout-testing) to validate the integration is properly installed.
# NopCommerce
Source: https://docs.sezzle.com/docs/plugins/nopcommerce
This guide explains how to add Sezzle as a payment option on your NopCommerce website, enabling customers to use Sezzle at checkout.
### Install the Sezzle NopCommerce Extension
Go to [https://www.nopcommerce.com/sezzle](https://www.nopcommerce.com/sezzle) and click`Get Extension`.
### Admin Configuration
1. Go to `Configuration` > `Local Plugins`
2. Click `Upload Plugin or Theme` and select the downloaded zipped file per the instructions given
3. After the extension has been uploaded, click `Install`
4. Under `Configuration`, go to `Payment Methods` and then click `Configure` under `Sezzle`
5. Click `Edit` from the Payment Method list
6. Copy your Merchant ID from your [Sezzle Merchant Dashboard](https://dashboard.sezzle.com/merchant/settings/business)
* Paste it into the corresponding field in the Sezzle configuration page of your NopCommerce admin
7. Copy your Public Key and Private Key from your [Sezzle Merchant Dashboard](https://dashboard.sezzle.com/merchant/settings/business)
* Paste it into the corresponding field in the Sezzle configuration page of your NopCommerce admin
8. Set `Transaction Mode` to either `Authorize` or `Authorize and Capture`
See [Authorize Only vs Authorize and Capture](/docs/guides/auth-and-capture) for details about the difference between the two choices.
9. Save the configuration
10. To restrict Sezzle usage based on billing country, go to `Configuration` > `Payment Restrictions`
11. Choose the country you want to restrict for Sezzle
Sezzle is currently available for customers from `The United States` and `Canada`.
You may wish to restrict all countries where Sezzle is not available.
12. Integration is complete
### Validate
Step through a [test checkout](/docs/api/test-cards#checkout-testing) to validate the integration is properly installed.
# Open Cart
Source: https://docs.sezzle.com/docs/plugins/open-cart
This guide explains how to add Sezzle as a payment option on your Open Cart website, enabling customers to use Sezzle at checkout.
Sezzle supports Opencart versions 3.0.3.7.
### Installation
1. Download the Sezzle module from the Opencart Marketplace
2. In your Opencart back office, go to `Extensions` > `Installer`
3. Select `Upload` and select the .zip file that you downloaded
4. Go to `Extensions` > `Payments`
5. Find `Sezzle`, and select `Enable Module`
* The plugin is ready to be configured
To learn how to install the plugin after you've downloaded it, watch the official Opencart [video tutorial](https://www.youtube.com/watch?v=mXhRSXw_ycE\&t=3s)
### Configuration
1. In your Opencart admin, go to `Extensions` > `Payments`
2. In the `Payments` section, find `Sezzle` and select `Configure`
3. Fill out the following fields
| Field | Value |
| -------------------------- | ----------------------------------------------------------------------------------------------------------------------------------------------------------------------------------------------------------------------------------------------------------------------------------------------------------------------------------------------------------------------------------------------------------------------------- |
| Status | Enable or Disable |
| Public Key | Public Key from the Sezzle Merchant Dashboard |
| Private Key | Private Key from the Sezzle Merchant Dashboard |
| Test Mode | Yes or No for Testing |
| Transaction Method | Use *Authorize and Capture* to immediately capture payment when a Sezzle checkout is completed and *Authorize Only* to authorize payment when a Sezzle checkout is completed. This requires a follow up capture request from backoffice to complete payment. See [Authorize Only vs Authorize and Capture](/docs/guides/auth-and-capture) for details about the difference between the two choices. |
| Allow Tokenization | Enable to offer returning shoppers a faster checkout experience by bypassing the Sezzle checkout. |
| Enable Widget in PDP | Enable for showing the Sezzle widget on the PDP |
| Enable Widget in Cart Page | Enable for showing the Sezzle widget on the Cart Page |
| Sort Order | Enable for sorting the position of Sezzle payment option in the checkout page |
### Payment Capture
* Payment will automatically be captured during the checkout process.
1. 1. In your Opencart back office, go to `Sales` > `Orders`
2. 2. Select the order in which you want to capture the payment
3. 3. Go to the `Sezzle` tab
4. 4. Enter the capture amount
5. 5. Click `Capture Payment`
### Payment Refund
1. In your Opencart back office, go to `Sales` > `Orders`
2. Select the order for which you want to refund the payment
3. Go to the `Sezzle` tab
4. Enter the refund amount
5. Click `Refund Payment`
### Payment Release
1. In your Opencart back office, go to `Sales` > `Orders`
2. Select the order for which you want to release the payment
3. Go to the `Sezzle` tab
4. Enter the release amount
5. Click `Release Payment`
### Upgrading the module
If you are using an older Sezzle Opencart module version and want to use the latest version follow these steps:
1. Uninstall the existing Sezzle module
2. Install the latest plugin version as described in [Installation](https://docs.sezzle.com/docs/plugins/open-cart#installation)
3. Configure the latest plugin version as described in [Configuration](https://docs.sezzle.com/docs/plugins/open-cart#configuration)
# Prestashop
Source: https://docs.sezzle.com/docs/plugins/prestashop
The Sezzle module for PrestaShop can be [downloaded from GitHub](https://github.com/sezzle/sezzle-prestashop).
### Installation
1. In your PrestaShop back office, go to `Modules` > `Module Manager`
2. Select `Upload a module`, then select the .zip file that you downloaded on your computer
3. Go to `Payment` > `Payment methods`
4. Find `Sezzle`, and select `Enable Module`
* The plugin is now ready to be configured
To learn how to install the plugin after you've downloaded it, watch the official [PrestaShop video tutorial](https://www.youtube.com/watch?v=nG3VSMQ593s)
### Configuration
1. In your PrestaShop back office, go to `Modules` > `Module Manager`
2. In the `Payment` section, find `Sezzle` and select `Configure`
* Fill out the following fields:
| Field | Value |
| :-------------------------- | :------------------------------------------------------------------------------------------------------------------------------------------------------------------------------------------------------------------------------------------------------------------------------------------------------------------ |
| Live Mode | Enable or Disable for testing |
| Merchant ID | Merchant ID that you got from [Merchant Dashboard](https://dashboard.sezzle.com/merchant/settings/business) |
| Public Key | Public Key that you got from [Merchant Dashboard](https://dashboard.sezzle.com/merchant/settings/apikeys) |
| Private Key | Private Key that you got from [Merchant Dashboard](https://dashboard.sezzle.com/merchant/settings/apikeys) |
| Payment Action | `Authorize and Capture` for instant capture and `Authorize Only` for just authorization (needs to be captured manually from backoffice) See [Authorize Only vs Authorize and Capture](/docs/guides/auth-and-capture) for details about the difference between the two choices |
| Allow Customer Tokenization | Enable to offer returning shoppers a faster checkout experience by saving their card details |
| Enable Widget | Enable for showing Sezzle widget in PDP and Cart Page |
### Payment Capture
* Payment will automatically be captured during the checkout process.
1. 1. In your Opencart backoffice, go to `Orders` > `Orders`
2. 2. Select the order for which you want to capture the payment
3. 3. In the `Payment` section right below, enter the below information and click `Add`
4. * Date
5. * Payment method
6. * Amount
7. 4. Change the `Order Status` to `Payment Accepted` if capture is successful
### Payment Refund
1. In your PrestaShop backoffice, go to Orders > Orders
2. Select the order for which you want to refund the payment
3. Click on Partial Refund, enter the amount and click on Partial Refund right below
4. For Full Refund, you have to fill up all the order related amounts in respective places
5. Change the Order Status to Refunded only if full refund is successful
### Payment Release
1. In your PrestaShop backoffice, go to `Orders` > `Orders`
2. Select the order for which you want to refund the payment
3. Change the `Order status` to `Cancelled` and click `Update Status`
### Upgrading the module
If you have an existing Sezzle PrestaShop module installed and want to upgrade a new version, proceed as follows:
1. Uninstall the existing Sezzle module
2. In the Upgrade drop-down menu select `Uninstall`
Manually remove the `/sezzle` folder from the `/modules` folder (if not removed during uninstall action)
3. [Install](https://docs.sezzle.com/docs/plugins/prestashop#installation) the latest plugin version
4. [Configure](https://docs.sezzle.com/docs/plugins/prestashop#configuration) the latest plugin version
### Reinstallation
When you reinstall the plugin, the plugin takes care of most of its configurations and functions except for the items listed below. We recommend that you follow the steps here to make sure that when you reinstall the plugin, it won't pick up settings from a previous installation.
**Order status**
* The plugin keeps the `Awaiting Sezzle Payment` order status because existing orders might still use them. If you would also like to remove these statuses, first make sure that these are no longer in use.
* To check if the status is in use:
1. Go to the `Orders` page in your Prestashop admin panel
2. Filter the orders for the `Awaiting Sezzle Payment` order status
3. If there are any, move them to another status that you would like to use
* When there are no more orders using this status, you can delete the status from your order status list
**Configurations**
The plugin keeps the `AWAITING_SEZZLE_PAYMENT` configuration fields in your database in case there are still orders in your system with the corresponding statuses. If you have already removed the status, you can also remove these leftover configurations.
# Salesforce Commerce Cloud
Source: https://docs.sezzle.com/docs/plugins/salesforce-commerce-cloud
This guide explains how to add Sezzle as a payment option on your Salesforce Commerce Cloud website, enabling customers to use Sezzle at checkout. This integration supports sites built with both the SiteGenesis and Reference Architecture.
See [Authorize Only vs Authorize and Capture](/docs/guides/auth-and-capture) for details about the difference between the two choices.
### Installation
* Get the [Sezzle Cartridge for B2C Commerce](https://appexchange.salesforce.com/appxListingDetail?listingId=a0N4V00000JhSz3UAF\&tab=e) on the Salesforce AppExchange or directly from [GitHub](https://github.com/sezzle/sezzle-commerce-cloud)
* Installation instructions are included in the [documentation](https://github.com/sezzle/sezzle-commerce-cloud/tree/production/documentation)
* If you need further assistance with our Salesforce cartridge, please contact our team by [submitting a support request](https://merchant-help.sezzle.com/hc/en-us/requests/new)
# Shift4Shop
Source: https://docs.sezzle.com/docs/plugins/shift4shop
This guide explains how to add Sezzle as a payment option on your Shift4Shop website, enabling customers to use Sezzle at checkout.
Only 3D Cart legacy merchants can use Sezzle at the moment.
### Install the Sezzle Shift4Shop Extension
1. Log in to your website's Shift4Shop admin
2. Get the [app](https://apps.shift4shop.com/sezzle)
3. Copy and paste your Store URL into the input area, then click `Proceed`
4. Check the PCI Compliance box, then click `Acknowledge and Authorize the App` to start the installation
### Admin Configuration
1. In your Shift4Shop admin, go to Settings > Payment
2. Click Select Payment Methods
3. Turn the `Sezzle` switch to `On`
4. Copy your Public Key from your [Sezzle Merchant Dashboard](https://dashboard.sezzle.com/merchant/settings/apikeys)
* Paste it into the corresponding field in the Sezzle configuration page of your Shift4Shop admin
5. Next to Private Key, click `Change`
6. Copy your Private Key from your [Sezzle Merchant Dashboard](https://dashboard.sezzle.com/merchant/settings/apikeys)
* Paste it into the corresponding field in the Sezzle configuration page of your Shift4Shop admin
7. Click `Save`
8. To restrict Sezzle usage by country, click the `Exclude List` hyperlink under the `Sezzle` switch
9. Click `Add Location`
10. Select the desired country, then click `Add`
Installation is complete!
### Validate
Step through a [test checkout](/docs/api/test-cards#checkout-testing) to validate the integration is properly installed.
### Troubleshooting
If testing was unsuccessful, review the following:
1. Sezzle Shift4Shop extension is the most updated version
2. Sezzle payment method is enabled
3. [API Keys](https://dashboard.sezzle.com/merchant/settings/apikeys) were entered correctly
It is recommended to use the Copy icon in the [Sezzle Merchant Dashboard](https://dashboard.sezzle.com/merchant/settings/apikeys) to avoid typos or extra spaces
4. If you have multiple accounts with Sezzle, the merchant ID and API Keys are tied to only one URL
5. Widget script is present on your website and reflects the Merchant ID from your [Sezzle Merchant Dashboard](https://dashboard.sezzle.com/merchant/settings/business)
1. Go to a product page on your website
2. Right-click then select `Inspect`
3. In the `Elements` tab, search for `widget.sezzle`
### Manual Theme Integration
If the Shift4Shop app fails to maintain the widget script on the product pages, or to add the script manually for additional pages, complete the following steps:
1. From your Shift4Shop admin, go to `Settings` > `Design` > `Themes & Styles`
2. In your Current Theme, click the button labeled `More` then select `Edit Template (HTML)`
3. Find the copy of your theme under `Go to Folder`
4. Click the gear icon next to the `product_items.html` file, then click `Edit`
5. When the dashboard asks if you want to edit your theme files, click the `Edit Theme Files` button
6. In the Source Code text area, copy and paste the script at the very beginning of the file
7. Click `Save`
### Insert Script into Webpage
Template:
```
```
Update `{sezzle_merchant_uuid}` in the above script template to reflect your site’s Merchant ID (removing the curly brackets), which can be found in the [Sezzle Merchant Dashboard](https://dashboard.sezzle.com/merchant/settings/business).
Example:
```
```
* Instructions may vary slightly depending on your active plug-ins.
* For assistance with widget configuration, click `Request Addition of Widgets` in the widget step of your [Sezzle Merchant Dashboard Setup Checklist](https://dashboard.sezzle.com/merchant/checklist).
### Uninstall Steps
1. Go to `Settings` > `Payment`
2. Click `Select Payment Methods`
3. Under the Sezzle App, click the gear icon then click `Delete`
# Shopify Payments
Source: https://docs.sezzle.com/docs/plugins/shopify-payments
This guide explains how to add Sezzle as a payment option on your Shopify website, enabling customers to use Sezzle at checkout.
### Install the Sezzle Payments App
1. Log in to your website's Shopify admin
2. Install the [Sezzle Payments app](https://apps.shopify.com/sezzle-payments)
1. Go to `Settings` > `Payments`
2. Under `Additional Payment Methods`, click `Add Payment Method`
3. Search for `Sezzle`
4. Click the result in the dropdown, then click `Sezzle Payments`
5. Click `Manage Account`
6. Click `Install`
3. Enter your production Sezzle public and private API keys
* For most merchants, we are able to pre-fill the public and private API keys based on the Shopify store
* If we cannot uniquely identify the merchant based on the Shopify store, you will be required to fill in the keys
4. Click `Save` to verify your Sezzle account
* You will be redirected to the payment settings page, where you will need to activate Sezzle Payments for your store
5. Click `Activate`
6. Verify Sezzle is available as a payment method for your store
You should see `Sezzle Payments` installed in your `Settings` > `Payments`
Without activating Sezzle Payments, Sezzle will not appear in the checkout, and the installation process is not complete. Verify this step has been completed.
### Validate
For Sandbox testing, do this step first
1. Navigate to `Settings` > `Payments` > `Sezzle Payments`
2. Click `Manage`, check `Enable test mode`, and click `Save`
3. Click the `Manage` button in Sezzle Payments, enter your sandbox API keys in the test tab
4. Click `Update settings`
For Live testing, do this step first
1. In the Sezzle configuration page of your Shopify admin, enter the API keys from your [Sezzle Merchant Dashboard](https://dashboard.sezzle.com/merchant/settings/apikeys)
2. Uncheck the `Enable Test Mode` checkbox
3. Save the configuration
Step through a [test checkout](/docs/api/test-cards#checkout-testing) to validate the integration is properly installed.
### Adding the Sezzle Tile to Accepted Payment Methods Footer
The Shopify "Accepted Payment Methods" footer widget does not support third-party payment apps by default. To show Sezzle in this section, follow the [instructions provided by Shopify](https://help.shopify.com/en/manual/online-store/themes/themes-by-shopify/vintage-themes/customizing-vintage-themes/add-credit-card-icons), adding `'sezzle'` to the list.
### Troubleshooting
If testing was unsuccessful, review the following:
**Sezzle Payments Shopify extension is the most updated version**
* Go to `Apps` > `Sezzle Payments`, then click `About`
* If there is an option to upgrade, do so now
**Sezzle gateway is activated**
* Go to `Settings` > `Payment Providers` and ensure "Sezzle is active" is listed under the `Alternative Payment Methods` section
**API keys were entered correctly**
* Use the Copy icon in the Sezzle Merchant Dashboard to avoid typos or extra spaces
* If you have multiple accounts with Sezzle, the merchant ID and API keys are tied to only one URL
### Uninstall the Sezzle Payments App
1. Go to `Apps`
2. Find `Sezzle Payments` and click `Delete`
### FAQs
Sezzle aligns with your Shopify `Payment Capture` settings. If set to `Manual`, you must manually capture payments for Sezzle orders. Authorization periods differ by merchant, so check the expiration in the Sezzle Merchant Dashboard under [Settings > eCommerce](https://dashboard.sezzle.com/merchant/settings/ecommerce) and adjust as needed.
Install using an incognito browser. Go to `https://your-store.myshopify.com/admin/settings/payments/alternative-providers/1057901`, replacing `your-store.myshopify.com` with your store’s URL. Log in and follow the steps to complete installation. For another store, close and start a new incognito session.
In Shopify, open the order and select `Information from the gateway`. The payment ID will match the Reference-ID in the Sezzle Merchant Dashboard.
You can also search Shopify Admin using `receipt.payment_id:`.
No, Sezzle lacks permissions to view or modify Shopify inventory, so this feature is not supported with the new payment app.
# Shopify Widgets
Source: https://docs.sezzle.com/docs/plugins/shopify-widgets
Shopify has disabled the legacy `Sezzle` private/unpublished widget app. If you are currently using the `Sezzle` app, please update to the `Sezzle Widget` public app now.
## Purpose
Increase AOV and conversions by promoting Sezzle on your storefront. Easily install assets to product and cart pages with the Sezzle Widget app.
## Prerequisites
1. You should have a Sezzle merchant account
* Please visit our [signup page](https://dashboard.sezzle.com/merchant/signup) if you don't have an account
2. [Install and configure](https://docs.sezzle.com/docs/plugins/shopify-payments/) the Sezzle Payments App
## Getting Started
1. Log in to your website's Shopify admin
2. Install the [Sezzle Widget app](https://apps.shopify.com/sezzle-widget)
* Alternatively, click the `Get the Widgets App` button under the `Add Sezzle to your product and cart pages` step of the Sezzle Merchant Dashboard Setup Checklist
3. Click `Install`
4. Within the Sezzle Widget app, enter your Public API Key and click `Link Sezzle Account`
* For most merchants, we are able to pre-fill the public API key based on the Shopify store URL
* To enter the API key manually, copy from the API Keys page within the [Sezzle Merchant Dashboard Settings](https://dashboard.sezzle.com/merchant/settings/apikeys)
## Installation
Please select ONE of the following installation methods:
[Jump to section](#installation-wizard)
[Jump to section](#installing-as-embed-blocks-manual)
[Jump to section](#installing-as-app-blocks)
### Installation Wizard
1. Select the theme you wish to edit, then click `Next`
This field does not default to your live theme - you must make a selection
2. Select the asset you wish to install, then click `Next`
3. Select the page you wish to install on, then click `Finish`
4. Click the `Activate` button
You must click Activate for changes to take effect
5. [Customize](#customizations) as desired, then click `Save`
### Installing as Embed Blocks (manual)
If you are not already in the app, you can alternatively enable the Sezzle products directly from your theme customizer window.
1. Within Shopify Admin, go to `Sales Channels` then `Online Store`
2. Under `Themes`, click `Customize` for the theme you wish to edit
3. In the upper-left corner, click the third icon `App Embeds`
4. Search for Sezzle and activate the product(s) you wish to install
* [Customize](#customizations) as desired and click `Save`
### Installing as App Blocks
App blocks allow merchants to control product placement. Compatible with 2.0 themes only.
1. Within `Shopify Admin`, go to `Sales Channels` then `Online Store`
2. Under `Themes`, click `Customize` for the theme you wish to edit
3. In the top toolbar, ensure the third icon `Activate Inspector` is activated
#### Installing Widget App Block on Product Page
1. Navigate to a product page
2. Hover over the area where you wish to display the widget
3. If app blocks can be placed there, `+` or `Add block` will appear. Click, then select `Sezzle Widget` under the `Apps` tab
* Alternatively, open the `Sections` tab and click `Add Block`
* Under the `Apps` tab, select `Sezzle Widget`
* Drag & drop the block to the desired location in the contents menu
4. [Customize](#customizations) as desired, then click `Save`
#### Installing Widget App Block and Checkout Button on Cart Page
1. Add a product to the cart
2. Navigate to the cart page
3. Hover over the area where you wish to display a Sezzle product
4. If app blocks can be placed there, `+` or `Add block` will appear
* Click, then under the `Apps` tab, select the product
* Alternatively, open the `Sections` tab and click `Add Block`
* Under the `Apps` tab, select `Sezzle Widget`
* Drag & drop the block to the desired location in the contents menu
5. Repeat the previous two steps for the other product, if desired
6. [Customize](#customizations) as desired, then click `Save`
### Customizations
The following section covers customization options that are available through the app.
#### Widget Customization Options
| **Property** | **Default** | **Range/Options** | **Step** |
| :----------- | :---------- | :---------------- | :------- |
| Font Size | `14px` | `9px` - `18px` | `0.5` |
| Font Family | inherit | (see dropdown) | - |
#### Checkout Button Customization Options
| **Property** | **Default** | **Range/Options** | **Step** |
| :-------------------------------- | :--------------------- | :-------------------- | :------- |
| Template | `Checkout with Sezzle` | `Pay with Sezzle` | - |
| Theme | `Light` | `Dark` | - |
| Padding (left and right only) | `9px` | `0px` - `30px` | `0.5` |
| Margins (controlled individually) | `0` | `-20` - `20` | `0.5` |
| Width | `auto` | `fit-content`, `100%` | - |
### Default Placement
**If Checked**
* The Sezzle Checkout Button will be placed after the native checkout button and inherit page styles
**If Unchecked**
* The button will be placed as indicated by the app block placement
* Styles may also be affected, based on the placement selected
#### Custom CSS
If you are familiar with CSS and would like additional style customizations, you can write them directly to your theme.
1. In the upper-left corner, click the second icon `Theme Settings`
2. Expand Custom CSS section and write your custom snippet, then click `Save`
### Troubleshooting
You will need to uninstall and re-install the app.
If you are using app blocks and there are multiple price elements on the page, all the corresponding widgets will cluster at the app block placement.
Consider switching to embed blocks, or [contact Sezzle support](#request-help) to update the config override.
* Widgets will only show for IP addresses in US and CA. If you are viewing from a different country, please use a VPN.
* By default, widgets only show on products up to \$2500.
* Confirm that only one installation method is in use. Additionally, only use one app block of each product per page.
Check that the widget was not placed further down on the page.
* App blocks might work where embed blocks do not.
* Otherwise, [contact Sezzle support](#request-help) for a custom configuration.
*
* Please [contact Sezzle support](#request-help) to update the override.
* Remove these snippets from your theme.
* App blocks with `Default Placement` unchecked may work.
* We usually resort to installing a [manual code snippet](#checkout-button-manual-theme-code-snippet-installation).
* [Contact Sezzle support](#request-help) if you would like assistance.
If you have noticed a bug in the widget or checkout button, please [contact Sezzle support](#request-help) to notify us of the issue. We can then determine whether this is an issue for all merchants or your specific theme and work to resolve accordingly.
#### Customization
* We offer a few select customization options. Please [contact Sezzle support](#request-help) to request any of the following:
* Grayscale logo
* Reflect checkout minimum in widget
* Reflect Sezzle/Afterpay dual widget
* Style & position changes
* For position changes, you must use the embed block option.
* Conditional rendering for subscription, gift cards, etc.
* Conditional rendering above a certain price threshold
Implementing customizations may prevent widgets from showing on unpublished
themes and will require help from the Sezzle team to update widgets when a
new theme is published.
### Request Help
If the `Sezzle Widget` app is not able to automatically install the Sezzle widget or checkout button on your storefront, please use the Request Help form within the app to contact the Sezzle Merchant Integrations team.
The Request Help form in the `Sezzle Widget` app is for widget and checkout button help only. For questions regarding your account or issues with the Sezzle payment option at checkout, please reach out to [merchantsupport@sezzle.com](mailto:merchantsupport@sezzle.com).
The Sezzle Merchant Integrations team does not respond to inquiries. If you
request a response or if we need to contact you regarding your request, we
will forward the response through our Merchant Support team.
### Manual Theme Code Snippet Installation
Installations that require code changes directly to the theme are not recommended unless your site uses a headless CMS, and should be used as a last resort.
#### Widget Manual Theme Code Snippet Installation
1. Within `Shopify Admin`, go to `Sales Channels` then `Online Store`
2. Under Themes, click `...` then `Edit Code` for the theme you wish to edit
3. In the `Code Explorer`, go to the `Layout` folder and select the `theme.liquid` file
4. Copy and paste the script to the very bottom of the file
* Script template to be inserted into your webpage:
```
```
5. Replace `{sezzle_merchant_uuid}` (including the curly brackets) in the script template with your site’s Merchant ID
* This can be found in the [Sezzle Merchant Dashboard Business Settings](https://dashboard.sezzle.com/merchant/settings/business)
* Example with Merchant ID value updated:
```
```
6. Click `Save`
#### Checkout Button Manual Theme Code Snippet Installation
To install the checkout button directly to your theme code, please refer to the documentation and snippet on [GitHub](https://github.com/sezzle/static-widgets/tree/production/src/sezzle-checkout-button#install-as-html).
## Uninstalling
### Uninstalling Embed Blocks
1. Within `Shopify Admin`, go to `Sales Channels` then `Online Store`
2. Under `Themes`, click `Customize` for the theme you wish to edit
3. In the upper-left corner, click the third icon `App Embeds`
4. Toggle the desired embed block(s) to the `OFF` position, then click `Save`
### Uninstalling App Blocks
1. Within `Shopify Admin`, go to `Sales Channels` then `Online Store`
2. Under `Themes`, click `Customize` for the theme you wish to edit
3. Navigate to a product page
4. In the upper-left corner, click the first icon `Sections`
5. Next to the `Sezzle Widget` block, click the `Delete` trash can icon, then click `Save`
6. Navigate to the cart page, and repeat the previous step for each product, then click `Save`
### Uninstalling Manual Theme Code Snippet
You should only need to perform this step if you had the old `Sezzle` private app installed, or if you installed products manually
1. Within `Shopify Admin`, go to `Sales Channels` then `Online Store`
2. Under `Themes`, click `...` then `Edit Code` for the theme you wish to edit
3. Review the layout/theme.liquid file for any Sezzle code snippets
1. Remove them, then click `Save`
2. Repeat for any files containing product and cart in the name
4. Once all references are removed, search for files containing sezzle in the name, and delete
### Uninstalling the App
1. Go to `Apps` then `Sezzle Widget`
2. In the top-right corner, click the `Menu` icon, then select `App Settings`
3. Click `Delete App`
Deleting the app will automatically remove all app blocks and embed blocks from all themes. Any code change installations will not be removed automatically.
# Shoplazza
Source: https://docs.sezzle.com/docs/plugins/shoplazza
This guide explains how to add Sezzle as a payment option on your Shoplazza website, enabling customers to use Sezzle at checkout.
### Install the Sezzle Shoplazza app
1. Log in to your website's Shoplazza admin
2. Go to `Settings` > `Payments`
3. Click `Add payment provider`
4. On the `Search by payment methods` tab, type `Sezzle` into the search bar, and select it from the results
5. Click `Activate`
### Admin Configuration
1. Go to `Settings` > `Payments`
2. Click `Manage`
3. Copy your Private Key and Public Key from your [Sezzle Merchant Dashboard](https://dashboard.sezzle.com/merchant/settings/apikeys)
* Paste them into the corresponding fields
4. Click `Activate`
### Validate
Step through a [test checkout](/docs/api/test-cards#checkout-testing) to validate the integration is properly installed.
### Troubleshooting
*Coming soon*
### Uninstall the Sezzle Shoplazza app
1. Go to `Settings` > `Payments`
2. Click `Manage`
3. Click `Disable`
### FAQs
*Coming soon*
# Shopware 5
Source: https://docs.sezzle.com/docs/plugins/shopware-5
This guide explains how to add Sezzle as a payment option on your Shopware 5 website, enabling customers to use Sezzle at checkout. Additionally, it includes steps to upgrade existing integrations to the latest version of the plugin.
Sezzle's Shopware 5 plugin can be [downloaded from GitHub](https://github.com/sezzle/sezzle-shopware5).
### Install the Sezzle Shopware 5 Plugin
In the following section, `[Shopware]` refers to your Shopware 5 root directory.
#### Using the Composer
Go to the Shopware 5 installation directory, then run the below commands:
1. Open terminal and navigate to `Shopware` root path
2. Run the below command for the adding the plugin into your codebase
```
composer require sezzle/shopware5
```
#### Manual Method
1. Download the `.zip` or `tar.gz` file from Sezzle's GitHub repository
2. Unzip the file
3. Navigate to Shopware `[Shopware]/custom/plugins/` either through SFTP or SSH
4. Copy `SwagPaymentSezzle` directory from unzipped folder to `[Shopware]/custom/plugins/`
5. Log in to Shopware 5 Backend and navigate to `Configuration` > `Plugin Manager` > `Management` > `Installed`
6. Find `Sezzle` from the `Uninstalled` list and click on the `+` button to install the plugin
* Once installed, you will see `Sezzle` under `Inactive` list
7. Click on the `x` button to activate the plugin
* After successful activation, you will be able to see `Sezzle` under `Configuration` > `Payment Methods`
### Upgrade the Shopware 5 Plugin
#### Using the Composer
1. Change the version number of the `sezzle/sezzlepay` inside `composer.json`
2. Open terminal and navigate to `Shopware` root path
3. Run the following command for the updating the plugin to a newer version
```
composer update sezzle/sezzlepay
```
#### Manual Method
1. Download the `.zip` or `tar.gz` file from Sezzle's GitHub repository
2. Unzip the file
3. Delete the contents from `[Shopware]/custom/plugins/SwagPaymentSezzle`
4. Copy the contents of `SwagPaymentSezzle` directory from unzipped folder to `[Shopware]/custom/plugins/SwagPaymentSezzle/`
5. Log in to Shopware Backend and navigate to `Configuration` > `Cache/performance`
6. Flush the cache storage by selecting `Clear shop cache`
### Configure Sezzle
#### Payment Configuration
1. Make sure you have the Merchant UUID and the API Keys from the [Sezzle Merchant Dashboard](https://dashboard.sezzle.com/merchant/)
You must be registered with [Sezzle](https://dashboard.sezzle.com/merchant/signup) to access the Merchant Dashboard
2. Navigate to `Customers` > `Payments` > `Sezzle` > `Settings` in your Shopware Backend
3. Enable Sezzle by checking the `Enable` for this shop checkbox
4. Set the Public Key and Private Key
5. For testing, enable the Sandbox mode by checking the `Enable sandbox` checkbox
You can also verify your `API Keys` by clicking on the `Test API Settings`button
6. Set the Merchant UUID
7. Set the Merchant Location as per the store origin
8. Check the `Enable Tokenization` checkbox to enable customer tokenization in the Sezzle checkout
* If the customer agrees to be tokenized, then future checkouts for this customer will not require a redirect to Sezzle
* See [Customer tokenization](/docs/api/tokenization/intro)
9. Set `Payment Action` as `Authorize only` for doing payment authorization only and `Authorize and Capture` for doing instant capture
See [Authorize Only vs Authorize and Capture](/docs/guides/auth-and-capture) for details about the difference between the two choices
10. Check the `Enable Widget in PDP` checkbox to add the widget script and the Sezzle Widget Modal to the Product Display Page
11. Check the `Enable Widget in Cart` checkbox to add the widget script and the Sezzle Widget Modal to the Cart Page
12. Check the `Display errors` checkbox for showing up Sezzle related error code in the web URL on failure
13. Set `Logging` to `ERROR` to log only error messages or `ALL` to log all messages, including errors, warnings, and notices
14. Save the settings and clear the cache
Your store is now ready to accept payments through Sezzle!
### Frontend Functionality
* If you have successfully installed the Sezzle plugin, then Sezzle will be included as a payment method in the checkout page.
1. Select `Sezzle` and continue
2. Once you click `Complete Payment`, you will be redirected to Sezzle Checkout to complete the checkout
If your account is already tokenized, skip the next two steps as you will not be redirected to Sezzle
3. \[Optional] On the final page of Sezzle Checkout, check the `Approve {Store Name}` to process payments from your Sezzle account for future transactions
* You may revoke this authorization at any time in your Sezzle Dashboard to tokenize your account
4. Click on `Complete Order` to complete your purchase
* On successful order placement, you will be redirected to the order confirmation page
### Capture Payment
**If Payment Action is set to Authorize and Capture**
* Capture will be performed instantly from the plugin after order is created and validated in `Shopware`
**If Payment Action is set to Authorize**
* Capture needs to be performed manually from the `Shopware` backend. Follow the below steps to capture:
1. Go the order and click on `Sezzle` tab
2. Enter a value in `Amount` field
3. Click on `Capture` to capture the payment in Sezzle
### Refund Payment
1. Go the order and click on `Sezzle` tab
2. Enter a value in `Amount` field
3. Click on `Refund` to refund the payment in Sezzle
### Release Payment
1. Go the order and click on `Sezzle` tab
2. Enter a value in `Amount` field
3. Click on `Release` to release the payment in Sezzle
### Order Verification in Shopware Backend
Merchants should always check the payment status and amount of all orders. The following steps ensure that each action has been completed as expected.
1. Log in to Shopware admin and navigate to `Customers` > `Orders`
2. Proceed into the corresponding order
* Payment is **successfully captured** by Sezzle when
* `Current Payment Status` `=` `Completely Paid`
* `Capture Amount` `=` `Auth Amount`
* Payment is only **authorized** when
* `Current Payment Status` `=` `Open`
* `Auth Amount` `=` `Order Amount`
* `Capture Amount` `=` `0`
* Payment is **refunded** when
* `Current Payment Status` `=` `Re-crediting`
* `Refund Amount` `=<` `Capture Amount`
* Payment is **released** when
* `Current Payment Status` `=` `The process is cancelled for a full release or Open for a partial release`
* Amount will be deducted from `Auth Amount` and should appear in `Released Amount`
### Order Verification in Sezzle Merchant Dashboard
1. Log in to Sezzle Merchant Dashboard and navigate to `Orders`
2. Proceed into the corresponding order
| Payment Status | Description |
| :----------------------------------------------------------- | :---------------------------------------------------------------- |
| Approved | Payment successfully captured |
| Authorized, uncaptured | Payment authorized but not captured |
| Refunded or Partially Refunded | Payment refunded |
| Deleted due to checkout not being captured before expiration | Payment released or not captured before the authorization expired |
### Customer Tokenization Details
1. Log in to Shopware Backend and navigate to `Customers` > `Customers`
2. Select customer to view tokenization details
* `Sezzle Customer UUID`, `Sezzle Customer UUID Expiry` and `Sezzle Customer UUID Status` will appear under `Free text fields`
### Validate
Step through a [test checkout](/docs/api/test-cards#live-checkout-testing) to validate the integration is properly installed
### Troubleshooting
* `Sezzle` plugin creates logs of `Sezzle` action
* In the event that Merchant Success and Support teams are unable to resolve any issue, the Merchant may request that these logs be forwarded to the Platform Integrations team for further troubleshooting
* Logs are named as `plugin_dev-.log`
* To facilitate troubleshooting, we recommend sending the `core_dev-.log` as well
* Logs can be find in `[Shopware]/var/log/`
# Wix
Source: https://docs.sezzle.com/docs/plugins/wix
This guide explains how to add Sezzle as a payment option on your Wix website, enabling customers to use Sezzle at checkout.
### Add Payment Method
1. From your Wix store dashboard, select `Settings`, and `Accept Payments`
2. Choose the `See More Payment Options` link at the bottom of the page
3. Locate `Sezzle` in the list, and choose `Connect`
* This takes you to the Connect Sezzle page
4. Enter your API Keys from the [Sezzle Merchant Dashboard](https://dashboard.sezzle.com/merchant/settings/apikeys) and choose `Connect`
* Sezzle will now be available as a payment method at checkout
### Validate
Step through a [test checkout](/docs/api/test-cards#checkout-testing) to validate the integration is properly installed.
### Troubleshooting
For account connection problems, check the following:
1. API Keys were entered correctly
To avoid typos or extra spaces, use the Copy icon in the [Sezzle Merchant Dashboard](https://dashboard.sezzle.com/merchant/settings/apikeys).
2. If you have multiple accounts with Sezzle, each store has its own merchant ID and API Keys that are tied to the store's URL
If Sezzle does not appear as a payment option during live testing:
* Ensure that Sezzle is activated as a payment provider on your site.
* Go to `Settings` > `Accept Payments` and ensure that `Accepting Payments` is displayed for Sezzle.
# WooCommerce
Source: https://docs.sezzle.com/docs/plugins/woocommerce
Sezzle [Express Checkout](#express-checkout) now available on `Sezzle Woocommerce Payments` plugin version 6.1.x or later.
This guide explains how to add Sezzle as a payment option on your WooCommerce website, enabling customers to use Sezzle at checkout.
### Install the Sezzle WooCommerce Extension
1. Log in to your website's Wordpress admin
* Ex: `your-website.com/wp-admin`
2. In the left sidebar, click `Plugins` > `Add New`
3. Search for `Sezzle`
4. Click `Install Now`
5. Click `Activate`
### Admin Configuration
1. In the left sidebar, click `WooCommerce` > `Settings`
2. Select the `Payments` tab
3. Click the `Manage` button for Sezzle
4. Check the `Enable/Disable` checkbox for enabling Sezzle
5. Please ensure only US and Canada are selected as Sezzle operates only in `US` and `Canada`
* Sezzle operates only in `US` and `Canada`
* Be sure to check this option
6. Set Merchant ID as received from the Business section of [Sezzle Merchant Dashboard](https://dashboard.sezzle.com/merchant)
7. Copy your Private Key and Public Key from your [Sezzle Merchant Dashboard](https://dashboard.sezzle.com/merchant/settings/apikeys), and paste them into the corresponding fields
8. Optional: Check the `Create order post checkout completion` checkbox for enabling WooCommerce order creation only after Sezzle checkout is successfully completed
This will only work with standard classic checkout, not with checkout blocks
Enabling this feature may result in higher uncaptured orders, especially if your store offers add-ons such as shipping insurance. Please refer to the [Order Fulfillment](#important-note-on-order-fulfillment) section for more information.
9. Set `Minimum Checkout Amount` if you want to restrict Sezzle based on a minimum order total
10. Set the `Transaction Mode` as `Live` for production and `Sandbox` for sandbox testing mode
11. Check the `Show Sezzle widget in product pages` checkbox for adding widget script in the Product Display Page, which allows enabling Sezzle Widget Modal in PDP
* After saving if you don't see the widget in PDP, try [installing it manually](#manual-widget-installation)
12. Configure the installment plan widget under Installment Plan Widget Configuration settings
13. Check the `Enable Installment Widget Plan in Checkout page` checkbox for enabling installment widget plan
14. Set the `Order Total Container Class Name`
* Default is `woocommerce-Price-amount`
15. Set the `Order Total Container Parent Class Name`
* Default is `order-total`
16. Check the `Enable Logging` checkbox for logging Sezzle checkout related data
* This is helpful for debugging issues, if encountered. See (logs)\[#logs] for more details.
17. Click `Save Changes`
### Express Checkout
Currently, the Express Checkout feature is only available for select merchant IDs. Please contact Sezzle Merchant Support if you wish to participate in the beta testing.
Merchant ID and API keys must be entered and saved before this feature will become visible in your Sezzle settings.
Express checkout is currently only compatible with standard/classic checkout, and requires your store to have a minimum of 1 shipping option configured for all US and Canada zones.
It is not currently compatible with:
* checkout blocks
* stores who are any combination of the following:
* digital products only
* in-person products only
* buy-online-pick-up-in-store (BOPIS) only
* Shipping protection or other selection that would alter order total during checkout
* Upsell app that would alter order total post-checkout
Note: coupon codes can still be used with Express Checkout, but must be applied on the merchant's site before the shopper proceeds to Sezzle.
1. Check the `Enable Express Checkout in Cart Page` checkbox to enable Sezzle express checkout on your cart page and mini-cart.
2. Optional: Select the desired `Express Checkout Mode`: `Pop Up` or `IFrame`
**popup** mode will work out-of-the-box. No additional configuration is required to use **popup**. Sezzle currently recommends **popup** mode.
**iframe** mode will not work properly without first contacting Sezzle. For security reasons, Sezzle must enable **iframe** for your domain(s). To have it enabled, please submit a request with your Sezzle Merchant UUID and a list of domains to be allowed per environment (production and sandbox). For example, [*please enable uat1.mysite.com, uat2.mysite.com in sandbox and www.mysite.com, mysite.com in production*](http://www.mysite.com).
The integration for **popup** and **iframe** are identical, aside from the mode. Using **popup** mode will expedite your development. Upon completing the integration, if **iframe** is a requirement, then contact Sezzle to enable your domain(s) and switch the mode to **iframe**.
### Validate
Step through a [test checkout](/docs/api/test-cards#checkout-testing) to validate the integration is properly installed.
### Important Note on Order Fulfillment
After the shopper completes checkout, orders will be validated to ensure the Sezzle authorized total matches the order total in Woocommerce prior to payment capture. Uncaptured orders should remain in the `Pending Payment` stage in WooCommerce. However before shipping the order, ensure that the Order in the WooCommerce interface show the order status is `Processing` and reflects the Note `Payment approved by Sezzle`. When these notes exist, Sezzle successfully captured the payment and you will be paid for the order.
Do not fulfill orders where the Sezzle payment was not captured. Please provide the (logs)\[#logs] to Sezzle Merchant Support for further investigation.
### Logs
1. From your WP admin, go to WooCommerce > Status
2. Click the Logs tab
3. In the `All Sources` dropdown, select `sezzlepay` then click `Filter`
4. Select the files for all dates for the investigation
5. In the `Bulk Actions` dropdown, select `Download` then click `Apply`
### A Guide to Order Reference IDs
| Setting | Format | Description |
| ------------------------------------------------------------------ | -------------------------------- | -------------------------------------- |
| Standard checkout with`Create Order Post Checkout Completion`: ON | 6903bd4e9a370 | unique ID; order ID # not yet assigned |
| Standard checkout with`Create Order Post Checkout Completion`: OFF | 6903bd072eef3-103 | unique ID + order ID # |
| Express checkout with`Create Order Post Checkout Completion`: ON | 7373a6360061102dcc43e03fc473da28 | Cart Hash; Order Key not yet assigned |
| Express checkout with`Create Order Post Checkout Completion`: OFF | wc\_order\_rq9mAmVMhMfdh | Order Key |
### Manual Widget Installation
#### Using Elementor?
Within the Elementor Page Builder, drag and drop the Custom HTML block type into the site footer, adding the widget script snippet into the code box, then save and publish changes.
1. In your WooCommerce account, go to `Appearance`, and then `Theme Editor`
2. Click `Theme Footer` to the right of the page
3. In the Content text area, insert the script on the last line of the code, and click `Update File`
* The script below is what you will need to insert:
```
```
* You will need to update the in the above script to reflect your store’s UUID.
* You can find your UUID in your Sezzle dashboard, under `Settings`, and then `Business`.
* When you enter your UUID, please make sure that you remove the surrounding it.
### Troubleshooting
If testing was unsuccessful, review the following:
1. Sezzle WooCommerce extension is the most updated version
1. Go to `Plugins` > `Installed Plugins`
2. Click `View Details` next to the `Sezzle WooCommerce Payment`
3. If there is an option to upgrade, do so now
2. Sezzle extension is activated
1. Go to `WooCommerce` > `Settings`
2. Ensure the switch is turned `On`
3. Merchant ID was entered correctly
4. API Keys were entered correctly
It is recommended to use the Copy icon in the [Sezzle Merchant Dashboard](https://dashboard.sezzle.com/merchant/settings/apikeys) to avoid typos or extra spaces
5. If you have multiple accounts with Sezzle, the merchant ID and API Keys are tied to only one URL
6. Show Sezzle widget in product pages box is checked
7. Widget script is present on your website and reflects the Merchant ID from your [Sezzle Merchant Dashboard](https://dashboard.sezzle.com/merchant/settings/business)
1. Go to a product page on your website
2. Right-click then select `Inspect`
3. In the `Elements` tab, search for `widget.sezzle`
### Uninstall Steps
1. Go to `Plugins` > `Installed Plugins`
2. Under `Sezzle WooCommerce Payment`, click `Deactivate` then click `Delete`
# Zoey
Source: https://docs.sezzle.com/docs/plugins/zoey
This guide explains how to add Sezzle as a payment option on your Zoey website, enabling customers to use Sezzle at checkout.
### Install the Sezzle Zoey Extension
Contact [Zoey Support](https://www.support.zoey.com/) to install the Sezzle app.
### Admin Configuration
1. Go to `Set-up` > `Payment Methods` > `Sezzle`
2. Click `Configure`
3. Configure the extension
1. Set `Enabled` to `Yes`
2. Copy your Merchant ID from your [Sezzle Merchant Dashboard](https://dashboard.sezzle.com/merchant/settings/business)
* Paste it into the corresponding field in the Sezzle configuration page of your Zoey admin
3. Copy your Public Key and Private Key from your [Sezzle Merchant Dashboard](https://dashboard.sezzle.com/merchant/settings/apikeys)
* Paste them into the corresponding fields in the Sezzle configuration page of your Zoey admin
4. Widget Script Placements
* If you want the widget script added to the Product Display Page, set `Add Widget Script in PDP` to `Yes`
* If you want the widget script added to the Cart Page, set `Add Widget Script in Cart Page`to `Yes`
5. Set `Payment from Applicable Countries` to `Specific Countries`
6. Set `Payment from Specific Countries` to `United States` or `Canada` as applicable
7. Save the configuration
8. Click `Advanced/Refresh Your Store`
Installation is complete!
### Validate
Step through a [test checkout](/docs/api/test-cards#checkout-testing) to validate the integration is properly installed.

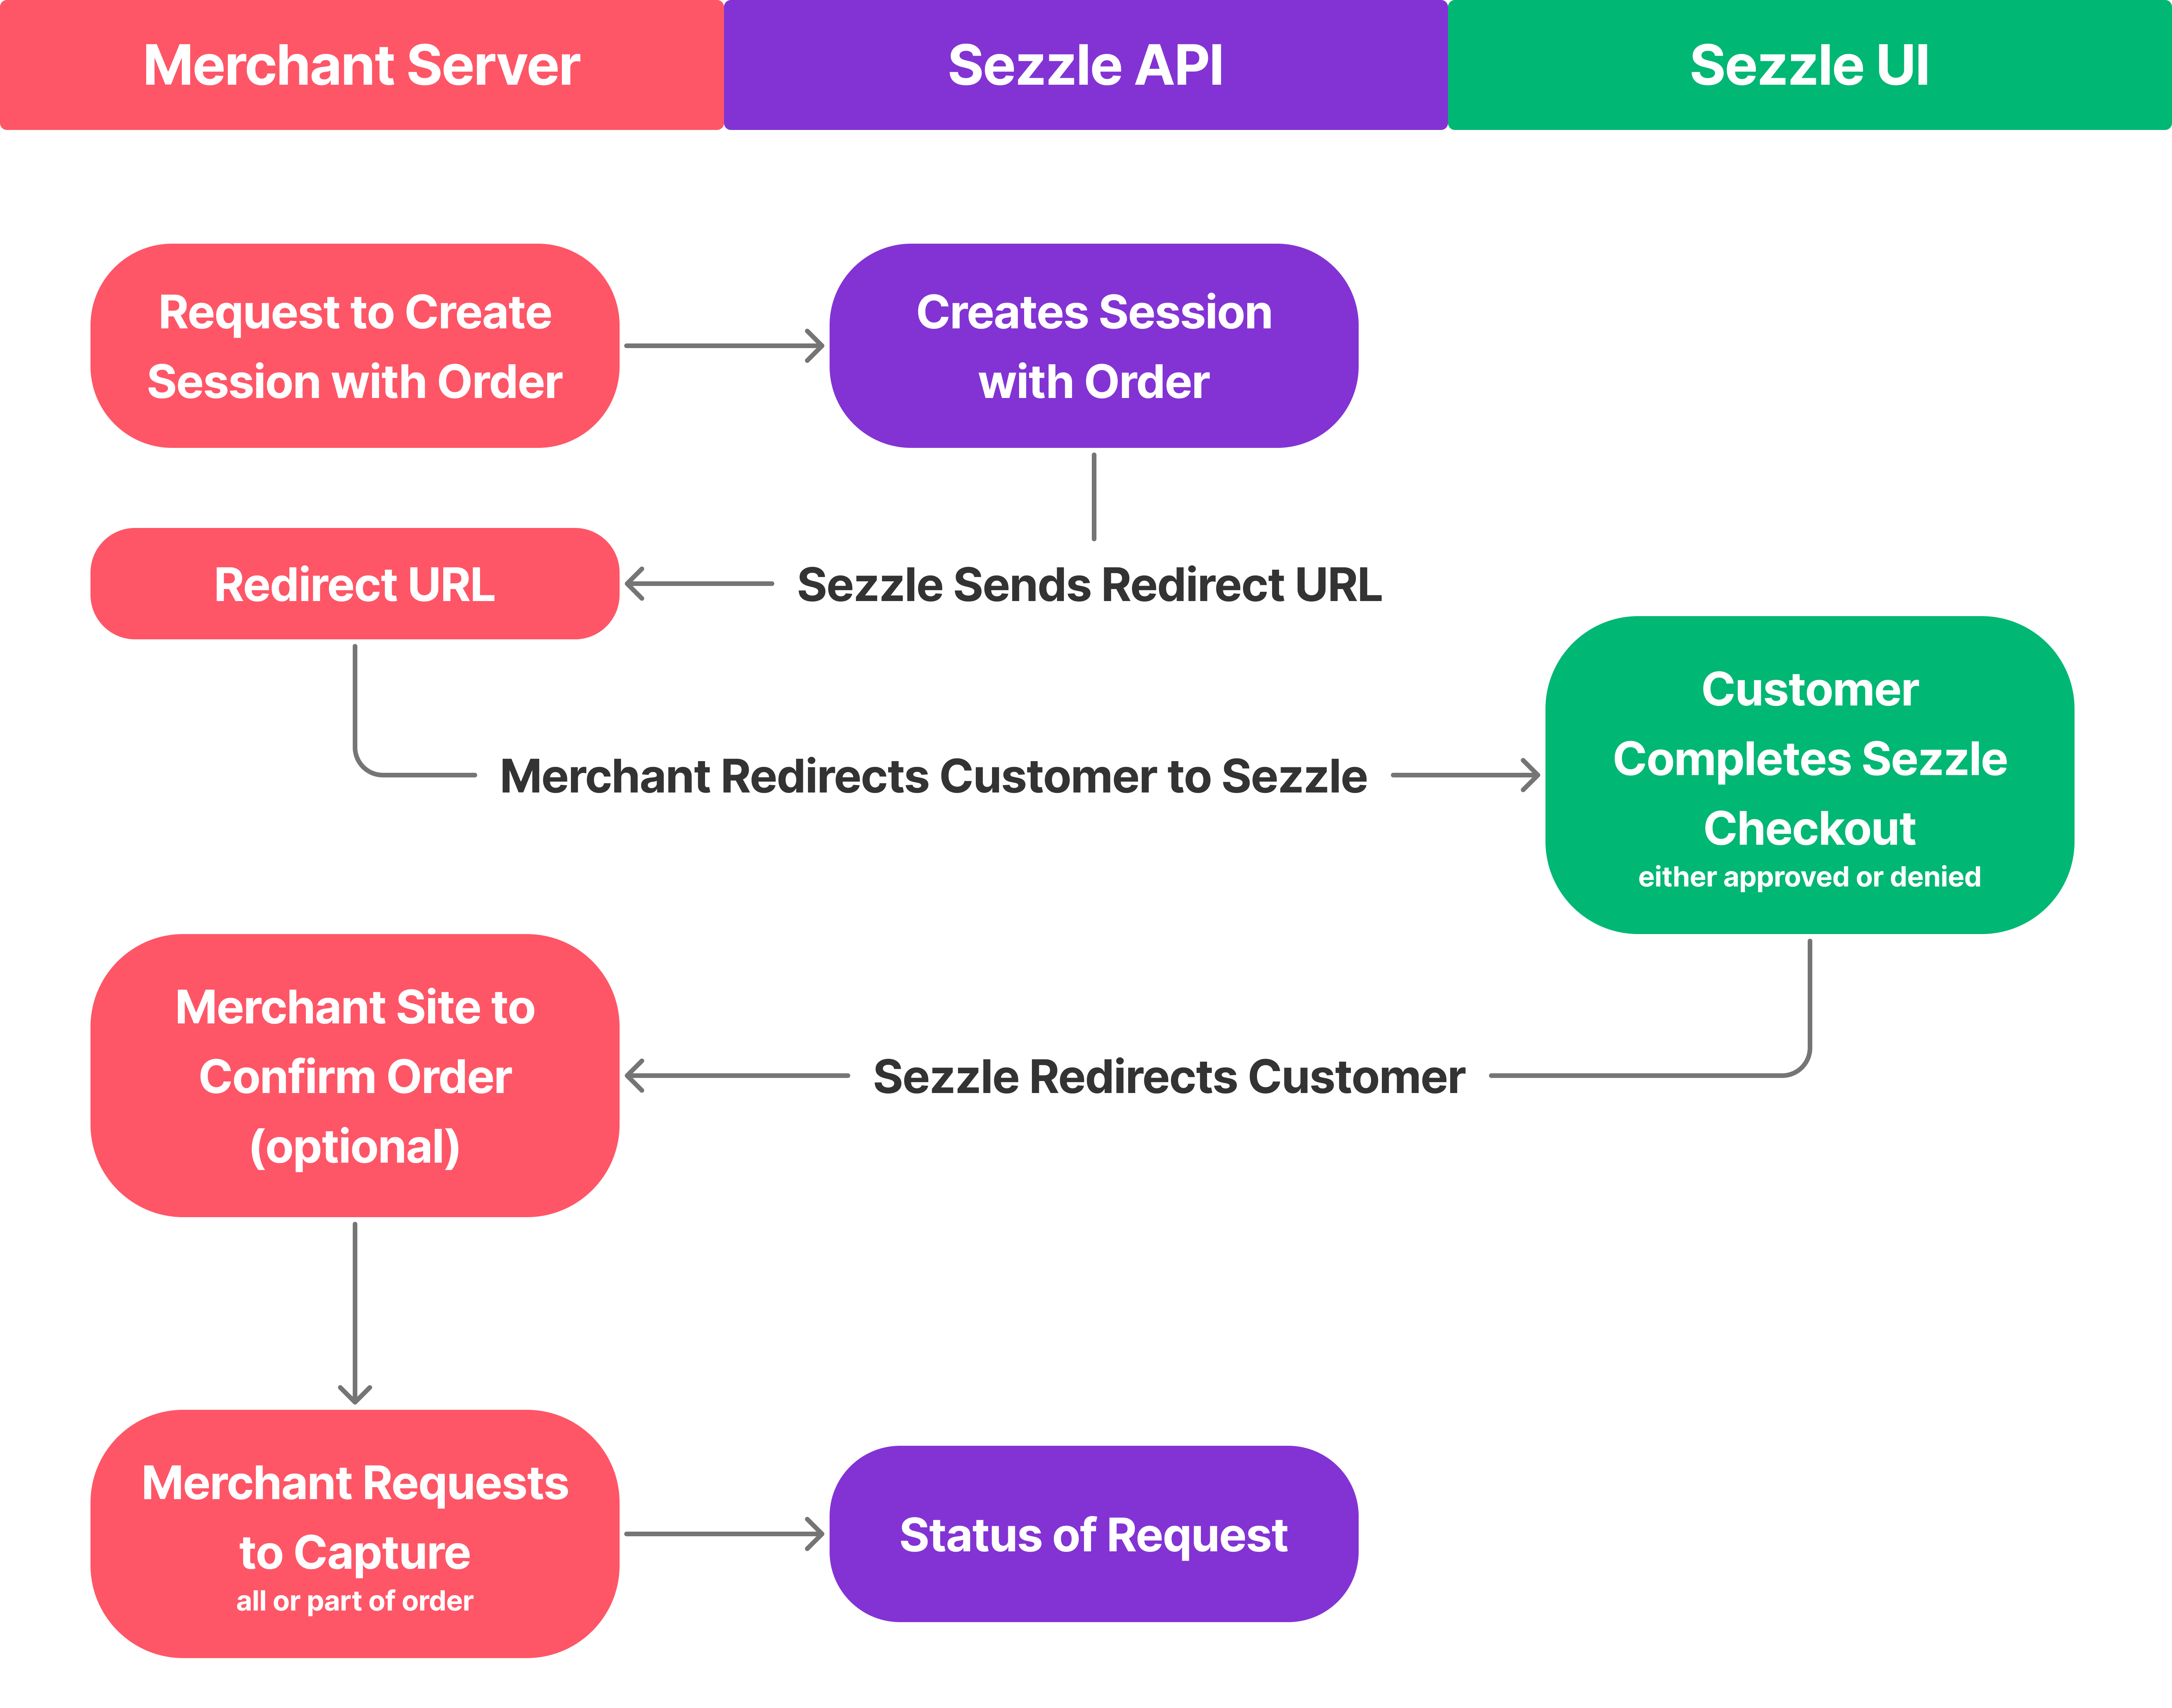 1. Merchant calls `/v2/session` with order and intent of `AUTH` or `CAPTURE`. Optionally, the merchant can send customer information
2. Sezzle returns order uuid and checkout URL.
3. Merchant redirects customer to Sezzle checkout URL.
4. Customer completes the Sezzle checkout and is redirected to the session complete URL.
* If the intent was to `CAPTURE`, Sezzle will capture the total order amount.
* If the intent was to `AUTH`, Sezzle will only authorize the total order amount and the merchant can call `/v2/order` later to release or capture amounts using the order uuid.
## Supported Methods
1. Merchant calls `/v2/session` with order and intent of `AUTH` or `CAPTURE`. Optionally, the merchant can send customer information
2. Sezzle returns order uuid and checkout URL.
3. Merchant redirects customer to Sezzle checkout URL.
4. Customer completes the Sezzle checkout and is redirected to the session complete URL.
* If the intent was to `CAPTURE`, Sezzle will capture the total order amount.
* If the intent was to `AUTH`, Sezzle will only authorize the total order amount and the merchant can call `/v2/order` later to release or capture amounts using the order uuid.
## Supported Methods
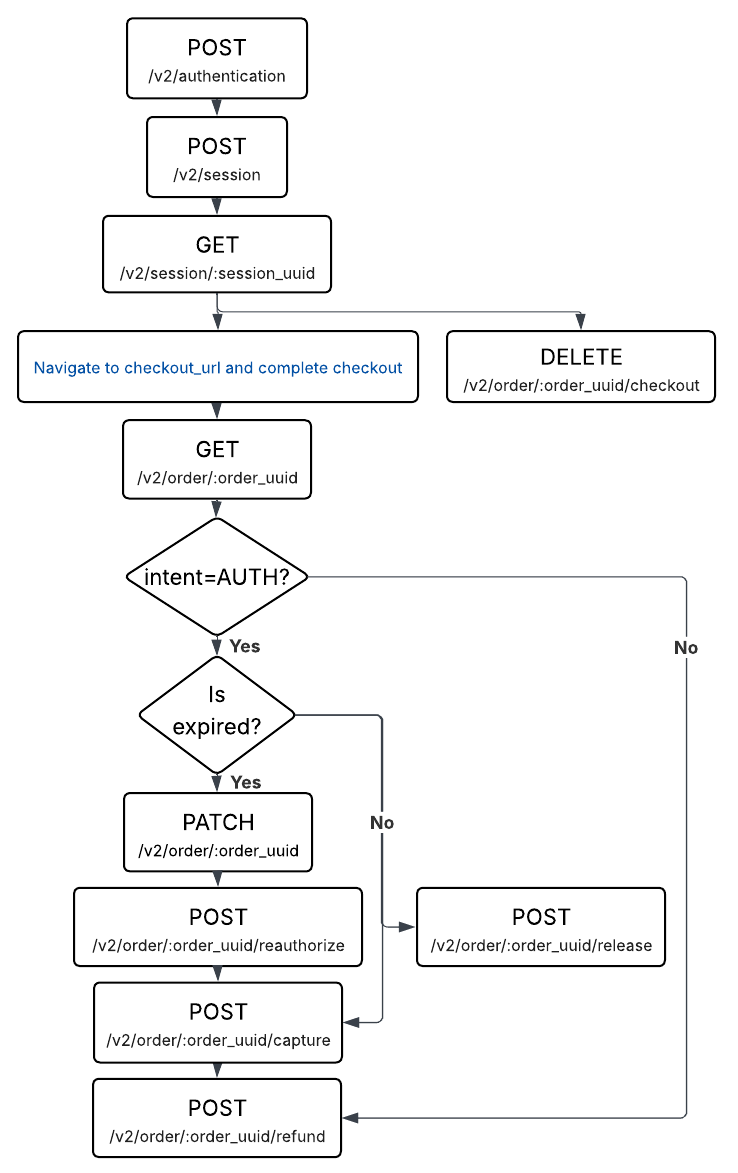 3. Once a session is created, you must visit the checkout\_url in the response and complete the checkout before testing most other Orders endpoints.
* Log in at sandbox.dashboard.sezzle.com/customer
* The customer account does not need to match the customer details given in the session payload
* The phone number for the customer account must be real, but other personal information can be fake
* OTP will be `123123`
# Test Data
Source: https://docs.sezzle.com/docs/api/test-cards
Test data is important to use in our Sandbox environment because it offers a way to use reliable forced responses.
## Phone and Personal Information
* Use any valid US or CA phone number, real or fake
* The expected OTP is `123123`
* Personal information does not need to be real
## Test Credit Cards
| Brand | Number | CVC | Expiration |
| ---------- | ---------------- | ------------ | --------------- |
| Visa | 4242424242424242 | Any 3 digits | Any future date |
| Mastercard | 5555555555554444 | Any 3 digits | Any future date |
| Amex | 371449635398431 | Any 4 digits | Any future date |
| Amex | 378282246310005 | Any 4 digits | Any future date |
| Discover | 6011111111111117 | Any 3 digits | Any future date |
## Checkout Testing
* Use your [sandbox API keys](https://sandbox.dashboard.sezzle.com/merchant/settings/apikeys) when testing in a test environment
* Use your [production API keys](https://dashboard.sezzle.com/merchant/settings/apikeys) when testing in a live environment
1. On your website, add an item to your cart, then proceed to Checkout and select `Sezzle` as the payment method
2. Click `Place Order`
3. Once a session is created, you must visit the checkout\_url in the response and complete the checkout before testing most other Orders endpoints.
* Log in at sandbox.dashboard.sezzle.com/customer
* The customer account does not need to match the customer details given in the session payload
* The phone number for the customer account must be real, but other personal information can be fake
* OTP will be `123123`
# Test Data
Source: https://docs.sezzle.com/docs/api/test-cards
Test data is important to use in our Sandbox environment because it offers a way to use reliable forced responses.
## Phone and Personal Information
* Use any valid US or CA phone number, real or fake
* The expected OTP is `123123`
* Personal information does not need to be real
## Test Credit Cards
| Brand | Number | CVC | Expiration |
| ---------- | ---------------- | ------------ | --------------- |
| Visa | 4242424242424242 | Any 3 digits | Any future date |
| Mastercard | 5555555555554444 | Any 3 digits | Any future date |
| Amex | 371449635398431 | Any 4 digits | Any future date |
| Amex | 378282246310005 | Any 4 digits | Any future date |
| Discover | 6011111111111117 | Any 3 digits | Any future date |
## Checkout Testing
* Use your [sandbox API keys](https://sandbox.dashboard.sezzle.com/merchant/settings/apikeys) when testing in a test environment
* Use your [production API keys](https://dashboard.sezzle.com/merchant/settings/apikeys) when testing in a live environment
1. On your website, add an item to your cart, then proceed to Checkout and select `Sezzle` as the payment method
2. Click `Place Order`
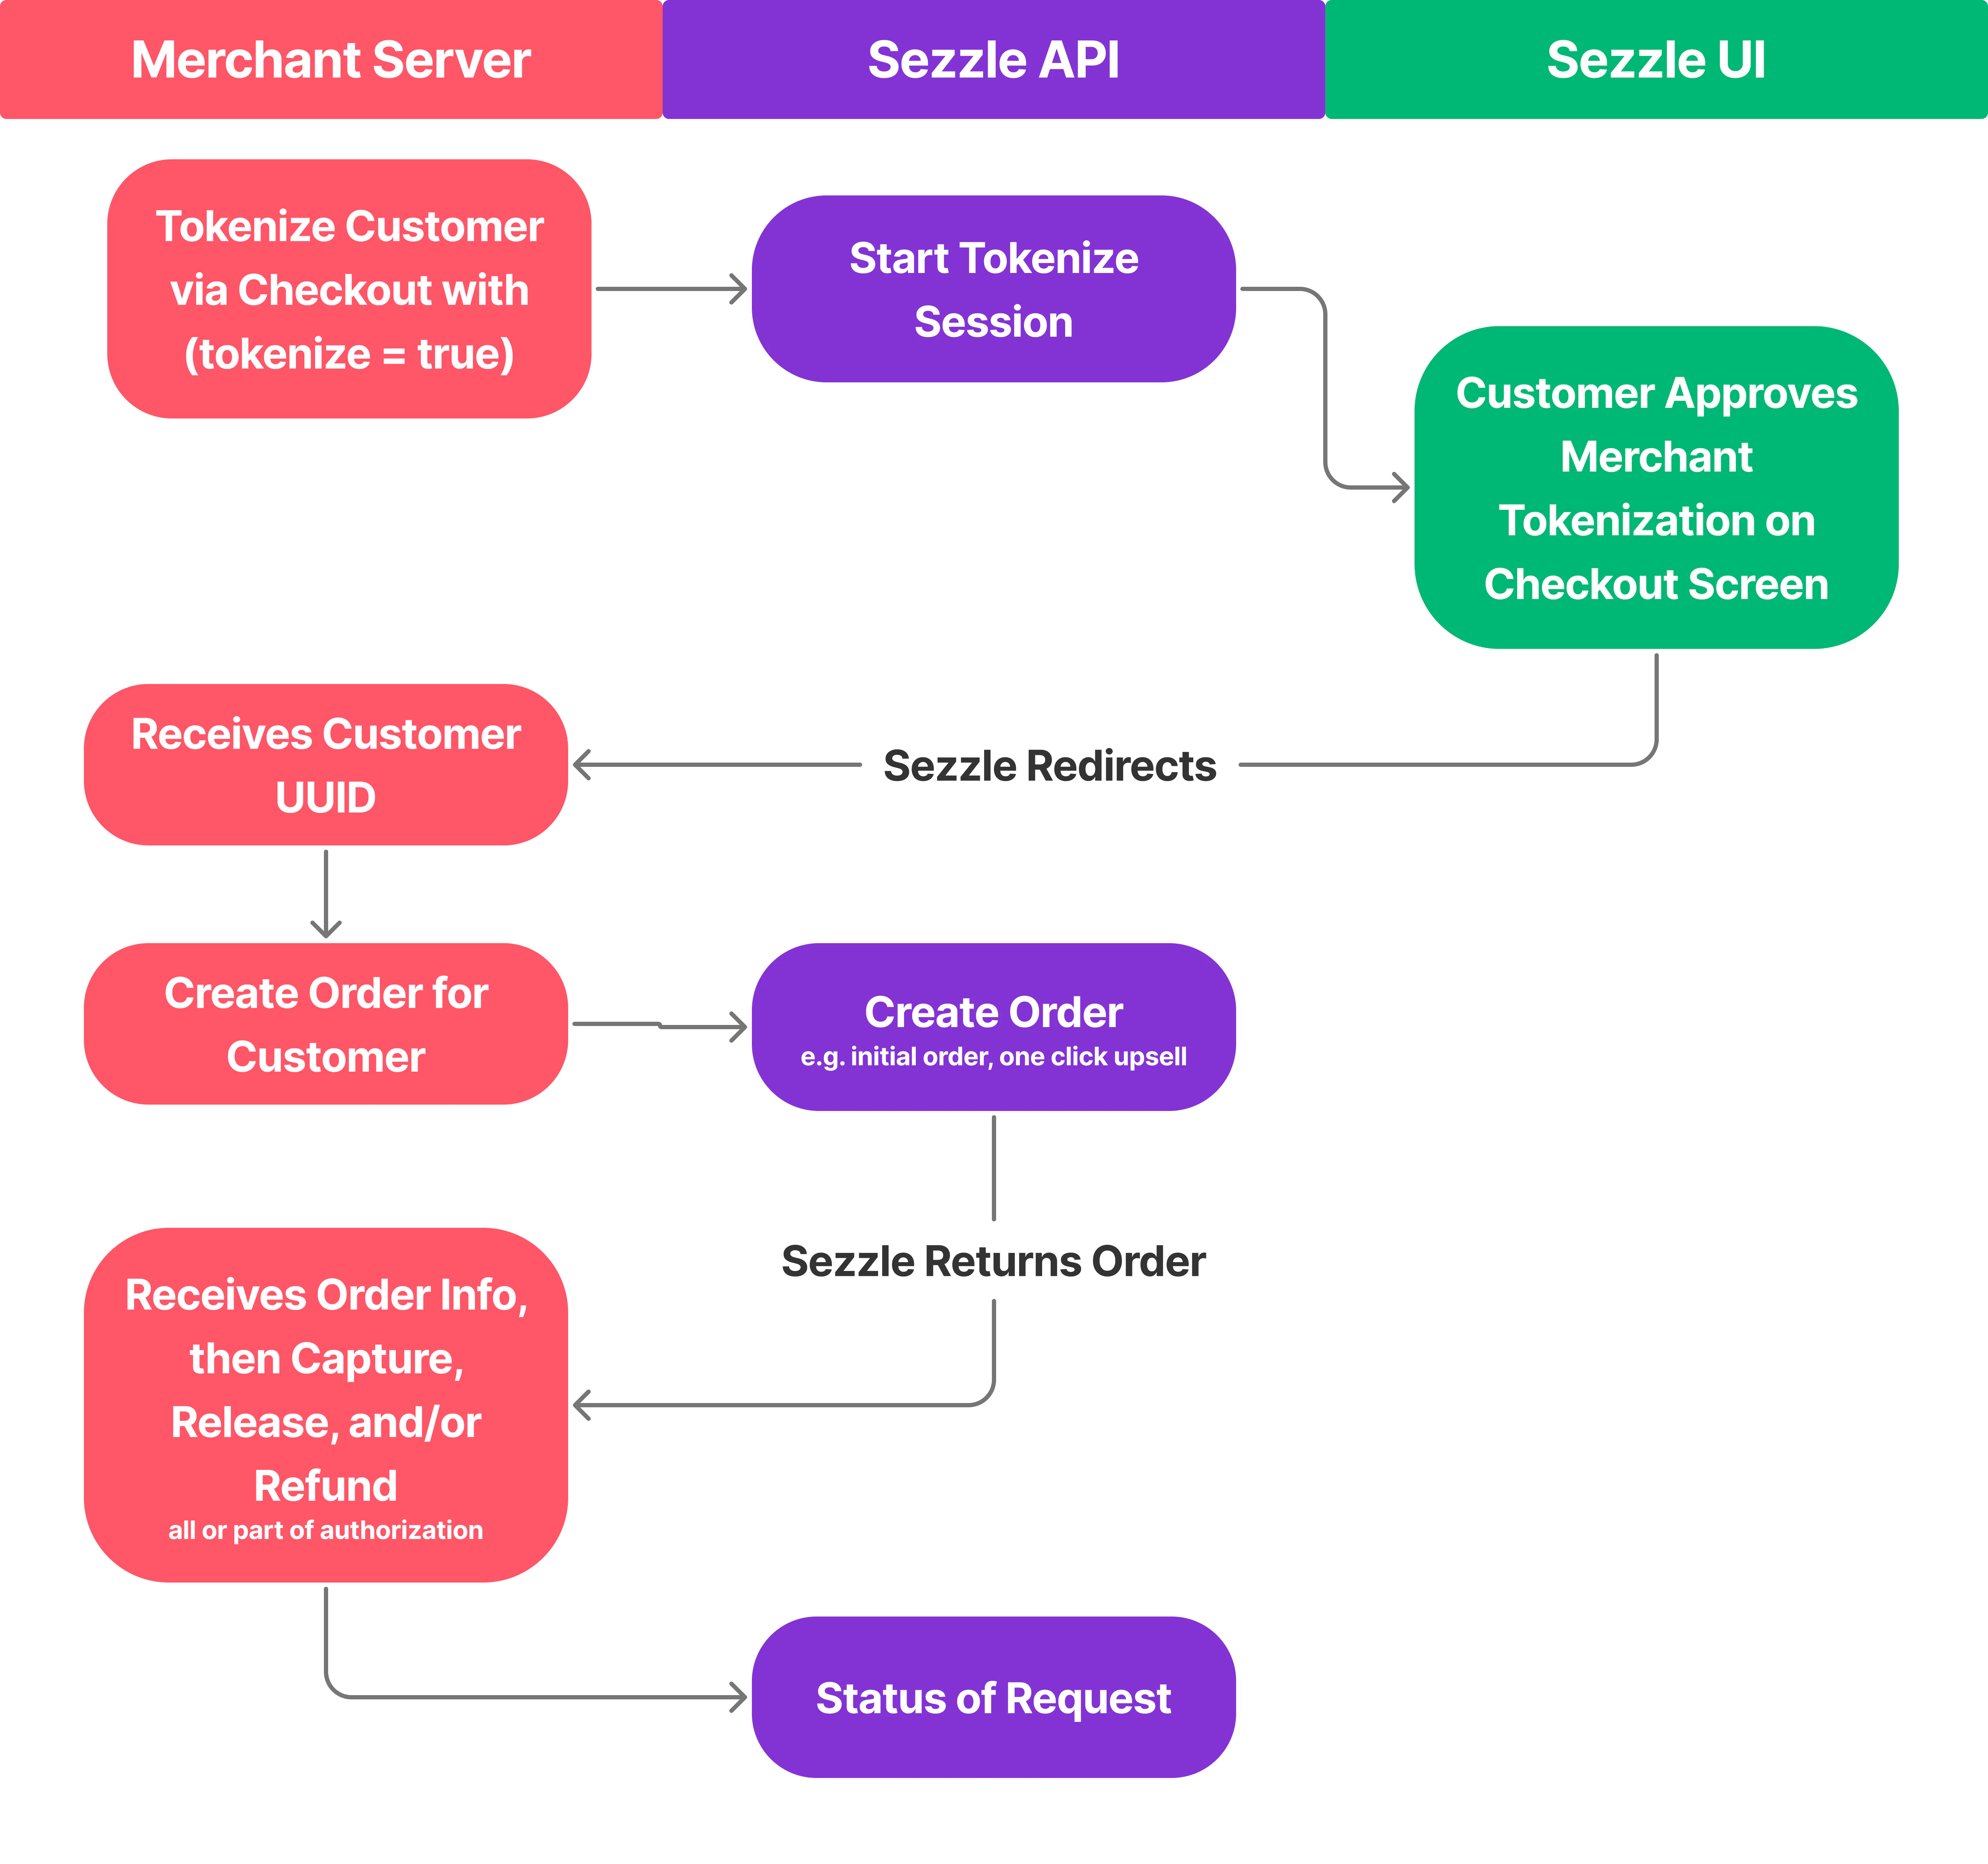 1. Tokenize Customer via Checkout
* The merchant calls `/v2/session` with `tokenize: true`, optionally including customer details to speed up registration for new Sezzle users.
* Sezzle returns a session `tokenize` token.
2. Merchant Redirects User to Checkout URL
* Customer sees option to allow merchant to process payments from their Sezzle account for future transactions.
* The customer may decide to allow this permission before completing their checkout.
1. Tokenize Customer via Checkout
* The merchant calls `/v2/session` with `tokenize: true`, optionally including customer details to speed up registration for new Sezzle users.
* Sezzle returns a session `tokenize` token.
2. Merchant Redirects User to Checkout URL
* Customer sees option to allow merchant to process payments from their Sezzle account for future transactions.
* The customer may decide to allow this permission before completing their checkout.
 * If agreed, Sezzle redirects back to the merchant’s session complete URL, appending a `customer-uuid` query parameter.
* Alternatively, the merchant can call `/v2/token` with the session tokenize token to retrieve the UUID.
3. Charge Customer
* The merchant uses the `customer-uuid` to create orders via `/v2/customer/{customer_uuid}/order`.
* If the authorization is approved, the merchant can manage the order (release, capture, or refund) using `/v2/order` endpoints.
## Notes
* Tokenization is optional, recommended only for charging via Sezzle outside standard checkouts.
* Orders created via customer UUID are treated the same as those from a standard Sezzle checkout.
## Customers
Use the customers endpoints to:
* [Delete](/docs/api/tokenization/customers/deletev2token) a customer
* [Get](/docs/api/tokenization/customers/getv2customer) details on an existing customer
* [Get](/docs/api/tokenization/customers/getv2customerlist) a list of customers
* [Create](/docs/api/tokenization/customers/postv2customerorder) an order for a customer
* [Preapprove](/docs/api/tokenization/customers/preapprovev2token) an amount for the customer
* If agreed, Sezzle redirects back to the merchant’s session complete URL, appending a `customer-uuid` query parameter.
* Alternatively, the merchant can call `/v2/token` with the session tokenize token to retrieve the UUID.
3. Charge Customer
* The merchant uses the `customer-uuid` to create orders via `/v2/customer/{customer_uuid}/order`.
* If the authorization is approved, the merchant can manage the order (release, capture, or refund) using `/v2/order` endpoints.
## Notes
* Tokenization is optional, recommended only for charging via Sezzle outside standard checkouts.
* Orders created via customer UUID are treated the same as those from a standard Sezzle checkout.
## Customers
Use the customers endpoints to:
* [Delete](/docs/api/tokenization/customers/deletev2token) a customer
* [Get](/docs/api/tokenization/customers/getv2customer) details on an existing customer
* [Get](/docs/api/tokenization/customers/getv2customerlist) a list of customers
* [Create](/docs/api/tokenization/customers/postv2customerorder) an order for a customer
* [Preapprove](/docs/api/tokenization/customers/preapprovev2token) an amount for the customer
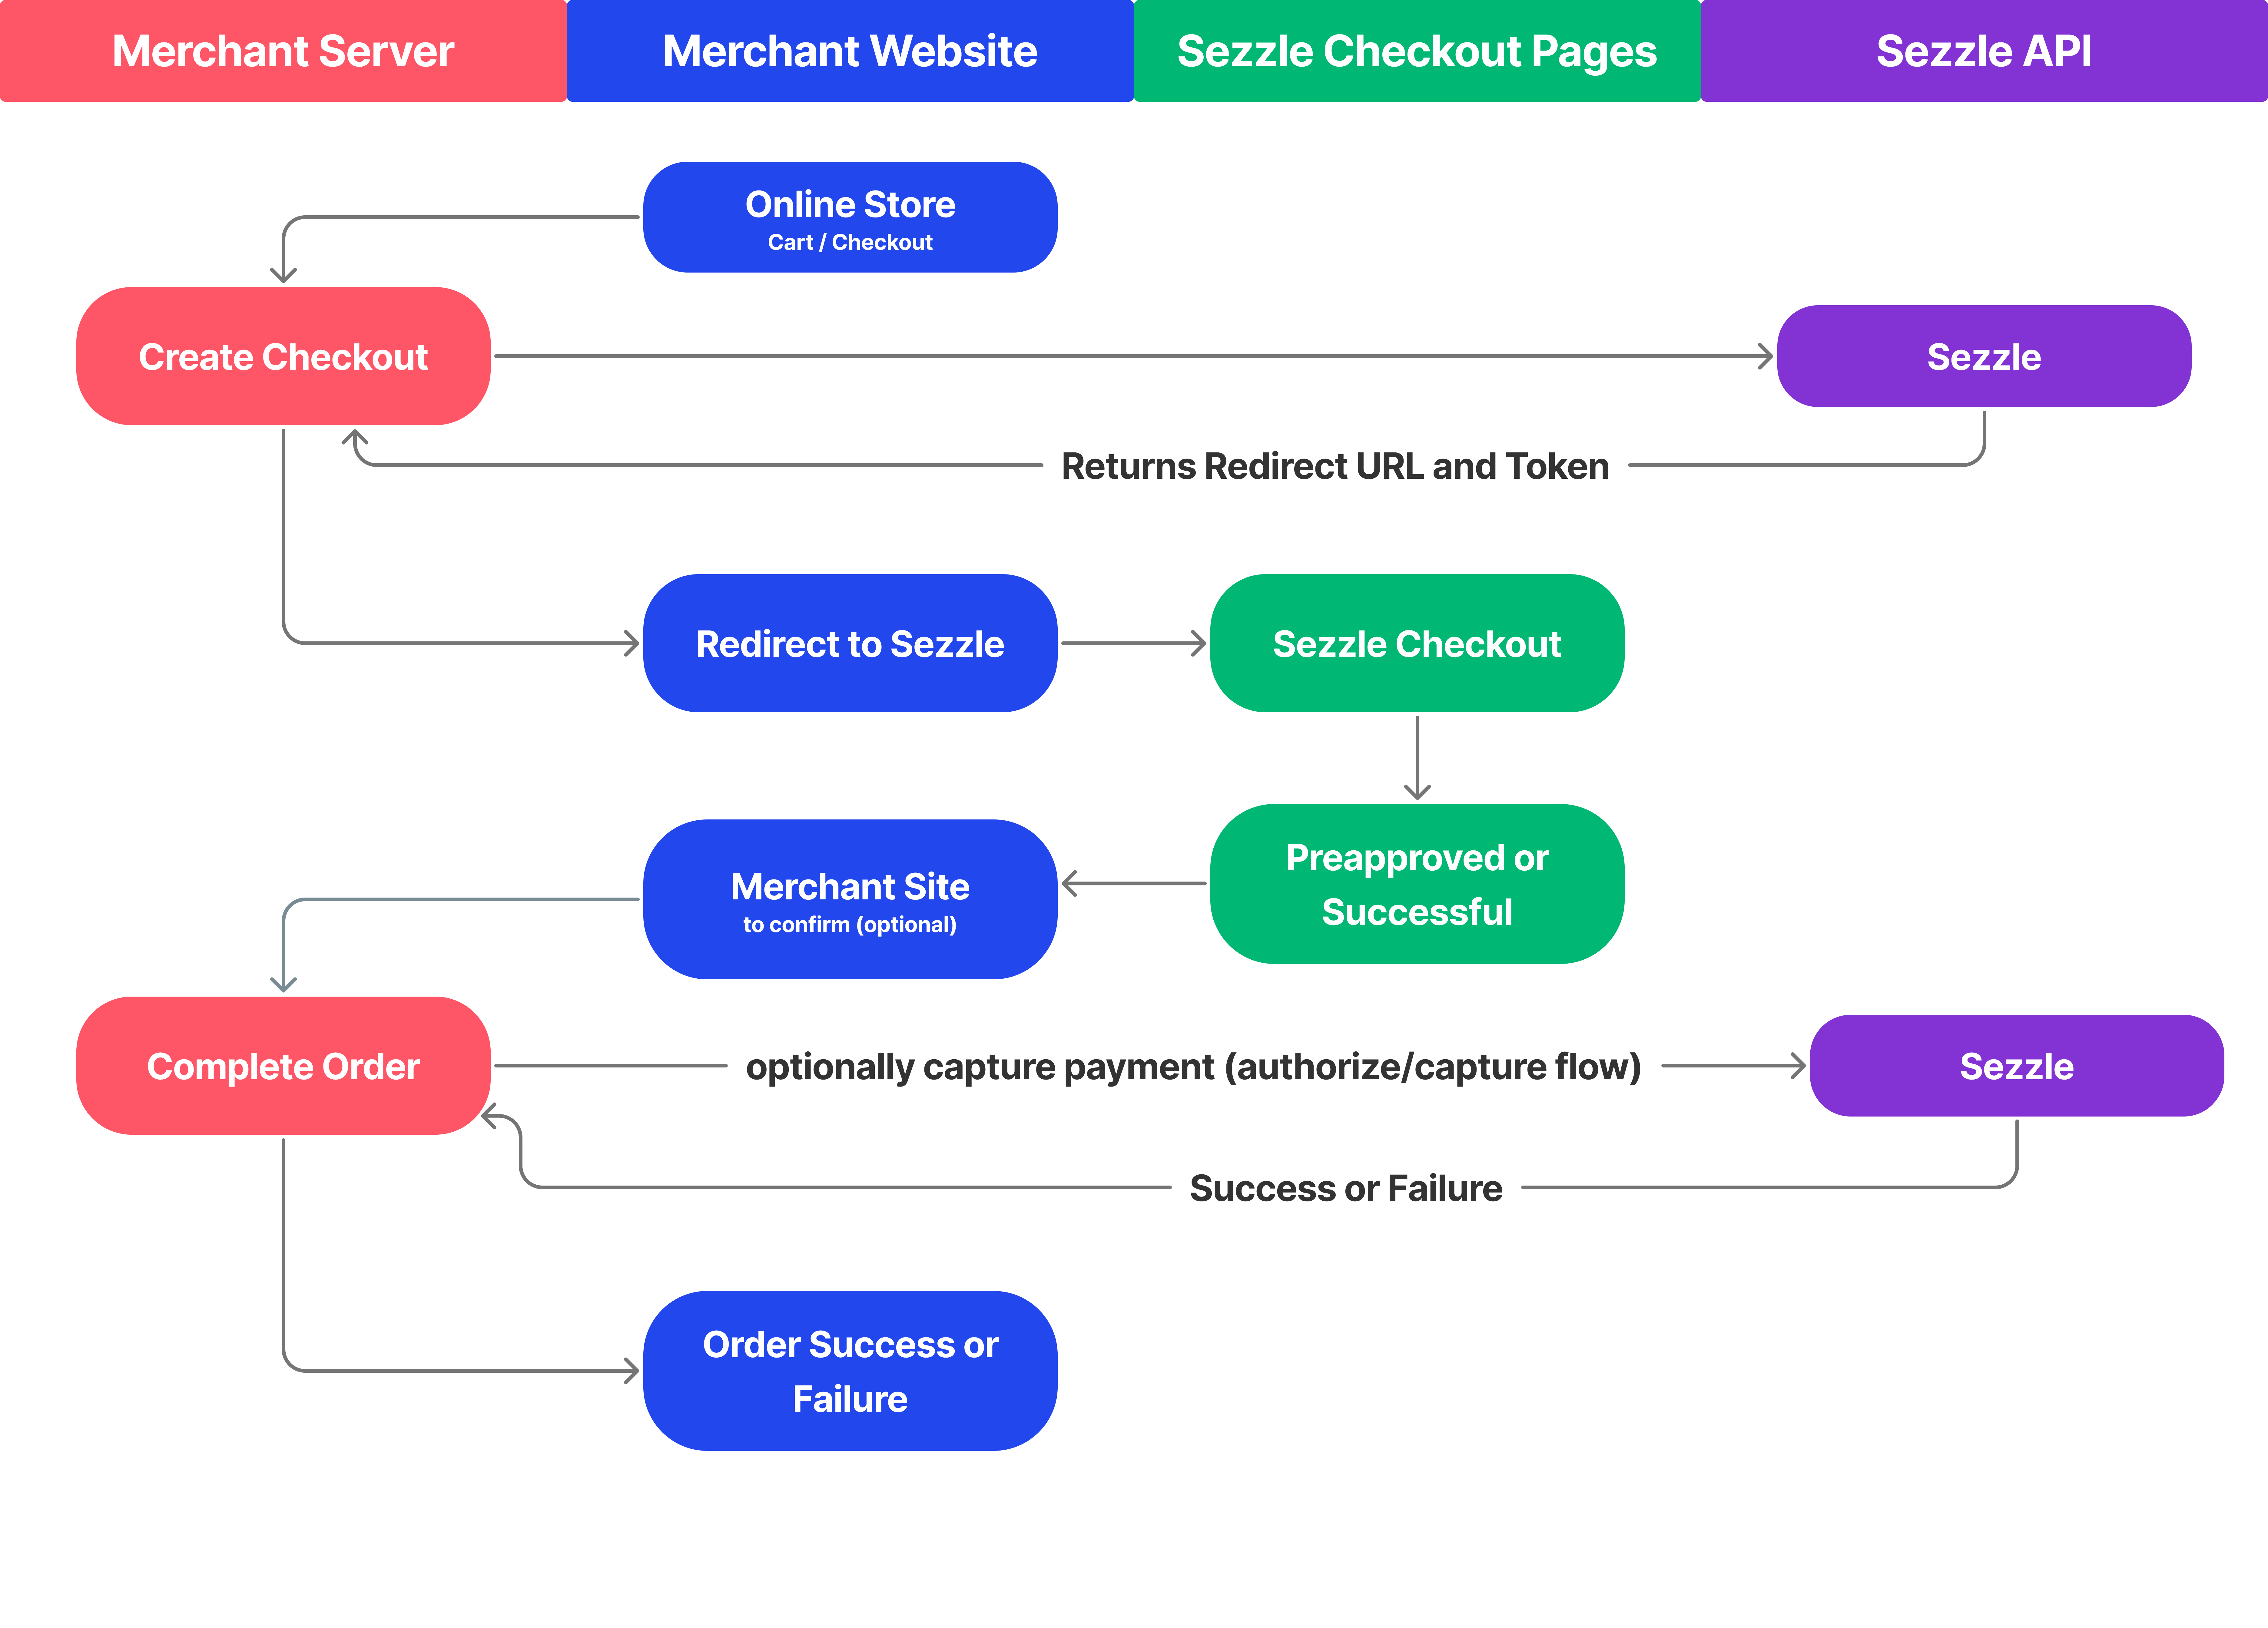 ### Payment Flow Explanation
1. Merchant calls `/v1/checkouts` to send cart data to Sezzle
2. Sezzle returns URL to redirect consumer to make payment at Sezzle checkout
3. Merchant redirects the consumer to Sezzle
4. When the consumer completes the Sezzle checkout flow, they are redirected back to merchant's website
5. Alternatively, on approval, the consumer is redirected from Sezzle checkout to merchant's website and merchant captures the order by calling `/v1/complete`
### Refund Request
| Parameter | Type | Description |
| ---------------- | ------- | ------------------------------------------------------------------------------------------------------------------------------------------------------------------------------------------------------------------------------------------------------------------------- |
| `amount*` | object | A price object that defines the amount to be refunded. Amount may not be 0, negative, or exceed the total order amount. Currency must either be the order's currency or the customer's paying currency. This field is optional if the `is_full_refund` parameter is true. |
| `refund_id` | string | UUID for the Refund. Must be unique to a Merchant. |
| `refund_reason` | string | A reason for the refund. |
| `is_full_refund` | boolean | Overrides `amount`. If true, the order will be fully refunded. If omitted, will default to false |
## Javascript SDK
The Javascript SDK is documented in the latest [API v2 documentation](/#javascript-sdk). It is supported for users of the v1 API using the same loadable page script.
### Payment Flow Explanation
1. Merchant calls `/v1/checkouts` to send cart data to Sezzle
2. Sezzle returns URL to redirect consumer to make payment at Sezzle checkout
3. Merchant redirects the consumer to Sezzle
4. When the consumer completes the Sezzle checkout flow, they are redirected back to merchant's website
5. Alternatively, on approval, the consumer is redirected from Sezzle checkout to merchant's website and merchant captures the order by calling `/v1/complete`
### Refund Request
| Parameter | Type | Description |
| ---------------- | ------- | ------------------------------------------------------------------------------------------------------------------------------------------------------------------------------------------------------------------------------------------------------------------------- |
| `amount*` | object | A price object that defines the amount to be refunded. Amount may not be 0, negative, or exceed the total order amount. Currency must either be the order's currency or the customer's paying currency. This field is optional if the `is_full_refund` parameter is true. |
| `refund_id` | string | UUID for the Refund. Must be unique to a Merchant. |
| `refund_reason` | string | A reason for the refund. |
| `is_full_refund` | boolean | Overrides `amount`. If true, the order will be fully refunded. If omitted, will default to false |
## Javascript SDK
The Javascript SDK is documented in the latest [API v2 documentation](/#javascript-sdk). It is supported for users of the v1 API using the same loadable page script.
 Without the Sezzle checkout button or prefilled information, the checkout process involves multiple steps, which can lead to cart abandonment due to complexity:
1. Add Items to Cart and Proceed to Checkout
* Shoppers select their desired products and initiate the checkout process on the merchant’s website
2. Enter Contact Information
* Shoppers manually input their name, email, and phone number
3. Enter Shipping Details
* Shoppers manually input their address
4. Select Shipping Method
* Shoppers manually select their shipping method
5. Select Sezzle as Payment Method
* Shoppers choose Sezzle from the available payment options and are redirected to Sezzle’s checkout page
6. Sign In and Complete Purchase
* On Sezzle’s site, shoppers sign in or create an account, confirm their payment plan (e.g., 25% upfront, three installments), and finalize the order
This multi-step process can deter shoppers, especially those who find entering information tedious or who abandon their carts due to lengthy forms.
## How It Works
Without the Sezzle checkout button or prefilled information, the checkout process involves multiple steps, which can lead to cart abandonment due to complexity:
1. Add Items to Cart and Proceed to Checkout
* Shoppers select their desired products and initiate the checkout process on the merchant’s website
2. Enter Contact Information
* Shoppers manually input their name, email, and phone number
3. Enter Shipping Details
* Shoppers manually input their address
4. Select Shipping Method
* Shoppers manually select their shipping method
5. Select Sezzle as Payment Method
* Shoppers choose Sezzle from the available payment options and are redirected to Sezzle’s checkout page
6. Sign In and Complete Purchase
* On Sezzle’s site, shoppers sign in or create an account, confirm their payment plan (e.g., 25% upfront, three installments), and finalize the order
This multi-step process can deter shoppers, especially those who find entering information tedious or who abandon their carts due to lengthy forms.
## How It Works
 ## FAQs
.png?fit=max&auto=format&n=hKhvshWly4M3cXTJ&q=85&s=d2dd598b7780a4a1d394c7a8bcff3b1e) ## Installation
Select the implementation that fits your needs:
### Shopify:
* [Asset from CDN](#from-cdn)
* [Asset as Local File](#local-file)
* [Plain HTML](#install-as-html)
### All Platforms:
* [Asset from CDN](#from-cdn-2)
* [Asset as Local File](#local-file-2)
* [Plain HTML](#install-as-html-2)
***
## Shopify
### Install as Asset
#### From CDN
1. Log in to your Shopify Admin
2. Go to `Online Store` > `Themes`
3. Next to the applicable theme, click `Actions` then `Edit Code`
4. Paste the following snippet into the `sections/header.liquid` file where the banner should appear, update the `merchantUUID` value, then click `Save`
* Note: this is typically below the `header` or `sticky-header` closing tag. Open the file, then search (Cmd+F or Ctrl+F) for the word "sticky-header"
## Installation
Select the implementation that fits your needs:
### Shopify:
* [Asset from CDN](#from-cdn)
* [Asset as Local File](#local-file)
* [Plain HTML](#install-as-html)
### All Platforms:
* [Asset from CDN](#from-cdn-2)
* [Asset as Local File](#local-file-2)
* [Plain HTML](#install-as-html-2)
***
## Shopify
### Install as Asset
#### From CDN
1. Log in to your Shopify Admin
2. Go to `Online Store` > `Themes`
3. Next to the applicable theme, click `Actions` then `Edit Code`
4. Paste the following snippet into the `sections/header.liquid` file where the banner should appear, update the `merchantUUID` value, then click `Save`
* Note: this is typically below the `header` or `sticky-header` closing tag. Open the file, then search (Cmd+F or Ctrl+F) for the word "sticky-header"


 ## Installation
* **One-Click Installation**: Many leading platforms offer one-click installation with Sezzle. [Check for compatibility with your platform](https://docs.sezzle.com/docs/plugins/).
* **Manual Installation**: If one-click installation is unavailable or incompatible with your theme, refer to the manual installation guide or contact [merchantsupport@sezzle.com](mailto:merchantsupport@sezzle.com) for assistance.
## Customization
Sezzle provides extensive configuration options to tailor the widget to your site’s needs. Our engineering team is available to ensure seamless integration with your website’s design and functionality.
### HTML required
```html theme={"system"}
```
## Installation
* **One-Click Installation**: Many leading platforms offer one-click installation with Sezzle. [Check for compatibility with your platform](https://docs.sezzle.com/docs/plugins/).
* **Manual Installation**: If one-click installation is unavailable or incompatible with your theme, refer to the manual installation guide or contact [merchantsupport@sezzle.com](mailto:merchantsupport@sezzle.com) for assistance.
## Customization
Sezzle provides extensive configuration options to tailor the widget to your site’s needs. Our engineering team is available to ensure seamless integration with your website’s design and functionality.
### HTML required
```html theme={"system"}
```
 2. Go to `Online Payment Methods`, find `Sezzle` and click `Set up`
 3. Copy your Public Key and Private Key from your [Sezzle Merchant Dashboard](https://dashboard.sezzle.com/merchant/)
* Paste them into the corresponding fields
4. Select the `Transaction Type`
3. Copy your Public Key and Private Key from your [Sezzle Merchant Dashboard](https://dashboard.sezzle.com/merchant/)
* Paste them into the corresponding fields
4. Select the `Transaction Type`
 4. Search for `Sezzle`
 5. Click `Sezzle`, then click `Get This App`
 6. Click `Install`
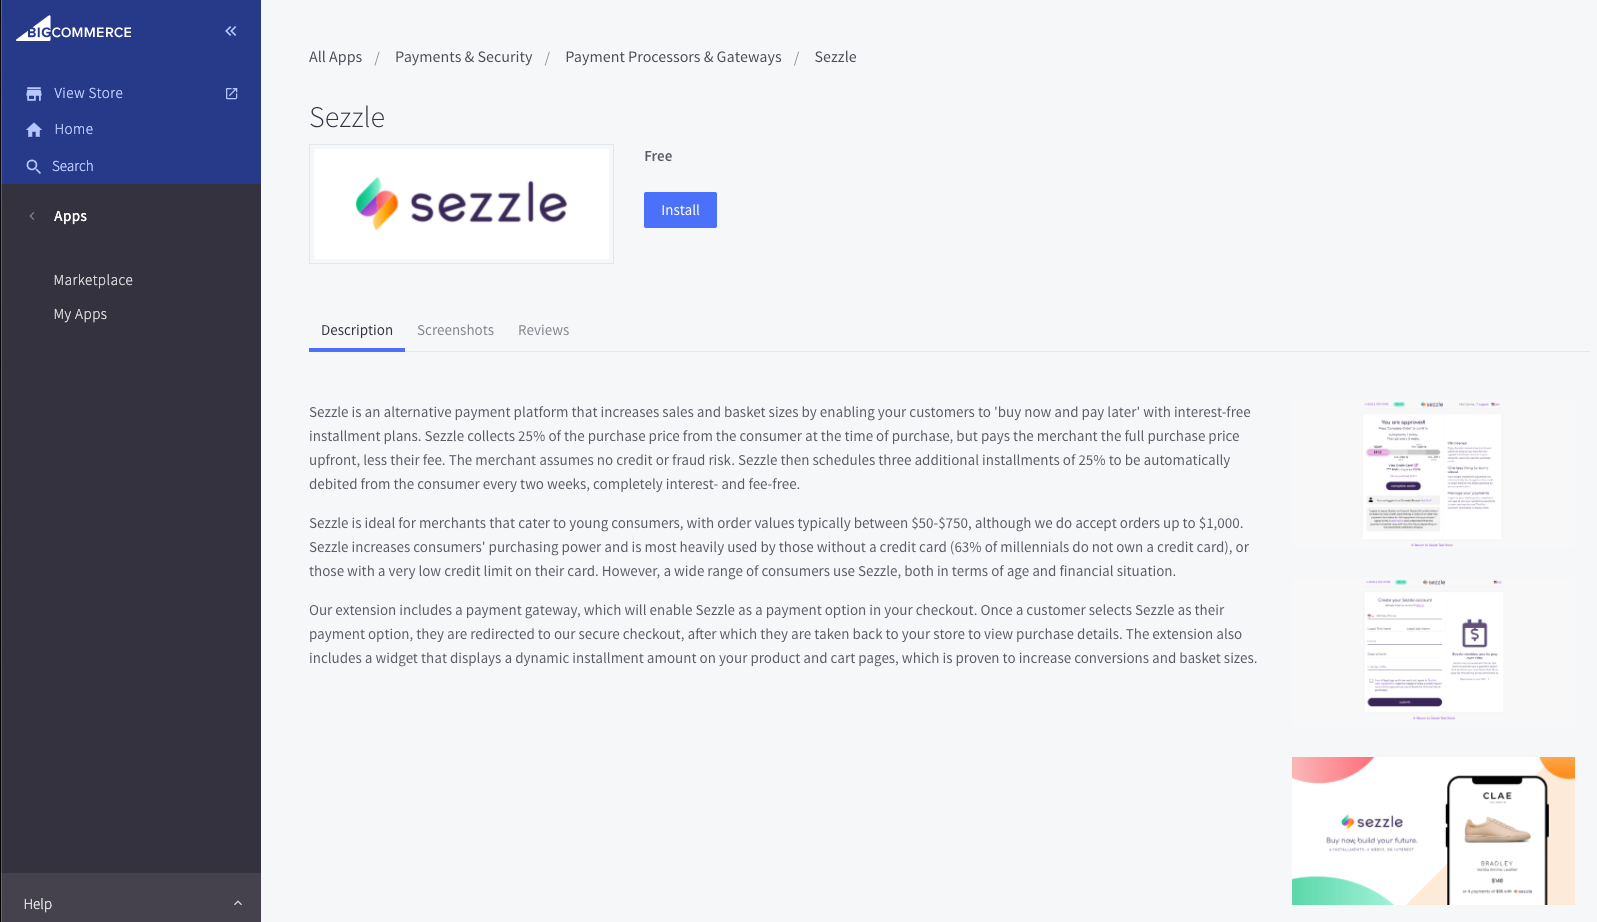 7. Check the PCI Compliance box, then click `Confirm` to start the installation
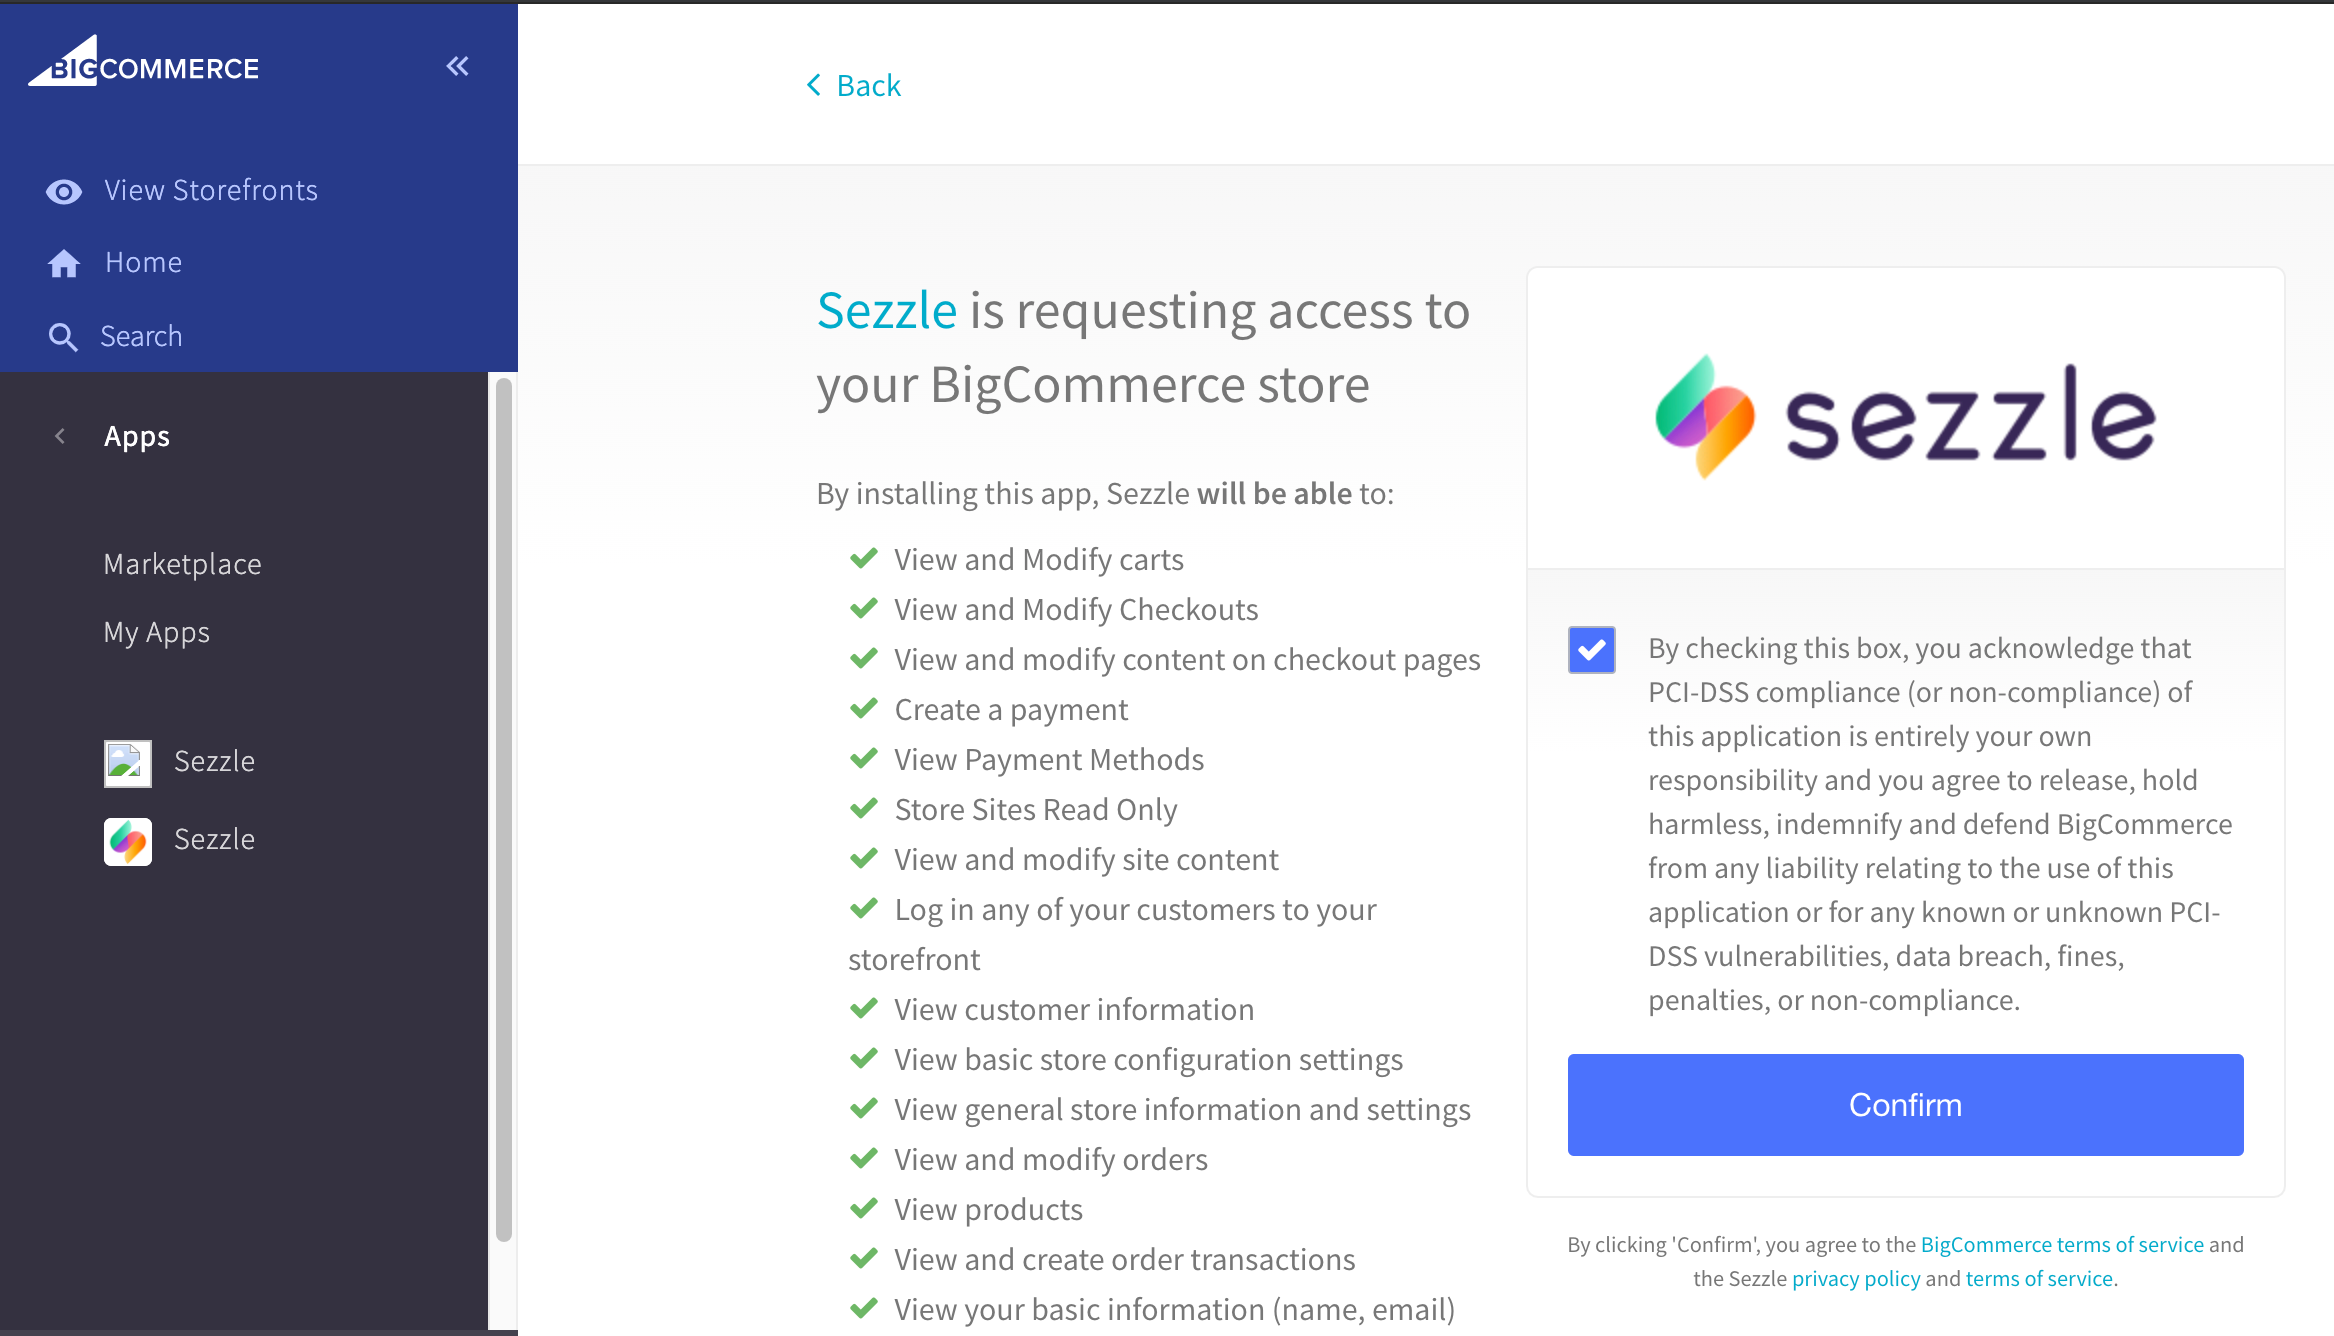 ### Widget Pre-Configuration
1. Make sure you have the Sezzle App installed in your store
2. Go to `Apps` > `Sezzle`
3. Copy your Merchant ID from your [Sezzle Merchant Dashboard](https://dashboard.sezzle.com/merchant/)
* Paste them into the corresponding fields in the Sezzle App of your BigCommerce admin
4. Check the Add Sezzle Widget Script box
* This will inject the widget script into the product and cart pages of your store
5. Save the configuration
### Validate
Step through a [test checkout](/docs/api/test-cards#checkout-testing) to validate the integration is properly installed.
### Troubleshooting
If testing was unsuccessful, review the following:
1. Site has Optimized One-Page Checkout enabled
* Go to `Advanced Settings` > `Checkout`
2. API Keys were entered correctly
* To avoid typos or extra spaces, use the Copy icon in the [Sezzle Merchant Dashboard](https://dashboard.sezzle.com/merchant/settings/apikeys)
3. If you have multiple accounts with Sezzle, each store has its own merchant ID and API Keys that are tied to the store's URL
4. Add Sezzle Widget Script box is checked
5. Widget script is present on your website and reflects the Merchant ID from your [Sezzle Merchant Dashboard](https://dashboard.sezzle.com/merchant/settings/business)
* Go to a product page on your website
* Right-click then select `Inspect`
* In the `Elements` tab, search for `widget.sezzle`
### Manual Theme Integration
If the Sezzle App fails to maintain the widget script on the product pages, or to add the script manually for additional pages, complete the following steps:
1. Go to `Storefront` > `Script Manager`
2. Click the `Create a Script` button
3. Set `Name of script` to `Sezzle Widget`
4. Set `Location on page` to `Footer`
5. Set `Select pages` where script will be added to `All pages`
6. Set `Script category` to `Essential`
7. Set `Script type` to `Script`
8. In the Script content area, copy and paste the script, then click `Save`
The script to be inserted into your webpage is as follows:
#### Template
```javascript theme={"system"}
```
### Widget Pre-Configuration
1. Make sure you have the Sezzle App installed in your store
2. Go to `Apps` > `Sezzle`
3. Copy your Merchant ID from your [Sezzle Merchant Dashboard](https://dashboard.sezzle.com/merchant/)
* Paste them into the corresponding fields in the Sezzle App of your BigCommerce admin
4. Check the Add Sezzle Widget Script box
* This will inject the widget script into the product and cart pages of your store
5. Save the configuration
### Validate
Step through a [test checkout](/docs/api/test-cards#checkout-testing) to validate the integration is properly installed.
### Troubleshooting
If testing was unsuccessful, review the following:
1. Site has Optimized One-Page Checkout enabled
* Go to `Advanced Settings` > `Checkout`
2. API Keys were entered correctly
* To avoid typos or extra spaces, use the Copy icon in the [Sezzle Merchant Dashboard](https://dashboard.sezzle.com/merchant/settings/apikeys)
3. If you have multiple accounts with Sezzle, each store has its own merchant ID and API Keys that are tied to the store's URL
4. Add Sezzle Widget Script box is checked
5. Widget script is present on your website and reflects the Merchant ID from your [Sezzle Merchant Dashboard](https://dashboard.sezzle.com/merchant/settings/business)
* Go to a product page on your website
* Right-click then select `Inspect`
* In the `Elements` tab, search for `widget.sezzle`
### Manual Theme Integration
If the Sezzle App fails to maintain the widget script on the product pages, or to add the script manually for additional pages, complete the following steps:
1. Go to `Storefront` > `Script Manager`
2. Click the `Create a Script` button
3. Set `Name of script` to `Sezzle Widget`
4. Set `Location on page` to `Footer`
5. Set `Select pages` where script will be added to `All pages`
6. Set `Script category` to `Essential`
7. Set `Script type` to `Script`
8. In the Script content area, copy and paste the script, then click `Save`
The script to be inserted into your webpage is as follows:
#### Template
```javascript theme={"system"}
```
 3. Toggle the button against Sezzle under `Store Setup` > `Payments` > `Online Payment Methods` to disable Sezzle as a payment option
# BuyItLive
Source: https://docs.sezzle.com/docs/plugins/buy-it-live
This guide explains how to add Sezzle as a payment option on your BuyItLive website, enabling customers to use Sezzle at checkout.
### BuyItLive Admin Configuration
1. Log in to your website's BuyItLive admin
2. Click `Add Payment Provider`
3. Select `Connect with Sezzle`
4. Go to `Sezzle Payments` > `Tools`
5. Copy your Private Key and Public Key from your [Sezzle Merchant Dashboard](https://dashboard.sezzle.com/merchant/settings/apikeys)
* Paste them into the corresponding fields in the Sezzle configuration page of your BuyItLive admin
6. Click `Save Settings`
7. Go to `Cart Settings` and ensure the `Sezzle` switch is in the `On` position
3. Toggle the button against Sezzle under `Store Setup` > `Payments` > `Online Payment Methods` to disable Sezzle as a payment option
# BuyItLive
Source: https://docs.sezzle.com/docs/plugins/buy-it-live
This guide explains how to add Sezzle as a payment option on your BuyItLive website, enabling customers to use Sezzle at checkout.
### BuyItLive Admin Configuration
1. Log in to your website's BuyItLive admin
2. Click `Add Payment Provider`
3. Select `Connect with Sezzle`
4. Go to `Sezzle Payments` > `Tools`
5. Copy your Private Key and Public Key from your [Sezzle Merchant Dashboard](https://dashboard.sezzle.com/merchant/settings/apikeys)
* Paste them into the corresponding fields in the Sezzle configuration page of your BuyItLive admin
6. Click `Save Settings`
7. Go to `Cart Settings` and ensure the `Sezzle` switch is in the `On` position

 4. Click `Install App` in the top right corner
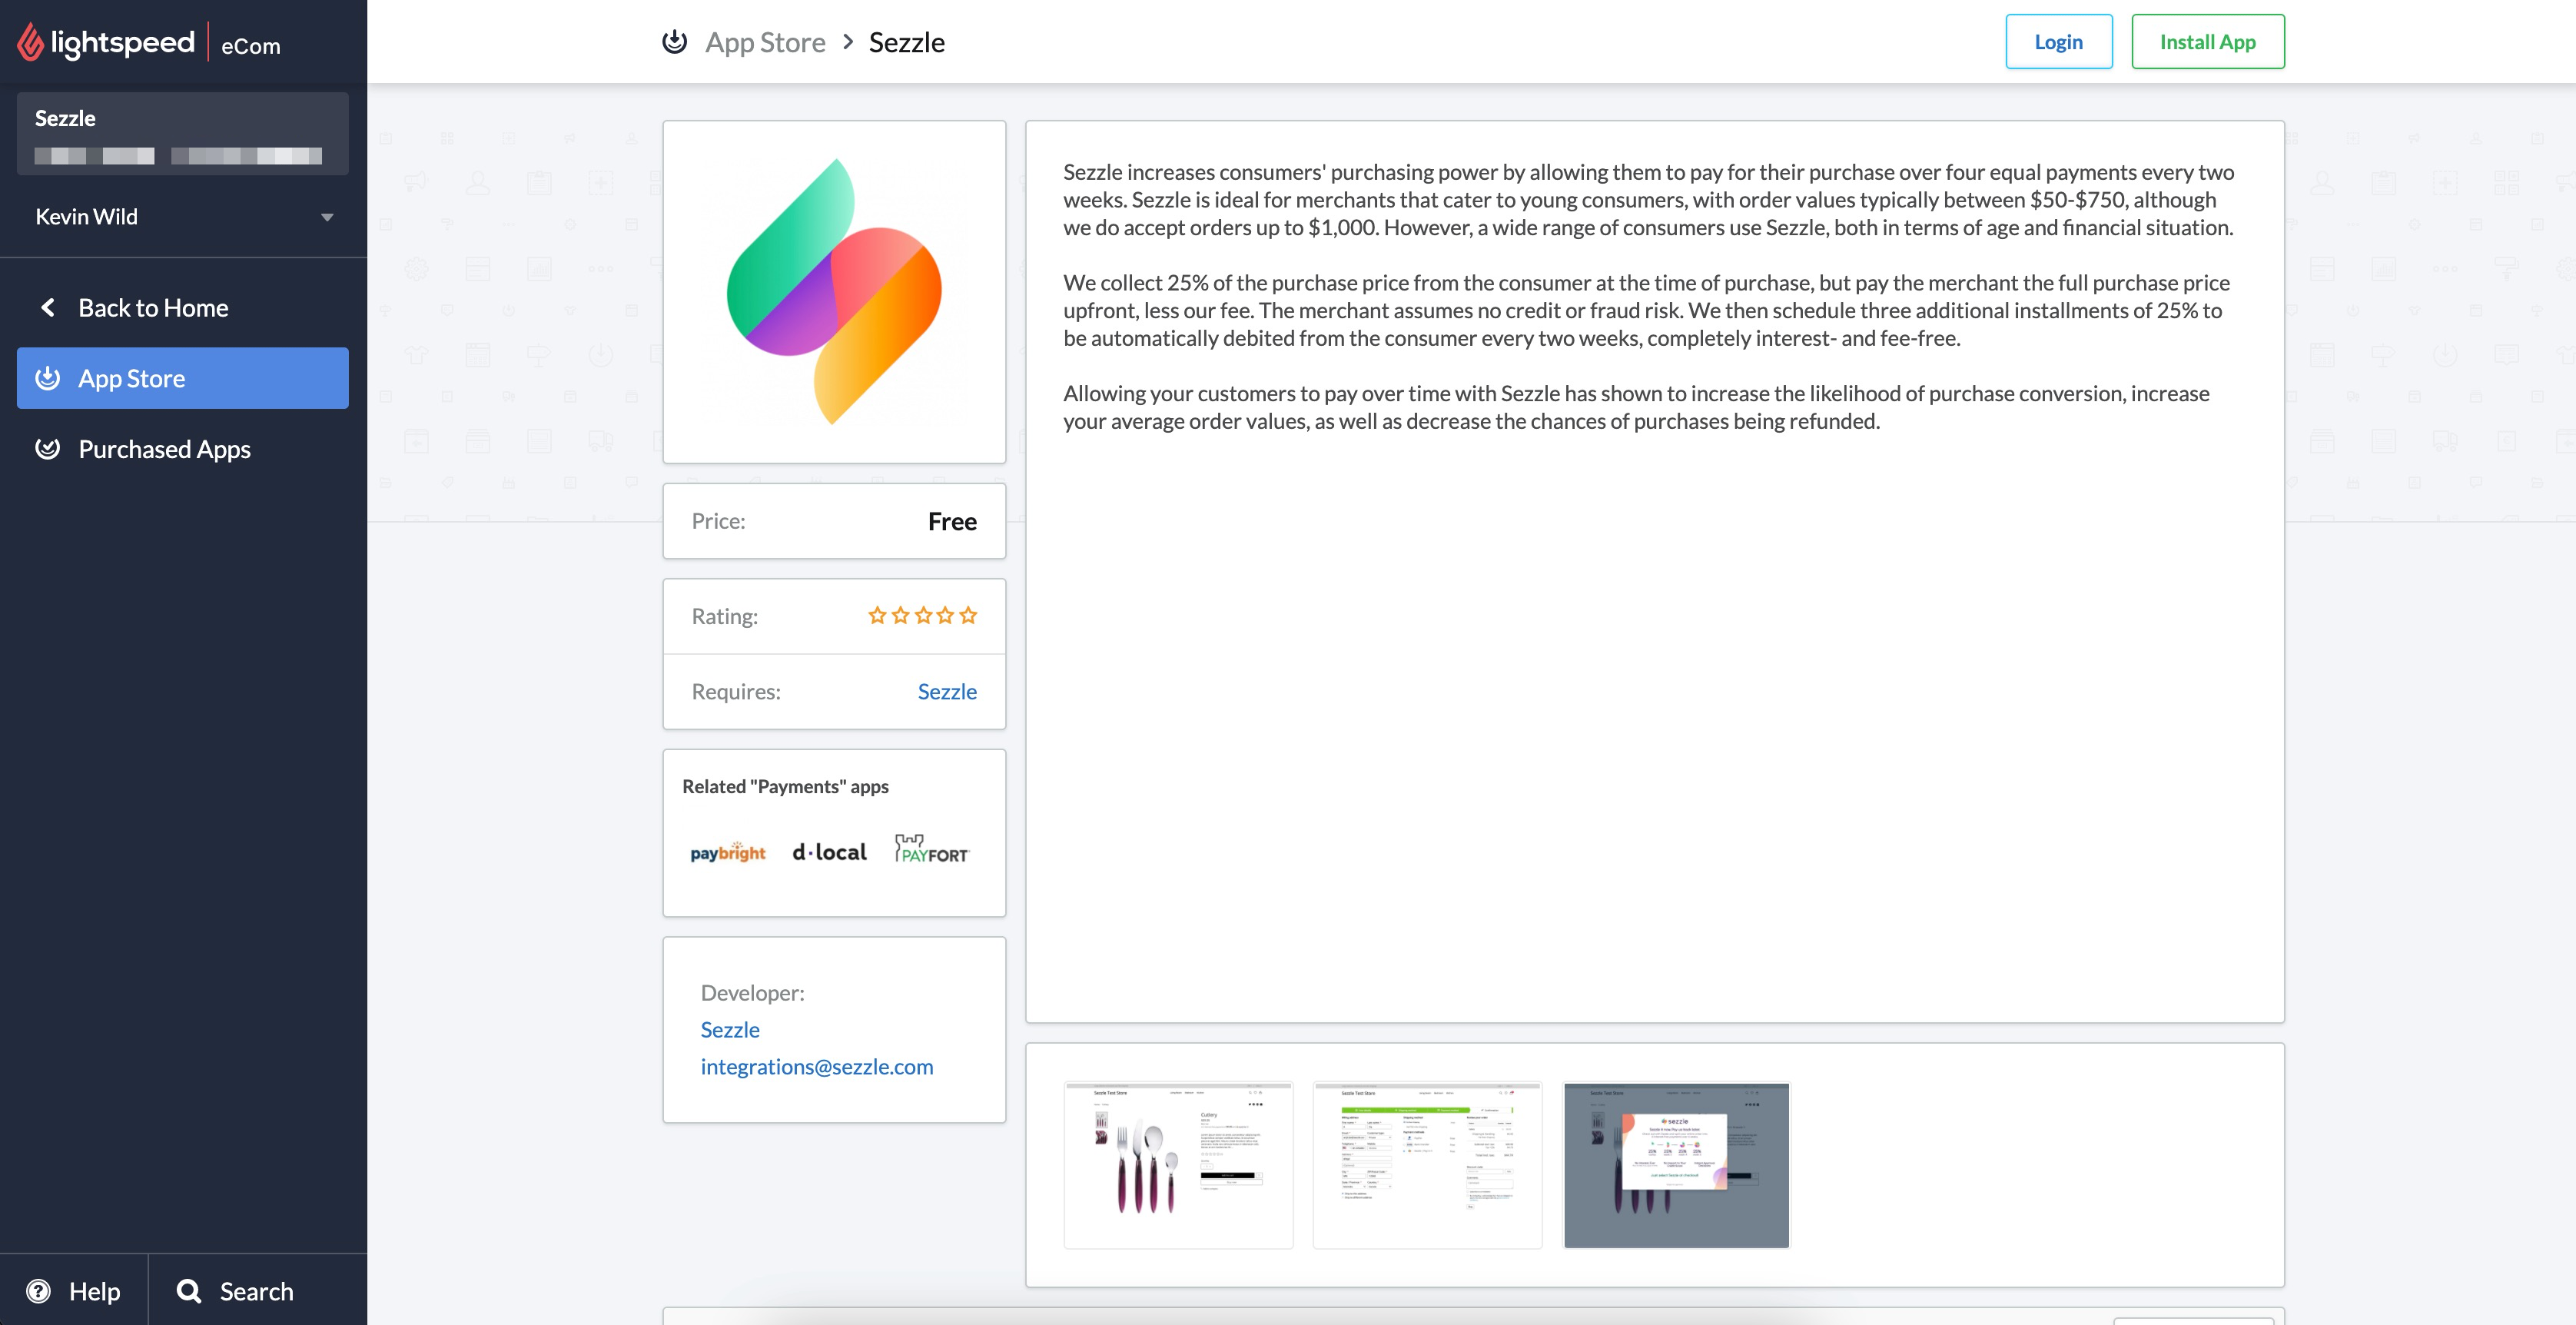 5. On successful install, you will be redirected to Sezzle App
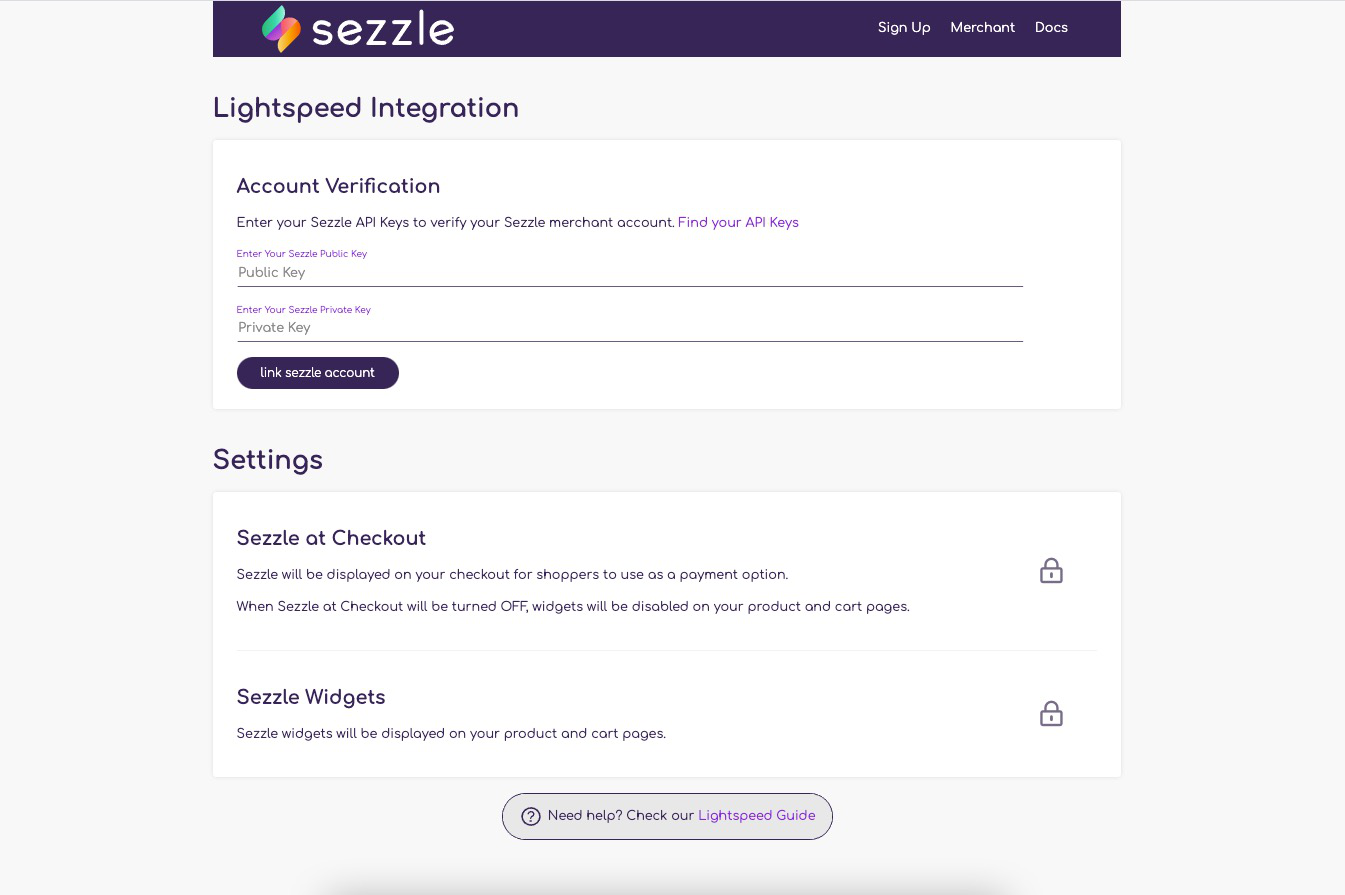 ### Configure Sezzle
1. Navigate to the Sezzle App by clicking on `Go to App` located at `Apps` > `Purchased Apps` > `Sezzle`
2. Copy your Public Key and Private Key from your [Sezzle Merchant Dashboard](https://dashboard.sezzle.com/merchant/settings/apikeys)
* Paste them into the corresponding fields
3. Click on `link sezzle account` to link your Sezzle account with your Lightspeed store
### Configure Sezzle
1. Navigate to the Sezzle App by clicking on `Go to App` located at `Apps` > `Purchased Apps` > `Sezzle`
2. Copy your Public Key and Private Key from your [Sezzle Merchant Dashboard](https://dashboard.sezzle.com/merchant/settings/apikeys)
* Paste them into the corresponding fields
3. Click on `link sezzle account` to link your Sezzle account with your Lightspeed store
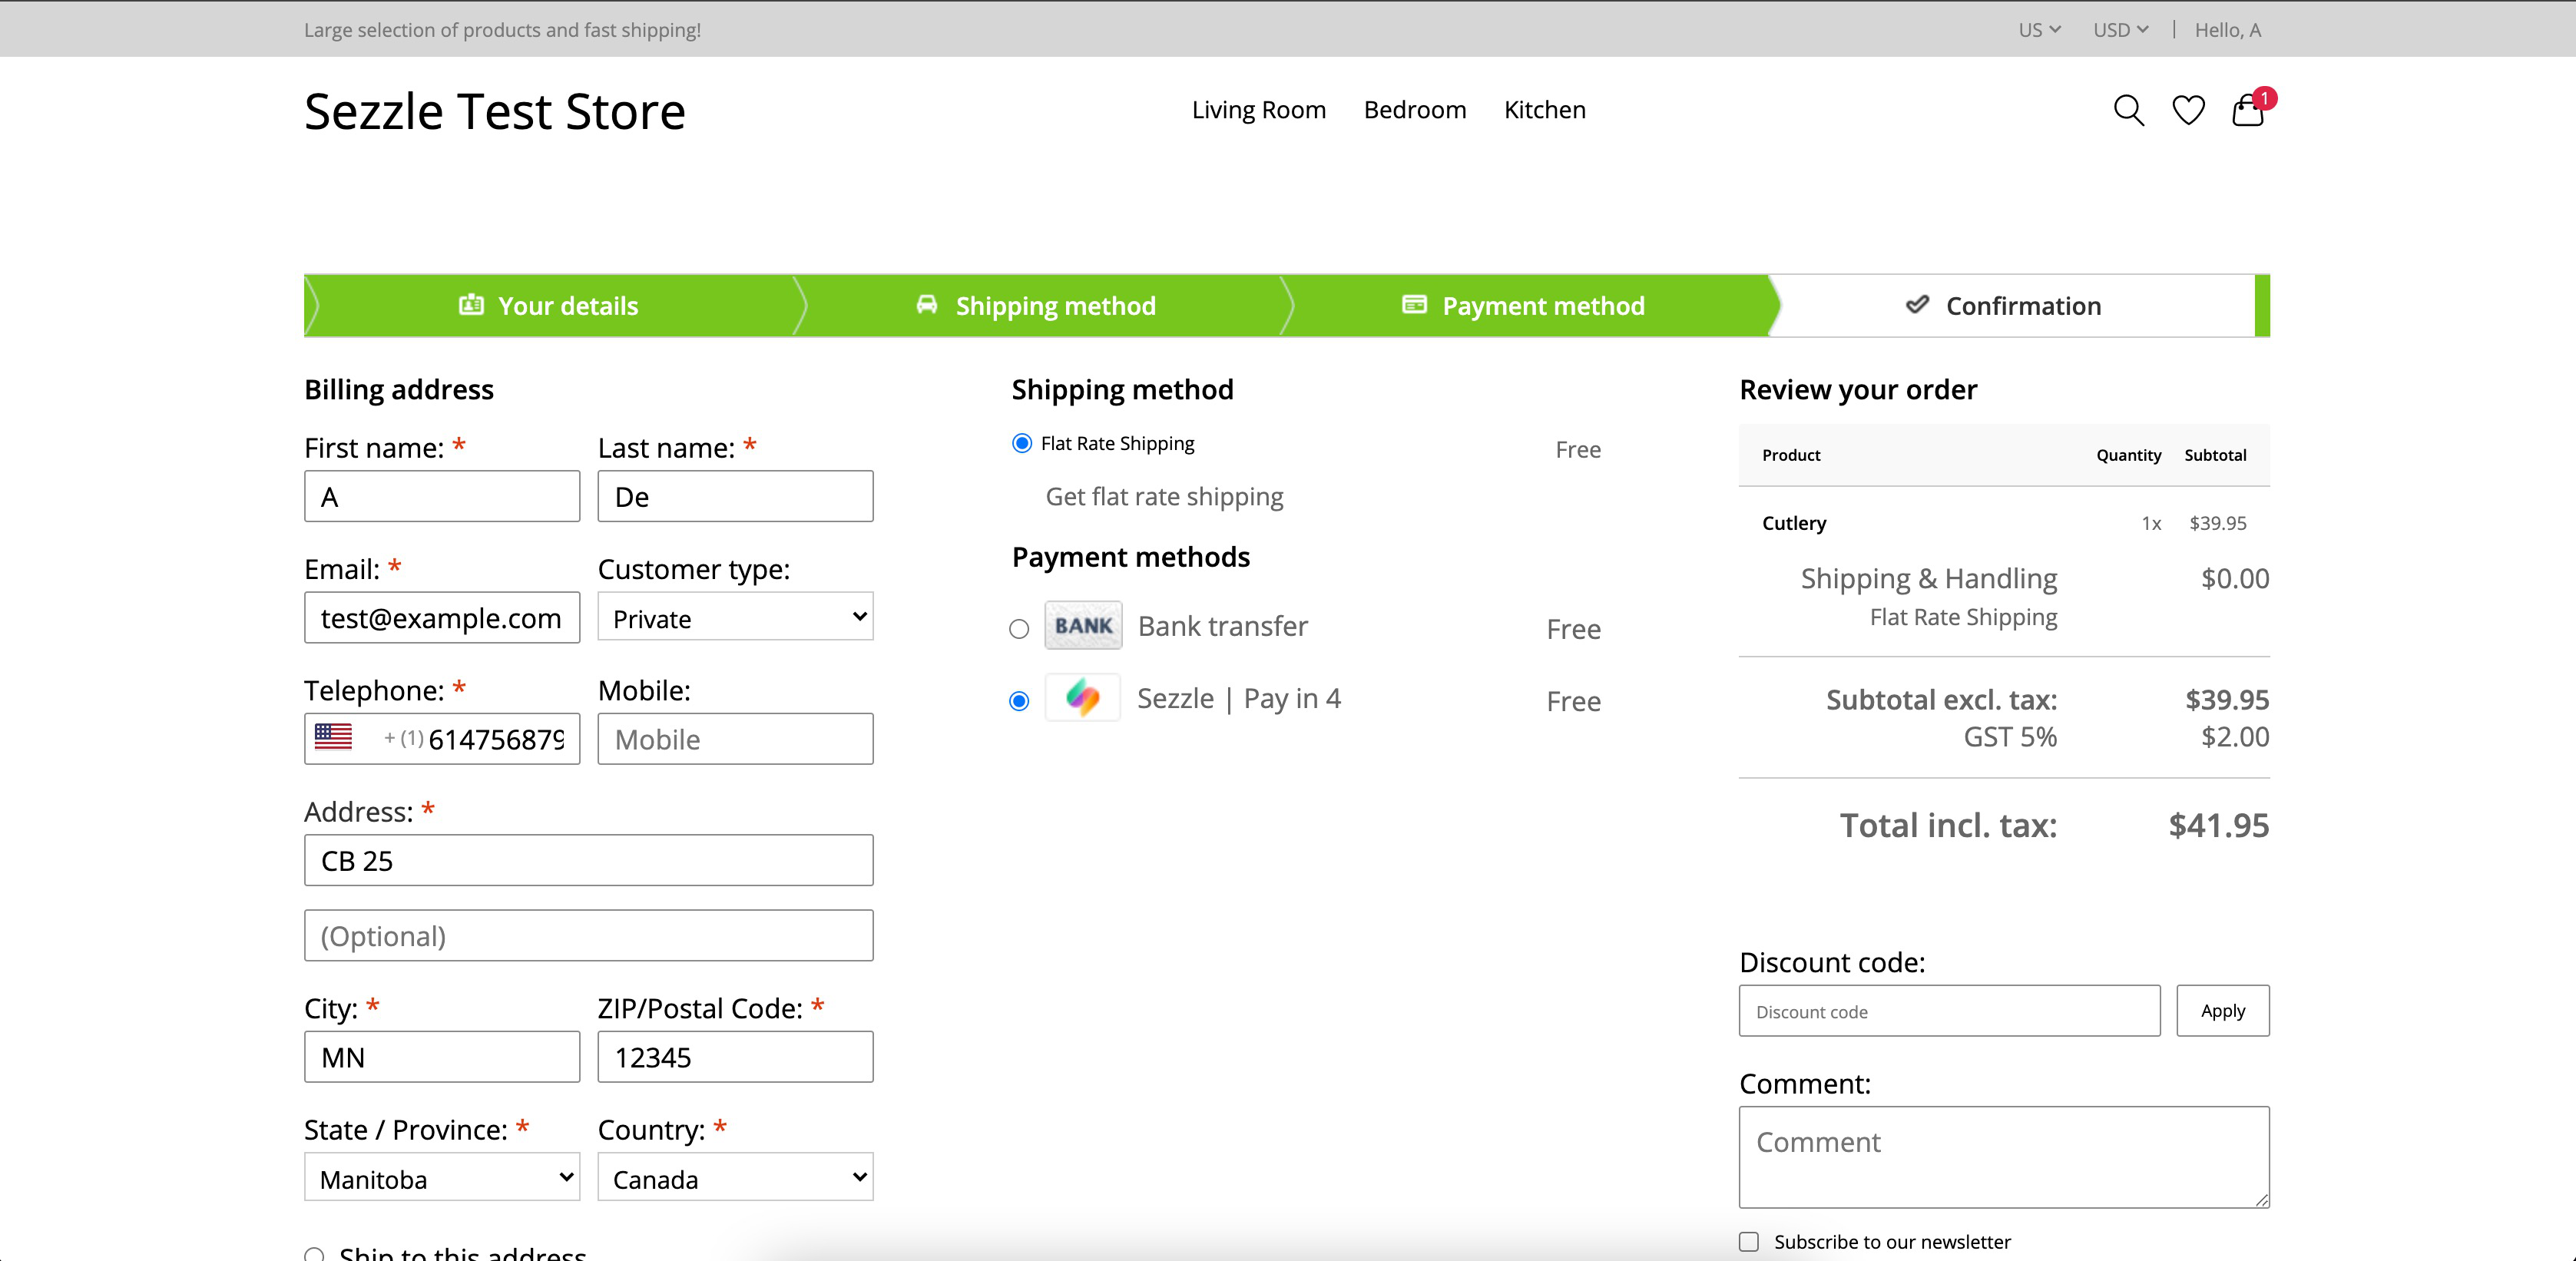
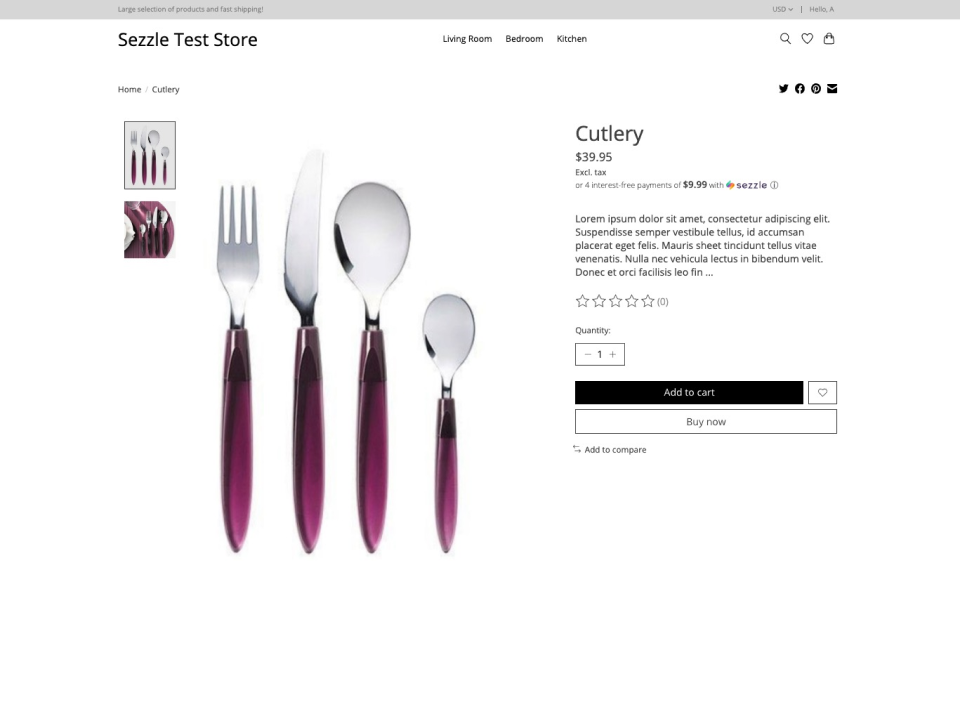
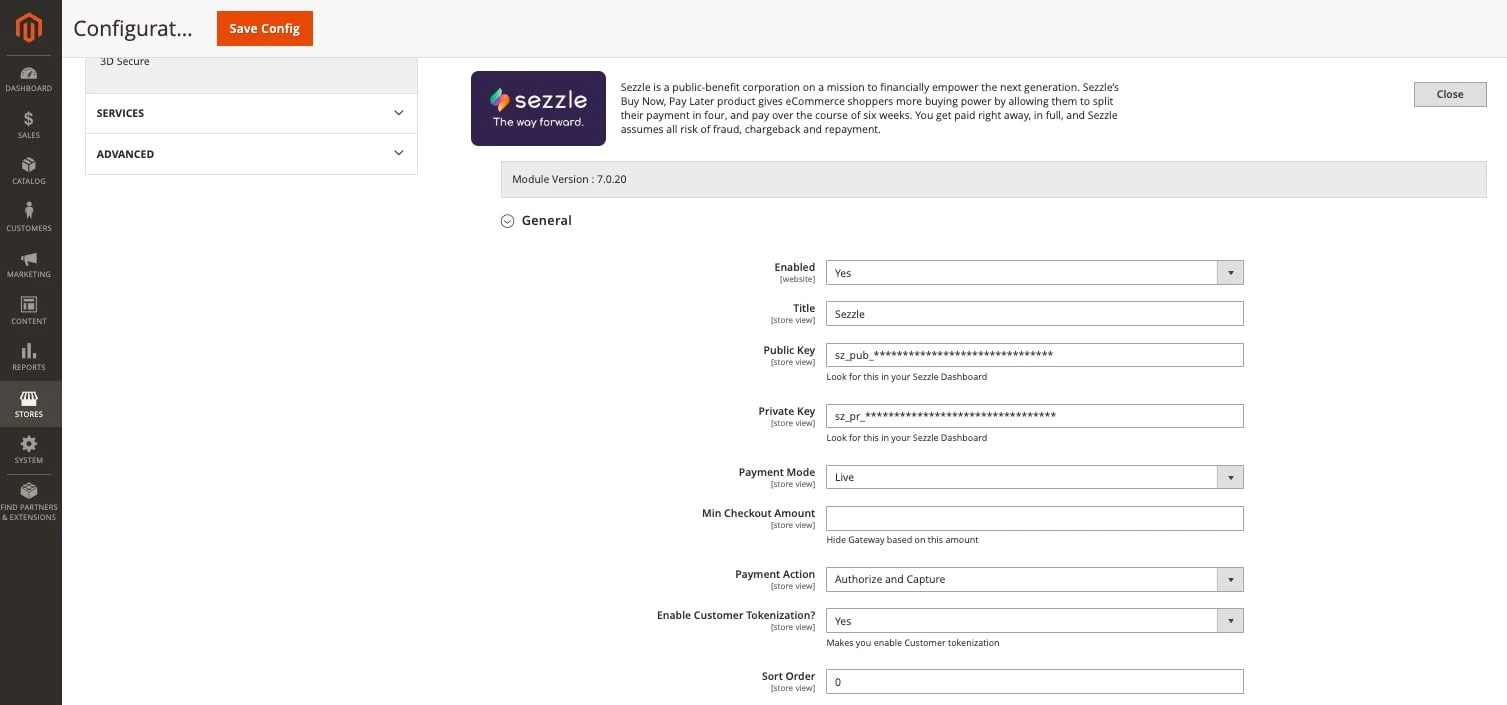 ### In-Context Settings
In-Context Solution opens Sezzle payment processing in an iframe or pop-up. When disabled, shoppers will be redirected to Sezzle for payment processing, then returned to the merchant site upon completion.
* Set `Enable In-Context Solution` to `Yes` to enable In-Context Checkout.
* Set `In-Context Checkout Mode`
* `IFrame` will open Sezzle in a modal over the merchant site
* For security reasons, Sezzle must whitelist site URL(s) wishing to use this option.
* `Pop Up` will open Sezzle in a new window
* This option works without additional configuration from Sezzle's end.
### In-Context Settings
In-Context Solution opens Sezzle payment processing in an iframe or pop-up. When disabled, shoppers will be redirected to Sezzle for payment processing, then returned to the merchant site upon completion.
* Set `Enable In-Context Solution` to `Yes` to enable In-Context Checkout.
* Set `In-Context Checkout Mode`
* `IFrame` will open Sezzle in a modal over the merchant site
* For security reasons, Sezzle must whitelist site URL(s) wishing to use this option.
* `Pop Up` will open Sezzle in a new window
* This option works without additional configuration from Sezzle's end.
 ### Settlement Report Settings
1. Set `Enable Settlement Reports` to `Yes` to enable the Settlement Reports Dashboard
2. Set `Range` to a value based on which you want to fetch the Settlement Reports
3. Set `Enable Automatic Syncing` to fetch the Settlement Reports asynchronously
### Settlement Report Settings
1. Set `Enable Settlement Reports` to `Yes` to enable the Settlement Reports Dashboard
2. Set `Range` to a value based on which you want to fetch the Settlement Reports
3. Set `Enable Automatic Syncing` to fetch the Settlement Reports asynchronously
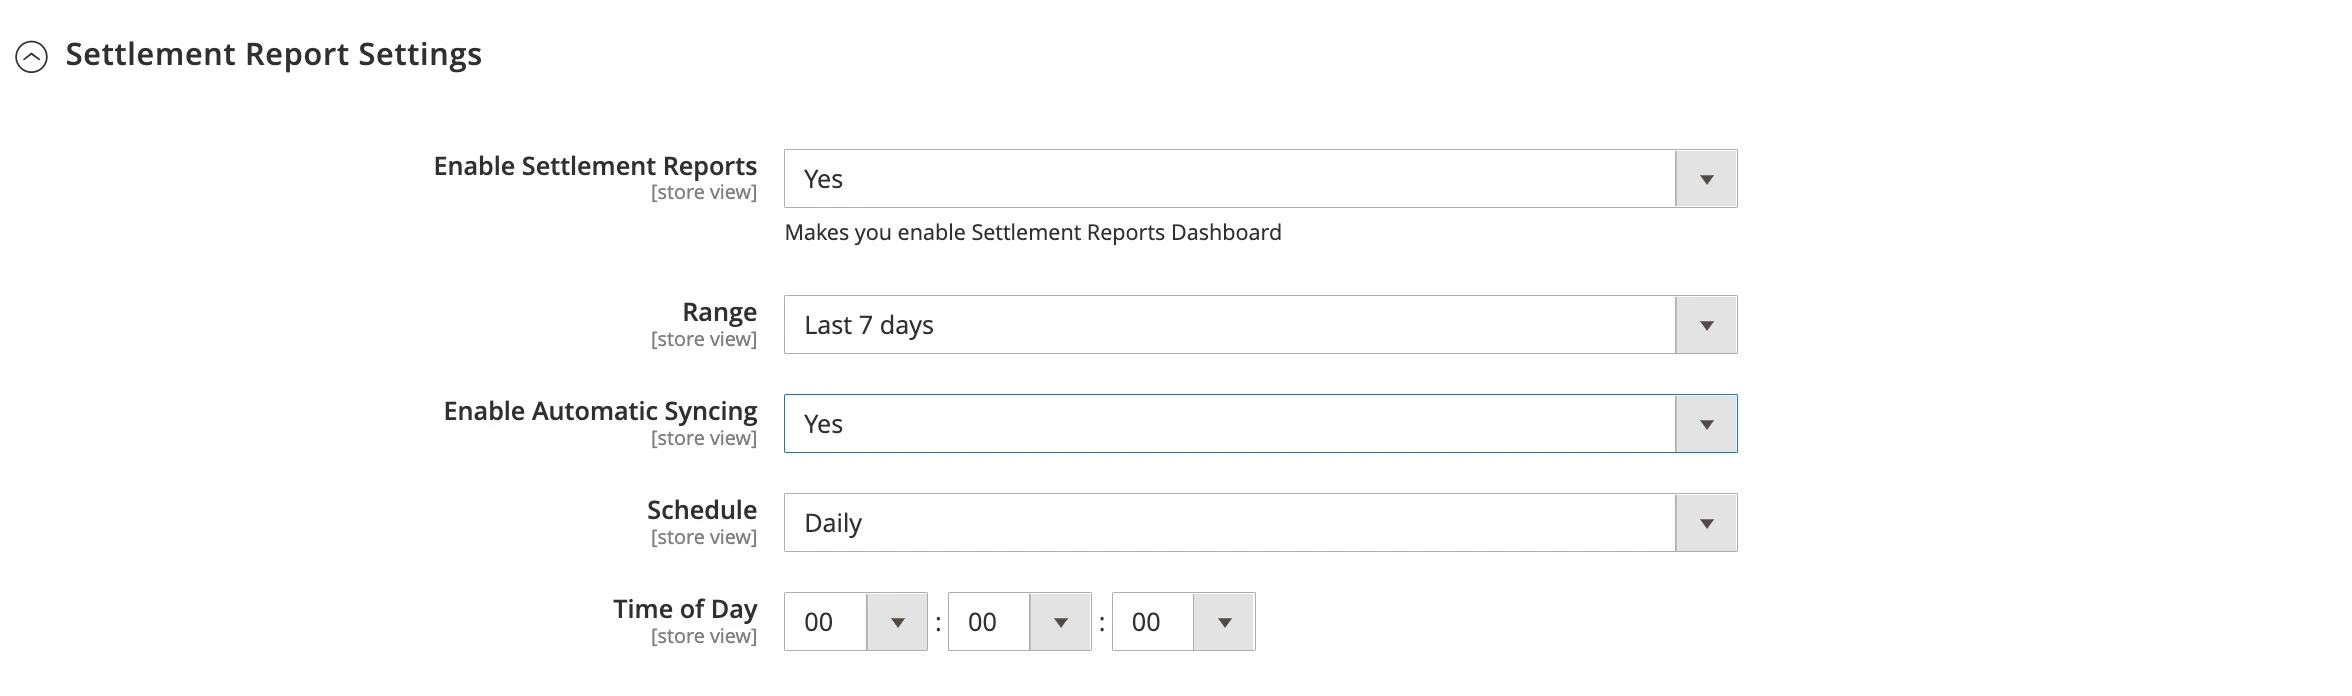 ### Widget Settings
1. Set `Enable Widget in PDP` to `Yes` to display Sezzle on-site messaging after the product price on the Product Detail Page
2. Set `Enable Widget in Cart Page` to `Yes` to display Sezzle on-site messaging after the cart total on the Cart Page
3. Set `Enable Installment Widget in Checkout Page` to `Yes` to show the Sezzle installment plan widget under the Sezzle payment option on the Checkout Page
4. Set `Path to Price Element` to define where in the Checkout Page the order total text value will be detected for the installment widget
5. Save the configuration and clear the cache
### Widget Settings
1. Set `Enable Widget in PDP` to `Yes` to display Sezzle on-site messaging after the product price on the Product Detail Page
2. Set `Enable Widget in Cart Page` to `Yes` to display Sezzle on-site messaging after the cart total on the Cart Page
3. Set `Enable Installment Widget in Checkout Page` to `Yes` to show the Sezzle installment plan widget under the Sezzle payment option on the Checkout Page
4. Set `Path to Price Element` to define where in the Checkout Page the order total text value will be detected for the installment widget
5. Save the configuration and clear the cache
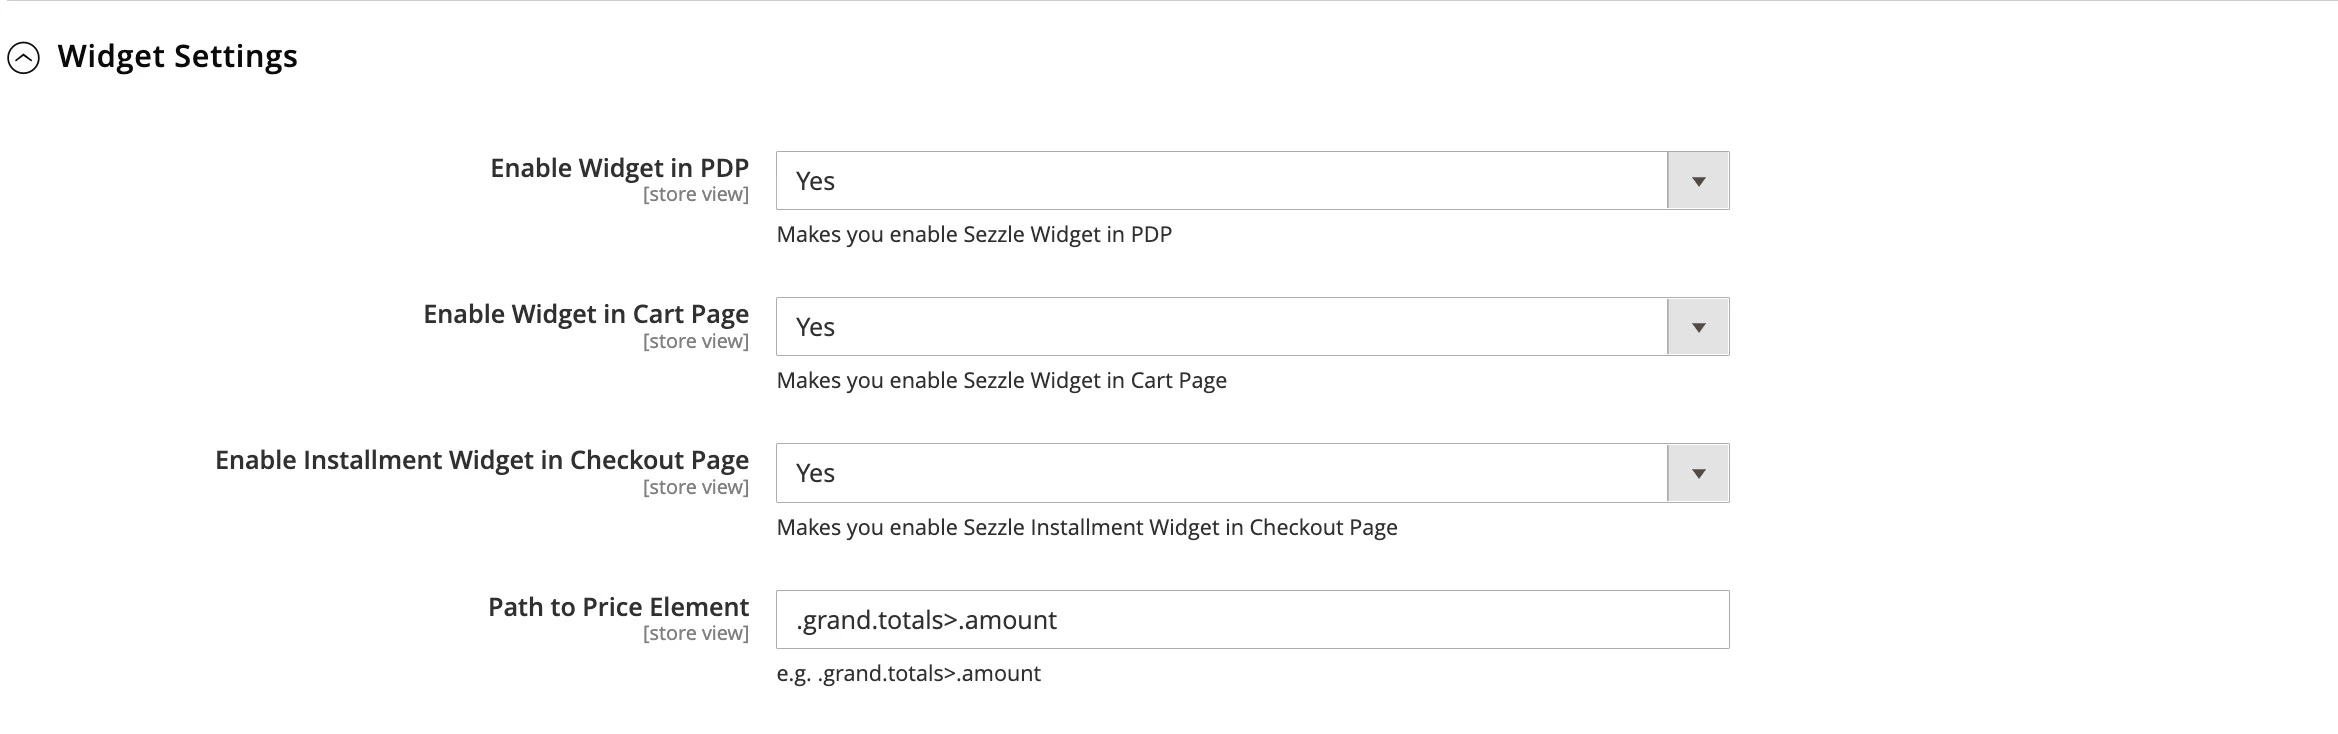
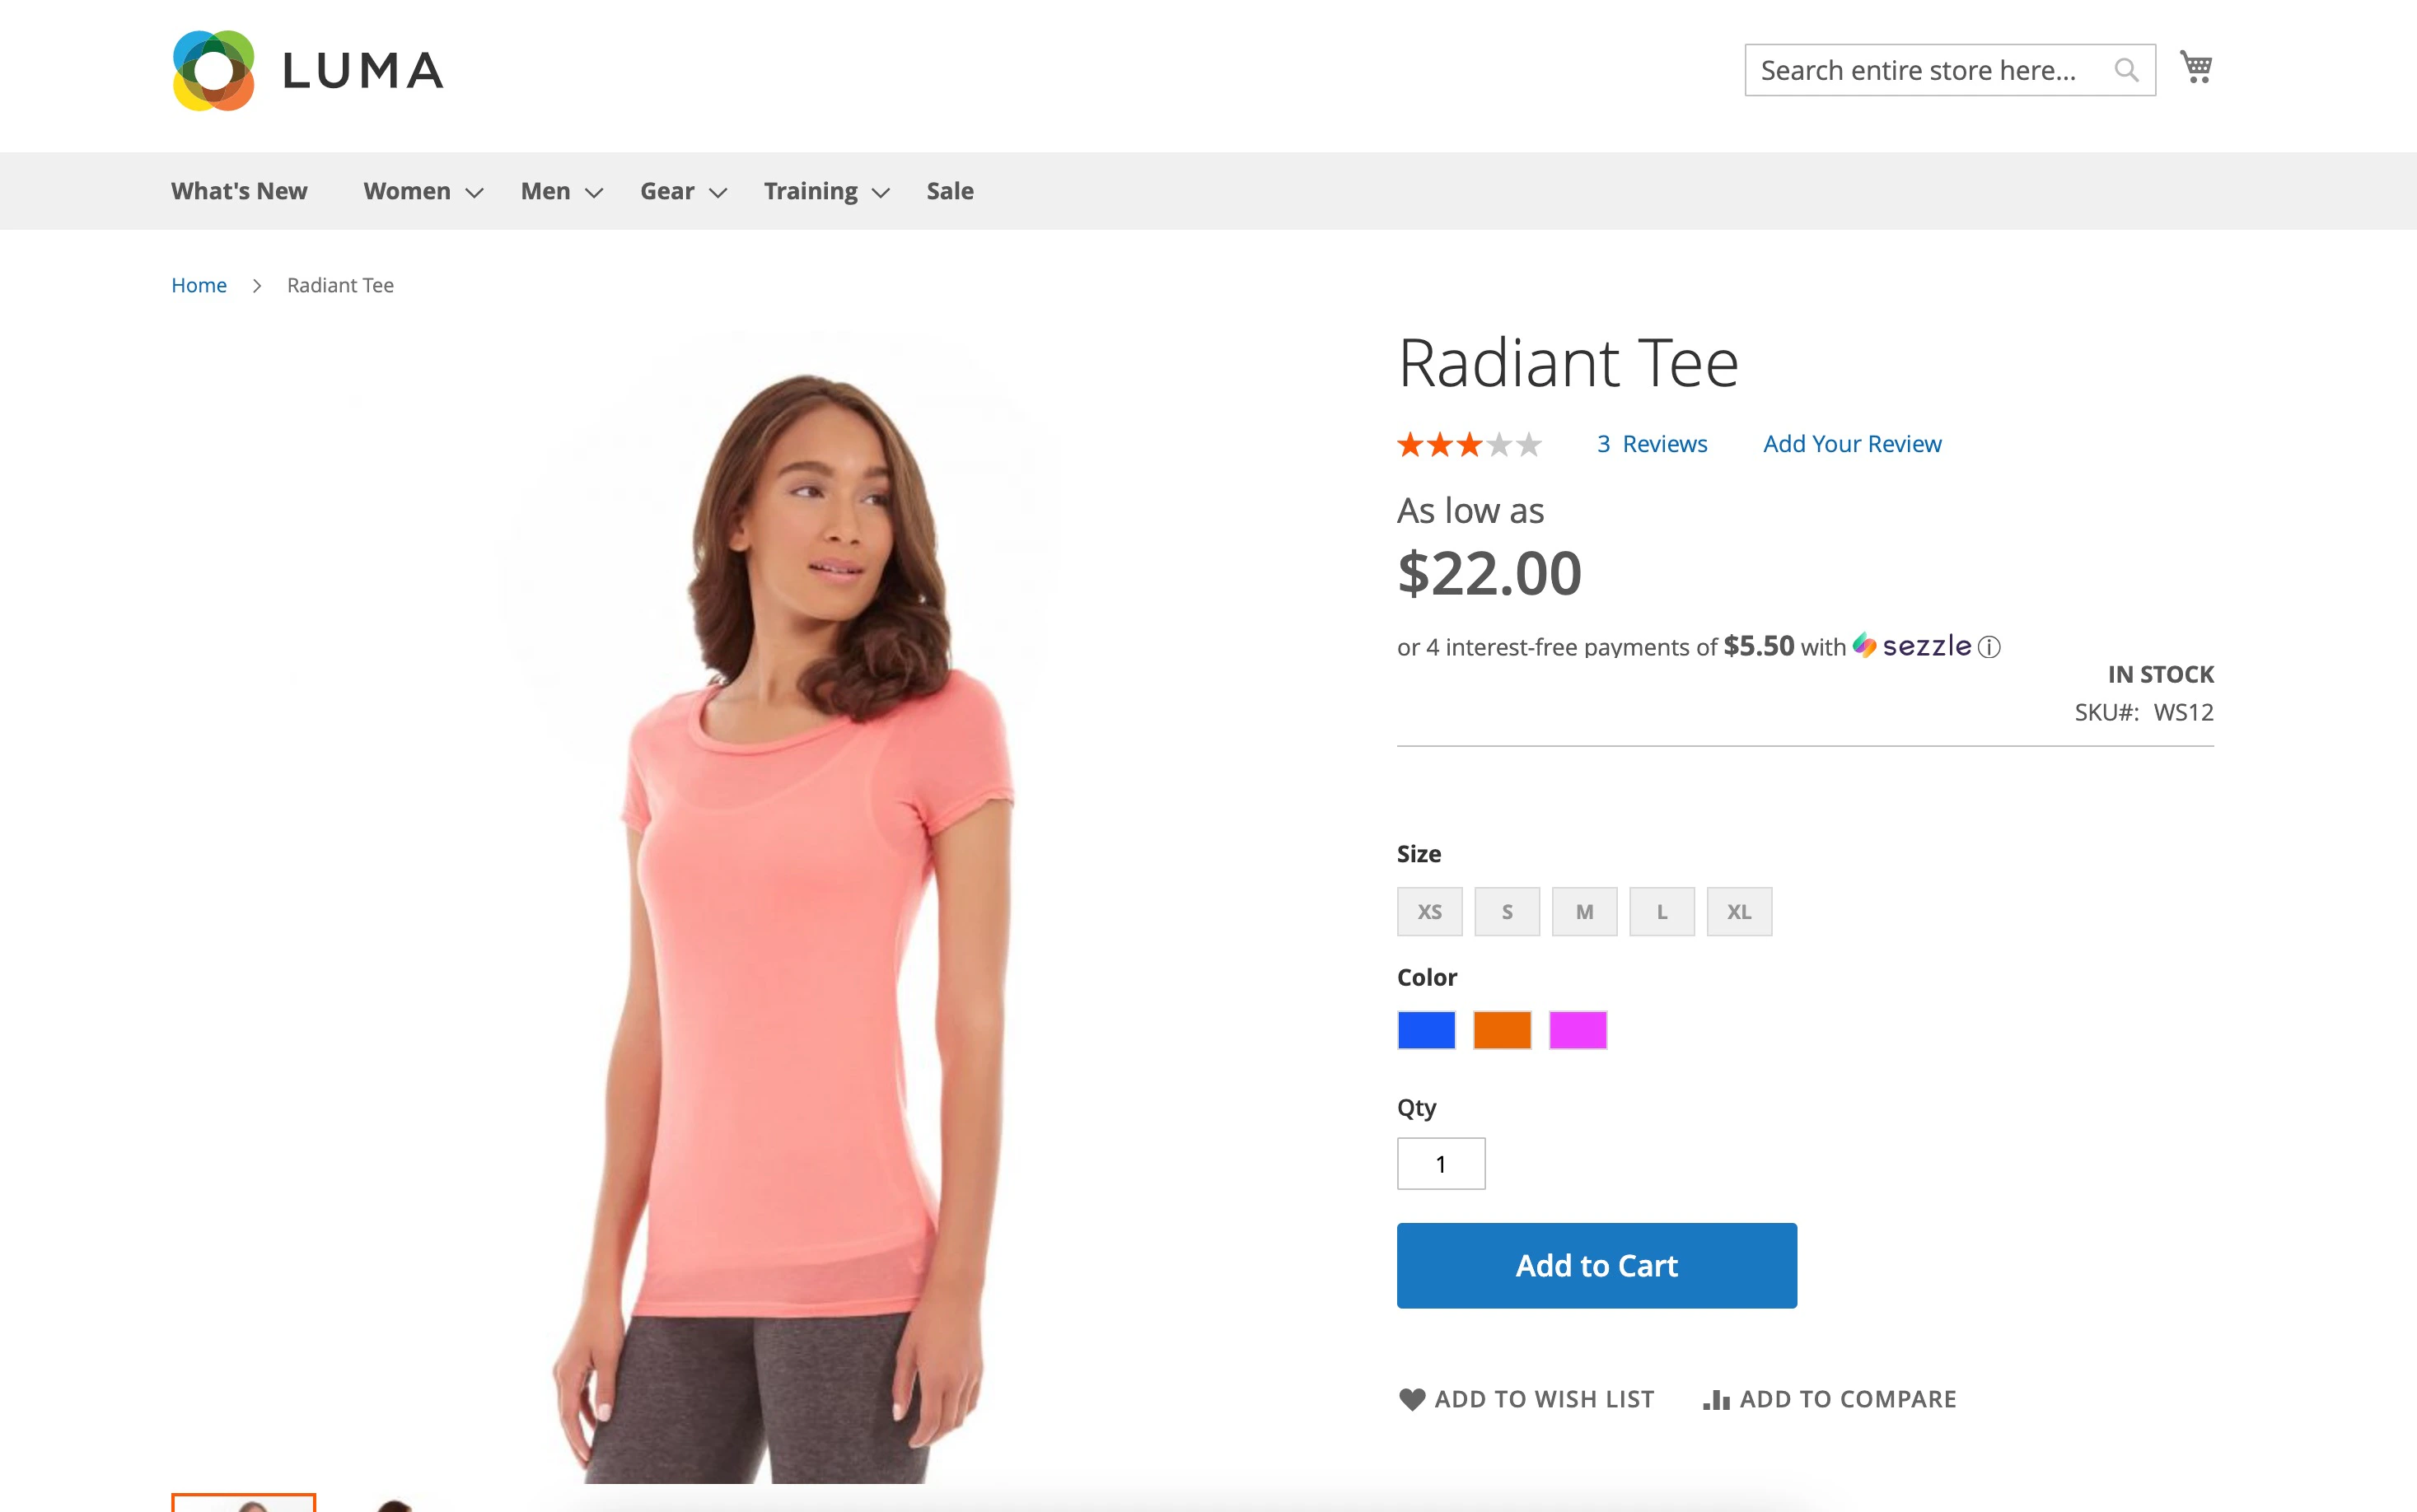
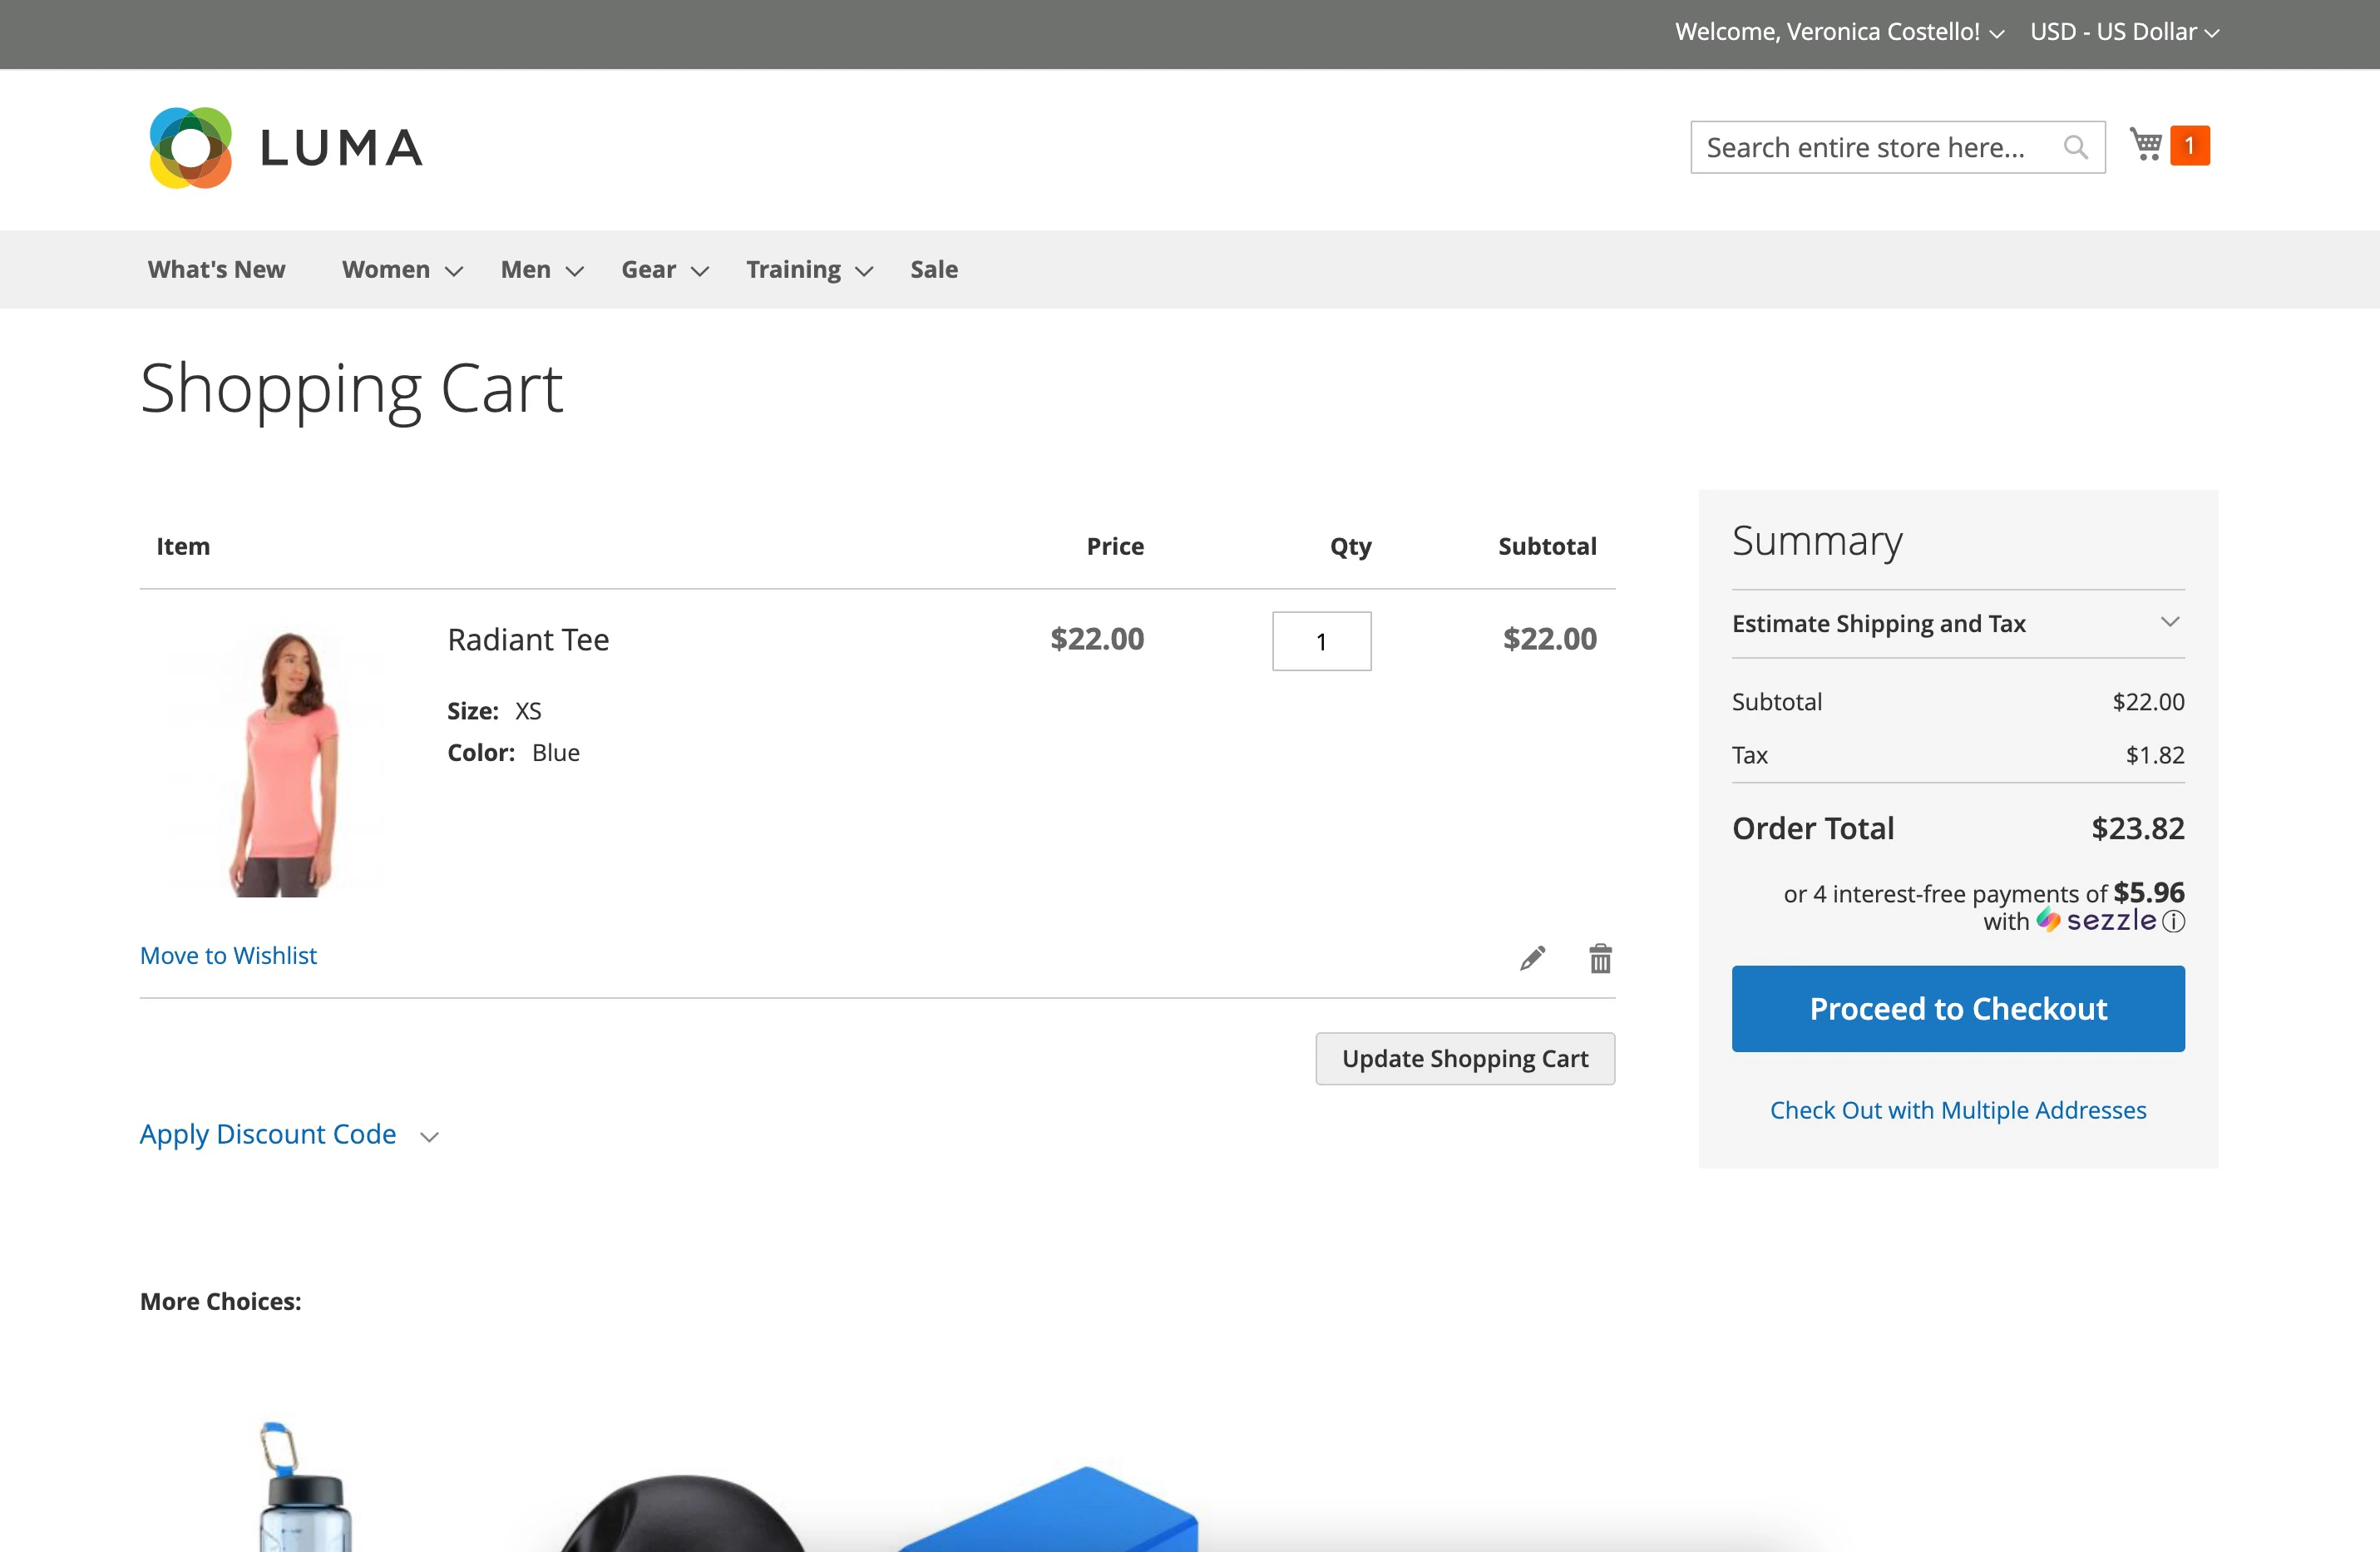 ### Widget Support
If widgets do not appear on the PDP and/or cart page after enabling the `Widget Settings`, click the `Request` button in this section to contact the Sezzle Widget team for assistance.
### Widget Support
If widgets do not appear on the PDP and/or cart page after enabling the `Widget Settings`, click the `Request` button in this section to contact the Sezzle Widget team for assistance.
 ### Developer Settings
1. Set Enable Log Tracker to Yes to trace the Sezzle checkout process
2. Set Send Logs to Sezzle to Yes to send the logs to Sezzle automatically
### Developer Settings
1. Set Enable Log Tracker to Yes to trace the Sezzle checkout process
2. Set Send Logs to Sezzle to Yes to send the logs to Sezzle automatically
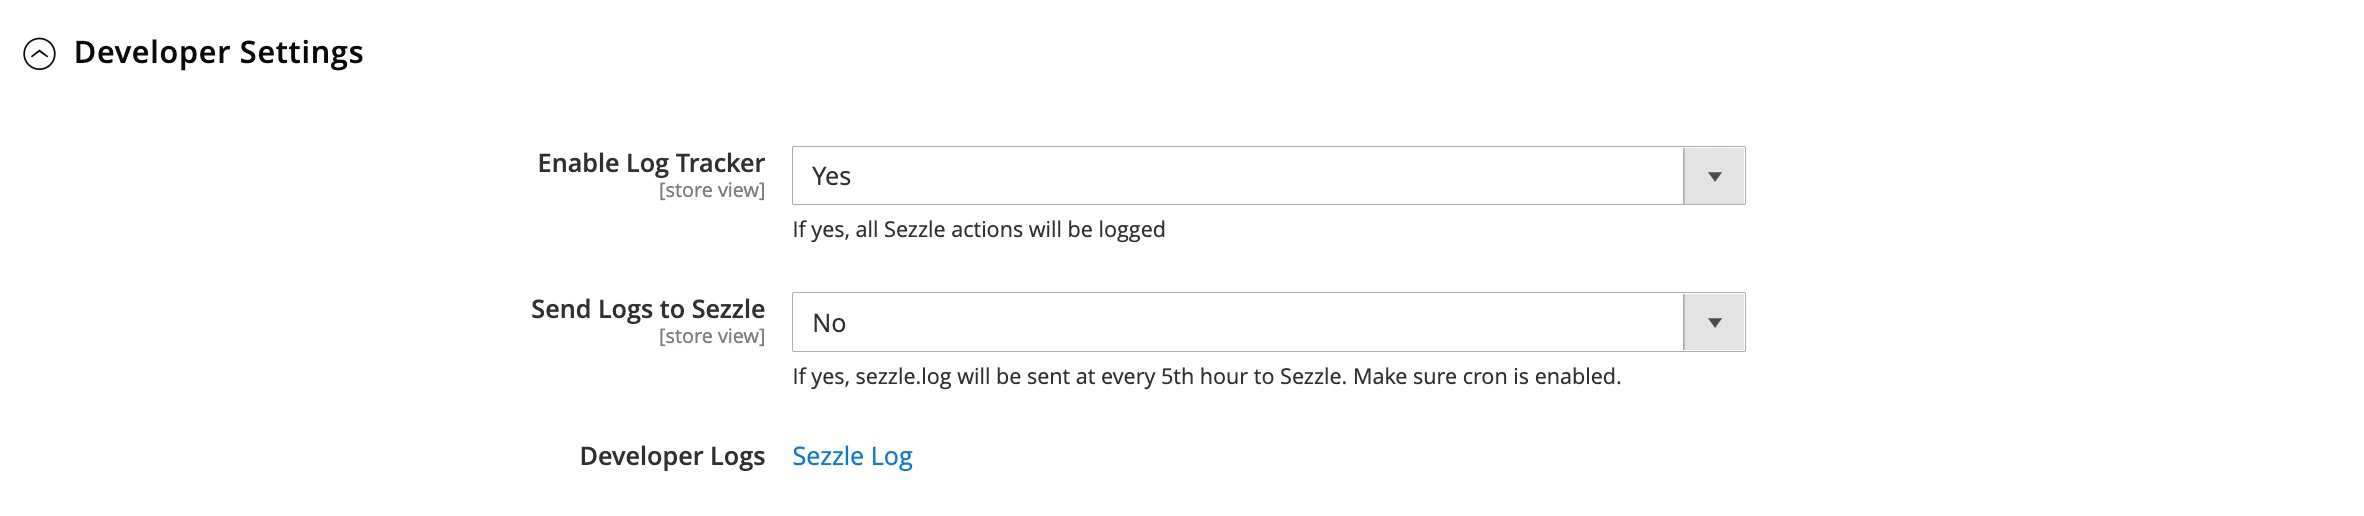 ### Clearing the Cache
1. Navigate to `System` > `Cache Management`
2. Click `Flush Cache Storage`
* Your store is now ready to accept payments through Sezzle
## Sezzle Order Management
### Sandbox Testing
1. On your dev/staging site, go to `Stores` > `Configuration` > `Sales` > `Payment Methods` > `Additional Payment Solutions`
2. Next to `Sezzle`, click `Configure`
3. Under `General`, update `Payment Mode to Sandbox`
4. Replace Public Key and Private Key with the API keys from your [Sezzle Merchant Sandbox Dashboard](https://dashboard.sezzle.com/merchant/settings/apikeys)
5. Click `Save Config`
6. On your website, add an item to the cart, then proceed to checkout and select Sezzle as the payment method
1. If customer is not tokenized, click `Continue to Sezzle`
2. If customer is tokenized, click `Place Order`
3. If In-Context checkout, click `Pay with Sezzle`
7. Sign In to Sezzle or Sign Up to continue
8. Enter the payment details using [test data](https://docs.sezzle.com/docs/api/core/test-data/#checkout-testing), then proceed to the final page
9. Check the `Approve {Website Name}` to process payments from your Sezzle account for future transactions
### Clearing the Cache
1. Navigate to `System` > `Cache Management`
2. Click `Flush Cache Storage`
* Your store is now ready to accept payments through Sezzle
## Sezzle Order Management
### Sandbox Testing
1. On your dev/staging site, go to `Stores` > `Configuration` > `Sales` > `Payment Methods` > `Additional Payment Solutions`
2. Next to `Sezzle`, click `Configure`
3. Under `General`, update `Payment Mode to Sandbox`
4. Replace Public Key and Private Key with the API keys from your [Sezzle Merchant Sandbox Dashboard](https://dashboard.sezzle.com/merchant/settings/apikeys)
5. Click `Save Config`
6. On your website, add an item to the cart, then proceed to checkout and select Sezzle as the payment method
1. If customer is not tokenized, click `Continue to Sezzle`
2. If customer is tokenized, click `Place Order`
3. If In-Context checkout, click `Pay with Sezzle`
7. Sign In to Sezzle or Sign Up to continue
8. Enter the payment details using [test data](https://docs.sezzle.com/docs/api/core/test-data/#checkout-testing), then proceed to the final page
9. Check the `Approve {Website Name}` to process payments from your Sezzle account for future transactions
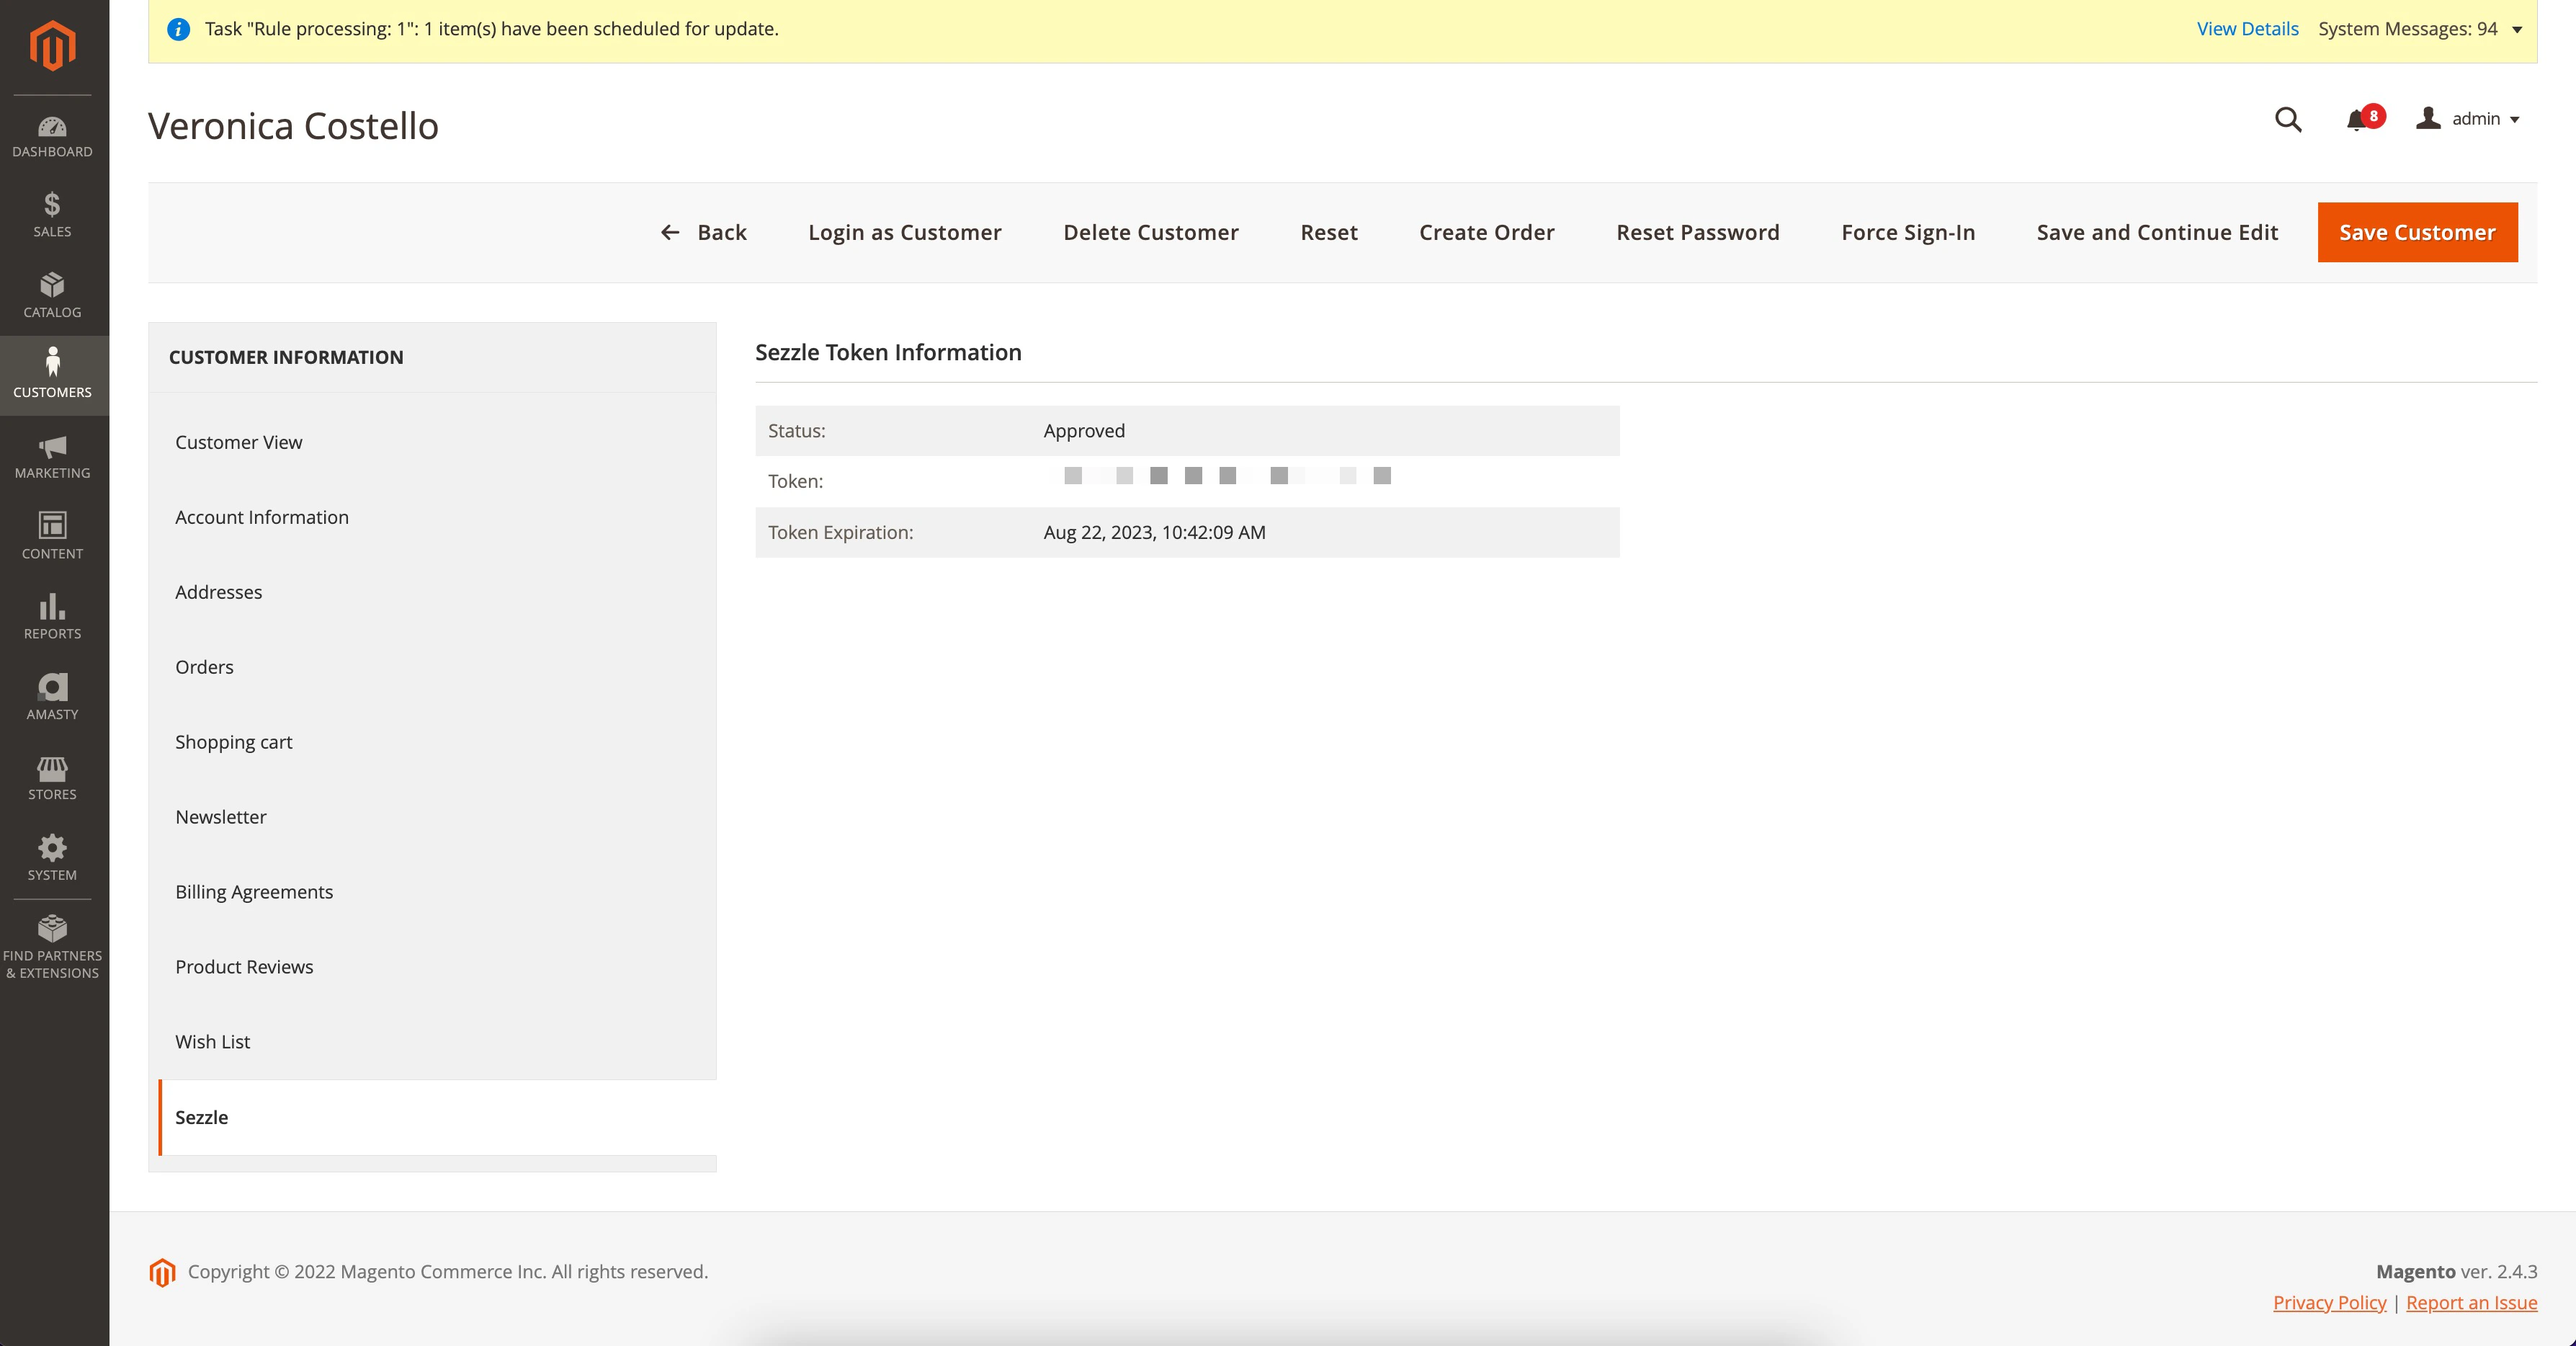 ### Settlement Reports
1. Navigate to `Reports` > `Sales` > `Sezzle Settlement`
* A list of recent Settlement Reports will be shown
2. To make a Quick Sync, enter the From and To Date and click `Sync`
3. To view details of a report, in the `Action` column, click `View`
4. To download a report, in the `Action` column, click `Download`
* You can download the Settlement Report in `CSV` or `Excel` format
### Settlement Reports
1. Navigate to `Reports` > `Sales` > `Sezzle Settlement`
* A list of recent Settlement Reports will be shown
2. To make a Quick Sync, enter the From and To Date and click `Sync`
3. To view details of a report, in the `Action` column, click `View`
4. To download a report, in the `Action` column, click `Download`
* You can download the Settlement Report in `CSV` or `Excel` format
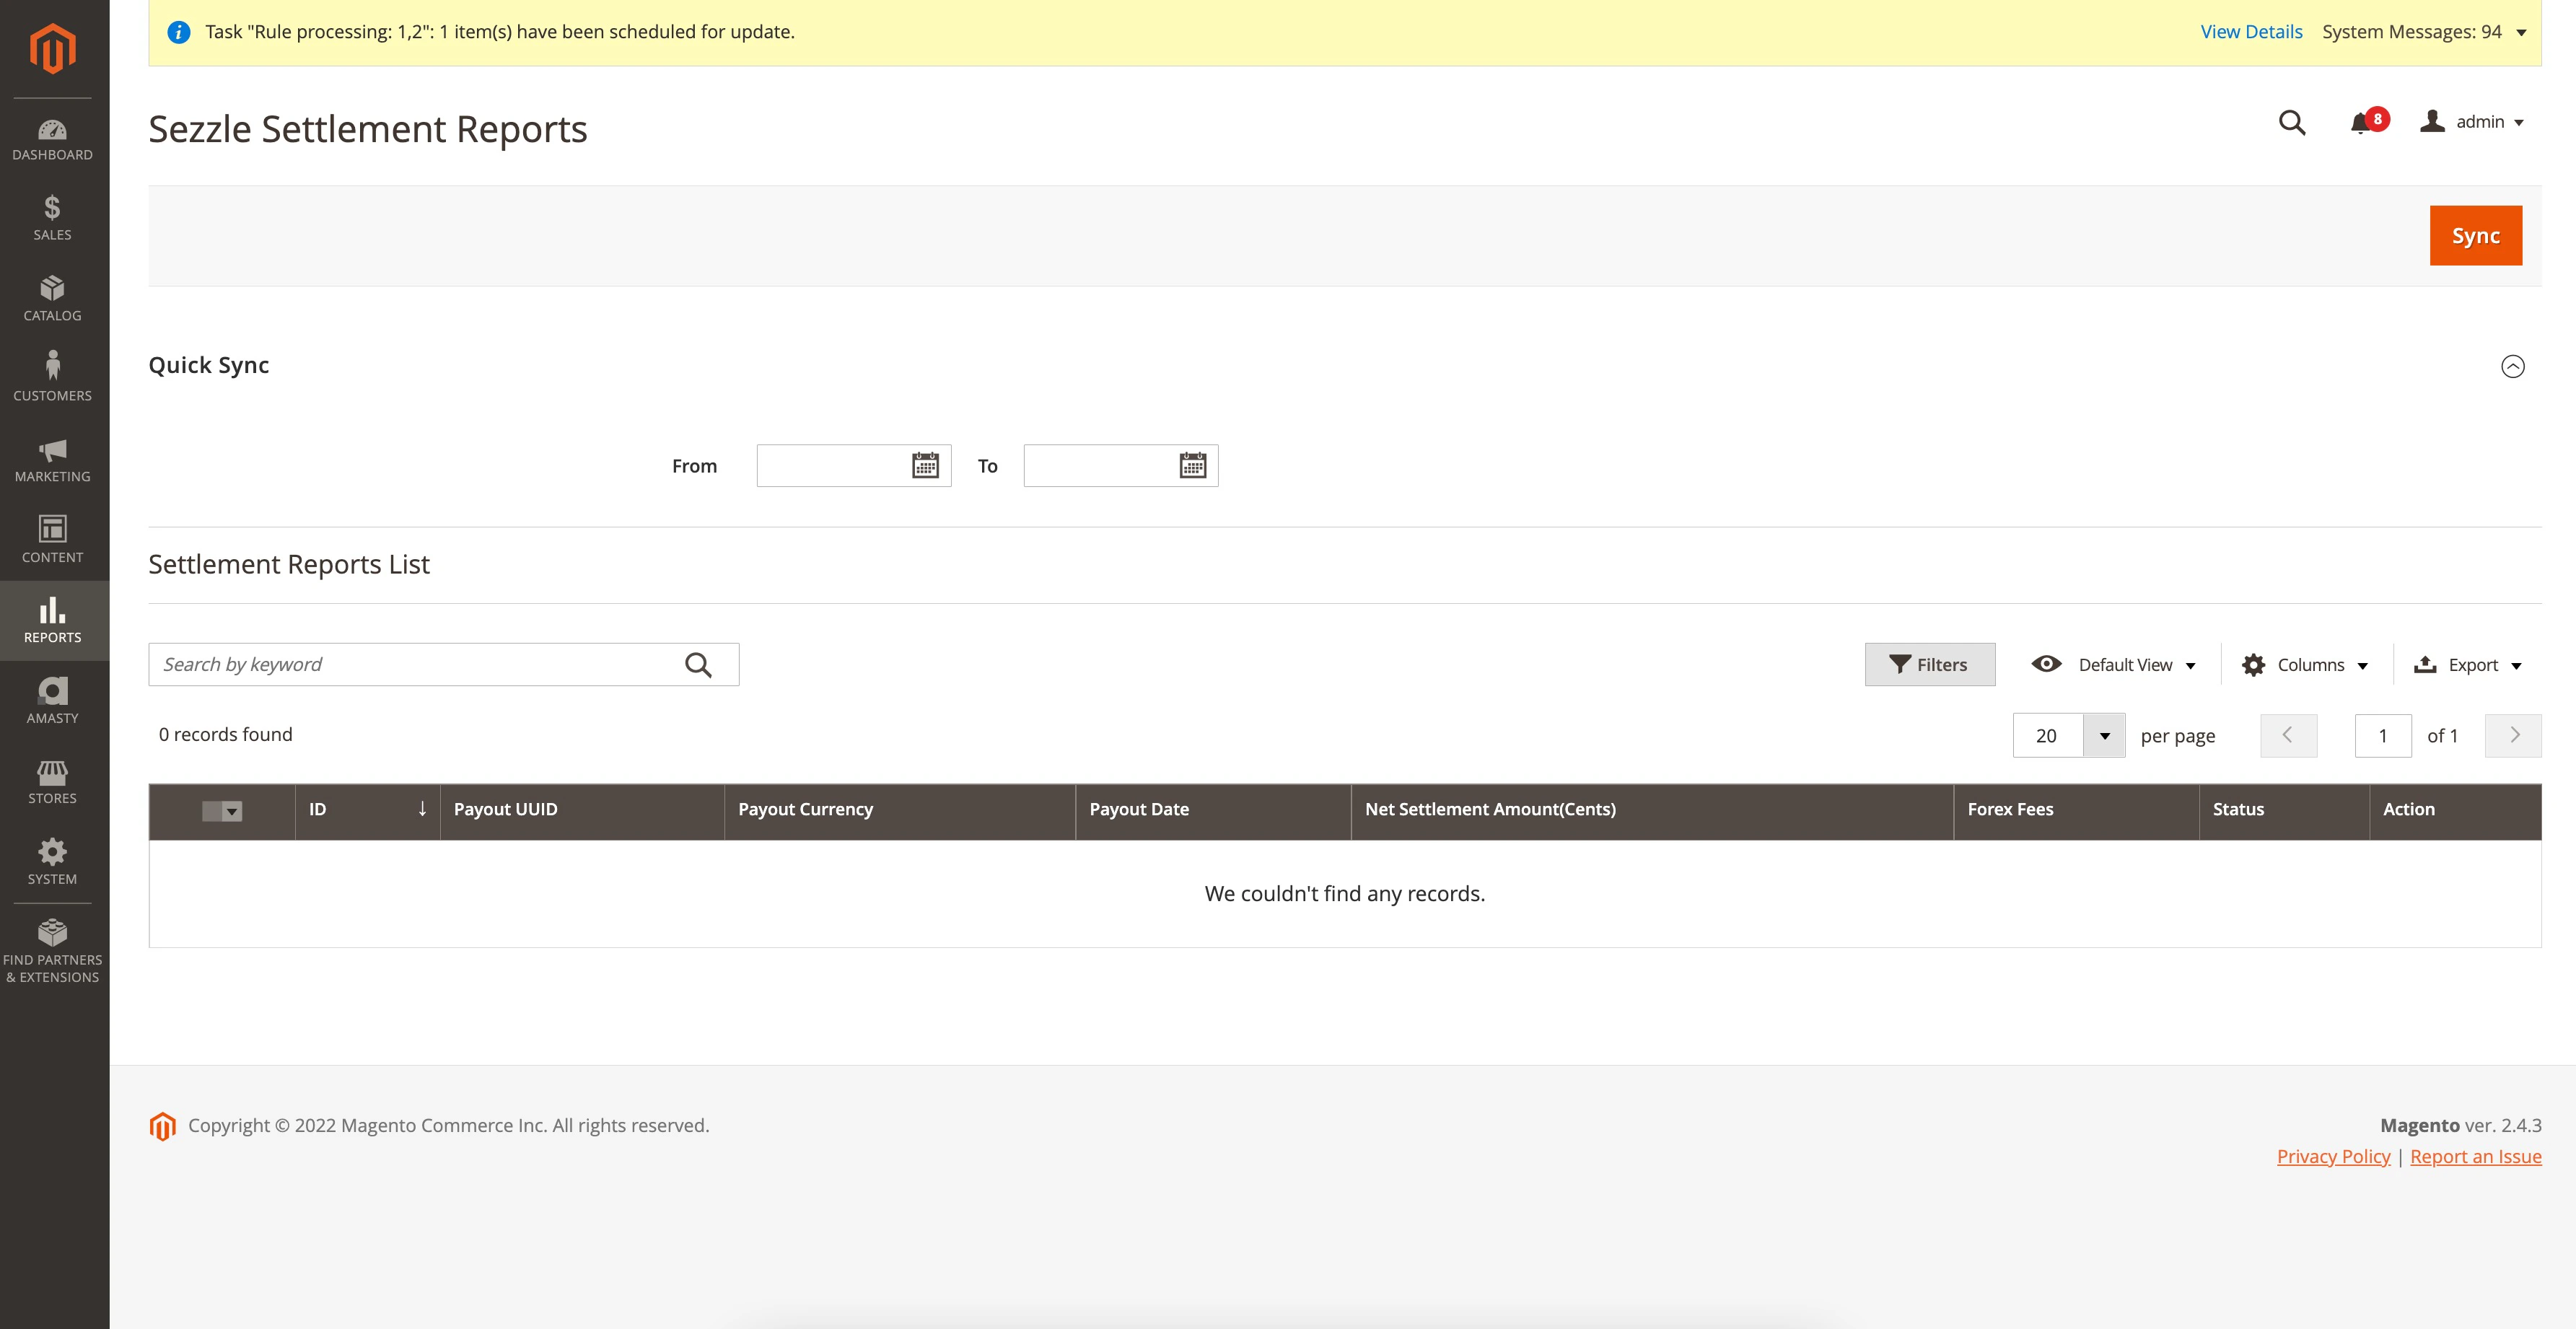 ## Troubleshooting
If testing was unsuccessful, review the following:
1. Sezzle-Magento2 extension is the latest version
2. Sezzle extension is enabled
1. Go to `Stores` > `Configuration` > `Sales` > `Payment Methods` > `Additional Payment Solutions`
2. Next to `Sezzle`, click `Configure`
3. Ensure `Enabled` is set to `Yes`
3. API Keys were entered correctly, and for the correct environment
## Troubleshooting
If testing was unsuccessful, review the following:
1. Sezzle-Magento2 extension is the latest version
2. Sezzle extension is enabled
1. Go to `Stores` > `Configuration` > `Sales` > `Payment Methods` > `Additional Payment Solutions`
2. Next to `Sezzle`, click `Configure`
3. Ensure `Enabled` is set to `Yes`
3. API Keys were entered correctly, and for the correct environment
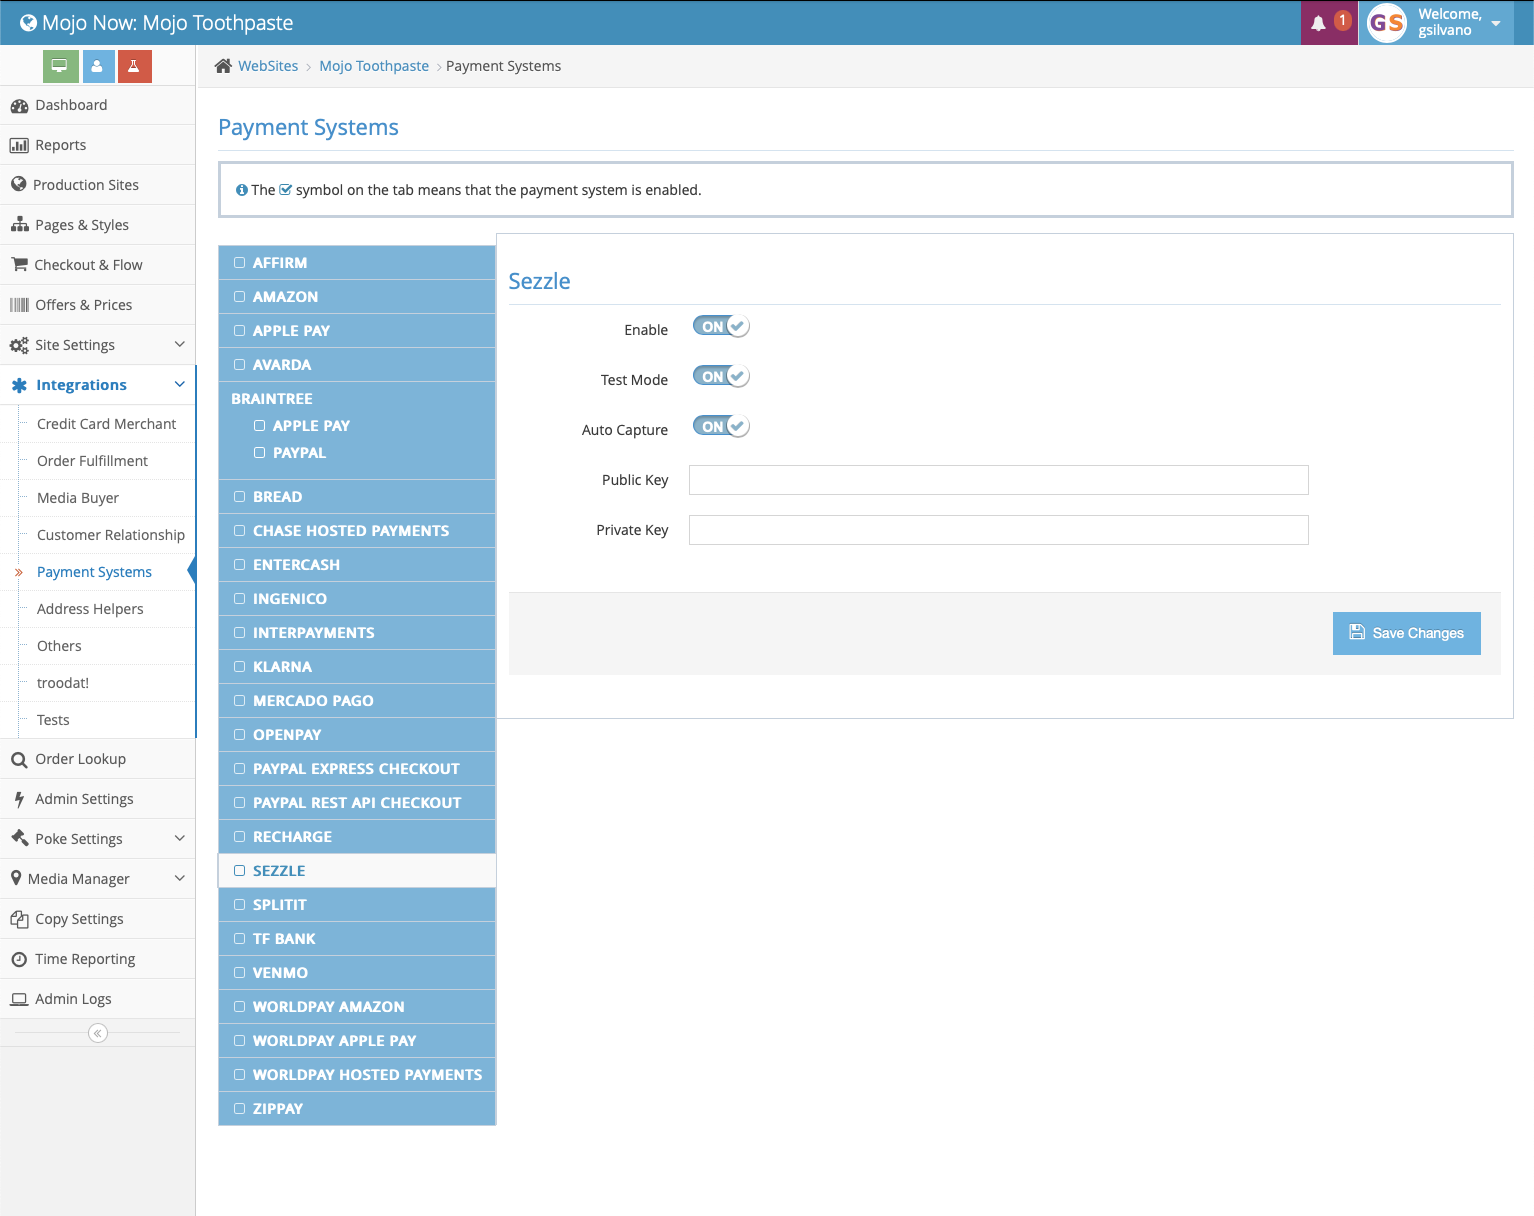 6. Ensure consistency between your webpage offers and payment options upon final checkout
* Navigate to your Site Settings to enable or disable those features that you want enabled with Sezzle
6. Ensure consistency between your webpage offers and payment options upon final checkout
* Navigate to your Site Settings to enable or disable those features that you want enabled with Sezzle
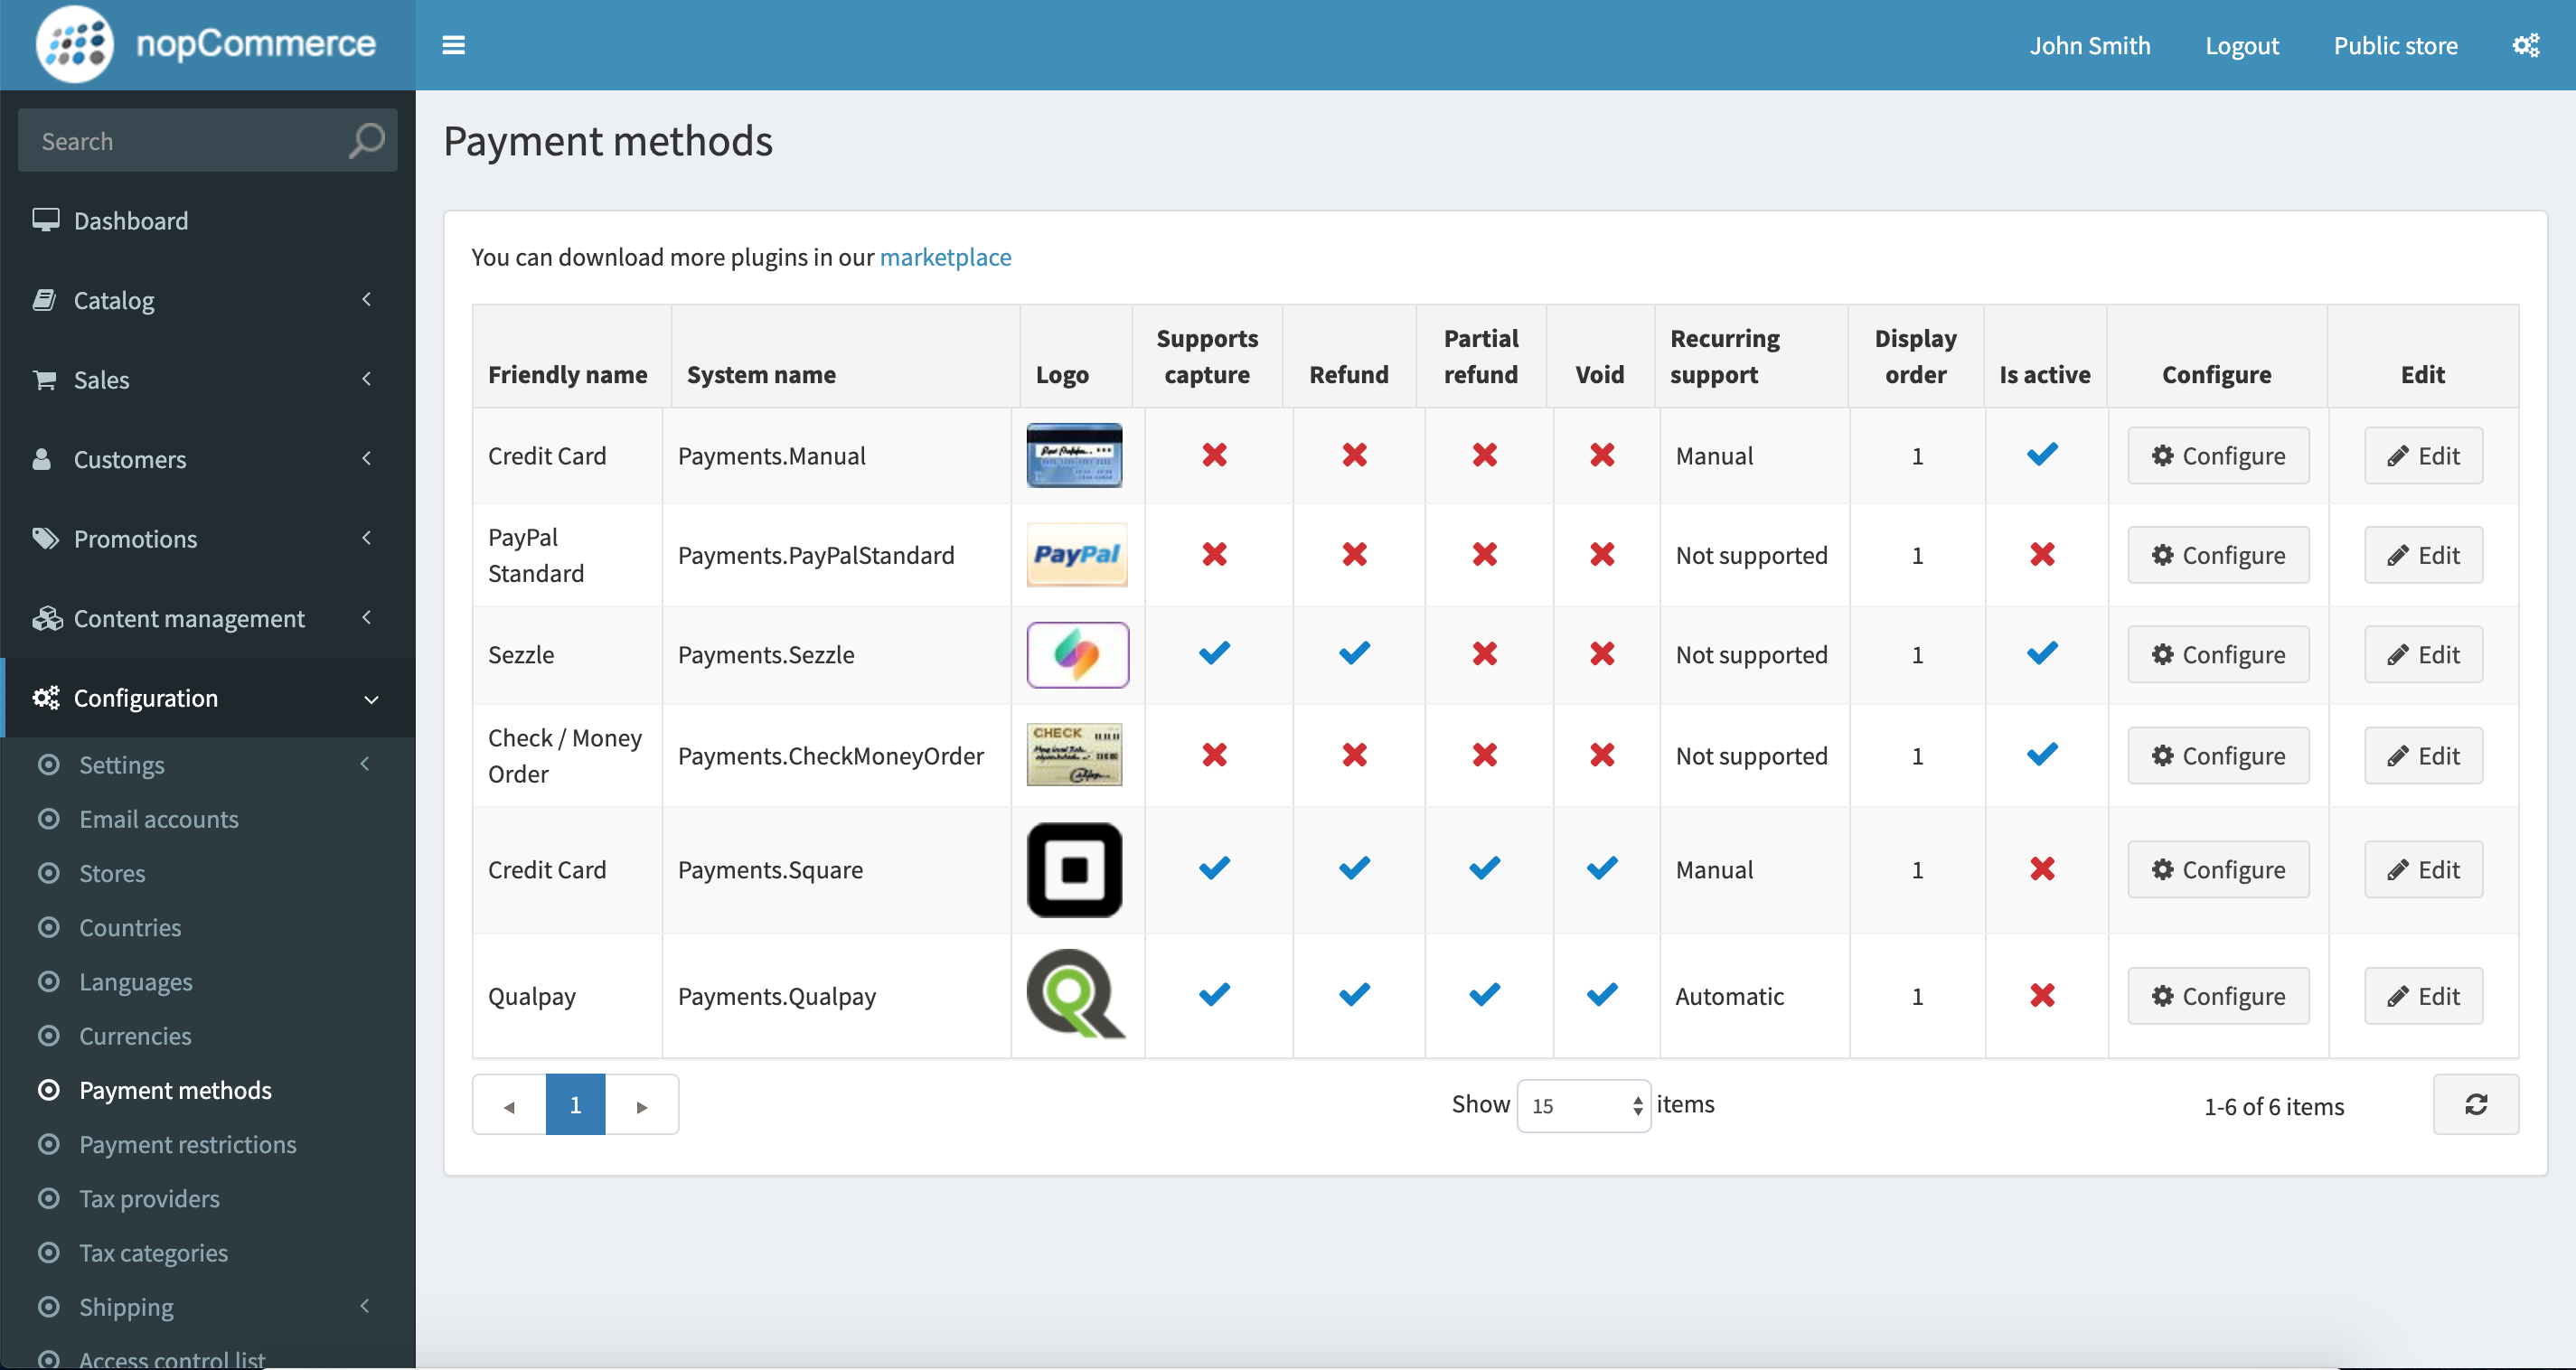 5. Click `Edit` from the Payment Method list
6. Copy your Merchant ID from your [Sezzle Merchant Dashboard](https://dashboard.sezzle.com/merchant/settings/business)
* Paste it into the corresponding field in the Sezzle configuration page of your NopCommerce admin
7. Copy your Public Key and Private Key from your [Sezzle Merchant Dashboard](https://dashboard.sezzle.com/merchant/settings/business)
* Paste it into the corresponding field in the Sezzle configuration page of your NopCommerce admin
8. Set `Transaction Mode` to either `Authorize` or `Authorize and Capture`
5. Click `Edit` from the Payment Method list
6. Copy your Merchant ID from your [Sezzle Merchant Dashboard](https://dashboard.sezzle.com/merchant/settings/business)
* Paste it into the corresponding field in the Sezzle configuration page of your NopCommerce admin
7. Copy your Public Key and Private Key from your [Sezzle Merchant Dashboard](https://dashboard.sezzle.com/merchant/settings/business)
* Paste it into the corresponding field in the Sezzle configuration page of your NopCommerce admin
8. Set `Transaction Mode` to either `Authorize` or `Authorize and Capture`
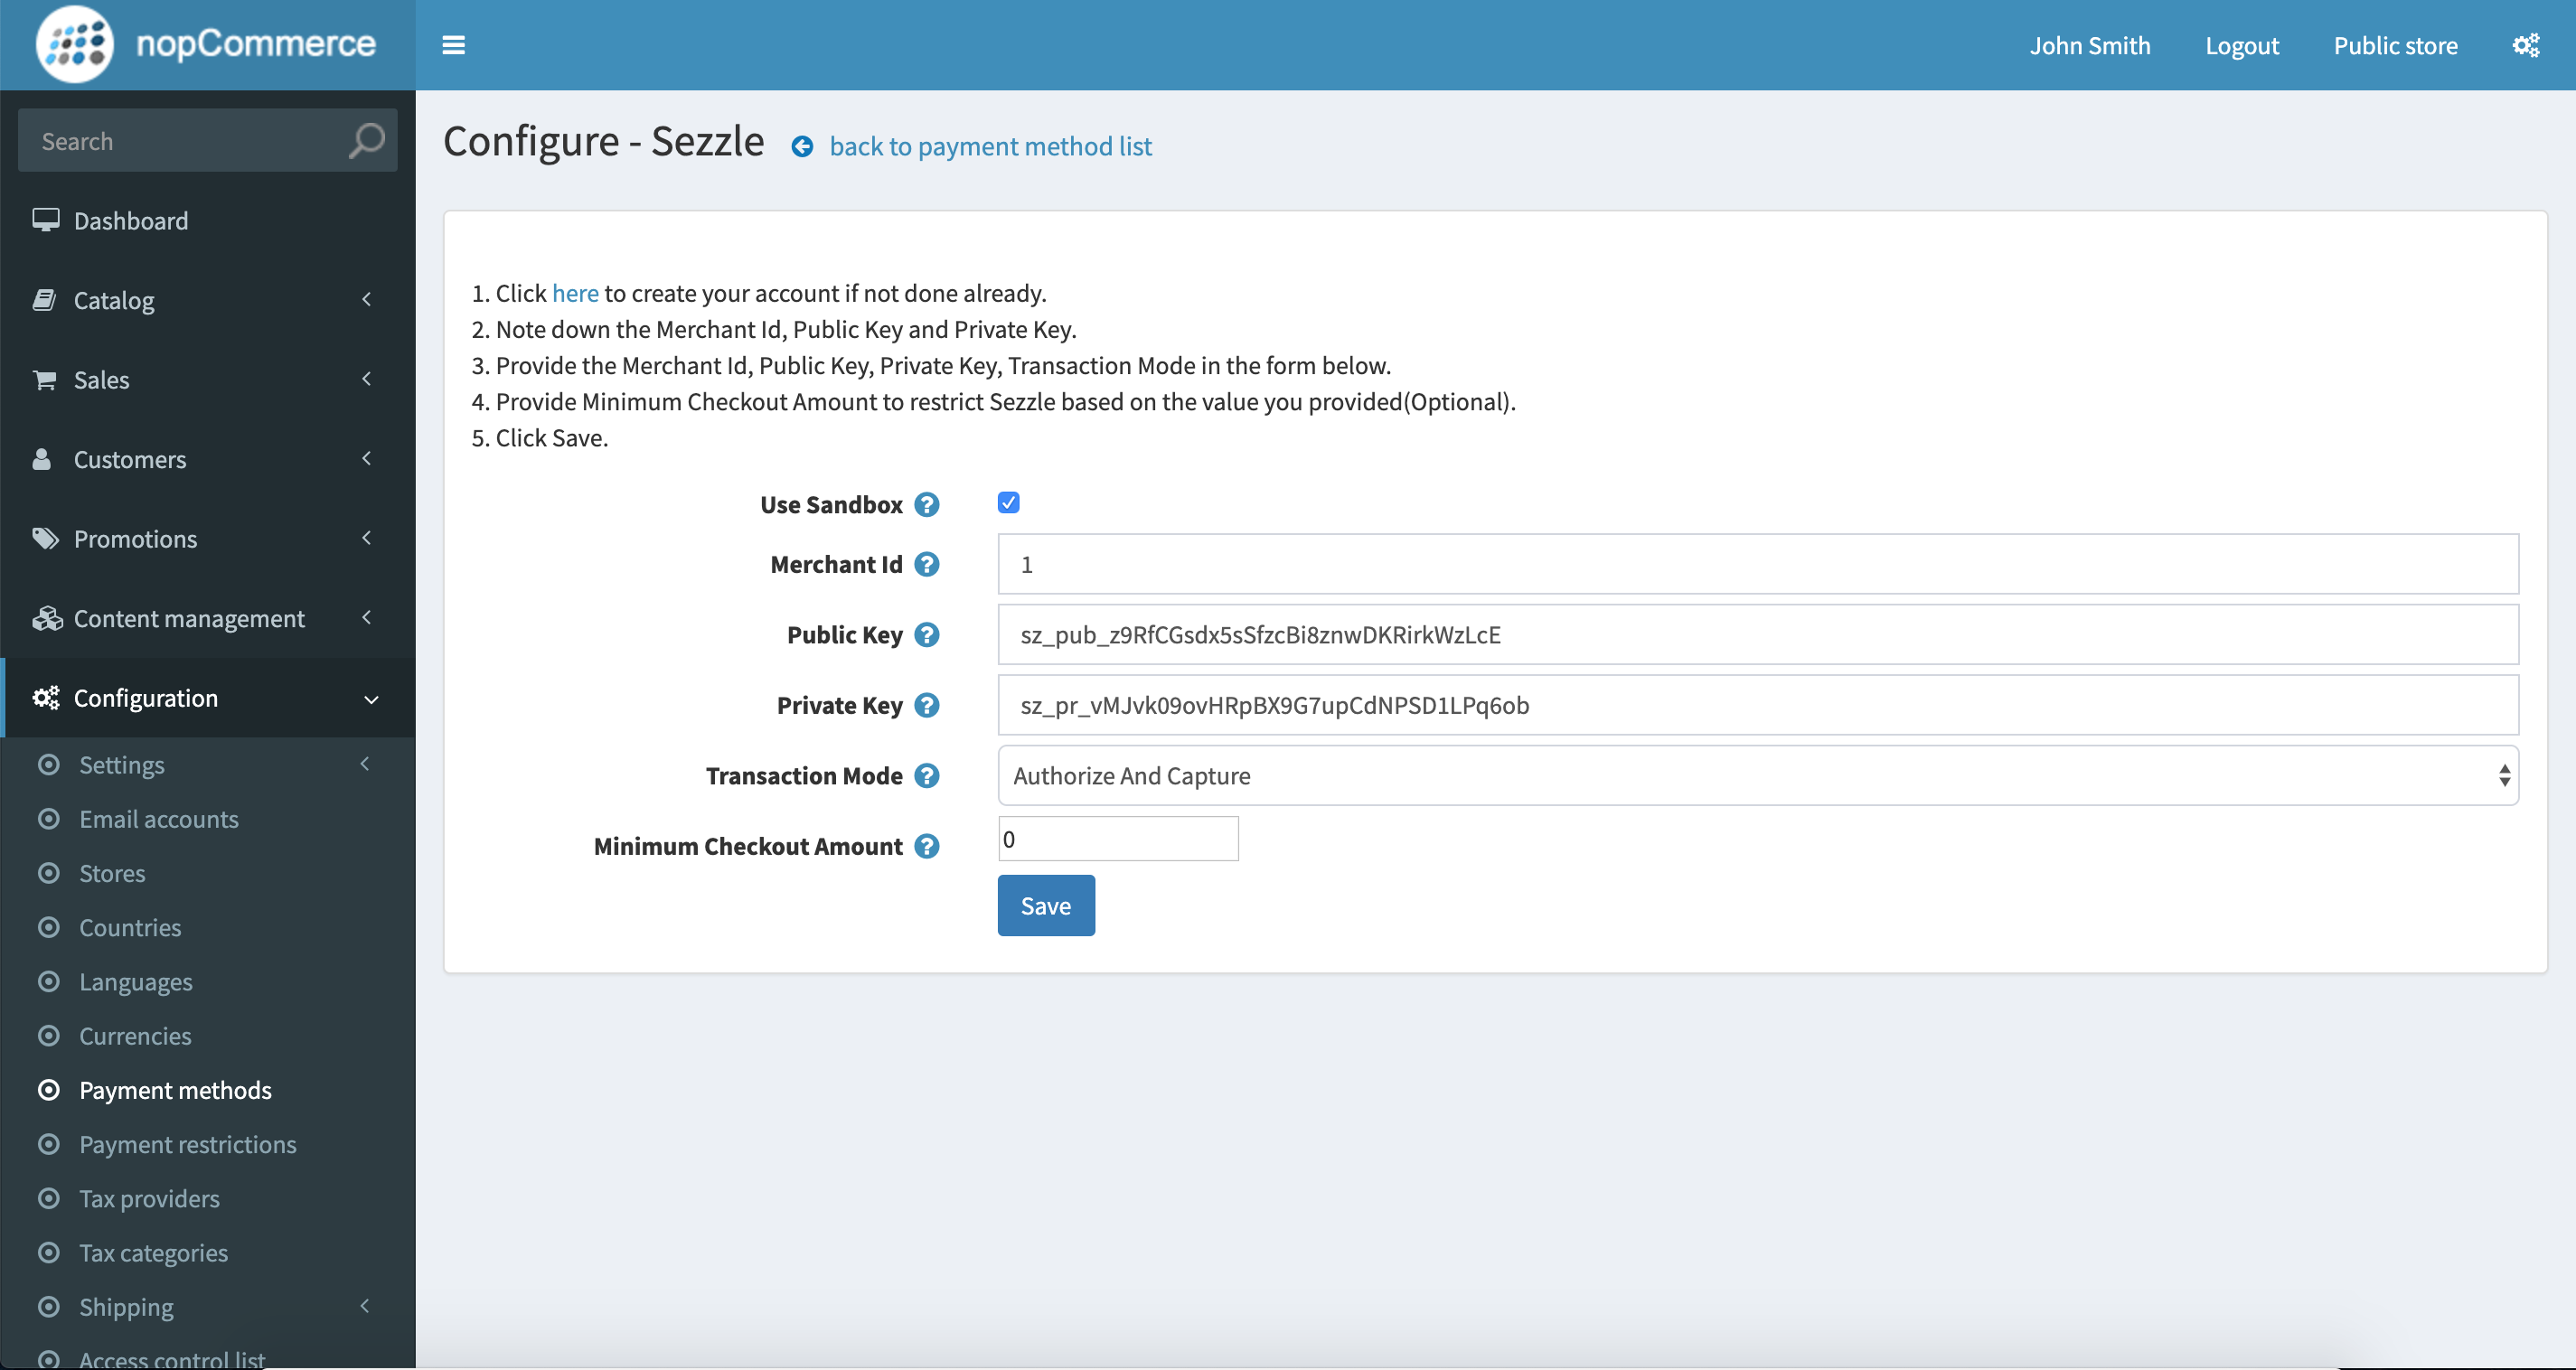 10. To restrict Sezzle usage based on billing country, go to `Configuration` > `Payment Restrictions`
11. Choose the country you want to restrict for Sezzle
10. To restrict Sezzle usage based on billing country, go to `Configuration` > `Payment Restrictions`
11. Choose the country you want to restrict for Sezzle
 12. Integration is complete
### Validate
Step through a [test checkout](/docs/api/test-cards#checkout-testing) to validate the integration is properly installed.
# Open Cart
Source: https://docs.sezzle.com/docs/plugins/open-cart
This guide explains how to add Sezzle as a payment option on your Open Cart website, enabling customers to use Sezzle at checkout.
12. Integration is complete
### Validate
Step through a [test checkout](/docs/api/test-cards#checkout-testing) to validate the integration is properly installed.
# Open Cart
Source: https://docs.sezzle.com/docs/plugins/open-cart
This guide explains how to add Sezzle as a payment option on your Open Cart website, enabling customers to use Sezzle at checkout.
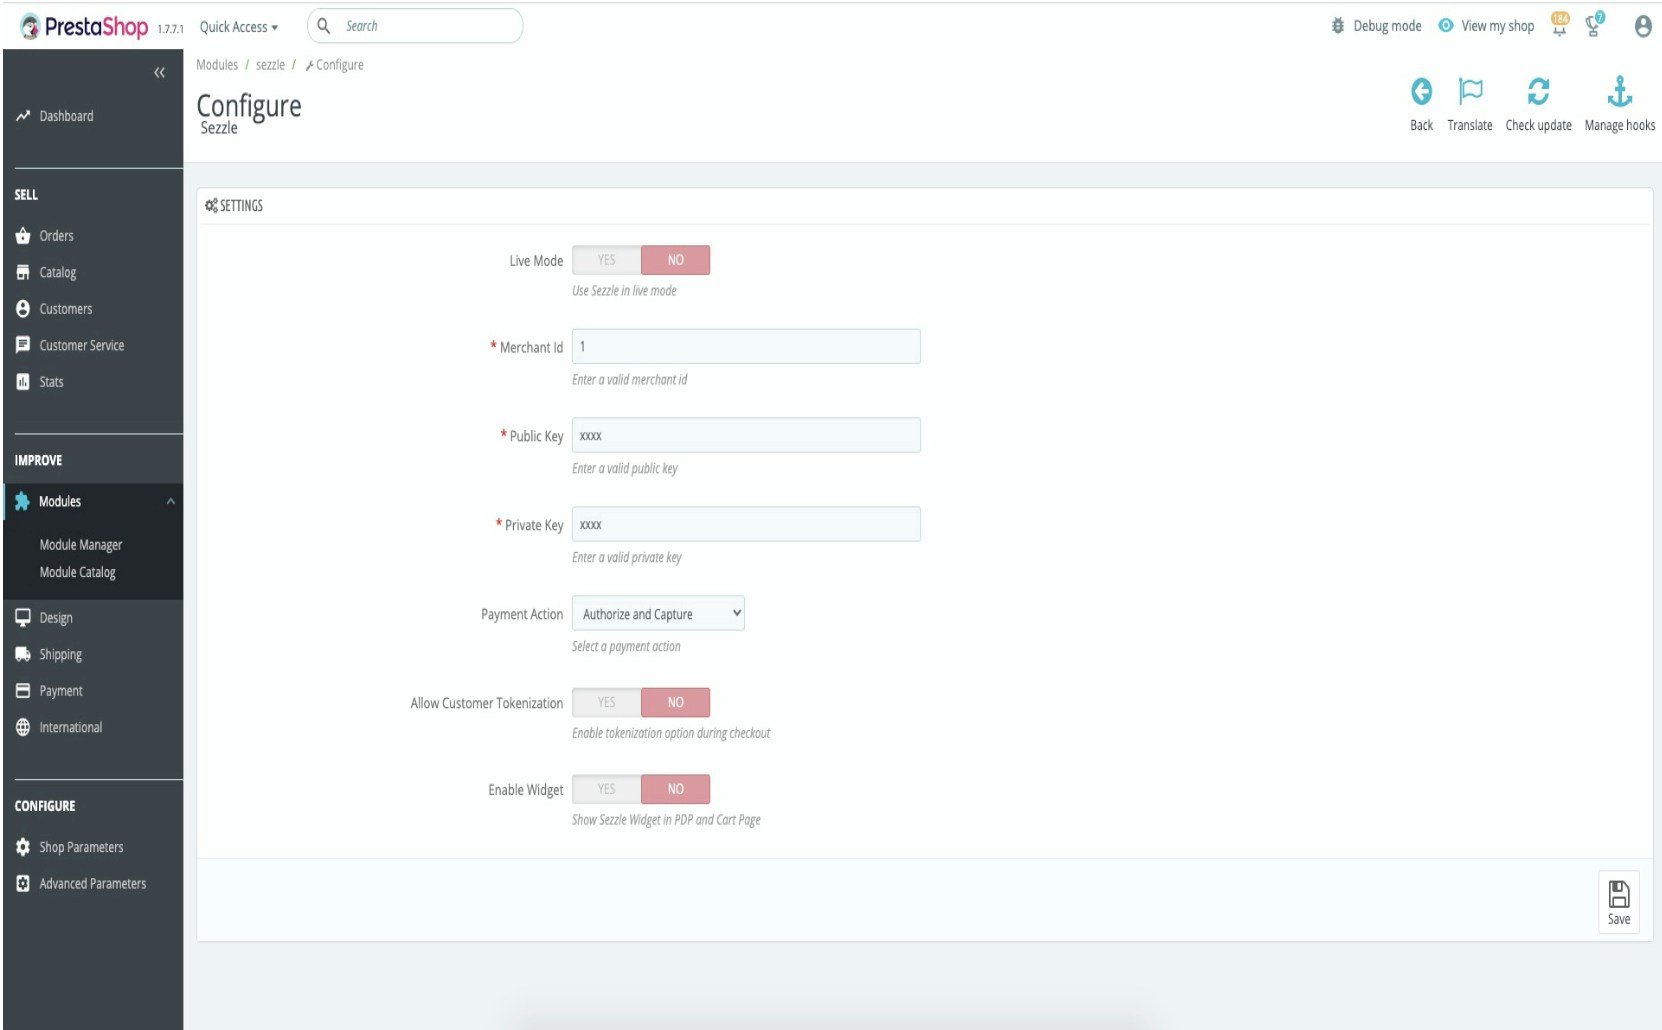 ### Payment Capture
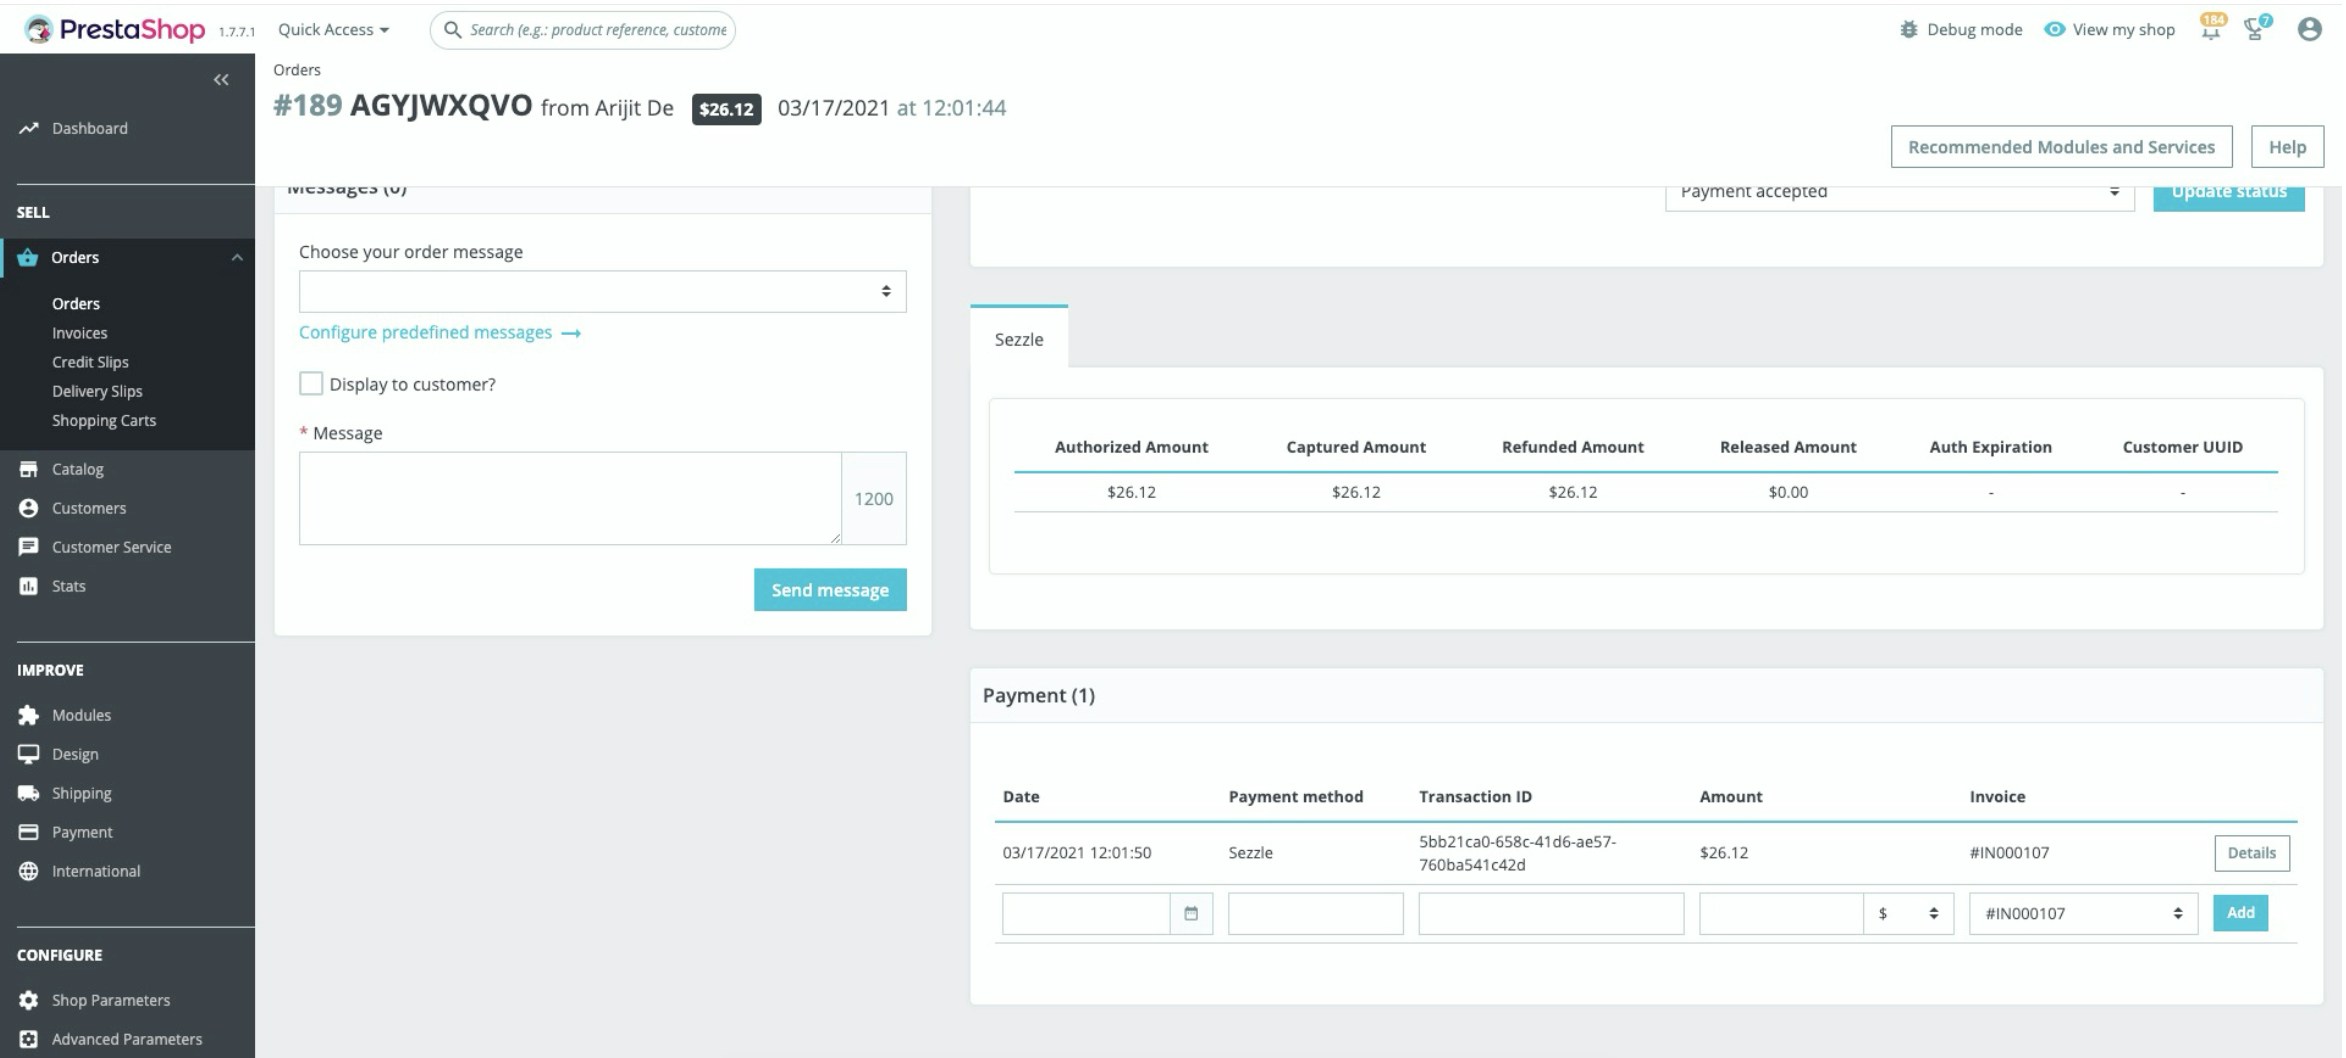 ### Payment Refund
1. In your PrestaShop backoffice, go to Orders > Orders
2. Select the order for which you want to refund the payment
3. Click on Partial Refund, enter the amount and click on Partial Refund right below
4. For Full Refund, you have to fill up all the order related amounts in respective places
5. Change the Order Status to Refunded only if full refund is successful
### Payment Refund
1. In your PrestaShop backoffice, go to Orders > Orders
2. Select the order for which you want to refund the payment
3. Click on Partial Refund, enter the amount and click on Partial Refund right below
4. For Full Refund, you have to fill up all the order related amounts in respective places
5. Change the Order Status to Refunded only if full refund is successful
 ### Payment Release
1. In your PrestaShop backoffice, go to `Orders` > `Orders`
2. Select the order for which you want to refund the payment
3. Change the `Order status` to `Cancelled` and click `Update Status`
### Payment Release
1. In your PrestaShop backoffice, go to `Orders` > `Orders`
2. Select the order for which you want to refund the payment
3. Change the `Order status` to `Cancelled` and click `Update Status`
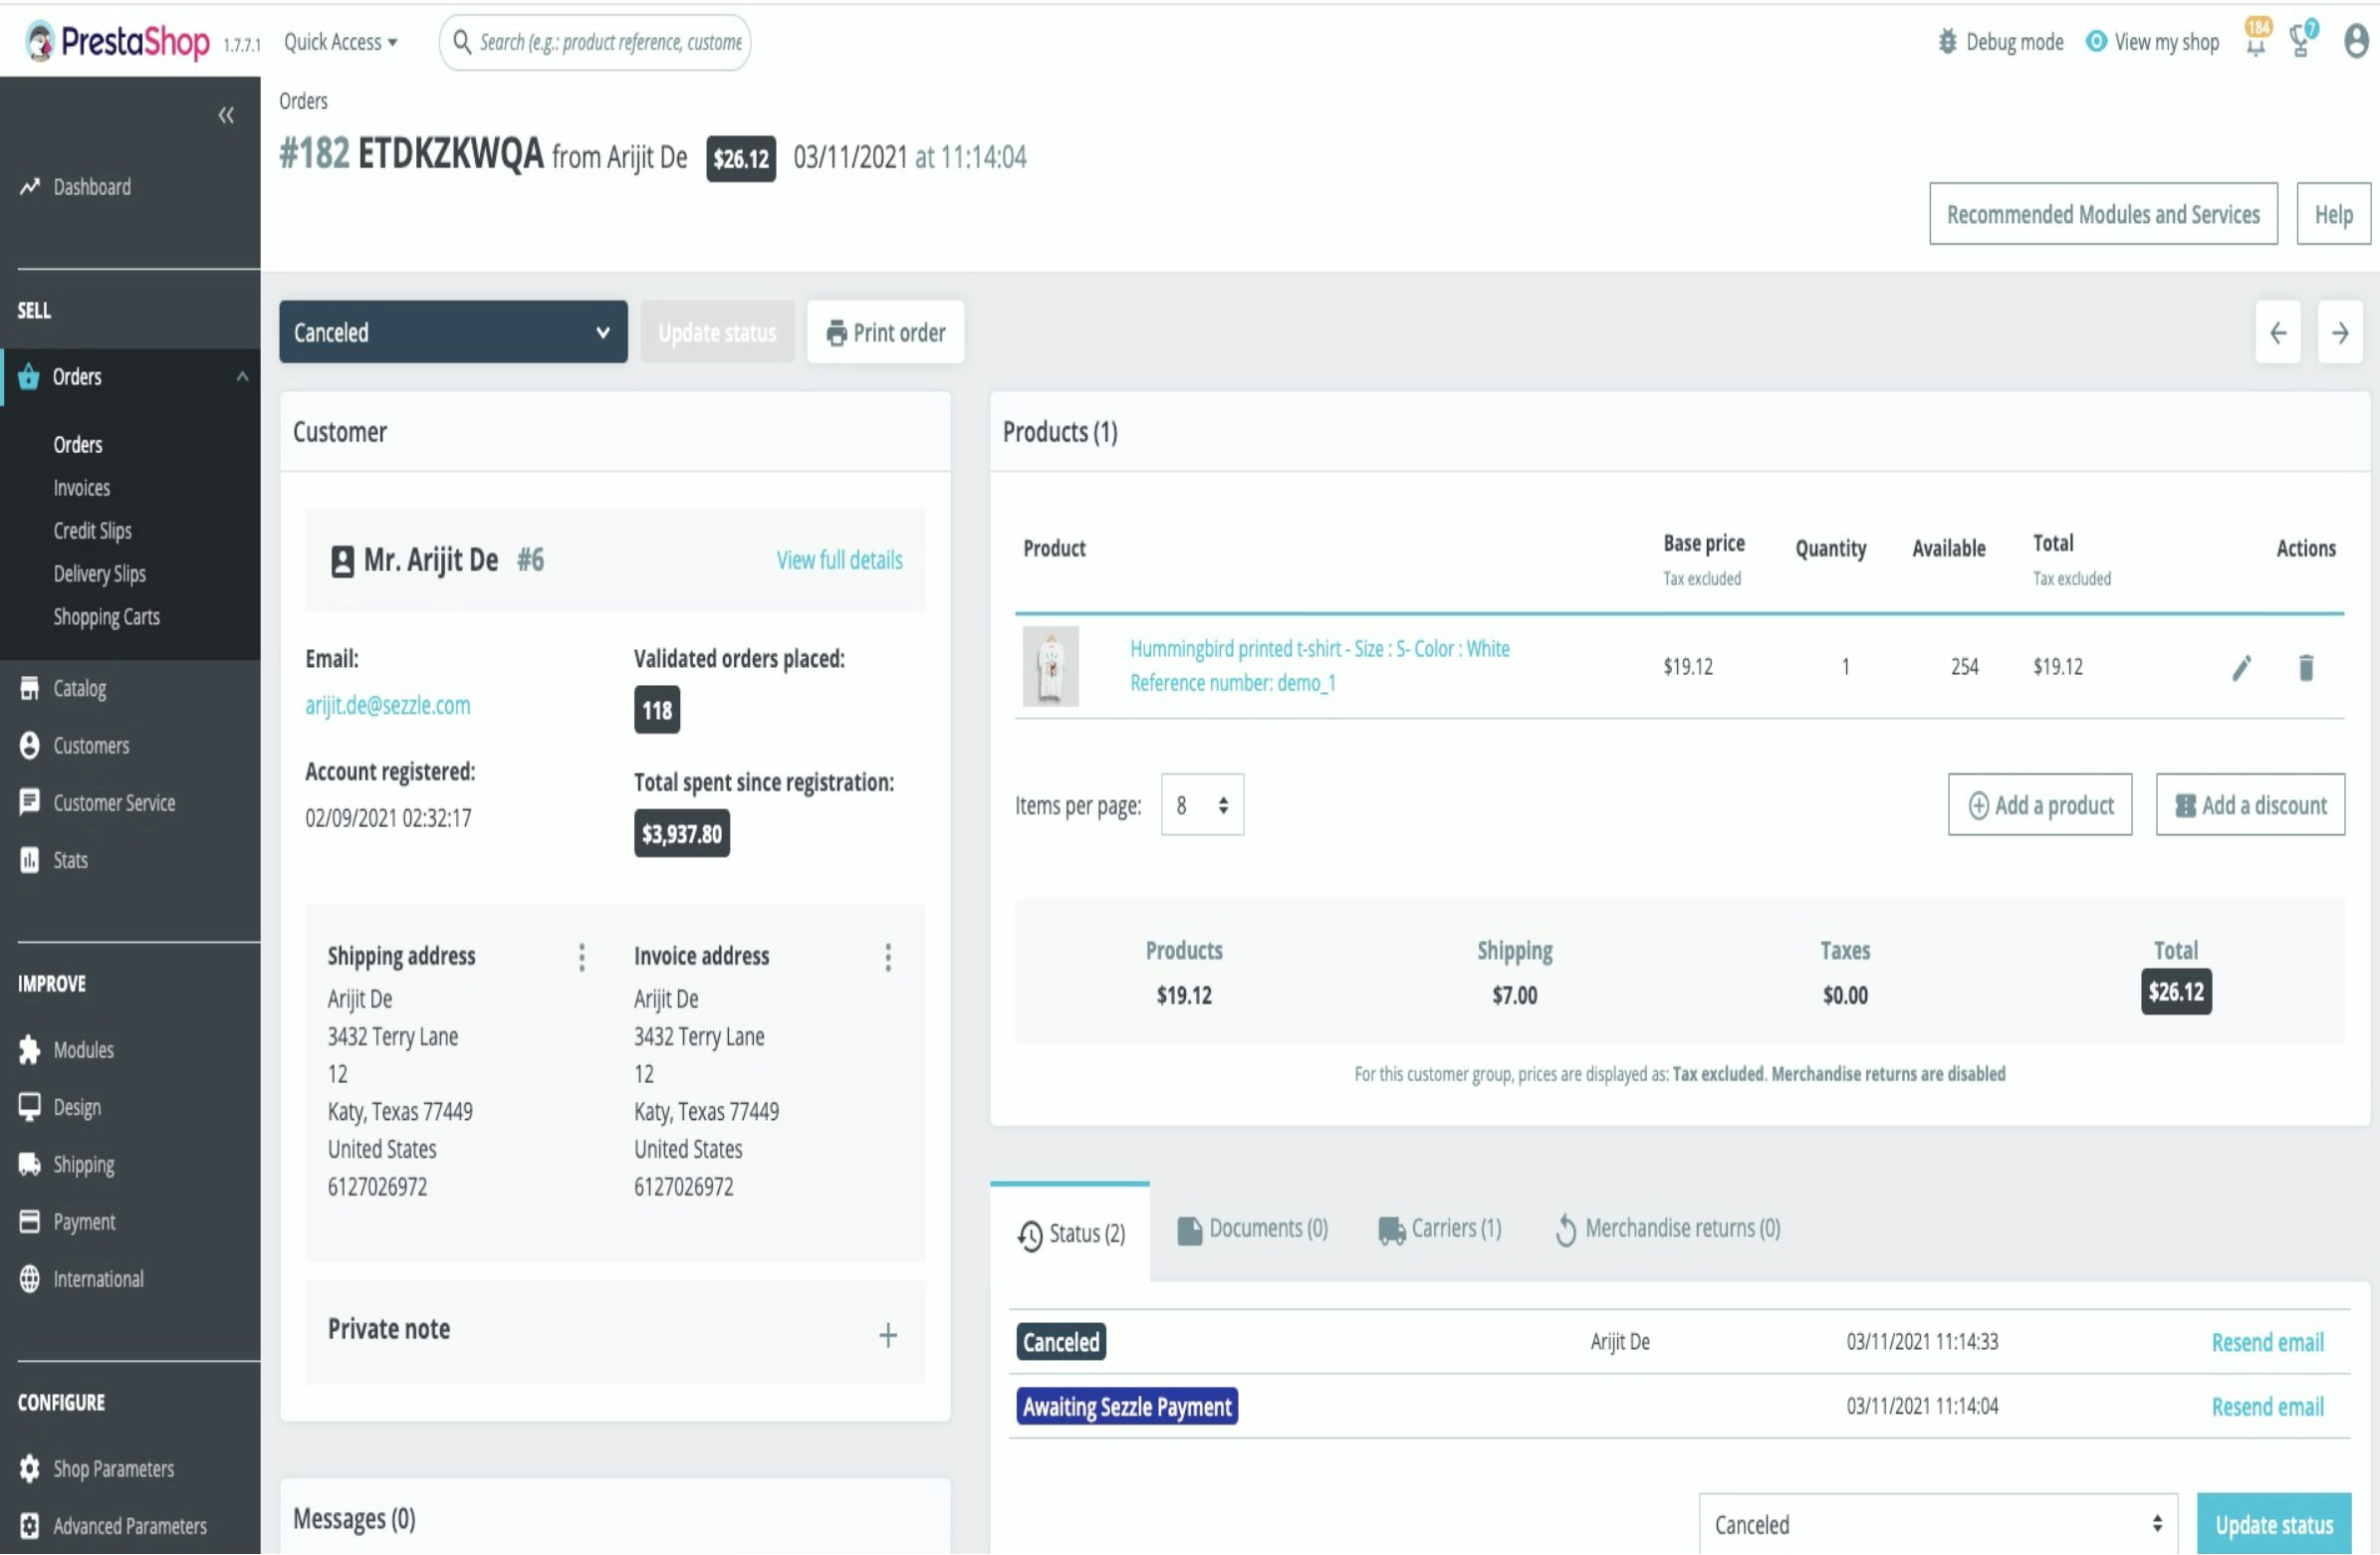 ### Upgrading the module
If you have an existing Sezzle PrestaShop module installed and want to upgrade a new version, proceed as follows:
1. Uninstall the existing Sezzle module
2. In the Upgrade drop-down menu select `Uninstall`
### Upgrading the module
If you have an existing Sezzle PrestaShop module installed and want to upgrade a new version, proceed as follows:
1. Uninstall the existing Sezzle module
2. In the Upgrade drop-down menu select `Uninstall`
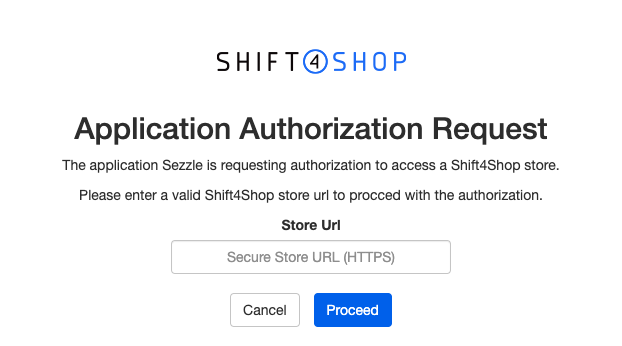 4. Check the PCI Compliance box, then click `Acknowledge and Authorize the App` to start the installation
### Admin Configuration
1. In your Shift4Shop admin, go to Settings > Payment
2. Click Select Payment Methods
4. Check the PCI Compliance box, then click `Acknowledge and Authorize the App` to start the installation
### Admin Configuration
1. In your Shift4Shop admin, go to Settings > Payment
2. Click Select Payment Methods
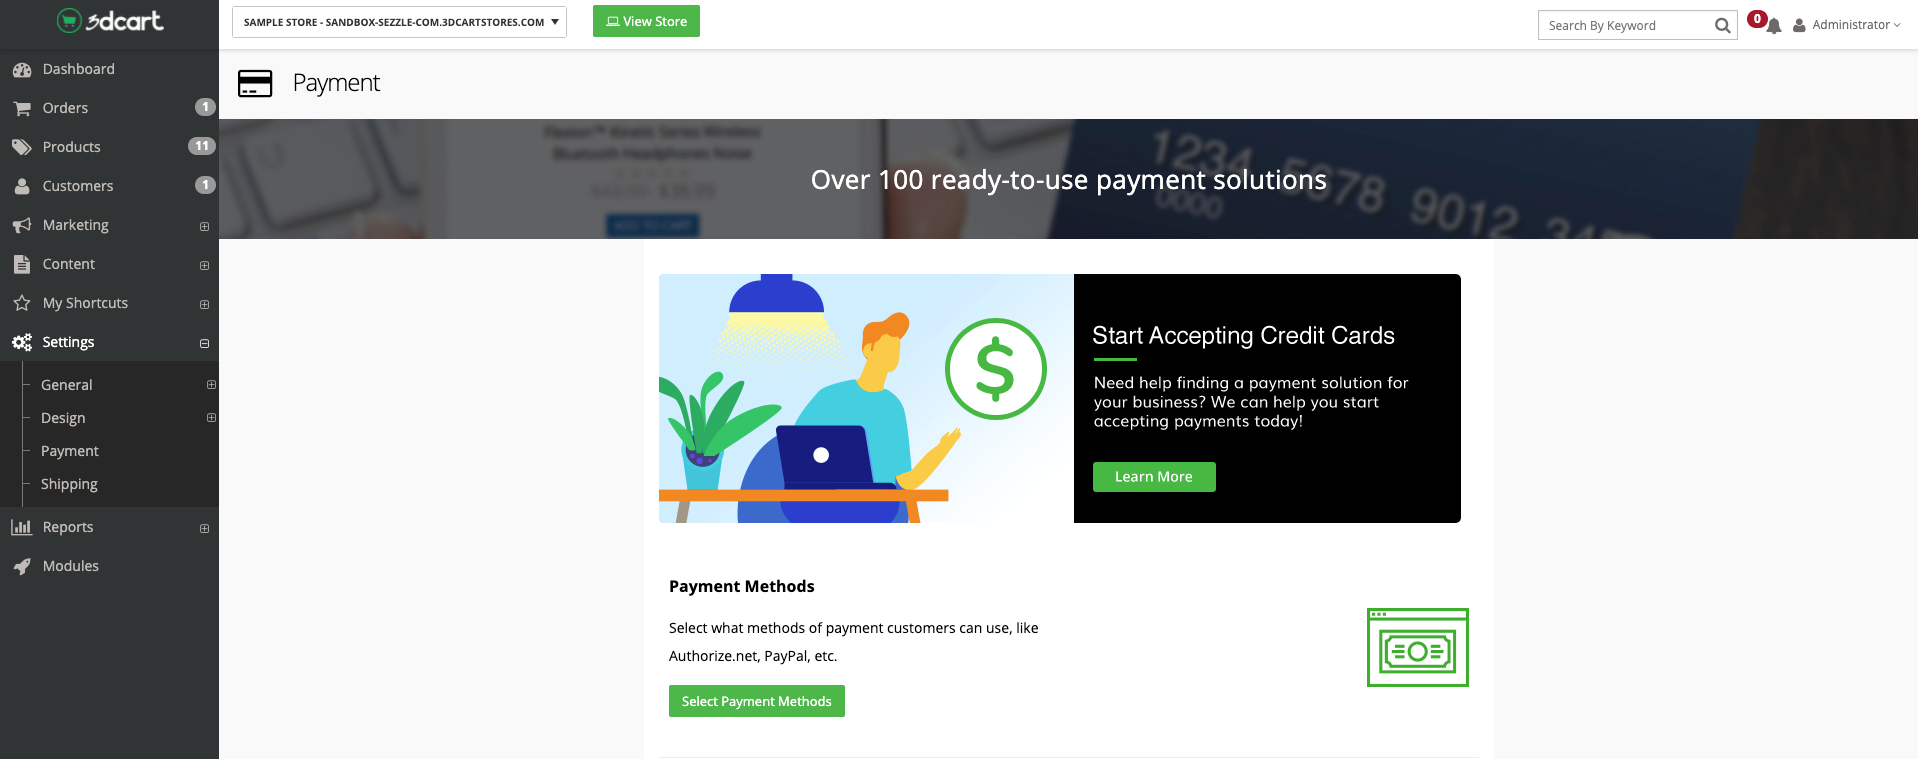 3. Turn the `Sezzle` switch to `On`
4. Copy your Public Key from your [Sezzle Merchant Dashboard](https://dashboard.sezzle.com/merchant/settings/apikeys)
* Paste it into the corresponding field in the Sezzle configuration page of your Shift4Shop admin
5. Next to Private Key, click `Change`
6. Copy your Private Key from your [Sezzle Merchant Dashboard](https://dashboard.sezzle.com/merchant/settings/apikeys)
* Paste it into the corresponding field in the Sezzle configuration page of your Shift4Shop admin
7. Click `Save`
3. Turn the `Sezzle` switch to `On`
4. Copy your Public Key from your [Sezzle Merchant Dashboard](https://dashboard.sezzle.com/merchant/settings/apikeys)
* Paste it into the corresponding field in the Sezzle configuration page of your Shift4Shop admin
5. Next to Private Key, click `Change`
6. Copy your Private Key from your [Sezzle Merchant Dashboard](https://dashboard.sezzle.com/merchant/settings/apikeys)
* Paste it into the corresponding field in the Sezzle configuration page of your Shift4Shop admin
7. Click `Save`
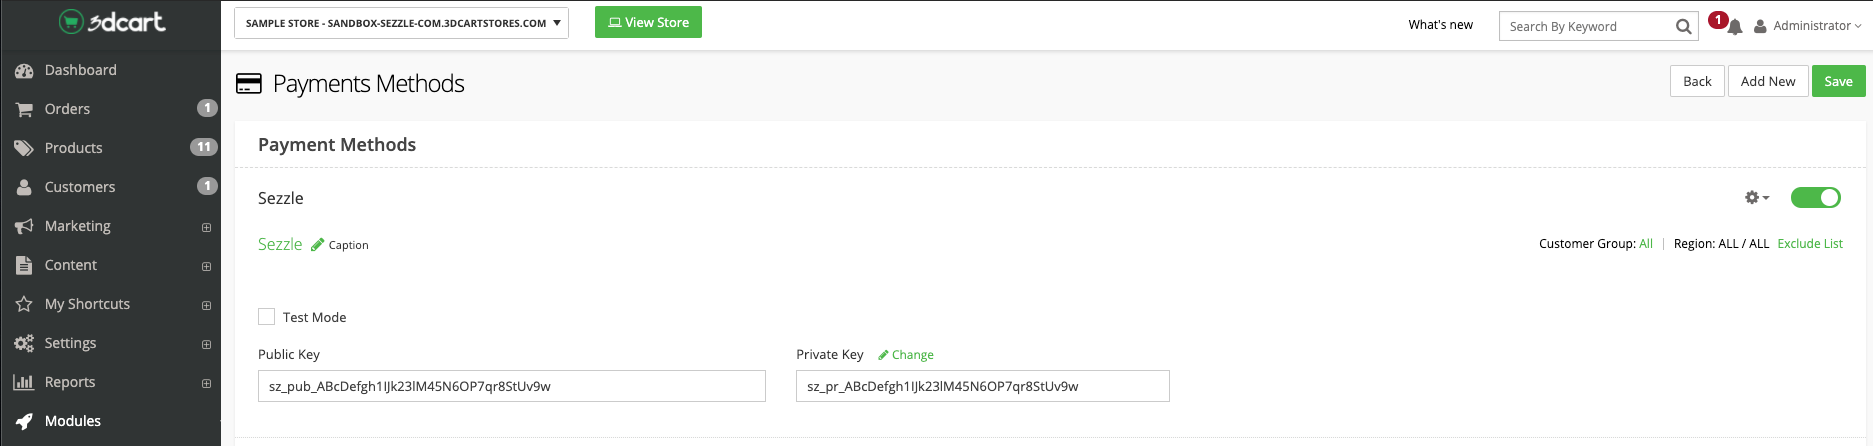 8. To restrict Sezzle usage by country, click the `Exclude List` hyperlink under the `Sezzle` switch
9. Click `Add Location`
10. Select the desired country, then click `Add`
8. To restrict Sezzle usage by country, click the `Exclude List` hyperlink under the `Sezzle` switch
9. Click `Add Location`
10. Select the desired country, then click `Add`
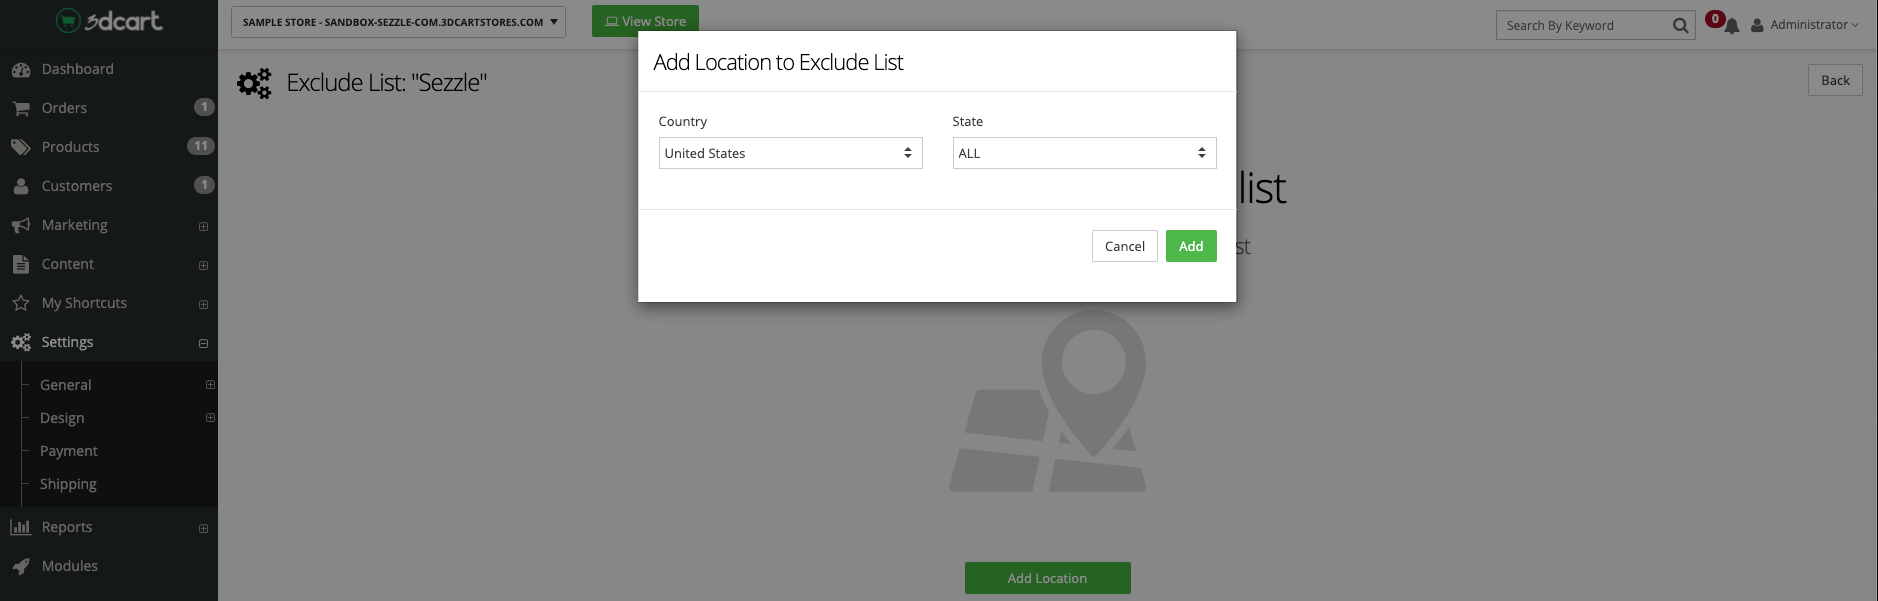
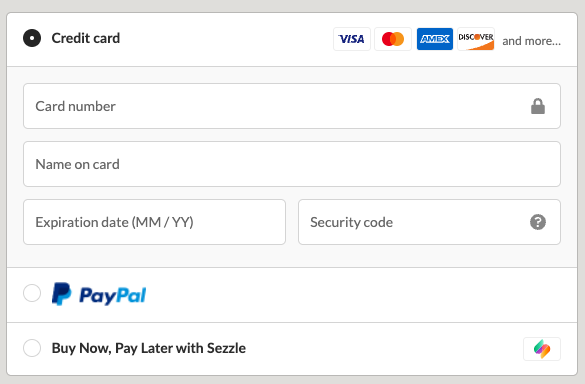
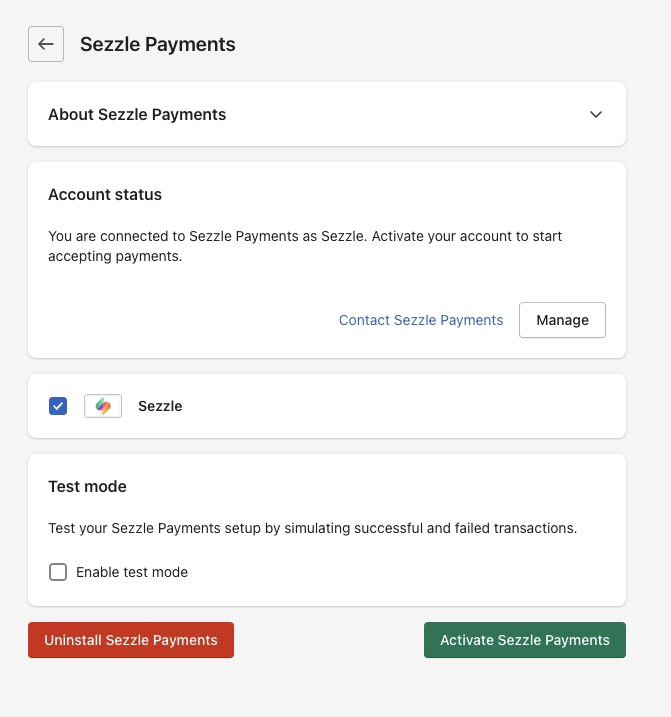 ### Validate
For Sandbox testing, do this step first
1. Navigate to `Settings` > `Payments` > `Sezzle Payments`
2. Click `Manage`, check `Enable test mode`, and click `Save`
3. Click the `Manage` button in Sezzle Payments, enter your sandbox API keys in the test tab
4. Click `Update settings`
For Live testing, do this step first
1. In the Sezzle configuration page of your Shopify admin, enter the API keys from your [Sezzle Merchant Dashboard](https://dashboard.sezzle.com/merchant/settings/apikeys)
2. Uncheck the `Enable Test Mode` checkbox
3. Save the configuration
### Validate
For Sandbox testing, do this step first
1. Navigate to `Settings` > `Payments` > `Sezzle Payments`
2. Click `Manage`, check `Enable test mode`, and click `Save`
3. Click the `Manage` button in Sezzle Payments, enter your sandbox API keys in the test tab
4. Click `Update settings`
For Live testing, do this step first
1. In the Sezzle configuration page of your Shopify admin, enter the API keys from your [Sezzle Merchant Dashboard](https://dashboard.sezzle.com/merchant/settings/apikeys)
2. Uncheck the `Enable Test Mode` checkbox
3. Save the configuration
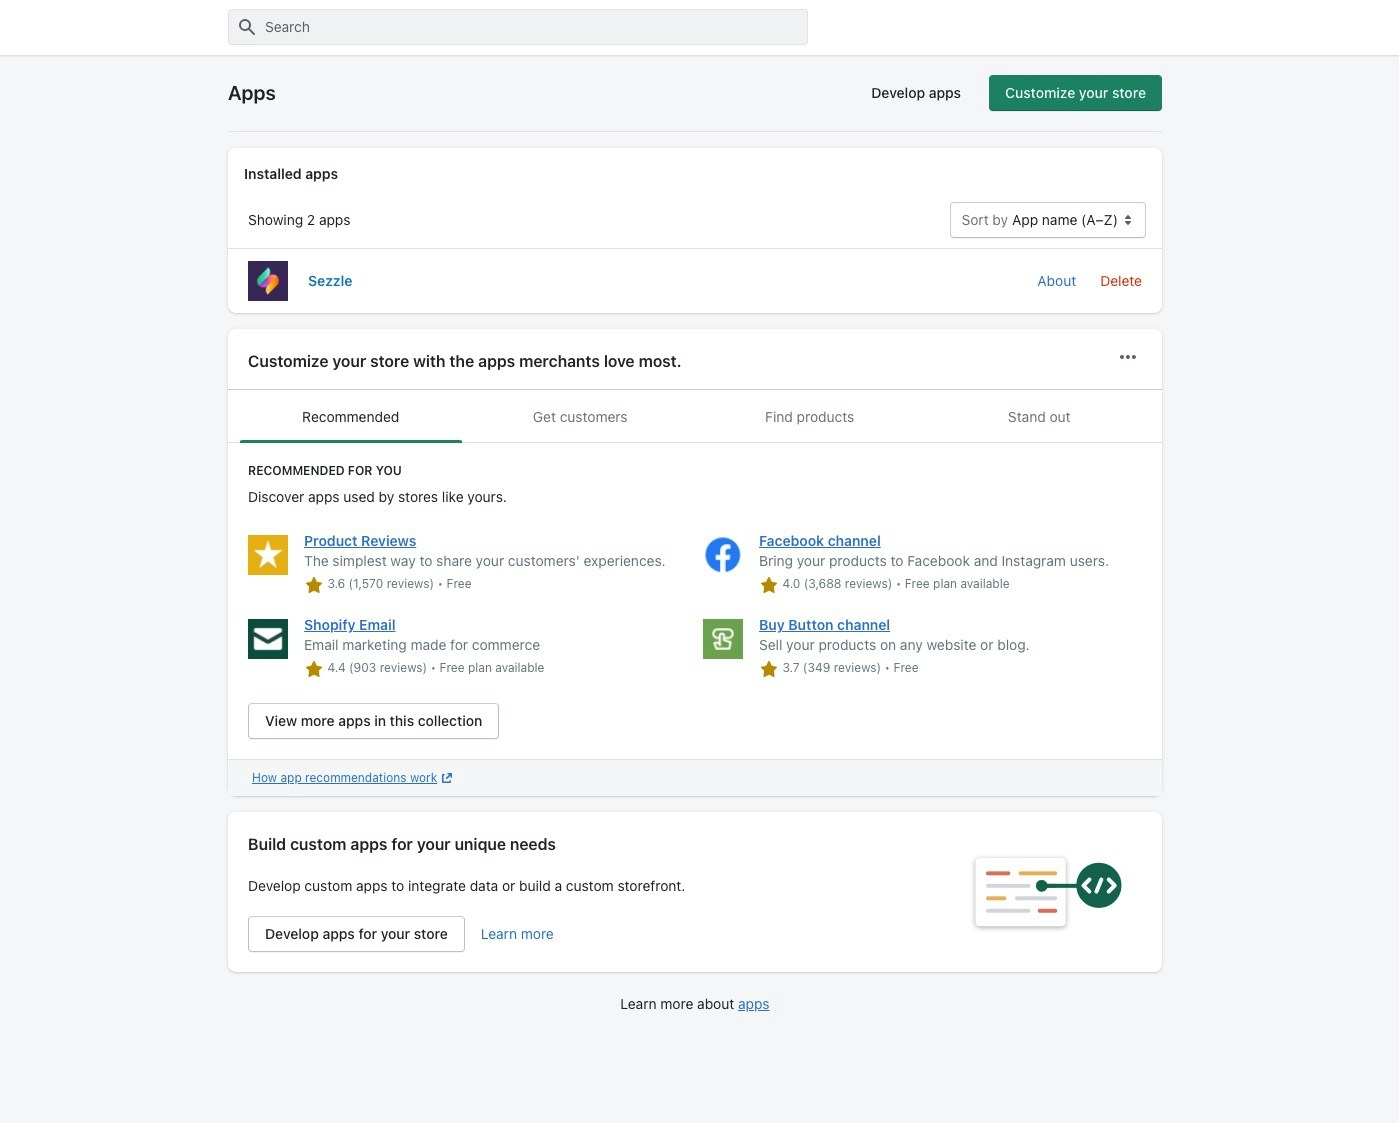 ### FAQs
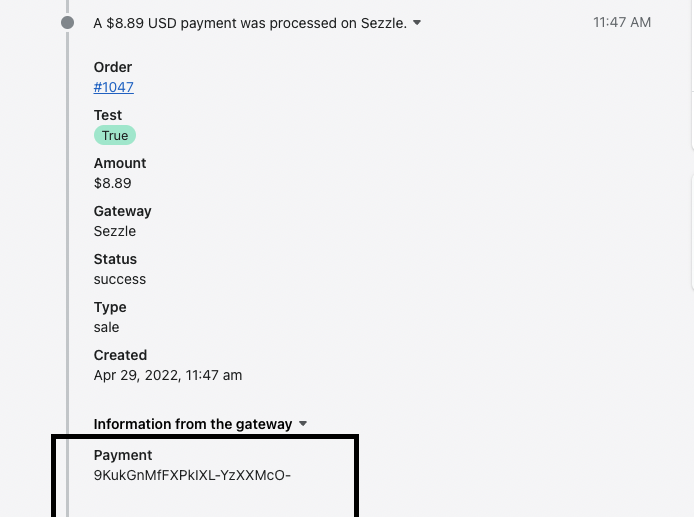
 You can also search Shopify Admin using `receipt.payment_id:
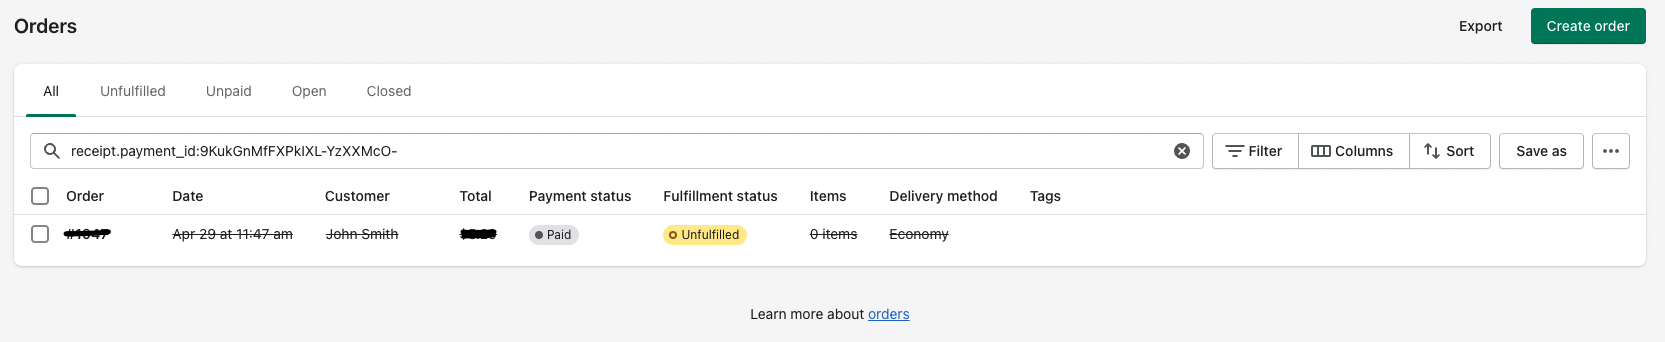
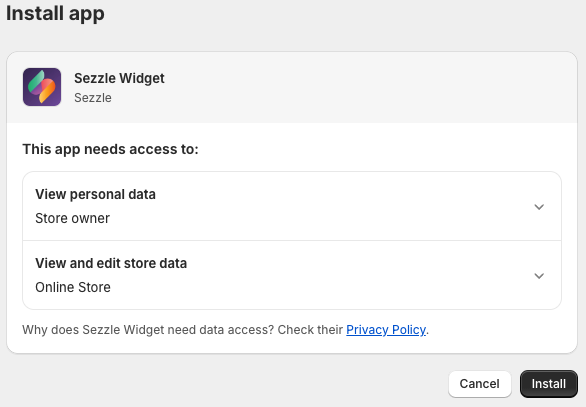 4. Within the Sezzle Widget app, enter your Public API Key and click `Link Sezzle Account`
* For most merchants, we are able to pre-fill the public API key based on the Shopify store URL
* To enter the API key manually, copy from the API Keys page within the [Sezzle Merchant Dashboard Settings](https://dashboard.sezzle.com/merchant/settings/apikeys)
4. Within the Sezzle Widget app, enter your Public API Key and click `Link Sezzle Account`
* For most merchants, we are able to pre-fill the public API key based on the Shopify store URL
* To enter the API key manually, copy from the API Keys page within the [Sezzle Merchant Dashboard Settings](https://dashboard.sezzle.com/merchant/settings/apikeys)
 ## Installation
Please select ONE of the following installation methods:
## Installation
Please select ONE of the following installation methods:
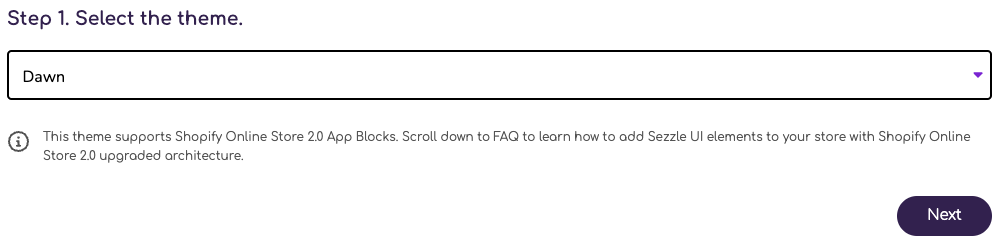 2. Select the asset you wish to install, then click `Next`
 3. Select the page you wish to install on, then click `Finish`
 4. Click the `Activate` button
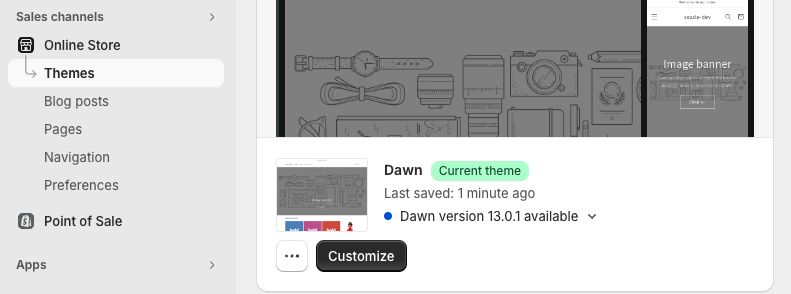 3. In the upper-left corner, click the third icon `App Embeds`
4. Search for Sezzle and activate the product(s) you wish to install
* [Customize](#customizations) as desired and click `Save`
3. In the upper-left corner, click the third icon `App Embeds`
4. Search for Sezzle and activate the product(s) you wish to install
* [Customize](#customizations) as desired and click `Save`
 ### Installing as App Blocks
App blocks allow merchants to control product placement. Compatible with 2.0 themes only.
1. Within `Shopify Admin`, go to `Sales Channels` then `Online Store`
2. Under `Themes`, click `Customize` for the theme you wish to edit
### Installing as App Blocks
App blocks allow merchants to control product placement. Compatible with 2.0 themes only.
1. Within `Shopify Admin`, go to `Sales Channels` then `Online Store`
2. Under `Themes`, click `Customize` for the theme you wish to edit
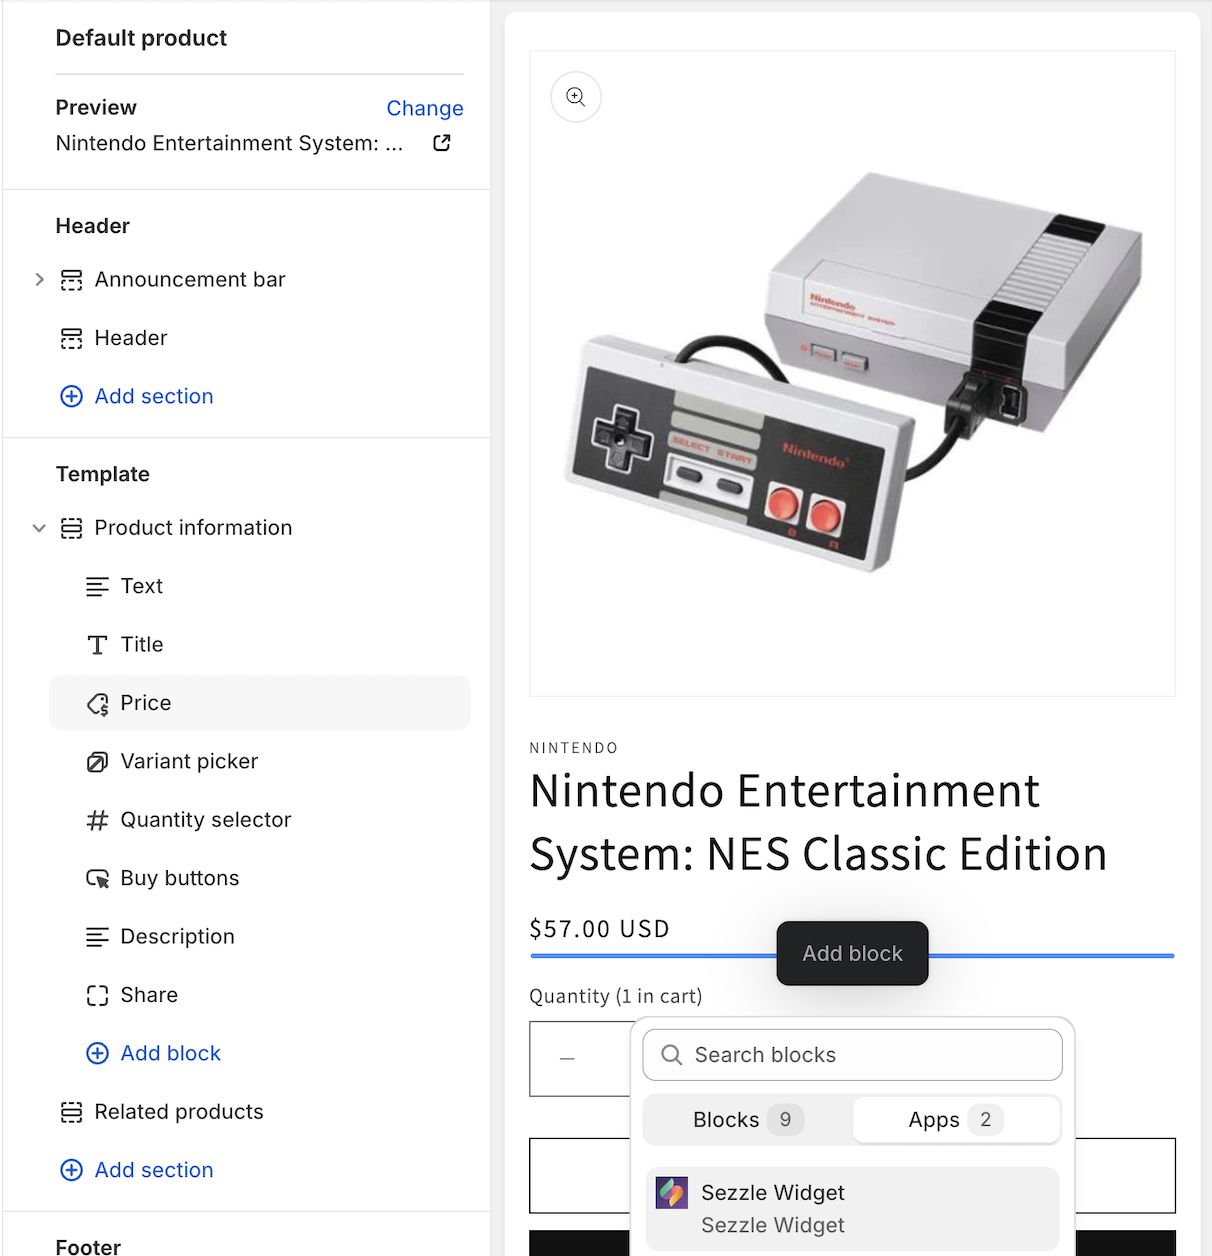 4. [Customize](#customizations) as desired, then click `Save`
#### Installing Widget App Block and Checkout Button on Cart Page
1. Add a product to the cart
2. Navigate to the cart page
3. Hover over the area where you wish to display a Sezzle product
4. If app blocks can be placed there, `+` or `Add block` will appear
* Click, then under the `Apps` tab, select the product
* Alternatively, open the `Sections` tab and click `Add Block`
* Under the `Apps` tab, select `Sezzle Widget`
* Drag & drop the block to the desired location in the contents menu
5. Repeat the previous two steps for the other product, if desired
4. [Customize](#customizations) as desired, then click `Save`
#### Installing Widget App Block and Checkout Button on Cart Page
1. Add a product to the cart
2. Navigate to the cart page
3. Hover over the area where you wish to display a Sezzle product
4. If app blocks can be placed there, `+` or `Add block` will appear
* Click, then under the `Apps` tab, select the product
* Alternatively, open the `Sections` tab and click `Add Block`
* Under the `Apps` tab, select `Sezzle Widget`
* Drag & drop the block to the desired location in the contents menu
5. Repeat the previous two steps for the other product, if desired
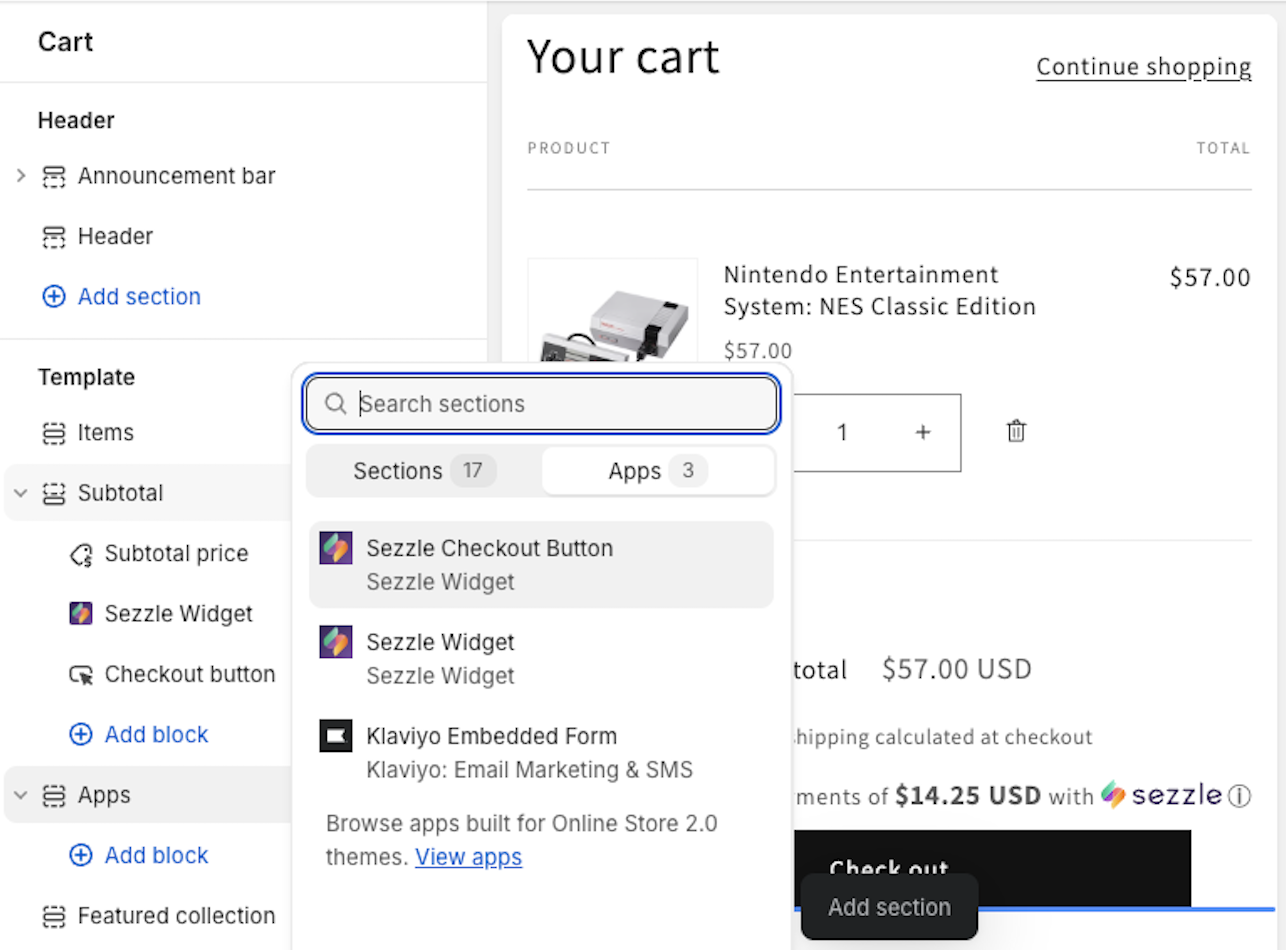 6. [Customize](#customizations) as desired, then click `Save`
### Customizations
The following section covers customization options that are available through the app.
#### Widget Customization Options
| **Property** | **Default** | **Range/Options** | **Step** |
| :----------- | :---------- | :---------------- | :------- |
| Font Size | `14px` | `9px` - `18px` | `0.5` |
| Font Family | inherit | (see dropdown) | - |
6. [Customize](#customizations) as desired, then click `Save`
### Customizations
The following section covers customization options that are available through the app.
#### Widget Customization Options
| **Property** | **Default** | **Range/Options** | **Step** |
| :----------- | :---------- | :---------------- | :------- |
| Font Size | `14px` | `9px` - `18px` | `0.5` |
| Font Family | inherit | (see dropdown) | - |
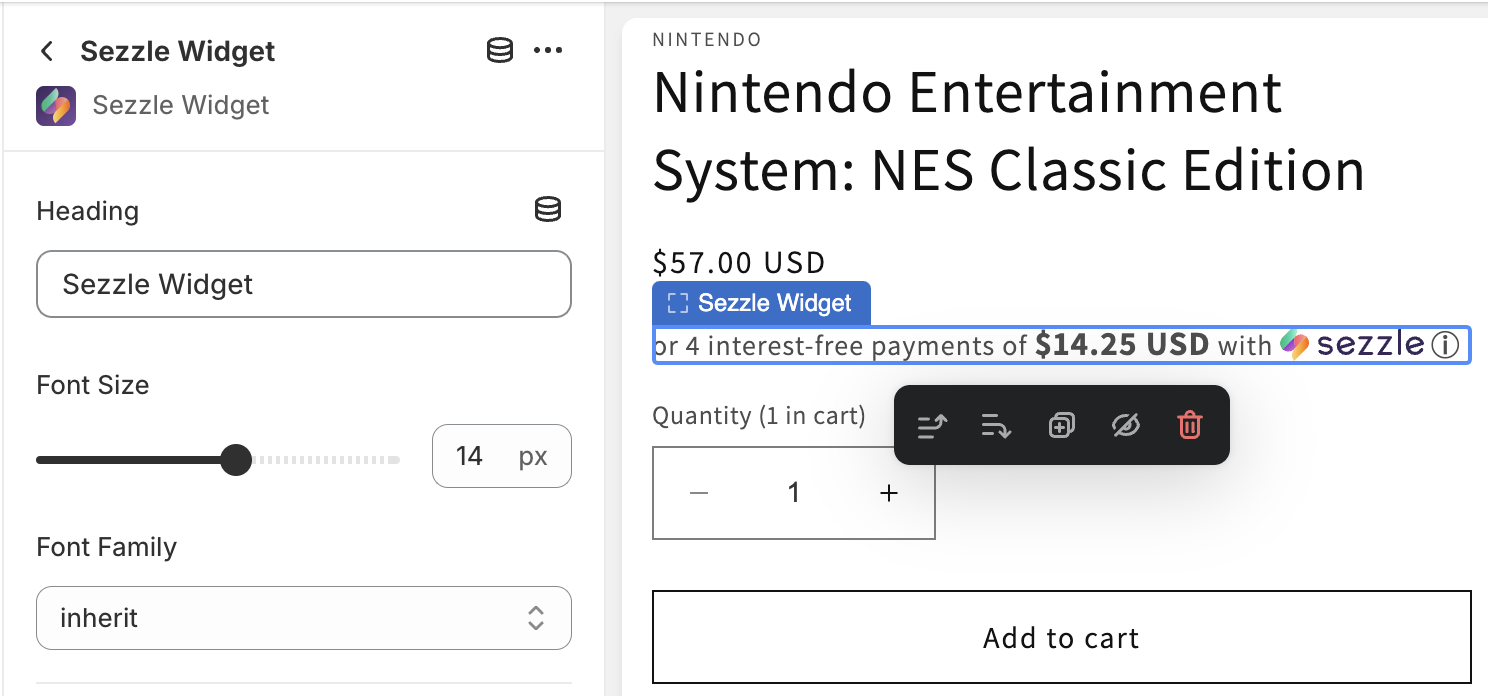 #### Checkout Button Customization Options
| **Property** | **Default** | **Range/Options** | **Step** |
| :-------------------------------- | :--------------------- | :-------------------- | :------- |
| Template | `Checkout with Sezzle` | `Pay with Sezzle` | - |
| Theme | `Light` | `Dark` | - |
| Padding (left and right only) | `9px` | `0px` - `30px` | `0.5` |
| Margins (controlled individually) | `0` | `-20` - `20` | `0.5` |
| Width | `auto` | `fit-content`, `100%` | - |
#### Checkout Button Customization Options
| **Property** | **Default** | **Range/Options** | **Step** |
| :-------------------------------- | :--------------------- | :-------------------- | :------- |
| Template | `Checkout with Sezzle` | `Pay with Sezzle` | - |
| Theme | `Light` | `Dark` | - |
| Padding (left and right only) | `9px` | `0px` - `30px` | `0.5` |
| Margins (controlled individually) | `0` | `-20` - `20` | `0.5` |
| Width | `auto` | `fit-content`, `100%` | - |
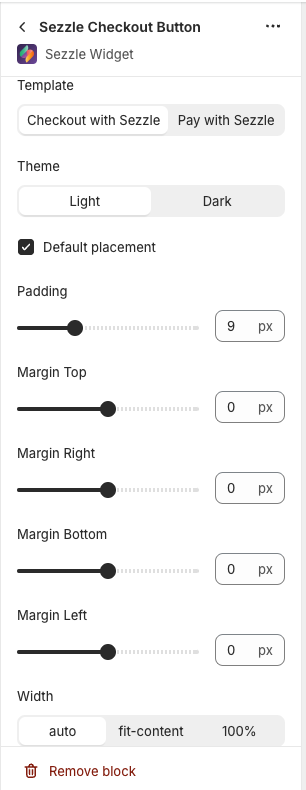 ### Default Placement
**If Checked**
* The Sezzle Checkout Button will be placed after the native checkout button and inherit page styles
**If Unchecked**
* The button will be placed as indicated by the app block placement
* Styles may also be affected, based on the placement selected
#### Custom CSS
If you are familiar with CSS and would like additional style customizations, you can write them directly to your theme.
1. In the upper-left corner, click the second icon `Theme Settings`
2. Expand Custom CSS section and write your custom snippet, then click `Save`
### Default Placement
**If Checked**
* The Sezzle Checkout Button will be placed after the native checkout button and inherit page styles
**If Unchecked**
* The button will be placed as indicated by the app block placement
* Styles may also be affected, based on the placement selected
#### Custom CSS
If you are familiar with CSS and would like additional style customizations, you can write them directly to your theme.
1. In the upper-left corner, click the second icon `Theme Settings`
2. Expand Custom CSS section and write your custom snippet, then click `Save`
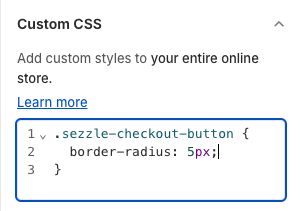 ### Troubleshooting
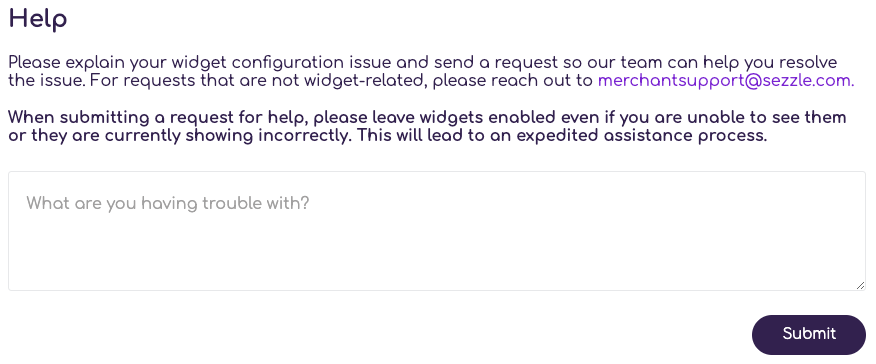 ### Manual Theme Code Snippet Installation
Installations that require code changes directly to the theme are not recommended unless your site uses a headless CMS, and should be used as a last resort.
#### Widget Manual Theme Code Snippet Installation
1. Within `Shopify Admin`, go to `Sales Channels` then `Online Store`
2. Under Themes, click `...` then `Edit Code` for the theme you wish to edit
### Manual Theme Code Snippet Installation
Installations that require code changes directly to the theme are not recommended unless your site uses a headless CMS, and should be used as a last resort.
#### Widget Manual Theme Code Snippet Installation
1. Within `Shopify Admin`, go to `Sales Channels` then `Online Store`
2. Under Themes, click `...` then `Edit Code` for the theme you wish to edit
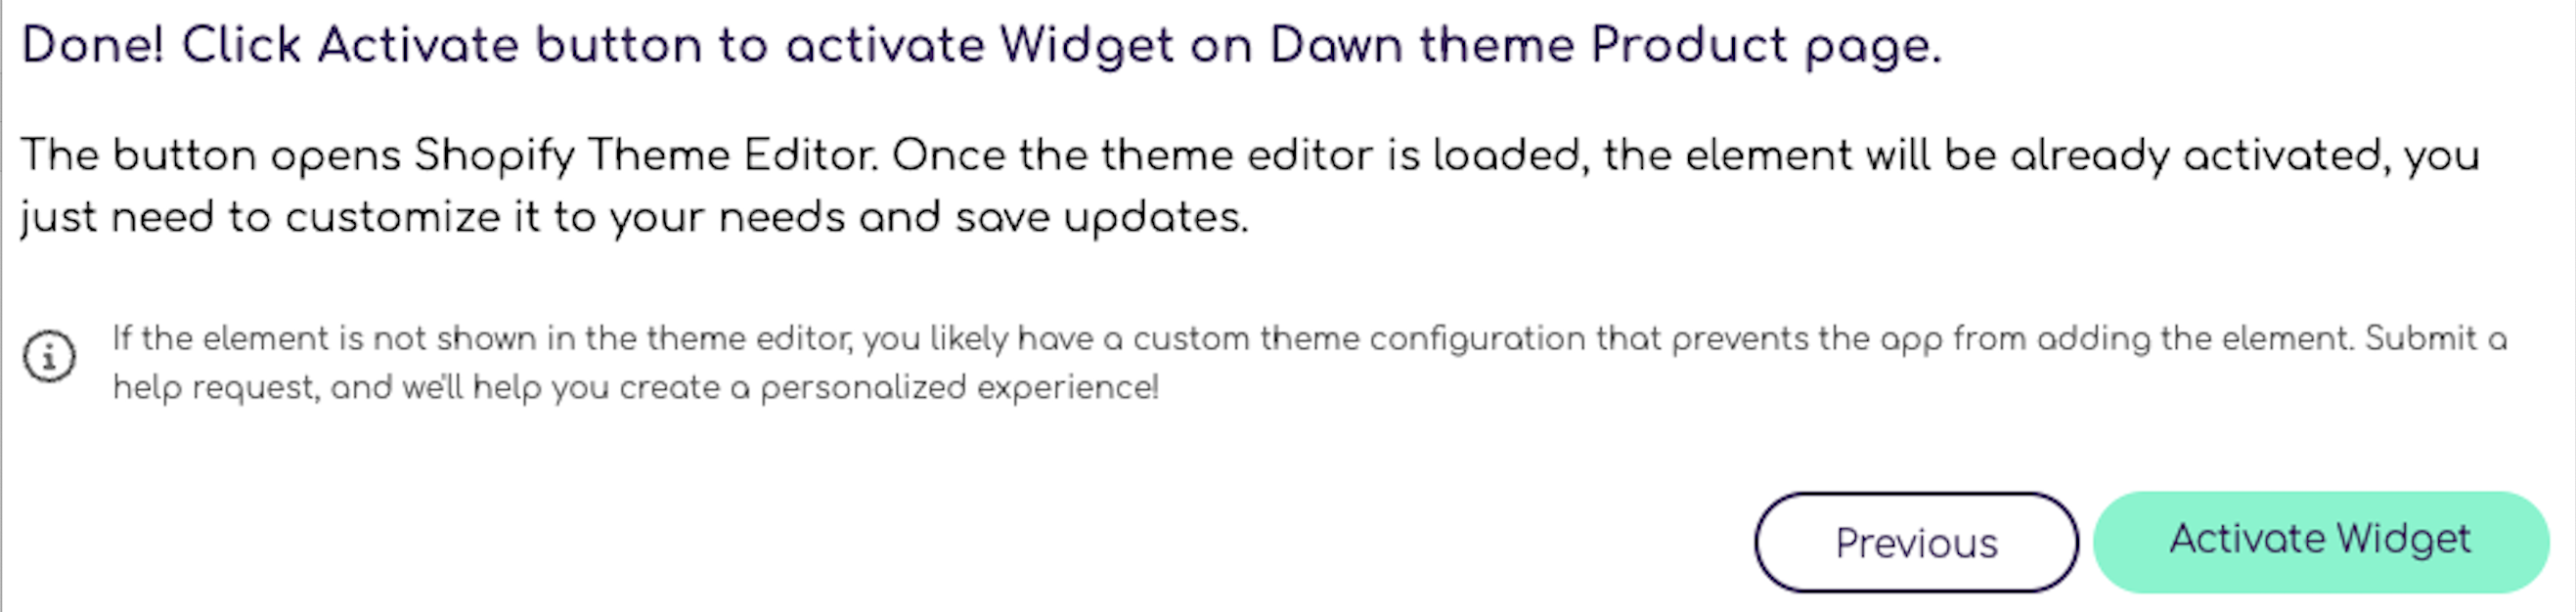 3. In the `Code Explorer`, go to the `Layout` folder and select the `theme.liquid` file
4. Copy and paste the script to the very bottom of the file
* Script template to be inserted into your webpage:
```
```
5. Replace `{sezzle_merchant_uuid}` (including the curly brackets) in the script template with your site’s Merchant ID
* This can be found in the [Sezzle Merchant Dashboard Business Settings](https://dashboard.sezzle.com/merchant/settings/business)
* Example with Merchant ID value updated:
```
```
6. Click `Save`
#### Checkout Button Manual Theme Code Snippet Installation
To install the checkout button directly to your theme code, please refer to the documentation and snippet on [GitHub](https://github.com/sezzle/static-widgets/tree/production/src/sezzle-checkout-button#install-as-html).
## Uninstalling
### Uninstalling Embed Blocks
1. Within `Shopify Admin`, go to `Sales Channels` then `Online Store`
2. Under `Themes`, click `Customize` for the theme you wish to edit
3. In the `Code Explorer`, go to the `Layout` folder and select the `theme.liquid` file
4. Copy and paste the script to the very bottom of the file
* Script template to be inserted into your webpage:
```
```
5. Replace `{sezzle_merchant_uuid}` (including the curly brackets) in the script template with your site’s Merchant ID
* This can be found in the [Sezzle Merchant Dashboard Business Settings](https://dashboard.sezzle.com/merchant/settings/business)
* Example with Merchant ID value updated:
```
```
6. Click `Save`
#### Checkout Button Manual Theme Code Snippet Installation
To install the checkout button directly to your theme code, please refer to the documentation and snippet on [GitHub](https://github.com/sezzle/static-widgets/tree/production/src/sezzle-checkout-button#install-as-html).
## Uninstalling
### Uninstalling Embed Blocks
1. Within `Shopify Admin`, go to `Sales Channels` then `Online Store`
2. Under `Themes`, click `Customize` for the theme you wish to edit
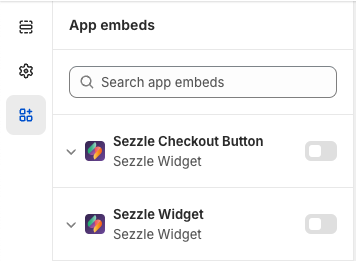 ### Uninstalling App Blocks
1. Within `Shopify Admin`, go to `Sales Channels` then `Online Store`
2. Under `Themes`, click `Customize` for the theme you wish to edit
### Uninstalling App Blocks
1. Within `Shopify Admin`, go to `Sales Channels` then `Online Store`
2. Under `Themes`, click `Customize` for the theme you wish to edit
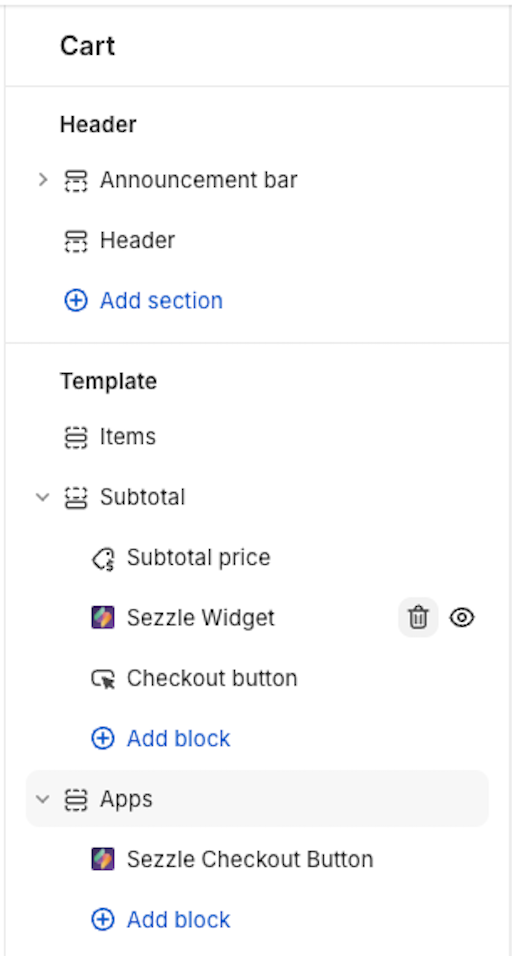 ### Uninstalling Manual Theme Code Snippet
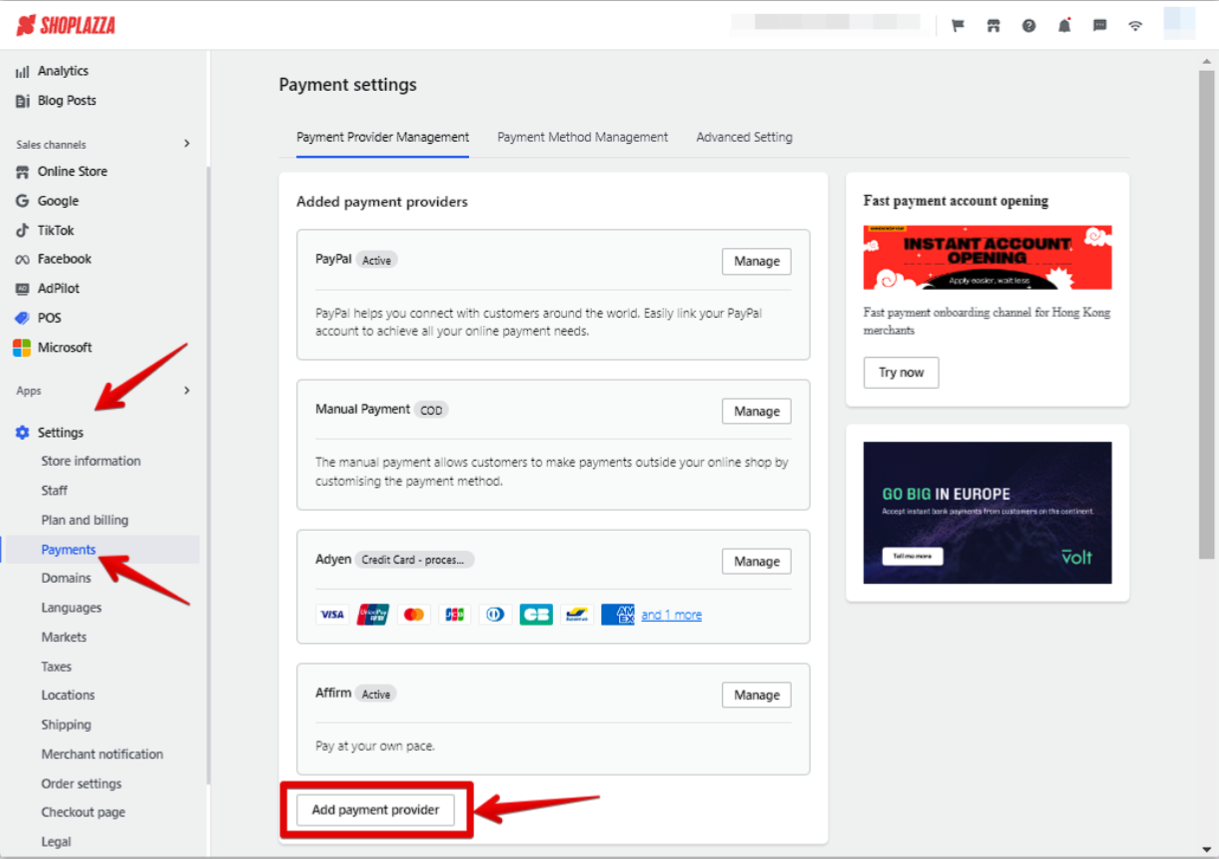 4. On the `Search by payment methods` tab, type `Sezzle` into the search bar, and select it from the results
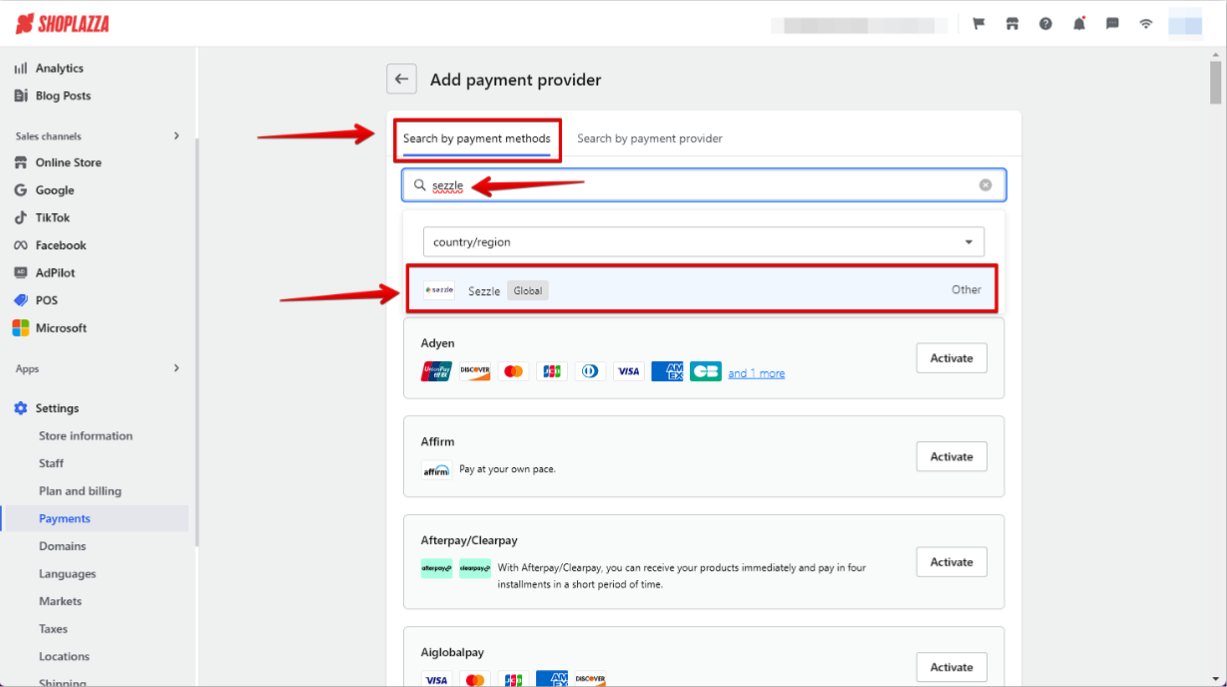 5. Click `Activate`
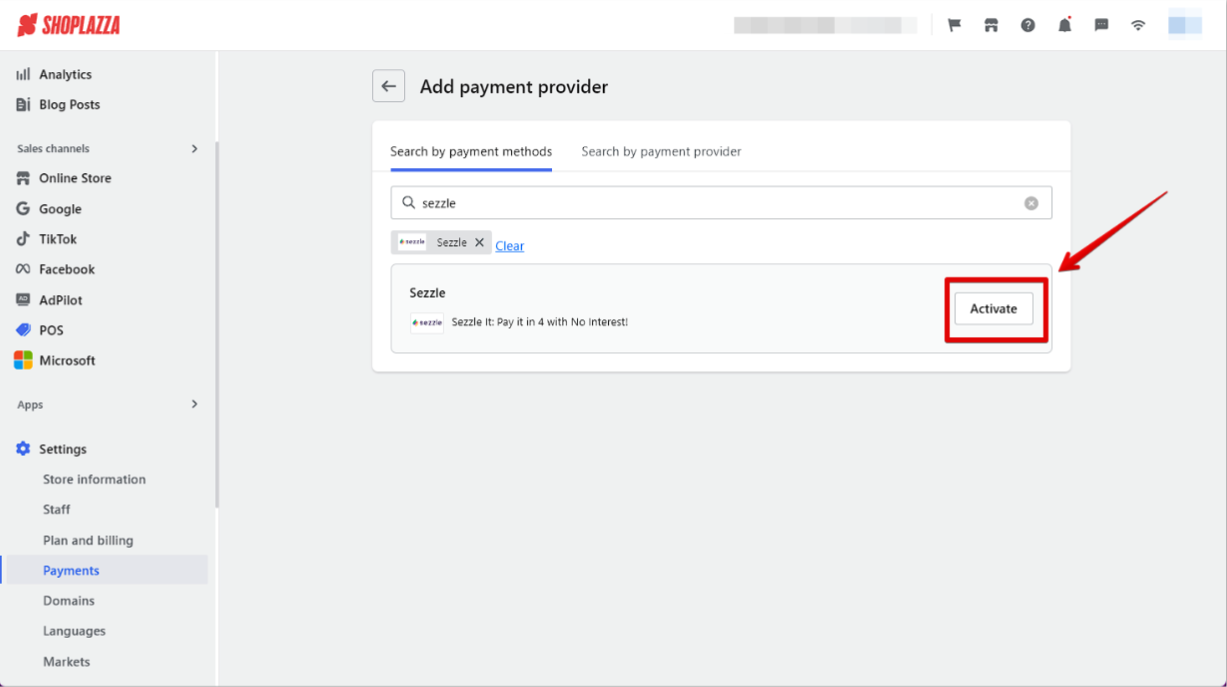 ### Admin Configuration
1. Go to `Settings` > `Payments`
2. Click `Manage`
3. Copy your Private Key and Public Key from your [Sezzle Merchant Dashboard](https://dashboard.sezzle.com/merchant/settings/apikeys)
* Paste them into the corresponding fields
4. Click `Activate`
### Admin Configuration
1. Go to `Settings` > `Payments`
2. Click `Manage`
3. Copy your Private Key and Public Key from your [Sezzle Merchant Dashboard](https://dashboard.sezzle.com/merchant/settings/apikeys)
* Paste them into the corresponding fields
4. Click `Activate`
 ### Validate
Step through a [test checkout](/docs/api/test-cards#checkout-testing) to validate the integration is properly installed.
### Validate
Step through a [test checkout](/docs/api/test-cards#checkout-testing) to validate the integration is properly installed.
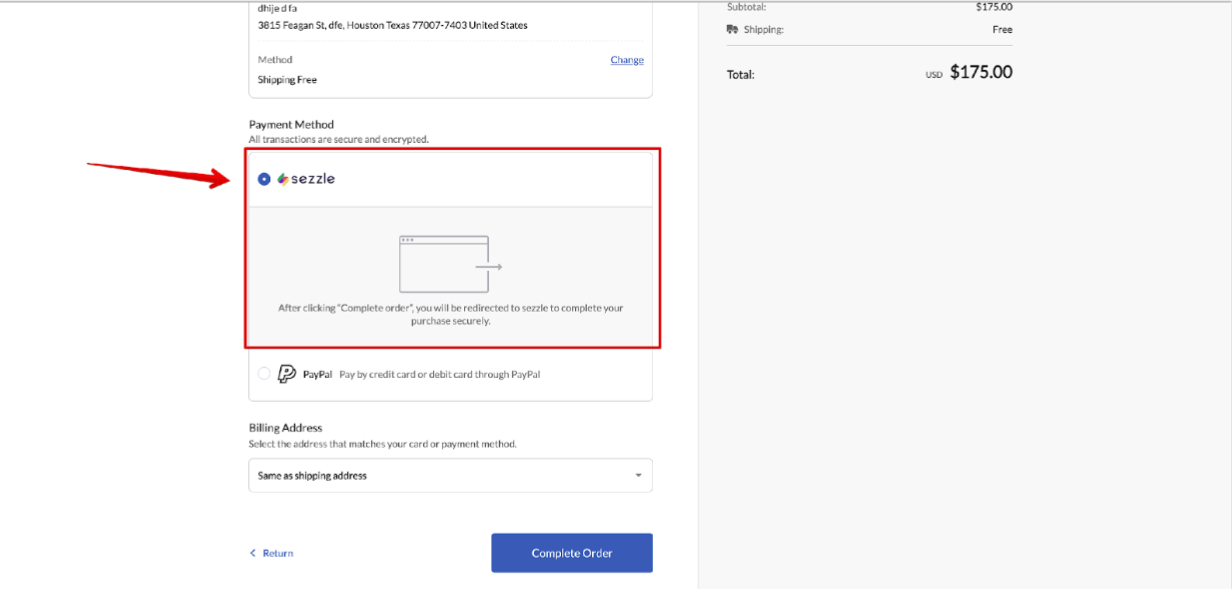 ### Troubleshooting
*Coming soon*
### Uninstall the Sezzle Shoplazza app
1. Go to `Settings` > `Payments`
2. Click `Manage`
### Troubleshooting
*Coming soon*
### Uninstall the Sezzle Shoplazza app
1. Go to `Settings` > `Payments`
2. Click `Manage`
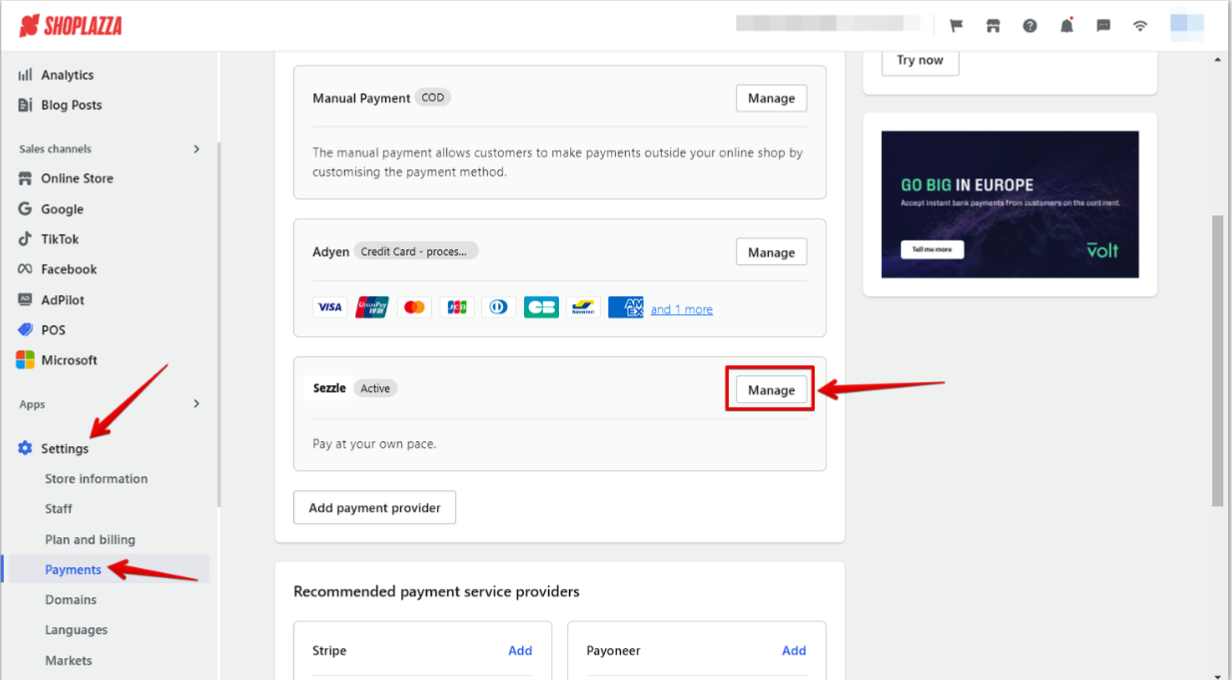 3. Click `Disable`
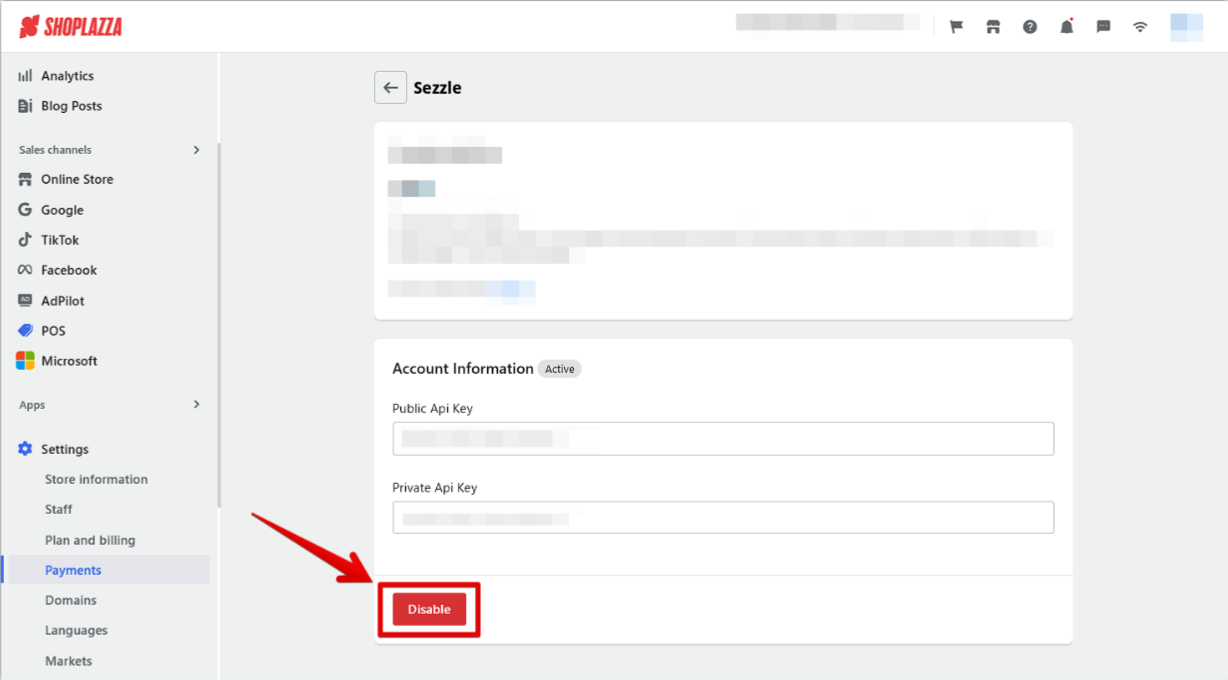 ### FAQs
*Coming soon*
# Shopware 5
Source: https://docs.sezzle.com/docs/plugins/shopware-5
This guide explains how to add Sezzle as a payment option on your Shopware 5 website, enabling customers to use Sezzle at checkout. Additionally, it includes steps to upgrade existing integrations to the latest version of the plugin.
### FAQs
*Coming soon*
# Shopware 5
Source: https://docs.sezzle.com/docs/plugins/shopware-5
This guide explains how to add Sezzle as a payment option on your Shopware 5 website, enabling customers to use Sezzle at checkout. Additionally, it includes steps to upgrade existing integrations to the latest version of the plugin.

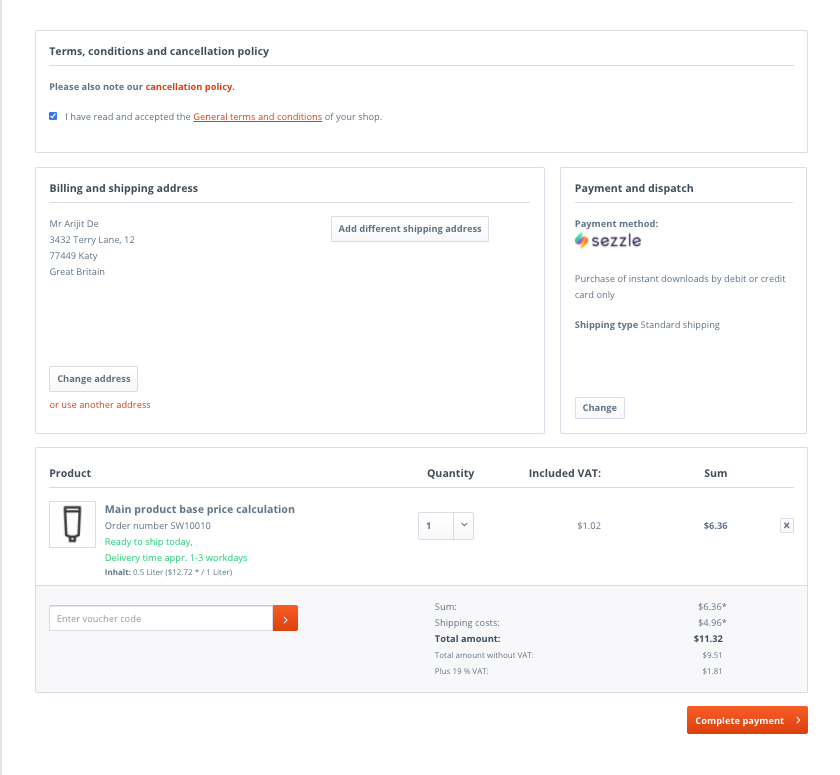 ### Capture Payment
**If Payment Action is set to Authorize and Capture**
* Capture will be performed instantly from the plugin after order is created and validated in `Shopware`
**If Payment Action is set to Authorize**
* Capture needs to be performed manually from the `Shopware` backend. Follow the below steps to capture:
1. Go the order and click on `Sezzle` tab
2. Enter a value in `Amount` field
3. Click on `Capture` to capture the payment in Sezzle
### Refund Payment
1. Go the order and click on `Sezzle` tab
2. Enter a value in `Amount` field
3. Click on `Refund` to refund the payment in Sezzle
### Release Payment
1. Go the order and click on `Sezzle` tab
2. Enter a value in `Amount` field
3. Click on `Release` to release the payment in Sezzle
### Order Verification in Shopware Backend
Merchants should always check the payment status and amount of all orders. The following steps ensure that each action has been completed as expected.
1. Log in to Shopware admin and navigate to `Customers` > `Orders`
### Capture Payment
**If Payment Action is set to Authorize and Capture**
* Capture will be performed instantly from the plugin after order is created and validated in `Shopware`
**If Payment Action is set to Authorize**
* Capture needs to be performed manually from the `Shopware` backend. Follow the below steps to capture:
1. Go the order and click on `Sezzle` tab
2. Enter a value in `Amount` field
3. Click on `Capture` to capture the payment in Sezzle
### Refund Payment
1. Go the order and click on `Sezzle` tab
2. Enter a value in `Amount` field
3. Click on `Refund` to refund the payment in Sezzle
### Release Payment
1. Go the order and click on `Sezzle` tab
2. Enter a value in `Amount` field
3. Click on `Release` to release the payment in Sezzle
### Order Verification in Shopware Backend
Merchants should always check the payment status and amount of all orders. The following steps ensure that each action has been completed as expected.
1. Log in to Shopware admin and navigate to `Customers` > `Orders`
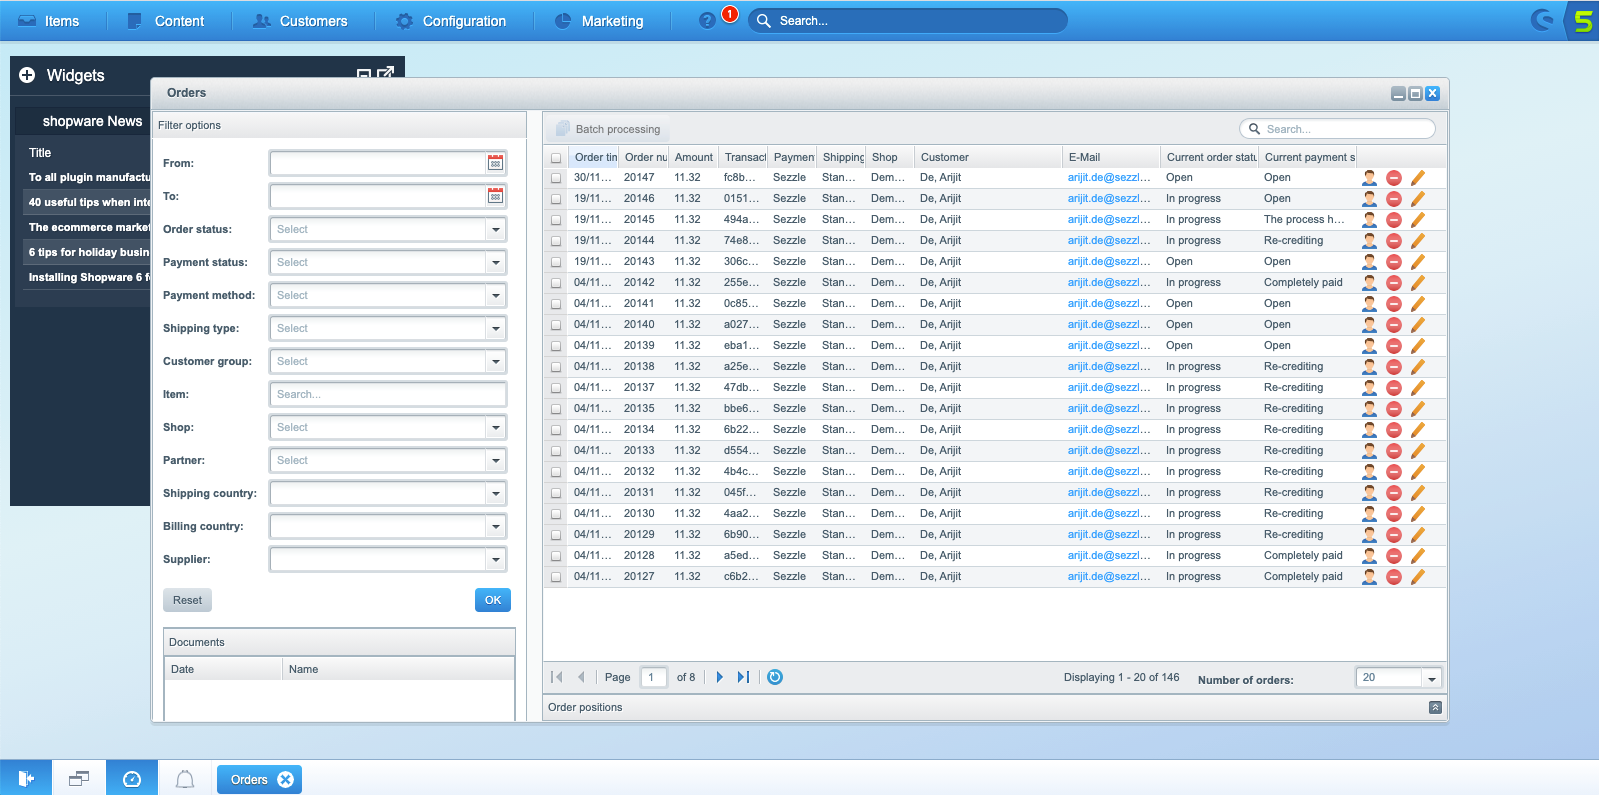 2. Proceed into the corresponding order
* Payment is **successfully captured** by Sezzle when
* `Current Payment Status` `=` `Completely Paid`
* `Capture Amount` `=` `Auth Amount`
* Payment is only **authorized** when
* `Current Payment Status` `=` `Open`
* `Auth Amount` `=` `Order Amount`
* `Capture Amount` `=` `0`
* Payment is **refunded** when
* `Current Payment Status` `=` `Re-crediting`
* `Refund Amount` `=<` `Capture Amount`
* Payment is **released** when
* `Current Payment Status` `=` `The process is cancelled for a full release or Open for a partial release`
* Amount will be deducted from `Auth Amount` and should appear in `Released Amount`
2. Proceed into the corresponding order
* Payment is **successfully captured** by Sezzle when
* `Current Payment Status` `=` `Completely Paid`
* `Capture Amount` `=` `Auth Amount`
* Payment is only **authorized** when
* `Current Payment Status` `=` `Open`
* `Auth Amount` `=` `Order Amount`
* `Capture Amount` `=` `0`
* Payment is **refunded** when
* `Current Payment Status` `=` `Re-crediting`
* `Refund Amount` `=<` `Capture Amount`
* Payment is **released** when
* `Current Payment Status` `=` `The process is cancelled for a full release or Open for a partial release`
* Amount will be deducted from `Auth Amount` and should appear in `Released Amount`
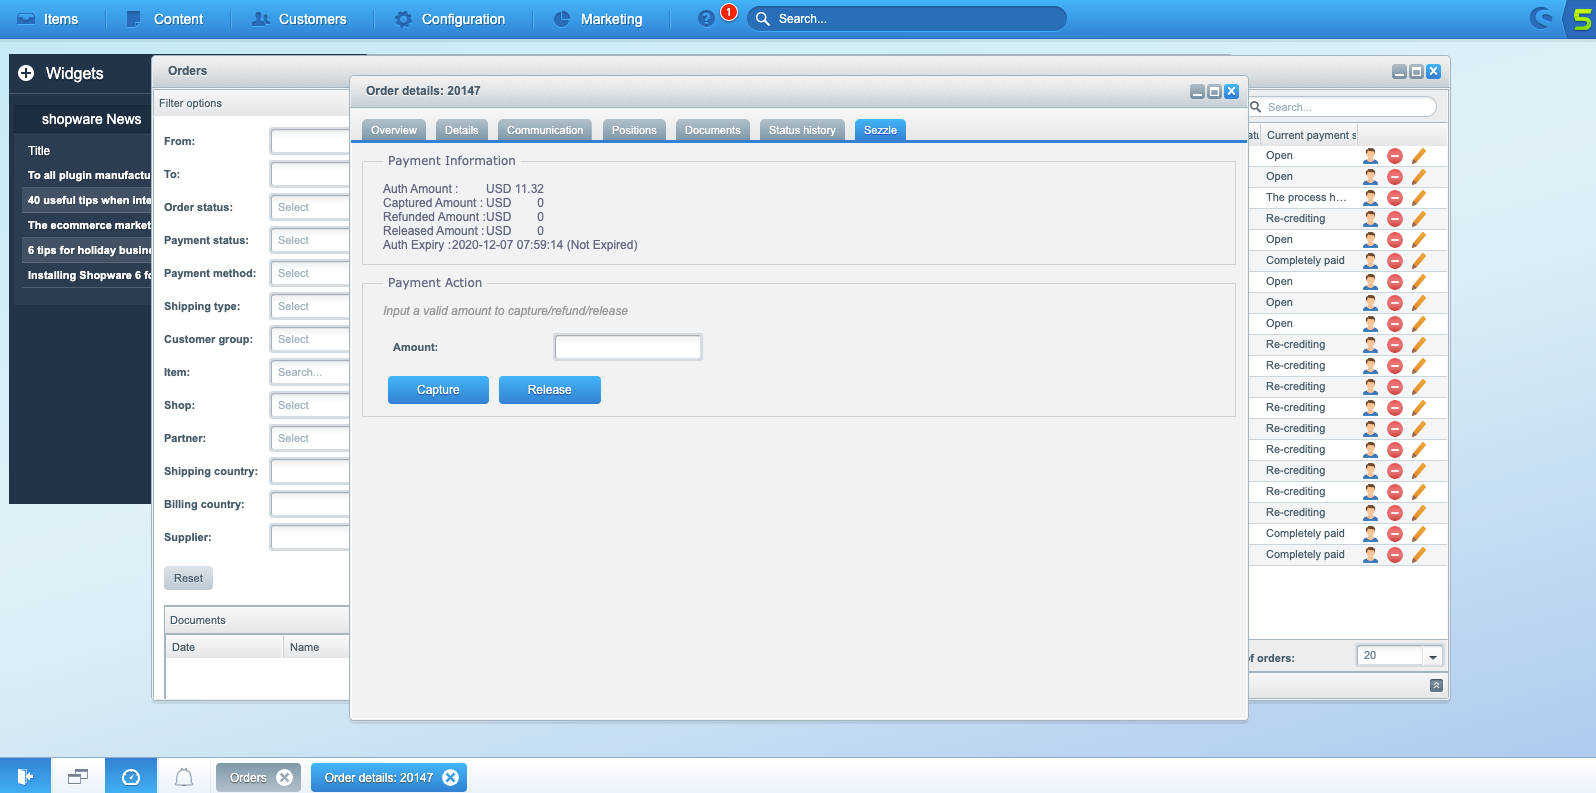 ### Order Verification in Sezzle Merchant Dashboard
1. Log in to Sezzle Merchant Dashboard and navigate to `Orders`
2. Proceed into the corresponding order
| Payment Status | Description |
| :----------------------------------------------------------- | :---------------------------------------------------------------- |
| Approved | Payment successfully captured |
| Authorized, uncaptured | Payment authorized but not captured |
| Refunded or Partially Refunded | Payment refunded |
| Deleted due to checkout not being captured before expiration | Payment released or not captured before the authorization expired |
### Customer Tokenization Details
1. Log in to Shopware Backend and navigate to `Customers` > `Customers`
2. Select customer to view tokenization details
* `Sezzle Customer UUID`, `Sezzle Customer UUID Expiry` and `Sezzle Customer UUID Status` will appear under `Free text fields`
### Order Verification in Sezzle Merchant Dashboard
1. Log in to Sezzle Merchant Dashboard and navigate to `Orders`
2. Proceed into the corresponding order
| Payment Status | Description |
| :----------------------------------------------------------- | :---------------------------------------------------------------- |
| Approved | Payment successfully captured |
| Authorized, uncaptured | Payment authorized but not captured |
| Refunded or Partially Refunded | Payment refunded |
| Deleted due to checkout not being captured before expiration | Payment released or not captured before the authorization expired |
### Customer Tokenization Details
1. Log in to Shopware Backend and navigate to `Customers` > `Customers`
2. Select customer to view tokenization details
* `Sezzle Customer UUID`, `Sezzle Customer UUID Expiry` and `Sezzle Customer UUID Status` will appear under `Free text fields`
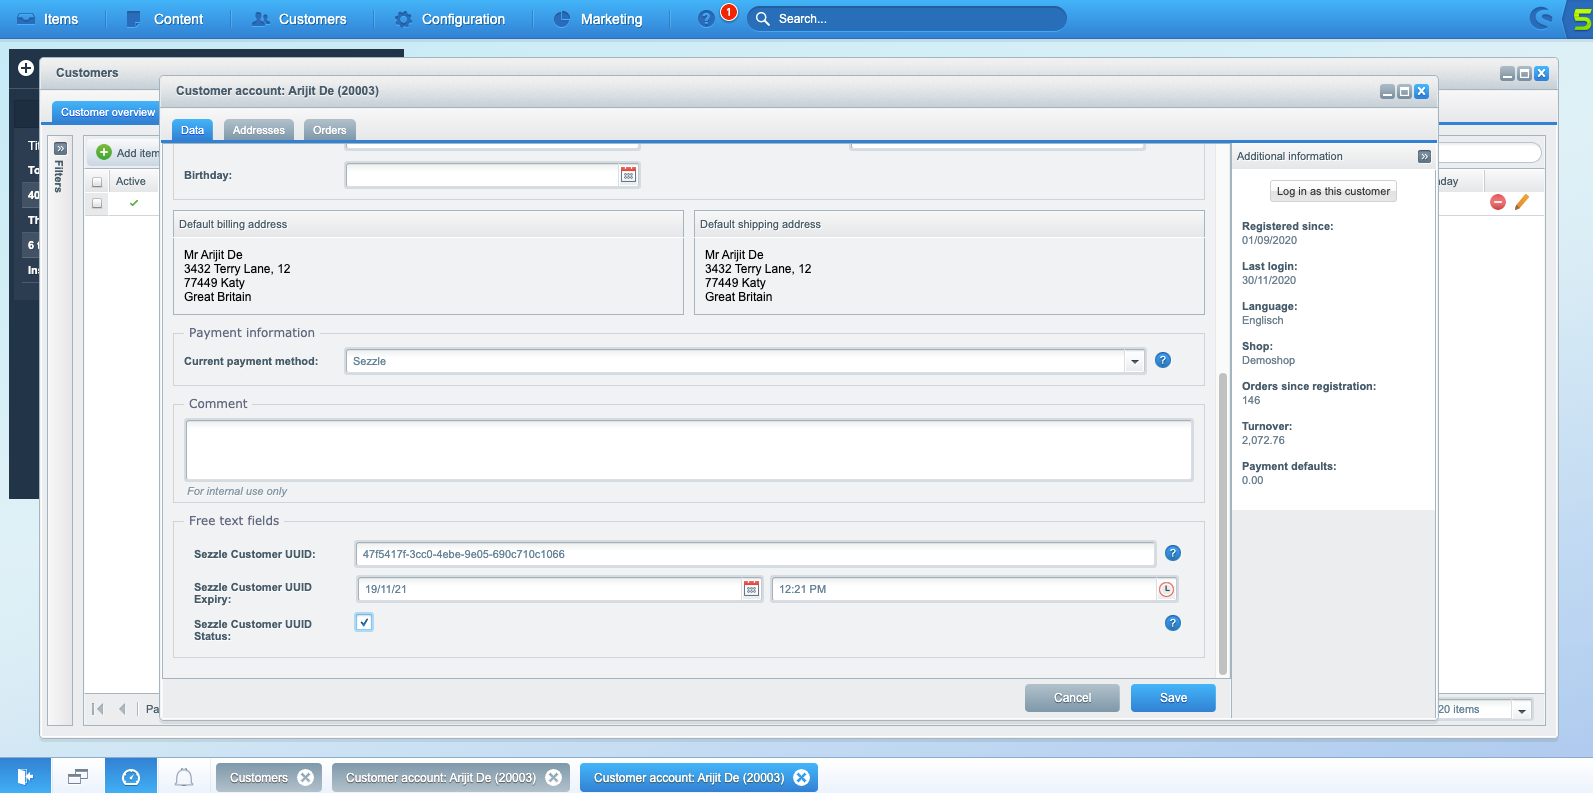 ### Validate
Step through a [test checkout](/docs/api/test-cards#live-checkout-testing) to validate the integration is properly installed
### Troubleshooting
* `Sezzle` plugin creates logs of `Sezzle` action
* In the event that Merchant Success and Support teams are unable to resolve any issue, the Merchant may request that these logs be forwarded to the Platform Integrations team for further troubleshooting
* Logs are named as `plugin_dev-
### Validate
Step through a [test checkout](/docs/api/test-cards#live-checkout-testing) to validate the integration is properly installed
### Troubleshooting
* `Sezzle` plugin creates logs of `Sezzle` action
* In the event that Merchant Success and Support teams are unable to resolve any issue, the Merchant may request that these logs be forwarded to the Platform Integrations team for further troubleshooting
* Logs are named as `plugin_dev- 2. In the left sidebar, click `Plugins` > `Add New`
3. Search for `Sezzle`
4. Click `Install Now`
2. In the left sidebar, click `Plugins` > `Add New`
3. Search for `Sezzle`
4. Click `Install Now`
 5. Click `Activate`
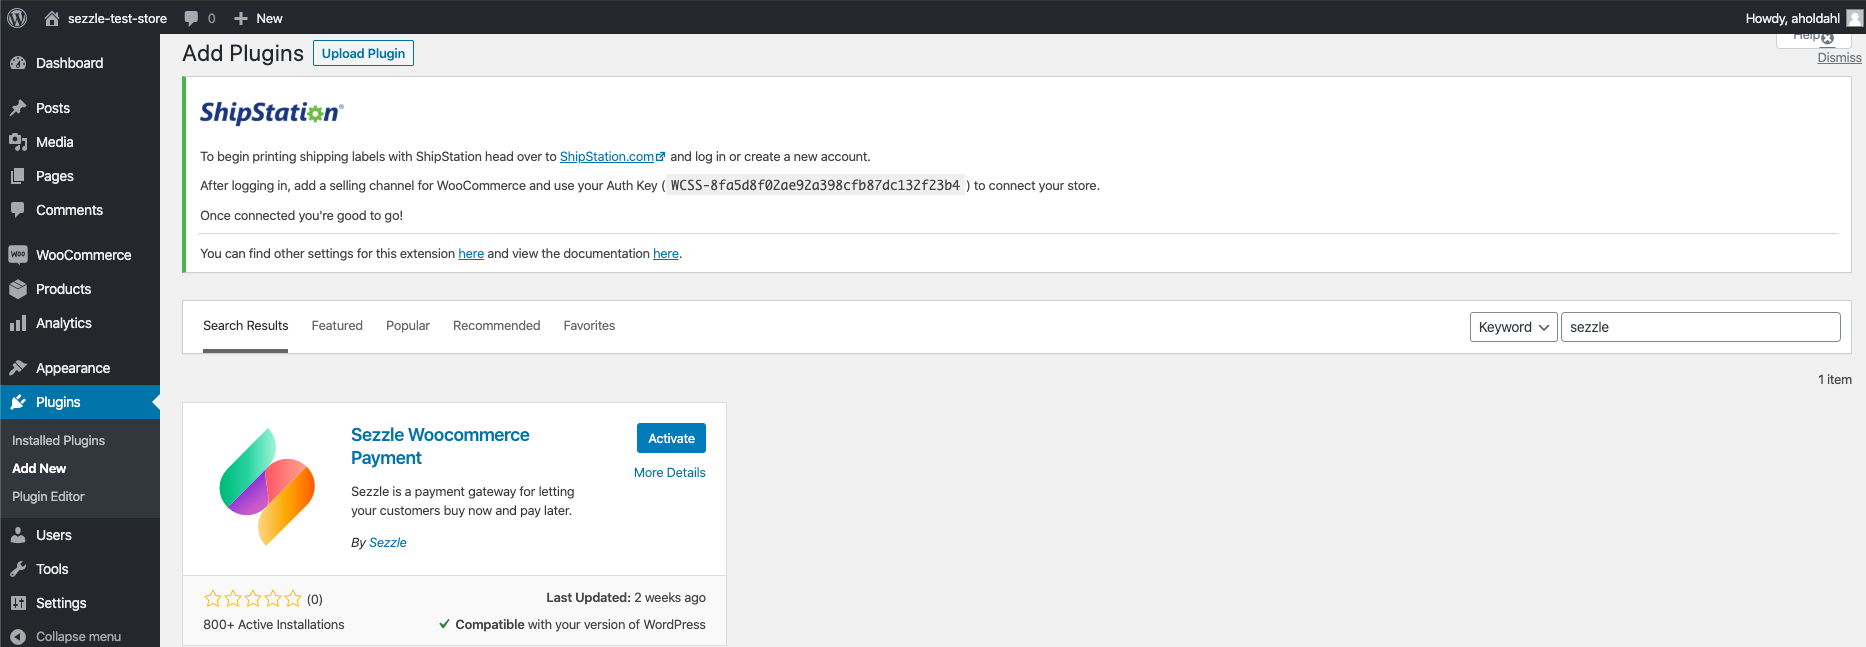 ### Admin Configuration
1. In the left sidebar, click `WooCommerce` > `Settings`
2. Select the `Payments` tab
### Admin Configuration
1. In the left sidebar, click `WooCommerce` > `Settings`
2. Select the `Payments` tab
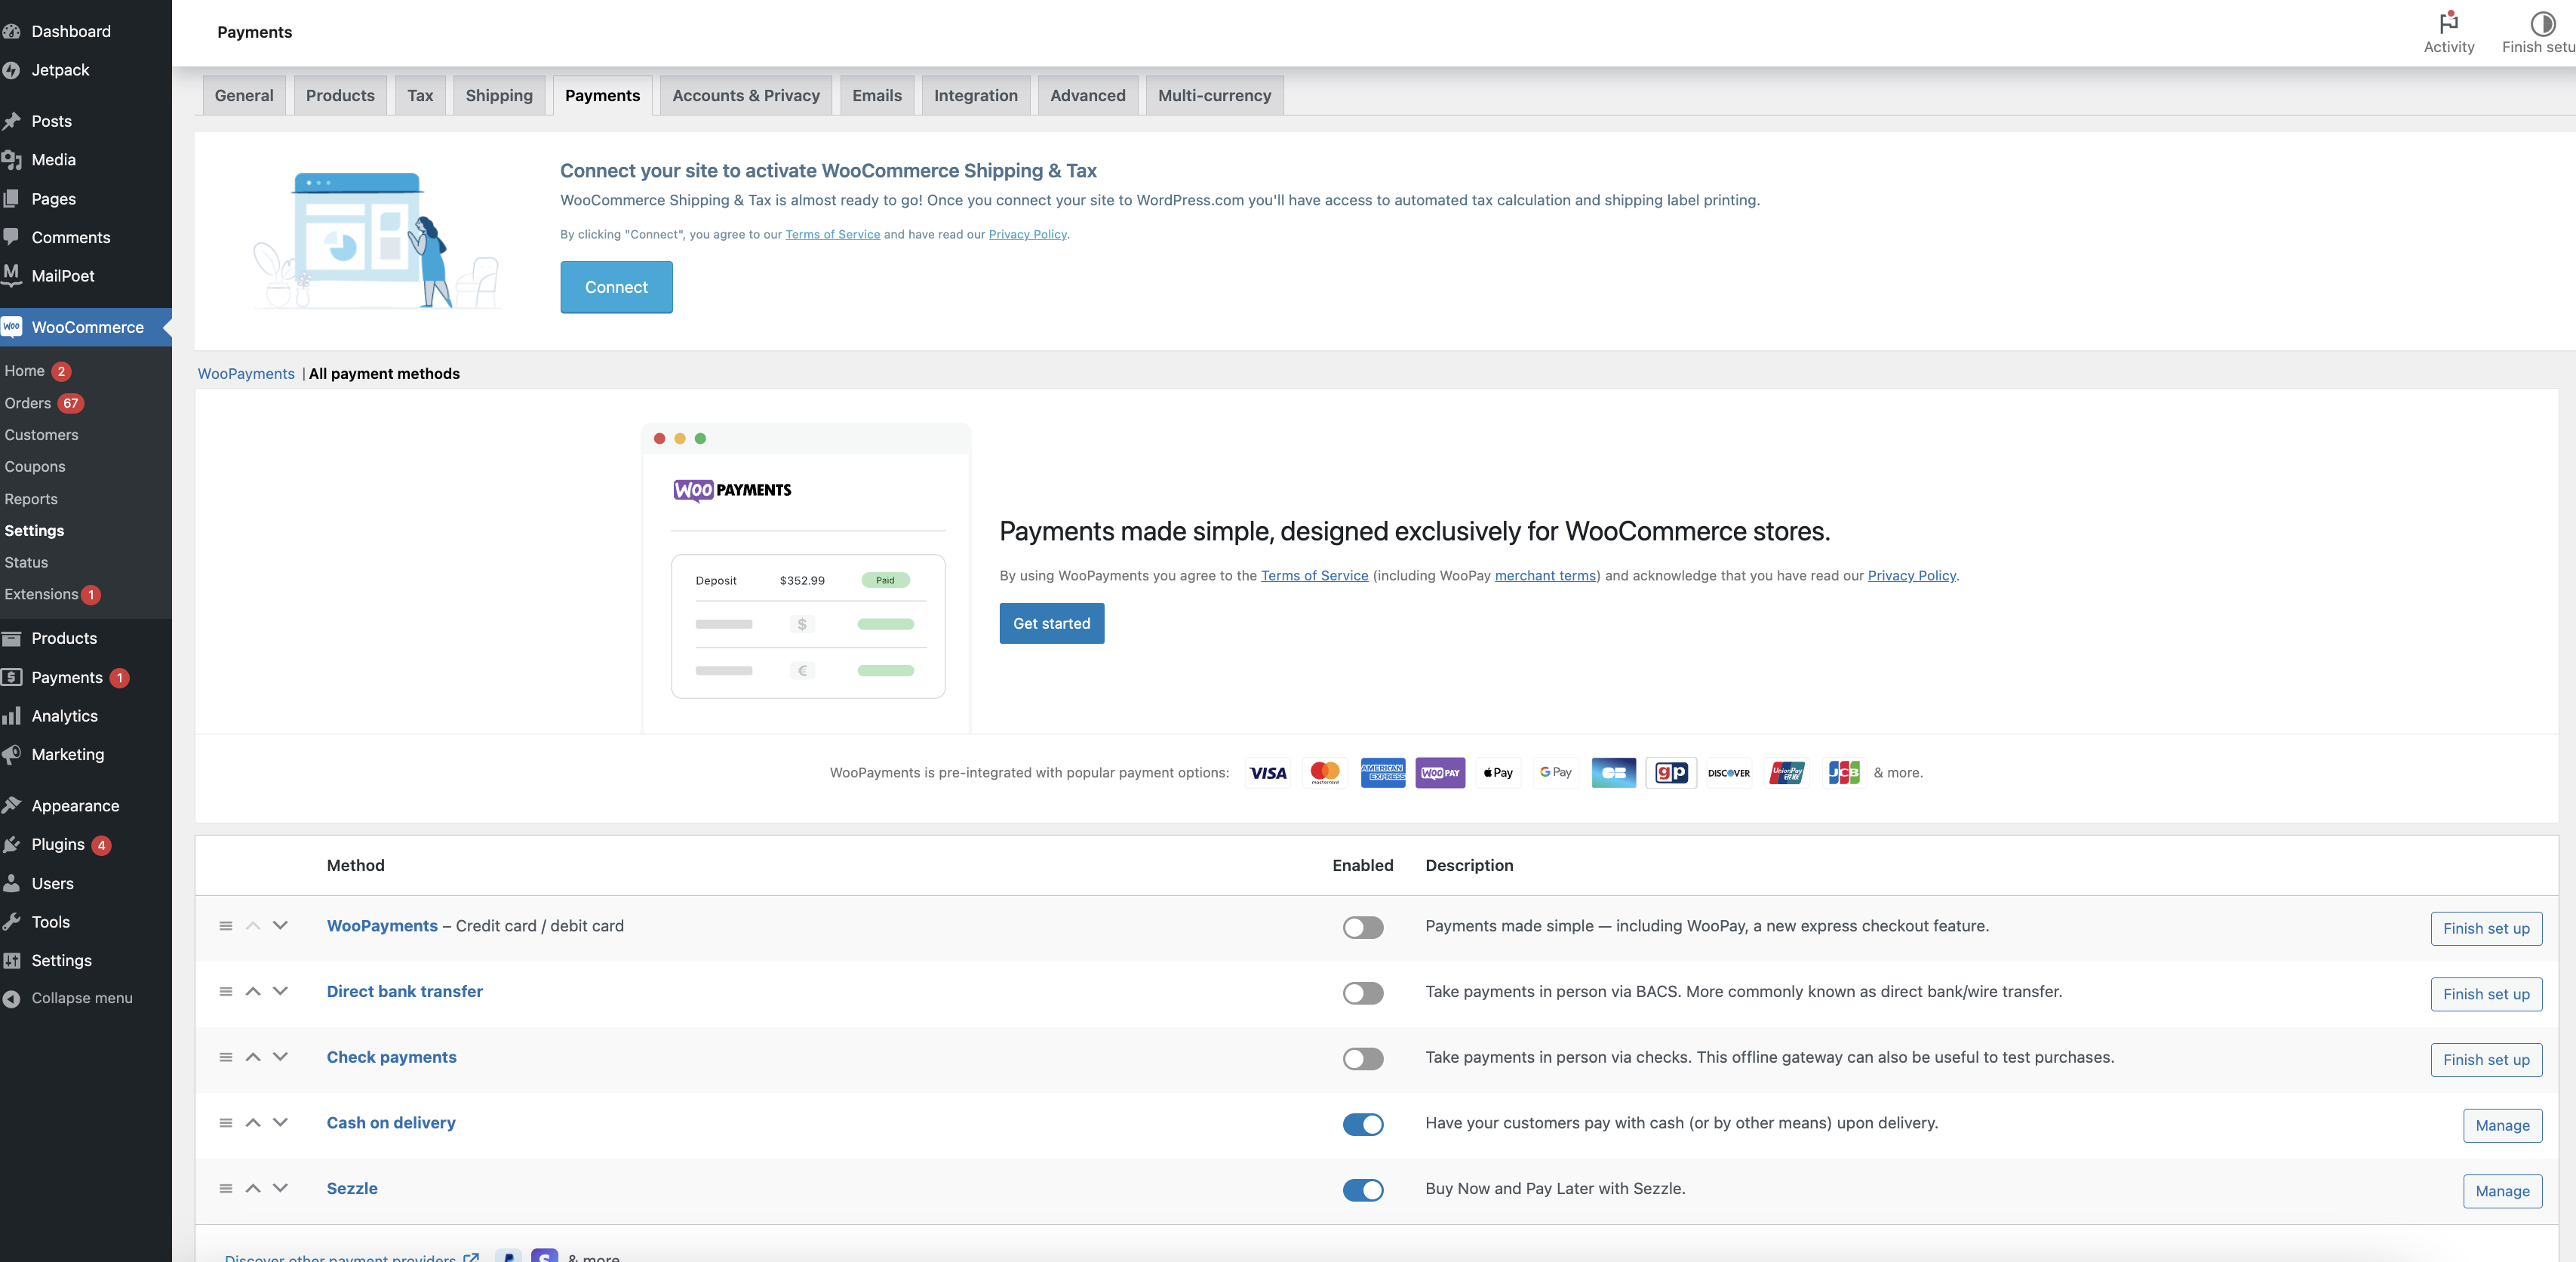 3. Click the `Manage` button for Sezzle
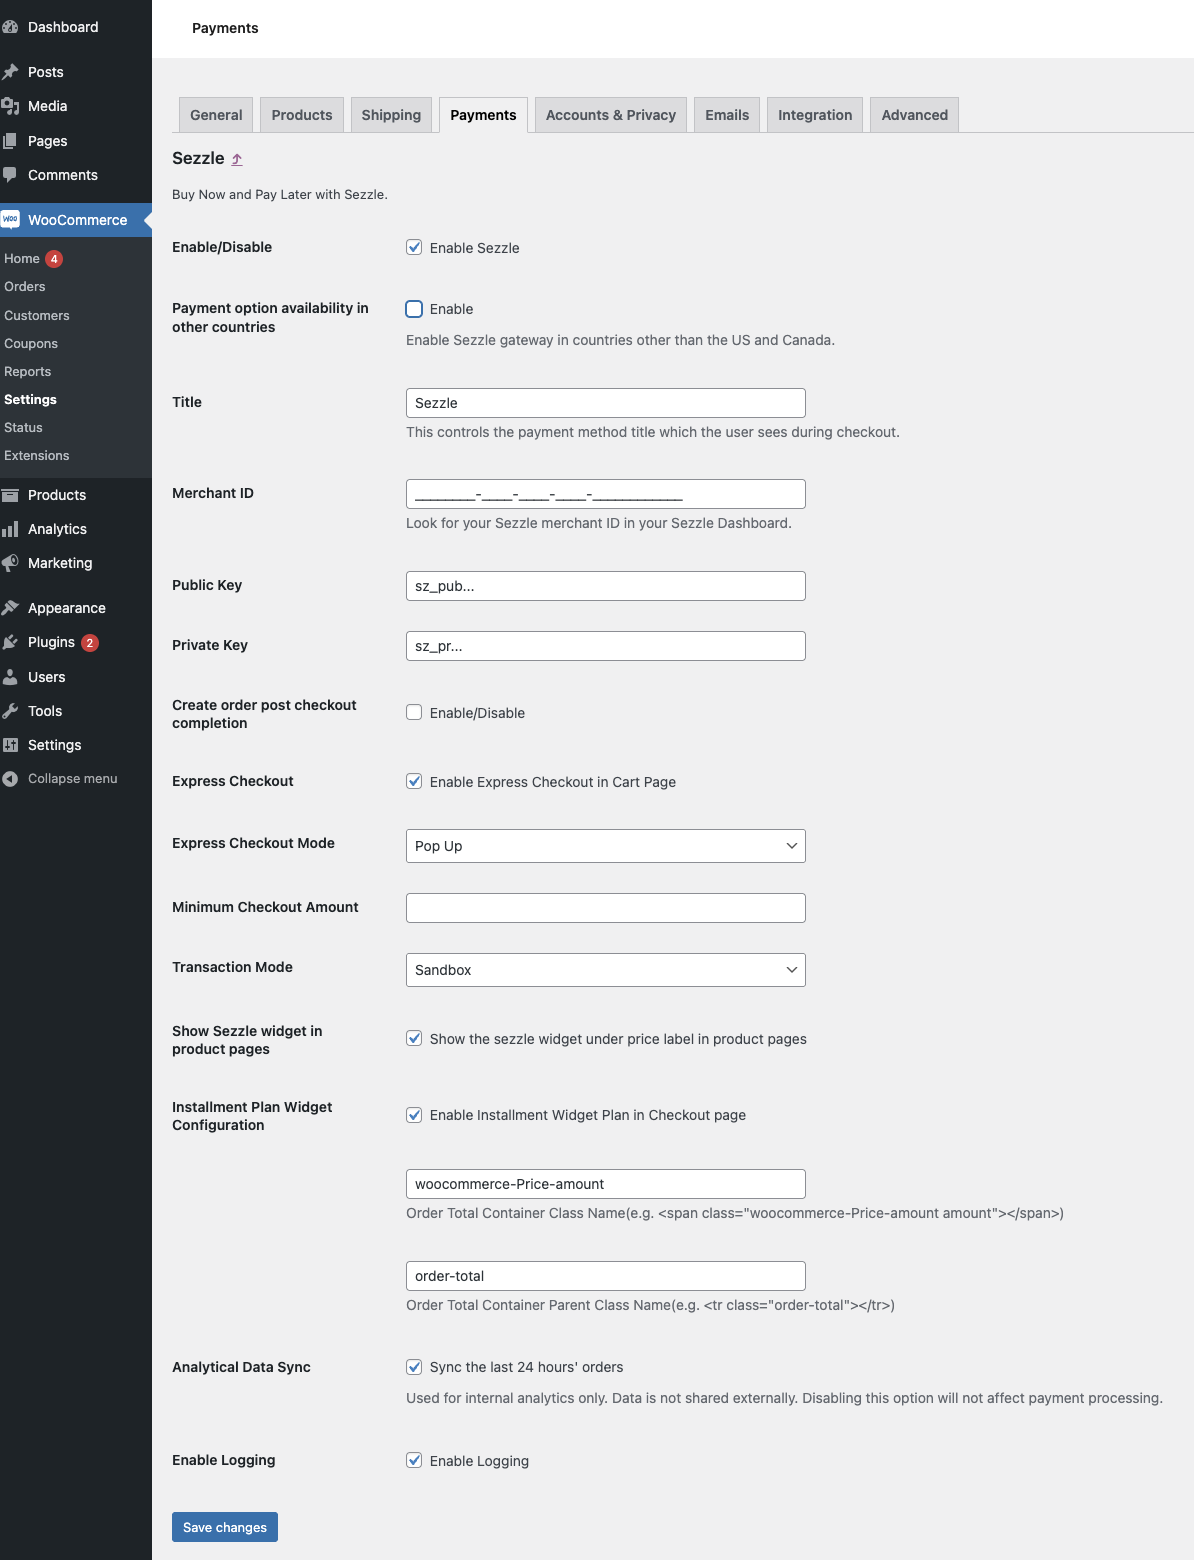 4. Check the `Enable/Disable` checkbox for enabling Sezzle
5. Please ensure only US and Canada are selected as Sezzle operates only in `US` and `Canada`
4. Check the `Enable/Disable` checkbox for enabling Sezzle
5. Please ensure only US and Canada are selected as Sezzle operates only in `US` and `Canada`
 3. Configure the extension
1. Set `Enabled` to `Yes`
2. Copy your Merchant ID from your [Sezzle Merchant Dashboard](https://dashboard.sezzle.com/merchant/settings/business)
* Paste it into the corresponding field in the Sezzle configuration page of your Zoey admin
3. Copy your Public Key and Private Key from your [Sezzle Merchant Dashboard](https://dashboard.sezzle.com/merchant/settings/apikeys)
* Paste them into the corresponding fields in the Sezzle configuration page of your Zoey admin
4. Widget Script Placements
3. Configure the extension
1. Set `Enabled` to `Yes`
2. Copy your Merchant ID from your [Sezzle Merchant Dashboard](https://dashboard.sezzle.com/merchant/settings/business)
* Paste it into the corresponding field in the Sezzle configuration page of your Zoey admin
3. Copy your Public Key and Private Key from your [Sezzle Merchant Dashboard](https://dashboard.sezzle.com/merchant/settings/apikeys)
* Paste them into the corresponding fields in the Sezzle configuration page of your Zoey admin
4. Widget Script Placements
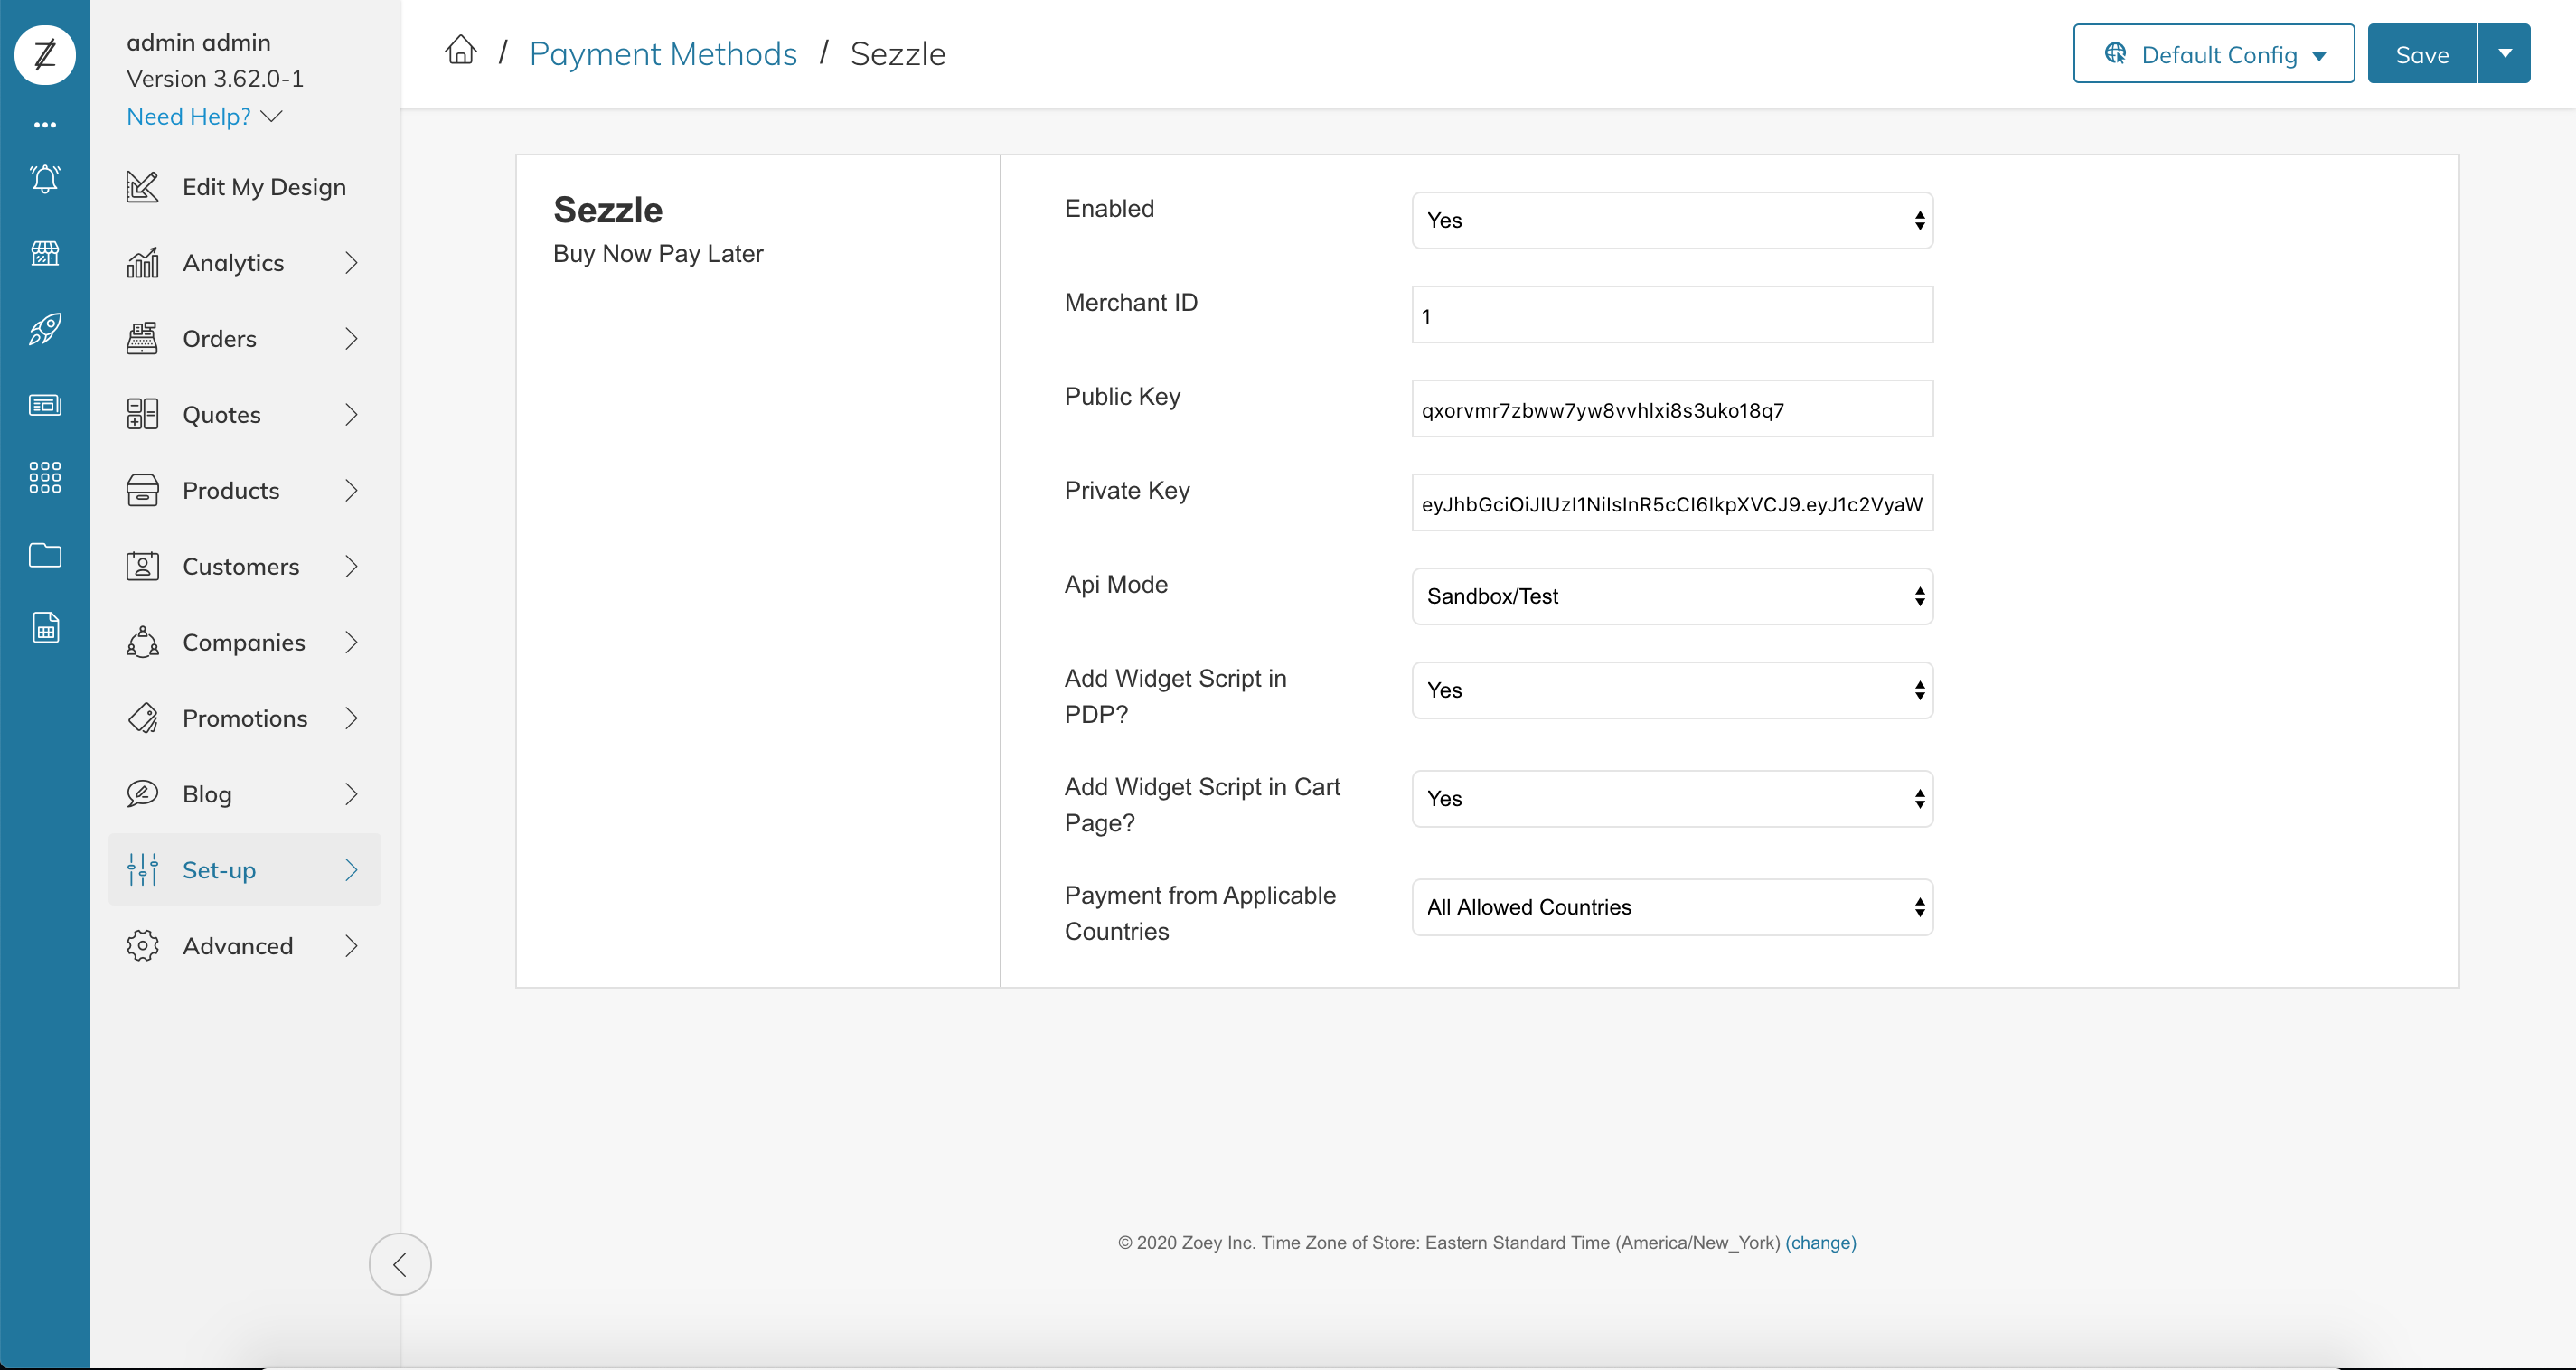 8. Click `Advanced/Refresh Your Store`