Introduction
You are viewing Version 1 of the Sezzle API. Check out the current version!
The Sezzle API v1 is intended for merchants interested in accepting Sezzle as a payment option. The Sezzle Integration Flow illustrates the user payment interaction.
Sezzle supports individually authorized transactions for a single purchase of goods or services.
Sezzle offers integrations with some of the most popular eCommerce platforms.
Note that v2 indicates support for v2 API only.
Please choose your platform to see the relevant documentation:
- 3DCart
- BigCommerce v2
- Bold Cashier
- BuyItLive
- CommentSold
- Magento 1
- Magento 2 v2
- Mojo v2
- NopCommerce
- Salesforce Commerce Cloud v2
- Shopify
- Shopware 5 v2
- Wix v2
- WooCommerce
- Zoey
Field or header names in bold case followed by an asterisk are required. (For example, this_is_required* is a required field whereas this_is_optional is not.)
If you have any questions regarding our API, please reach out to our team by email at dev@sezzle.com.
Testing
While you are working on the integration, you should test it before going live. Please use this section for information on testing.
Sandbox
API Endpoint https://sandbox.gateway.sezzle.com/v1
Sandbox Dashboard https://sandbox.dashboard.sezzle.com/merchant
Test Data
You can use the following test data to test your integration
Bank
Bank Test Bank
Username demo
Password go
Card
Card Number 4242424242424242
CVV/CVC any (3 numbers)
Expiration Date any
Name any
Address any
Phone and other information
- Please use any valid phone number.
- The expected
OTPis123123. - Personal information does not need to be real.
Open API
The OpenAPI Specification (OAS) defines a standard, language-agnostic interface to RESTful APIs which allows both humans and computers to discover and understand the capabilities of the service without access to source code, documentation, or through network traffic inspection.
Specification
Download the Sezzle OpenAPI Specification for Sandbox or Production.
Client Generator
The Sezzle OpenAPI Specification can be imported into the Swagger Editor to easily generate a Sezzle client in a variety of programming languages. Generate a Sezzle client for Sandbox or Production.
Integration Flow
Overview of Integration Flow
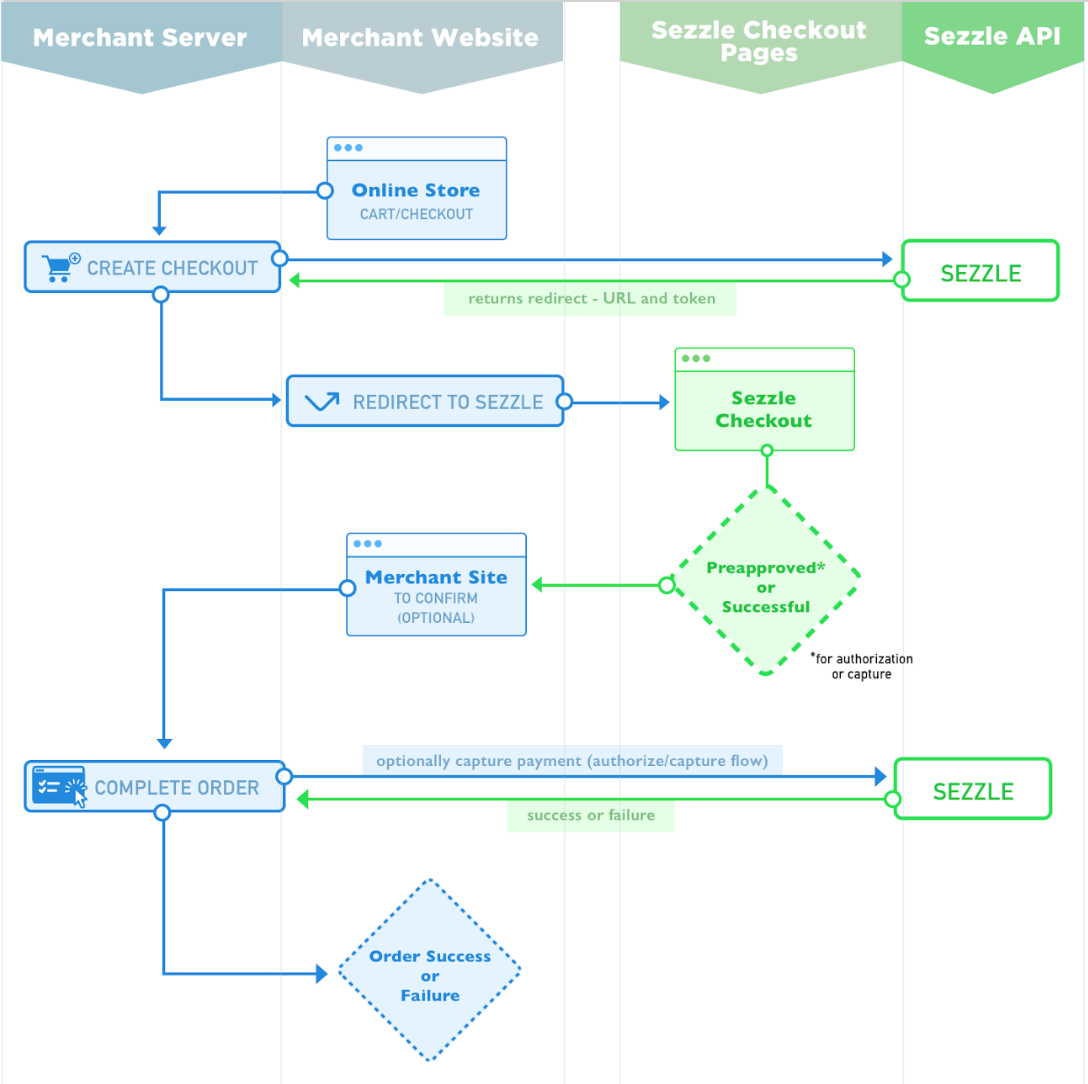
Explanation of payment flow
- Merchant calls
/v1/checkoutsto send cart data to Sezzle. - Sezzle returns URL to redirect consumer to make payment at Sezzle checkout.
- Merchant redirects the consumer to Sezzle.
- When the consumer completes the Sezzle checkout flow, they are redirected back to merchant's website.
- Alternatively, on approval, the consumer is redirected from Sezzle checkout to merchant's website and merchant captures the order by calling
/v1/complete.
Authentication
Obtain Authentication Token
To authorize, use the following format:
Request Body
{
    "public_key": "myPublicKey",
    "private_key": "myPrivateKey"
}
Make sure to replace
keyswith your API keys from your Merchant Dashboard.
Response Body
{
    "token": "authToken",
    "expiration_date": "2017-01-01T01:30:25.388940303Z",
    "merchant_uuid": "merchant1234567890"
}
POST https://gateway.sezzle.com/v1/authentication
Sezzle uses scoped API keys to allow access to the API. You can find/generate these keys on your merchant dashboard once you have been approved by Sezzle.
Once you have a valid token, it must be used as a Header for subsequent requests to our API, using the format below.
Authorization: Bearer authToken
Configuration
Setting your configuration
Request Body
{
    "webhook_url": "https://yourdomain.com/webhook"
}
There is no response body for this request. If successful, we return an HTTP 200 Status OK.
POST https://gateway.sezzle.com/v1/configuration
At this time, Sezzle only allows configuration of the URL that we send our webhooks to.
| Parameter | Type | Description |
|---|---|---|
| webhook_url* | string | A URL for us to send our webhooks to. |
Checkouts
Create a Checkout
Request Body
{
    "amount_in_cents": 12999,
    "currency_code": "USD",
    "order_reference_id": "Ref123456789",
    "order_description": "Order #1800",
    "checkout_cancel_url": "https://sezzle.com/cart",
    "checkout_complete_url": "https://sezzle.com/complete",
    "customer_details":
    {
        "first_name": "John",
        "last_name": "Doe",
        "email": "john.doe@sezzle.com",
        "phone": "5555045294"
    },
    "billing_address": {
        "name": "John Doe",
        "street": "123 W Lake St",
        "street2": "Unit 104",
        "city": "Minneapolis",
        "state": "MN",
        "postal_code": "55408",
        "country_code": "US",
        "phone_number": "5555045294"
    },
    "shipping_address": {
        "name": "John Doe",
        "street": "123 W Lake St",
        "street2": "Unit 104",
        "city": "Minneapolis",
        "state": "MN",
        "postal_code": "55408",
        "country_code": "US",
        "phone_number": "5555045294"
    },
    "requires_shipping_info": false,
    "items": [
        {
          "name": "widget",
          "sku": "sku123456",
          "quantity": 1,
          "price": {
              "amount_in_cents": 1000,
              "currency": "USD"
          }
        }
    ],
    "discounts": [
        {
          "name": "20% off",
          "amount": {
              "amount_in_cents": 1000,
              "currency": "USD"
          }
        }
    ],
    "tax_amount": {
        "amount_in_cents": 1000,
        "currency": "USD"
    },
    "shipping_amount": {
        "amount_in_cents": 1000,
        "currency": "USD"
    },
    "metadata": {
        "location_id": "123",
        "store_name": "Downtown Minneapolis",
        "store_manager": "Jane Doe"
    }
}
Response Body
{
    "checkout_url": "https://checkout.sezzle.com/?id=<checkout_id>",
    "checkout_uuid": "<checkout_id>"
}
HTTP Request
POST https://gateway.sezzle.com/v1/checkouts
This checkout endpoint creates a checkout in our system, and returns the URL that you should redirect the user to. We suggest you provide as much optional information about the user as you have available, since this will speed up our checkout process and increase conversion.
Sezzle is able to handle the entire checkout process after a Checkout has been provided. However, if your flow requires that the user confirm their checkout on
your site after being approved by Sezzle, you may include the merchant_completes parameter with the checkout request. In this flow, Sezzle will not complete the
order unless you make a checkout completion request.
Checkout Object
| Parameter | Type | Description |
|---|---|---|
| amount_in_cents* | int | The amount of the checkout. Must be at least 100 |
| currency_code* | string | The currency code of the checkout |
| order_reference_id* | string | A reference to this checkout in your systems |
| order_description* | string | A user-facing description for this checkout |
| checkout_cancel_url* | string | The URL we should redirect the customer to in the case of a cancellation |
| checkout_complete_url* | string | The URL we should redirect to in the case of a successful checkout |
| checkout_expiration | string | Checkout expiration in ISO 8601 date/time format |
| customer_details | object | The customer in the checkout |
| billing_address | object | The billing address of the checkout |
| shipping_address | object | The shipping address of the checkout |
| requires_shipping_info | boolean | Flag to indicate if you would like us to collect shipping information for this checkout from the customer. If omitted, will default to false |
| items | array | The items being purchased |
| discounts | array | The discounts applied. Must be included in the total |
| tax_amount | object | The taxes applied to this checkout. Must be included in the total |
| shipping_amount | object | The shipping fees applied to this checkout. Must be included in the total |
| merchant_completes | boolean | Flag to determine whether this checkout must be completed by the merchant. If omitted, will default to false |
| metadata | object | Object for any custom data you want to submit with the checkout. You are not limited to the key-value pairs shown in the example, and you may use any key-value pairs you like |
| send_checkout_url | object | A Notification object for sending checkout URL to the customer |
| locale | string | Localizes the checkout. Accepted values are en-US (English, United States), en-CA (English, Canada), and fr-CA (French, Canada). Defaults to en-US if not provided. |
Customer Details Object
| Parameter | Type | Description |
|---|---|---|
| first_name | string | The user's first name |
| last_name | string | The user's last name |
| string | The user's email address | |
| phone | string | The user's phone number |
Address Object
This is used for both billing and shipping
| Parameter | Type | Description |
|---|---|---|
| name | string | The name on the address |
| street | string | The street and number of the address |
| street2 | string | The apt or unit |
| city | string | The city |
| state | string | The 2 character state code |
| postal_code | string | The postal delivery code |
| country_code | string | The 2 character country code |
| phone_number | string | The phone number at the delivery location |
Item Object
| Parameter | Type | Description |
|---|---|---|
| name | string | The name of the item |
| sku | string | The sku identifier |
| quantity | int | The quantity purchased |
| price | object | The price object |
Tax Amount Object
| Parameter | Type | Description |
|---|---|---|
| tax_amount | object | A price object |
Shipping Amount Object
| Parameter | Type | Description |
|---|---|---|
| shipping_amount | object | A price object |
Discount Object
| Parameter | Type | Description |
|---|---|---|
| name | string | The description of the discount |
| amount | object | A price object |
Price Object
| Parameter | Type | Description |
|---|---|---|
| amount_in_cents | int | The amount of the item in pennies |
| currency | string | The 3 character currency code as defined by ISO 4217 |
Metadata Object
Use the metadata object for any additional information you would like to attach to the checkout. All values must be strings.
| Parameter | Type | Description |
|---|---|---|
| some_field_name | string | Custom metadata field |
| some_other_field_name | string | Custom metadata field |
Notification Object
A valid notification object contains at a minimum a phone or an email.
| Parameter | Type | Description |
|---|---|---|
| to_sms_phone | string | The SMS phone number of the notification |
| to_email | string | The email address of the notification |
| language | string | The 2-character ISO 639 langauge code of the notification. Acceptable values are "en" and "fr". Will default to English if not provided |
Complete a Checkout (optional)
Success response
Echoes the given Checkout.
Rejection response
{
	"status": 409,
	"id": "checkout_expired",
	"message": "checkout not completed within time limit"
}
POST https://gateway.sezzle.com/v1/checkouts/{order_reference_id}/complete
If you pass true to merchant_completes in our Create Checkout flow, then you must call our Complete Checkout endpoint.
For some checkouts, a merchant may need to have the user return to their site for additional steps before completing the purchase. If this is the case, the order completion endpoint is used to complete the Checkout with Sezzle. From the time the user is redirected back to the Merchant's site, you must make the request to complete the checkout within 30 minutes, or the checkout will be canceled by Sezzle. If the checkout has expired, we will return the rejection response on the right, with a Status 409. The default expiration period for new orders may be extended up to 7 days in your merchant dashboard.
There are two non-error responses expected. Either an HTTP 200, which echoes all accepted fields given at Checkout creation, or a rejection message.
Orders
Order Details
Order Details Response Body
{
    "created_at": "2018-11-02T20:09:59Z",
    "captured_at": "2018-11-02T20:18:50Z",
    "capture_expiration": "2018-11-02T20:48:45Z",
    "description": "Description of order",
    "amount_in_cents": 20000,
    "usd_amount_in_cents": 20000,
    "customer_amount_in_cents": 20000,
    "currency_code": "USD",
    "customer_currency_code": "USD",
    "reference_id": "Ref123456789",
    "customer": {
        "first_name": "John",
        "last_name": "Doe",
        "email": "john.doe@sezzle.com",
        "phone": "5555045294"
    },
    "shipping_address": {
        "name": "John Doe",
        "phone_number": "5555045294",
        "street": "123 W Lake St",
        "street2": "Unit 104",
        "city": "Minneapolis",
        "state": "MN",
        "postal_code": "55408",
        "country_code": "US"
    },
    "billing_address": {
        "name": "John Doe",
        "phone_number": "5555045294",
        "street": "123 W Lake St",
        "street2": "Unit 104",
        "city": "Minneapolis",
        "state": "MN",
        "postal_code": "55408",
        "country_code": "US"
    },
    "refunds": [
      {
        "amount": {
          "amount_in_cents": 10000,
          "currency": "USD"
        },
        "created_at": "2018-11-02T20:09:59Z",
        "is_full_refund": false,
        "order_reference_id": "Ref123456789",
        "refund_id": "52b2O9Lv-8",
        "refund_reason": "broken"
      }
    ],
    "metadata": {
      "location_id": "123",
      "store_name": "Downtown Minneapolis",
      "store_manager": "Jane Doe"
    },
    "items": [
        {
          "name": "widget",
          "sku": "sku123456",
          "quantity": 1,
          "price": {
              "amount_in_cents": 1000,
              "currency": "USD"
          }
        }
    ]
}
GET https://gateway.sezzle.com/v1/orders/{order_reference_id}
Once an order is created, you can retrieve the details of the order using this endpoint.
Optional Query Parameter(s)
| Parameter | Type | Values | Description |
|---|---|---|---|
| include-shipping-info | string | true or false | If your checkout post data required us to collect shipping information from the customer, then you can request that information alongside the order details. |
Order Refunds
Refund Request Body
{
	"refund_id": "41a2O9Lv-7",
	"amount": {
        "amount_in_cents": 500,
        "currency": "USD"
    },
	"refund_reason": "Item returned by user"
}
POST https://gateway.sezzle.com/v1/orders/{order_reference_id}/refund
Sezzle allows refunds for orders either through our Merchant Dashboard or through the API. If the refund is processed through the dashboard, a webhook will be sent to your system. In either case, Sezzle allows for either partial or complete refunds. Refund amounts are relative to the order total, not the amount that has been paid by the shopper.
Refund Request
| Parameter | Type | Description |
|---|---|---|
| amount* | object | A price object that defines the amount to be refunded. Amount may not be 0, negative, or exceed the total order amount. Currency must either be the order's currency or the customer's paying currency. This field is optional if the is_full_refund parameter is true. |
| refund_id | string | UUID for the Refund. Must be unique to a Merchant. |
| refund_reason | string | A reason for the refund. |
| is_full_refund | boolean | Overrides amount. If true, the order will be fully refunded. If omitted, will default to false |
Reporting
Settlement Reports
These endpoints allow you to view a list of payout summaries or a detailed report of an individual payout.
Settlement Summaries Response Body
[
    {
        "uuid": "b7916fbe-f30a-4435-b411-124634287a8ca",
        "payout_currency": "USD",
        "payout_date": "2019-12-09T15:52:33Z",
        "net_settlement_amount": 9370,
        "forex_fees": 0,
        "status": "Complete"
    },
    {
        "uuid": "c51343hba-d54b-5641-e341-15235523b3at",
        "payout_currency": "USD",
        "payout_date": "2019-12-10T15:52:33Z",
        "net_settlement_amount": 23470,
        "forex_fees": 0,
        "status": "Complete"
    }
]
Settlement Summaries Request
GET https://gateway.sezzle.com/v1/settlements/summaries
| Query Parameter | Description |
|---|---|
| start-date* | The UTC start date for the report. Must be in yyyy-mm-dd format. |
| end-date | The UTC end date for the report. Must be in yyyy-mm-dd format. If omitted, will default to the current date. |
| offset | The offset for the report. Limit is 20. |
| currency-code | The ISO-4217 currency code selected by users at checkout. If omitted, will default to USD. |
Settlement Details Response
total_order_amount,total_refund_amount,total_fee_amount,total_returned_fee_amount,total_chargeback_amount,total_chargeback_reversal_amount,total_interest_transfer_amount,total_correction_amount,total_referral_revenue_transfer_amount,total_bank_account_withdrawals,total_bank_account_withdrawal_reversals,forex_fees,net_settlement_amount,payment_uuid,settlement_currency,payout_date,payout_status
703.20,-5.00,-43.80,.30,0.00,0.00,-4.30,1.71,10.00,100.00,-100.00,0.00,693.61,a5c13qt1-4126-41d3-2fq8-9ca431f51431,USD,2019-11-02 00:05:00 +0000 UTC,Complete
type,order_capture_date,order_created_at,event_date,order_uuid,customer_order_id,external_reference_id,amount,posting_currency,type_code,chargeback_code,sezzle_order_id
ORDER,2019-11-01T19:09:50Z,2019-11-01T19:09:50Z,2019-10-22T19:09:50Z,bm99f-31vu1-kg00e-rae1g,1,12345,500.00,USD,001,,66d78e86-fd96-4266-9217-b769c102a0a0
ORDER,2019-11-01T19:09:50Z,2019-11-01T19:09:50Z,2019-10-22T19:09:50Z,va13d-474s9-3000e-nungg,13,12346,200.00,USD,001,,5e0d4886-8c3d-4d4e-901a-2046a06c1e0f
ORDER,2019-11-01T20:00:01Z,2019-11-01T00:00:01Z,2019-11-01T00:00:01Z,as41g-4v4s9-3000e-nunh0,1,12347,1.40,USD,001,,a2c1a142-96ad-48c9-93d2-1acaaee9f073
ORDER,2019-11-01T20:00:01Z,2019-11-01T20:00:01Z,2019-11-01T20:00:01Z,as62l-5ptqs-9g00e-pvk10,2,12348,1.80,USD,001,,3f62dcba-f5a4-41be-ad8f-53e938b5f310
FEE,2019-11-01T19:09:50Z,2019-11-01T19:09:50Z,2019-11-01T19:09:50Z,bm99f-31vu1-kg00e-rae1g,1,12345,-30.00,USD,003,,66d78e86-fd96-4266-9217-b769c102a0a0
FEE,2019-11-01T19:09:50Z,2019-11-01T19:09:50Z,2019-11-01T19:09:50Z,va13d-474s9-3000e-nungg,13,12346,-12.00,USD,003,,5e0d4886-8c3d-4d4e-901a-2046a06c1e0f
FEE,2019-11-01T20:00:01Z,2019-11-01T00:00:01Z,2019-11-01T20:00:01Z,as41g-4v4s9-3000e-nunh0,1,12347,-1.20,USD,003,,a2c1a142-96ad-48c9-93d2-1acaaee9f073
FEE,2019-11-01T20:00:01Z,2019-11-01T20:00:01Z,2019-11-01T20:00:01Z,as62l-5ptqs-9g00e-pvk10,2,12348,-0.60,USD,003,,3f62dcba-f5a4-41be-ad8f-53e938b5f310
REFUND,2019-10-22T19:09:50Z,2019-10-22T19:09:50Z,2019-11-01T19:09:50Z,bm5rm-vg2js-1tsky-c2dsky,8,12344,5.00,USD,002,,e4194956-de70-4958-9da4-6c05f276fdab
RETURNED_FEE,2019-10-22T19:09:50Z,2019-10-22T19:09:50Z,2019-11-01T19:09:50Z,bm5rm-vg2js-1tsky-c2dsky,7,12344,.30,USD,004,,e4194956-de70-4958-9da4-6c05f276fdab
CORRECTION,,,2019-11-01T17:00:01Z,,,,-1.29,,007,
CORRECTION,,,2019-11-01T17:00:01Z,,,,3.00,,007,
INTEREST_TRANSFER,,,2019-11-01T18:00:01Z,,,,-4.30,,008,
REFERRAL_REVENUE_TRANSFER,,,2019-11-01T15:00:01Z,,,,10.00,,009,
BANK_ACCOUNT_WITHDRAWAL,,,2019-11-02T00:05:00Z,,,,100.00,,010,
BANK_ACCOUNT_WITHDRAWAL_REVERSAL,,,2019-11-02T00:05:00Z,,,,-100.00,,011,
Settlement Details Request
GET https://gateway.sezzle.com/v1/settlements/details/{payout_uuid}
| Query Parameter | Description |
|---|---|
| metadata | An optional comma-separated list of metadata keys. To add a metadata key as a column to the report line items, include the key in this list. When applicable, the value of the metadata key will be added to the line item. If no line items contain the metadata key, the key will not be added as a column. |
The settlement details response contains two sections. The first two rows are a summary of the payout. The remaining rows contain the individual line items that contributed to the payout.
Summary column definitions:
| Column Header | Description |
|---|---|
| Total order amount | The sum of all orders on this payout. |
| Total refund amount | The sum of all refunds on this payout. |
| Total fee amount | The sum of all fees on this payout. |
| Total returned fee amount | The sum of all returned fees on this payout. |
| Total chargeback amount | The sum of all chargebacks on this payout. |
| Total chargeback reversal amount | The sum of all chargeback reversals on this payout. |
| Total interest transfer amount | The sum of all interest transfers on this payout. If you are not participating in the interest program, this field will be omitted. |
| Total correction amount | The sum of all corrections on this payout. |
| Total referral revenue transfer amount | The sum of all referral revenue transfers on this payout. |
| Total bank account withdrawal amount | The sum of all bank account withdrawals. |
| Total bank account withdrawal reversal amount | The sum of all bank account withdrawal reversals, which reflect a bank account withdrawal that has failed. |
| Forex fees | The cost of foreign exchange fees associated with this payout. |
| Net settlement amount | Net amount of settlement. |
| Payment uuid | The UUID for this payout. |
| Settlement currency | The currency in which this payout was sent. |
| Payout date | The date this payout was sent. |
| Payout status | The current status of this payout. |
Line item column definitions:
| Column Header | Description |
|---|---|
| Type | Describes the type of event (Order, Fee, Refund, etc.). |
| Order capture date | The date at which the order was captured. This field is empty if the order has not yet been captured. |
| Order created at | The date at which the order was created. |
| Event date | The date at which the event took place. |
| Order uuid | The uuid associated with the order. |
| Customer order id | The customer's order number. |
| External reference id | The external reference ID submitted with the order. |
| Amount | The amount of the event. |
| Posting currency | The customer's currency code. |
| Type code | A numeric code that corresponds with the Type field. |
| Chargeback code | A numeric code that corresponds with the type of chargeback submitted. |
| Sezzle order ID | The internal ID Sezzle has assigned to this order. |
Line item event type definitions:
| Type | Description | Type Code |
|---|---|---|
| ORDER | A completed order with Sezzle. | 001 |
| REFUND | An order that has been refunded. | 002 |
| FEE | The fee assessed by Sezzle for a given order. | 003 |
| RETURNED_FEE | A fee refunded by Sezzle. | 004 |
| CHARGEBACK | A chargeback resulting from a disputed order. | 005 |
| CHARGEBACK_REVERSAL | A reversal of a chargeback resulting from a disputed order. | 006 |
| CORRECTION | A manual correction to a payout. | 007 |
| INTEREST_TRANSFER | A transfer from the Sezzle interest account. | 008 |
| REFERRAL_REVENUE_TRANSFER | A payment earned from Sezzle's merchant referral program. | 009 |
| BANK_ACCOUNT_WITHDRAWAL | A withdrawal of funds from your bank to cover a negative balance with Sezzle. | 010 |
| BANK_ACCOUNT_WITHDRAWAL_REVERSAL | A failed BANK_ACCOUNT_WITHDRAWAL. | 011 |
Interest Account Reports
Sezzle gives merchants the option to enroll in an interest account program. If you are enrolled in the interest account program, you can use these endpoints to get the current balance and activity on the interest account. Fractions of cents are tracked to properly calculate daily interest accrual even if the interest balance is low.
Interest Account Balance Response Body
{
  "interest_balance": 5183.4624
}
Interest Account Balance Request
GET https://gateway.sezzle.com/v1/interest/balance
| Query Parameter | Description |
|---|---|
| currency-code | The ISO-4217 currency code of the interest account. If omitted, will default to USD. |
Interest Account Activity Response Body
type,event_date,interest_account_change_amount,interest_account_balance_after_change
INTEREST_PAYOUT,2019-12-21T19:10:00Z,122.8718,5101.4676
INTEREST_WITHDRAWAL,2019-12-21T19:20:00Z,-26.1000,5075.3676
INTEREST_ACCRUAL,2019-12-21T19:15:00Z,1.0702,5182.3922
INTEREST_ACCRUAL,2019-12-22T19:15:00Z,1.0702,5183.4624
Interest Account Activity Request
GET https://gateway.sezzle.com/v1/interest/activity
| Query Parameter | Description |
|---|---|
| start-date* | The start date for the report. Must be in yyyy-mm-dd format. |
| end-date | The end date for the report. Must be in yyyy-mm-dd format. If omitted, will default to the current date. |
| offset | The offset for the report. |
| currency-code | The ISO-4217 currency code of the interest account. If omitted, will default to USD. |
Webhooks
Order Webhooks
Webhook
{
	"time": "2017-10-19T00:33:10.548372055Z",
	"uuid": "02c5a2a0-8394-4b45-80b3-52d40c494322",
	"type": "order_update",
	"event": "order_complete",
	"object_uuid": "Ref123456789",
	"refund_id": "szl-a0293Pn-3948-80b3-ao34JAia39zQ",
	"refund_amount": {
        "amount_in_cents": 500,
        "currency": "USD"
    }
}
Because the majority of a consumer's checkout process happens on Sezzle's pages, our API uses webhooks to communicate information about checkout updates, completions, or refunds to your system.
We expect any response in the 200 range on submitting webhooks.
Order Webhook Object
| Parameter | Type | Description |
|---|---|---|
| time | string | The time (UTC) at which the Webhook was generated. |
| uuid | string | A unique identifier for the webhook. |
| type | string | The high-level category. For example, order_update |
| event | string | The specific action. For example, order_complete |
| object_uuid | string | The ID for the Checkout/Order. |
| refund_id | string optional | Unique ID for a refund. Included if the webhook event is order_refund. |
| refund_amount | object optional | Price object. Included if the webhook event is order_refund. |
Order Update Events/Types
| Type | Event | Description |
|---|---|---|
| order_update | order_complete | The checkout was completed successfully |
| order_update | order_refund | The order was refunded from the Sezzle Merchant Dashboard |
Errors
Error Details
Response Error Body
{
	"status": 400,
	"id": "error_id",
	"message": "Descriptive message"
}
Unless otherwise specified in our documentation, Sezzle returns a standard API error object.
We attempt to keep these errors as consistent as possible, and will announce any changes in advance if they are required.
Error Object
| Parameter | Type | Description |
|---|---|---|
| Status | int | Matches the HTTP Status code of the response |
| ID | string | A programmatic identifier for the error. These rarely (if at all) change. |
| Message | string | A human-friendly string. These may change, and are intended to assist in debugging rather than program logic. |
Javascript SDK
The Javascript SDK is documented in the latest API v2 documentation. It is supported for users of the v1 API using the same loadable page script.
Create a Checkout
checkout.startCheckout({
    checkout_payload: {
        "amount_in_cents": 12999,
        "currency_code": "USD",
        "order_reference_id": "Ref123456789",
        "order_description": "Order #1800",
    }
});
When using the Javascript SDK with v1, a checkout is created using the Checkout Object. The checkout is completed using the Complete a Checkout endpoint. This endpoint differs from the v2 endpoint in that it captures the total order amount and does not require a request body. Because of this, do not use the payload object shown in the example capture.
Complete a Checkout
checkout.capturePayment("Ref123456789");
Widget SDK
Purpose
The Widget SDK serves to load our sales widgets to web pages. The widgets will not show unless a config is provided before the script is loaded. The repository for this project can be found at https://github.com/sezzle/sezzle-js.
View our latest documentation for configuring widgets.
Platform Integrations
3DCart
This guide describes how to integrate Sezzle into your 3DCart website so that you can provide Sezzle as a payment option for your customers. After integrating Sezzle, your 3DCart site will:
- Offer Sezzle as a payment option on the checkout page.
- Refund Sezzle payments from your 3DCart order management system.
- Display Sezzle promotional messaging.
- Authorize and capture payments.
Integration Steps Overview
Before You Begin
- You should have a Sezzle merchant account.
- Please visit our signup page if you don't have an account.
- Make sure you have the following Sezzle details handy.
- Familiarize yourself with the transaction flow when buying with Sezzle.
Install the Sezzle 3DCart Extension
- Log in to your website's 3DCart admin.
- Get the app here.
- Copy+paste your
Store URLinto the input area, then clickProceed. - Check the PCI Compliance box, then click
Acknowledge and Authorize the Appto start the installation.
Admin Configuration
- In your 3DCart admin, go to
Settings>Payment. - Click
Select Payment Methods. - Turn the Sezzle switch to
On. - Copy your
Public Keyfrom your Sezzle Merchant Dashboard, and paste it into the corresponding field in the Sezzle configuration page of your 3DCart admin. - Next to
Private Key, clickChange. Then, copy yourPrivate Keyfrom your Sezzle Merchant Dashboard, and paste it into the corresponding field in the Sezzle configuration page of your 3DCart admin. - Click
Save. - To restrict Sezzle usage by country, click the
Exclude Listhyperlink under the Sezzle switch. - Click
Add Location. - Select the desired country, then click
Add. - Installation is complete.
3DCart Sandbox Testing
- In the Sezzle configuration page of your 3DCart admin, enter the Sandbox API Keys from your Sezzle Merchant Sandbox Dashboard and check the
Test Modecheckbox, then save the configuration. Make sure you are doing this on yourdev/stagingwebsite. - On your website, add an item to the cart, then proceed to checkout and select
Sezzleas the payment method. - Click
Place Orderand you should be redirected to the Sezzle checkout page. If prompted, sign in. - Enter the payment details using test data, then click
Complete Order. - After the payment is completed on Sezzle, you should be redirected back to your website and see a successful payment page.
- Sandbox testing is complete. You can log in to your Sezzle Merchant Sandbox Dashboard to see the test order you just placed.
3DCart Live Checkout
- In the Sezzle configuration page of your 3DCart admin, enter the API Keys from your Sezzle Merchant Dashboard and uncheck the
Test Modecheckbox, then save the configuration. - On your website, add an item to your cart, then proceed to
Checkoutand selectSezzleas the payment method. - Click
Place Order. - If you are redirected to the Sezzle checkout page, your integration is complete. Congratulations!

- Warning Don't complete the payment. Your checkout is now live, so you will be charged if you complete.
Troubleshooting
If testing was unsuccessful, review the following:
- Sezzle 3DCart extension is the most updated version.
- Sezzle payment method is enabled.
- API Keys were entered correctly.
- It is recommended to use the Copy icon in the Sezzle Merchant Dashboard to avoid typos or extra spaces.
- If you have multiple accounts with Sezzle, the merchant ID and API Keys are tied to only one URL.
- Widget script is present on your website and reflects the
Merchant IDfrom your Sezzle Merchant Dashboard.- Go to a product page on your website.
- Right-click then select
Inspect. - In the
Elementstab, search forwidget.sezzle.
Manual Theme Integration
If the 3DCart app fails to maintain the widget script on the product pages, or to add the script manually for additional pages, complete the following steps:
- From your 3DCart admin, go to
Settings>Design>Themes & Styles. - In your
Current Theme, click the button labeledMorethen selectEdit Template(HTML). - Find the copy of your theme under
Go to Folder. - Click the
gearicon next to theproduct_items.htmlfile, then clickEdit. - When the dashboard asks if you want to edit your theme files, click the
Edit Theme Filesbutton. - In the
Source Codetext area, copy+paste the script at the very beginning of the file. - Click
Save.
The script to be inserted into your webpage is as follows:
Template:
<script src="https://widget.sezzle.com/v1/javascript/price-widget?uuid=MERCHANT_UUID"></script>
Update MERCHANT_UUID in the above script template with your site’s Merchant ID (removing the curly brackets), which can be found in the Sezzle Merchant Dashboard.
Example:
<script src="https://widget.sezzle.com/v1/javascript/price-widget?uuid=12a34bc5-6de7-890f-g123-4hi5678jk901"></script>
Instructions may vary slightly depending on your active plug-ins. For assistance with widget configuration, click Request Addition of Widgets in the widget step of your Sezzle Merchant Dashboard Setup Checklist.
Uninstall Steps
- Go to
Settings>Payment. - Click
Select Payment Methods. - Under the Sezzle App, click the
gearicon then clickDelete.
Bold Cashier
This guide describes how to integrate Sezzle into your Bold Cashier website so that you can provide Sezzle as a payment option for your customers. After integrating Sezzle, your Bold Cashier site will:
- Offer Sezzle as a payment option on the checkout page.
- Refund Sezzle payments from your Bold Cashier order management system.
- Authorize and capture payments.
This integration is currently only available on Shopify.
Integration Steps Overview
- Install the Sezzle Bold Cashier app
- Test your integration
Before You Begin
- You should have a Sezzle merchant account.
- Please visit our signup page if you don't have an account.
- You should generate API Keys using your Sezzle Merchant Dashboard
- Familiarize yourself with the transaction flow when buying with Sezzle.
Install the Sezzle Bold Cashier Extension
- First you must install the Bold Cashier app to your platform and store url. You can do this from the Bold Cashier site.
- Log in to your Shopify admin.
- Go to
Apps>Bold Cashier.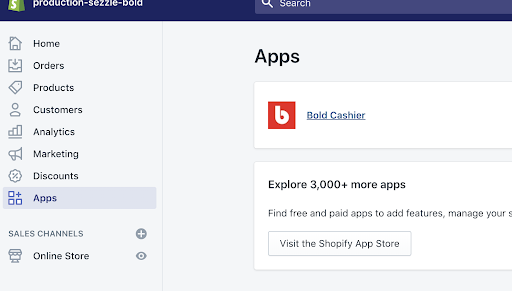
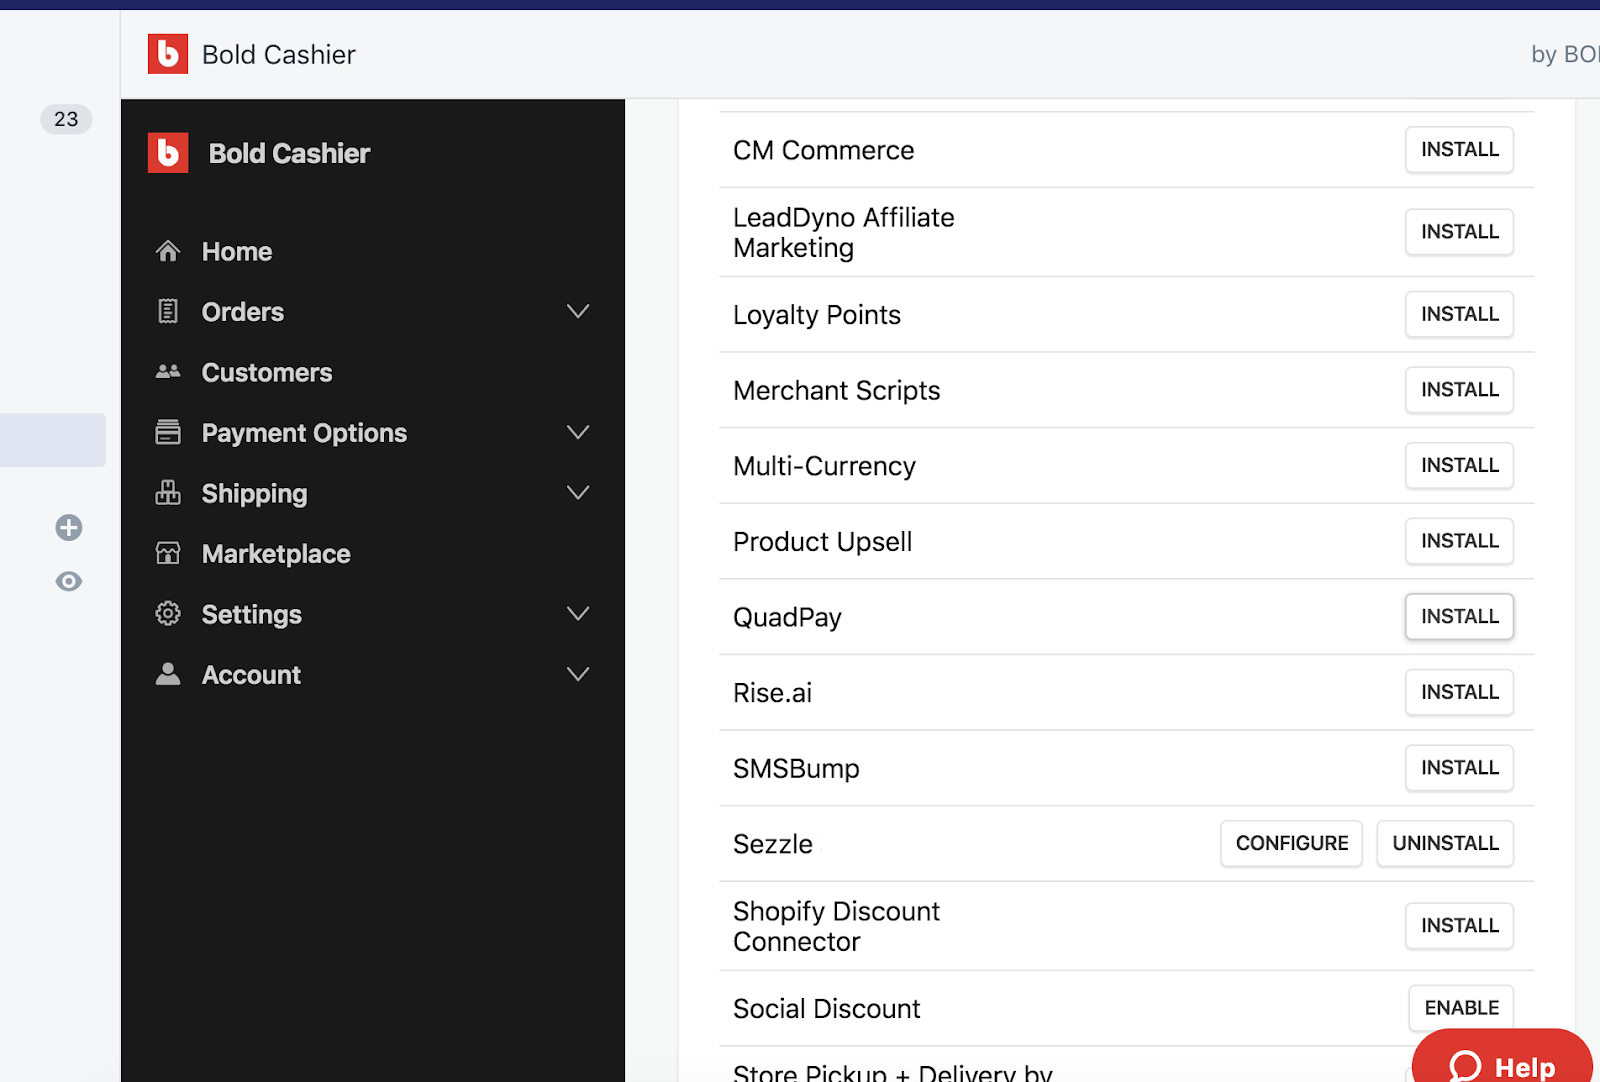
- In the Bold Cashier left sidebar, click
Marketplace, then findSezzleand clickInstall.
- Click
Allowto accept permissions and complete the installation.
- Installation is complete.
Bold Cashier Live Checkout
- On your website, add an item to your cart, then proceed to
Checkoutand selectSezzleas the payment method. - Click
Complete Order. - If you are redirected to the Sezzle checkout page, your integration is complete. Congratulations!
- Warning Don't complete the payment. Your checkout is now live, so you will be charged if you complete.
Uninstall Steps
- Go to your Bold Cashier
Marketplaceand scroll to findSezzle. - Click
Uninstall.
BuyItLive
This guide describes how to integrate Sezzle into your BuyItLive website so that you can provide Sezzle as a payment option for your customers. After integrating Sezzle, your BuyItLive site will:
- Offer Sezzle as a payment option on the checkout page.
- Refund Sezzle payments from your BuyItLive order management system.
- Authorize and capture payments.
Integration Steps Overview
Before You Begin
- You should have a Sezzle merchant account.
- Please visit our signup page if you don't have an account.
- Make sure you have the following Sezzle details handy.
- Familiarize yourself with the transaction flow when buying with Sezzle.
BuyItLive Admin Configuration
- Log in to your website's BuyItLive admin.
- Click
Add Payment Provider. - Select
Connect with Sezzle. - Go to
Sezzle Payments>Tools. - Copy your
Private KeyandPublic Keyfrom your Sezzle Merchant Dashboard, and paste them into the corresponding fields in the Sezzle configuration page of your BuyItLive admin. - Click
Save Settings. - Go to
Cart Settingsand ensure the Sezzle switch is in theOnposition. - Installation is complete.
BuyItLive Live Checkout
- On your website, add an item to your cart, then proceed to
Checkoutand selectSezzleas the payment method. - Click
Place Order. - If you are redirected to the Sezzle checkout page, your integration is complete. Congratulations!
- Warning Don't complete the payment. Your checkout is now live, so you will be charged if you complete.
CommentSold
This guide describes how to integrate Sezzle into your CommentSold website so that you can provide Sezzle as a payment option for your customers. After integrating Sezzle, your CommentSold site will:
- Offer Sezzle as a payment option on the checkout page.
- Refund Sezzle payments from your CommentSold order management system.
- Authorize and capture payments.
Integration Steps Overview
Before You Begin
- You should have a Sezzle merchant account.
- Please visit our signup page if you don't have an account.
- Make sure you have the following Sezzle details handy.
- Familiarize yourself with the transaction flow when buying with Sezzle.
CommentSold Admin Configuration
- In your CommentSold admin, go to
Setup. - Click
Payment Gateways. - Copy your
Private KeyandPublic Keyfrom your Sezzle Merchant Dashboard, and paste them into the corresponding fields in the Sezzle configuration page of your CommentSold admin. - Click
Update Keys.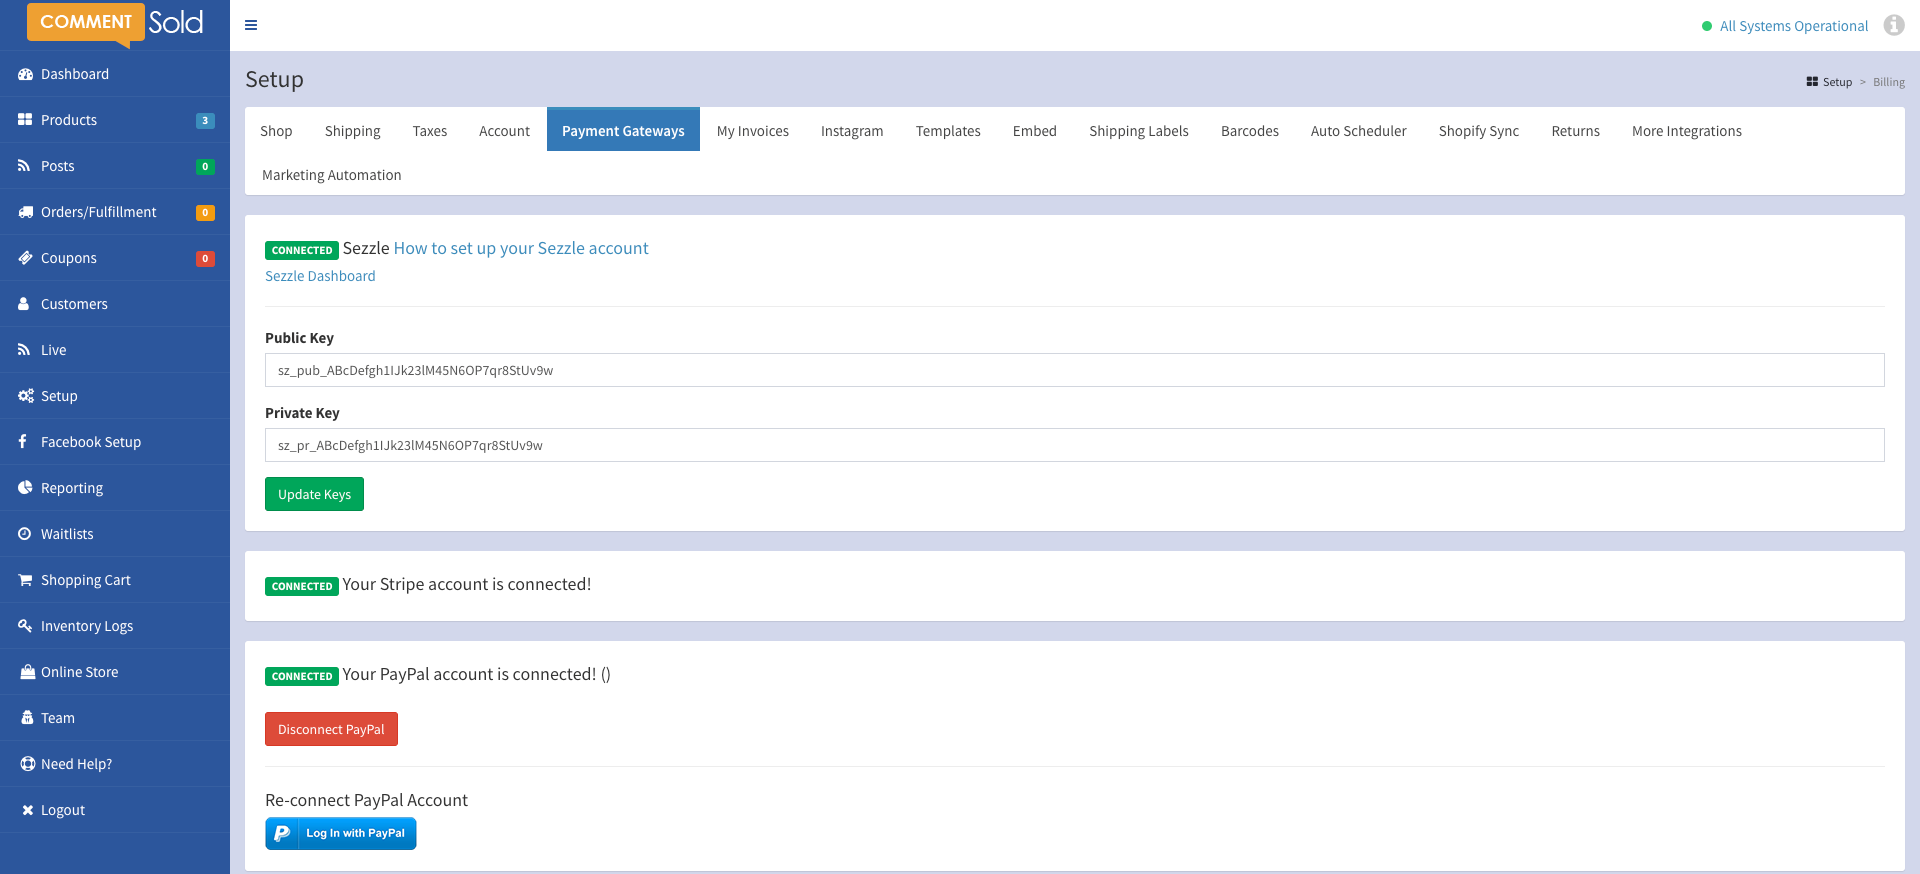
- Installation is complete.
CommentSold Live Checkout
- In the Sezzle configuration page of your CommentSold admin, enter the API Keys from your Sezzle Merchant Dashboard and uncheck the
Use Sandboxcheckbox, then save the configuration. - On your website, add an item to your cart, then proceed to
Checkoutand selectSezzleas the payment method. - Click
Place Order. - If you are redirected to the Sezzle checkout page, your integration is complete. Congratulations!
- Warning Don't complete the payment. Your checkout is now live, so you will be charged if you complete.
Magento 1
Magento 1 documentation is provided for legacy reference only. Please use Magento 2 for new projects or upgrades.
This guide describes how to integrate Sezzle into your Magento 1 website so that you can provide Sezzle as a payment option for your customers. After integrating Sezzle, your Magento 1 site will:
- Offer Sezzle as a payment option on the checkout page.
- Refund Sezzle payments from your Magento 1 order management system.
- Display Sezzle promotional messaging.
- Authorize and capture payments.
- Offer instant and delayed capture.
Integration Steps Overview
- Install and configure the Sezzle Magento 1 extension
- Test your integration
- (Optional) Sandbox Testing
Before You Begin
- You should have a Sezzle merchant account.
- Please visit our signup page if you don't have an account.
- Make sure you have the following Sezzle details handy.
- Familiarize yourself with the transaction flow when buying with Sezzle.
Install the Sezzle Magento 1 Extension
For the below instructions, assume [Magento] represents your root Magento directory.
- Download the .zip or tar.gz file from Sezzle's github repository.
- Unzip the file and follow the following instructions.
- Copy all files in the extracted folder's:
/app/code/community/to:[MAGENTO]/app/code/community. - Copy all files in the extracted folder's
/app/design/frontend/base/default/layout/to:[MAGENTO]/app/design/frontend/base/default/layout. - Copy all files in the extracted folder's
/app/design/frontend/base/default/template/to:[MAGENTO]/app/design/frontend/base/default/template. - Copy all files in the extracted folder's:
/app/etc/to:[MAGENTO]/app/etc. - Copy all files in the extracted folder's:
/jsto:[MAGENTO]/js. - Log in to your Magento 1 admin and go to
System/Cache Management. - Flush the cache storage by selecting
Flush Cache Storage.
Note: To upgrade the extension, completely remove the previously added Sezzle Magento extension files, then repeat the above steps with the updated sezzle-magento repository.
Admin Configuration
- Go to
System>Configuration>Sales>Payment Methods>Sezzle. - Configure the extension as follows:
- Set
EnabledtoYes. - Copy your
Merchant IDfrom your Sezzle Merchant Dashboard, and paste it into the corresponding field in the Sezzle configuration page of your Magento 1 admin. - Copy your
Public KeyandPrivate Keyfrom your Sezzle Merchant Dashboard, and paste them into the corresponding fields in the Sezzle configuration page of your Magento 1 admin. - Set
API ModetoLive. - If you want the widget script added to the Product Display Page, set
Add Widget Script in PDPtoYes - If you want the widget script added to the Cart Page, set
Add Widget Script in Cart PagetoYes - Set
Payment from Applicable CountriestoSpecific Countries. - Set
Payment from Specific CountriestoUnited StatesorCanadaas applicable. - Set
Payment ActionasAuthorize Onlyto authorize the payment at the time the order is placed but capture payment later, orAuthorize and Captureto both authorize and capture at the time the order is placed.- If
Authorize Onlyis selected, then the capture expiry time will be visible in theOrder Detailspage. You need to capture the payment before the given deadline by choosingCapture Onlinewhen you create the invoice.
- If
- Save the configuration.
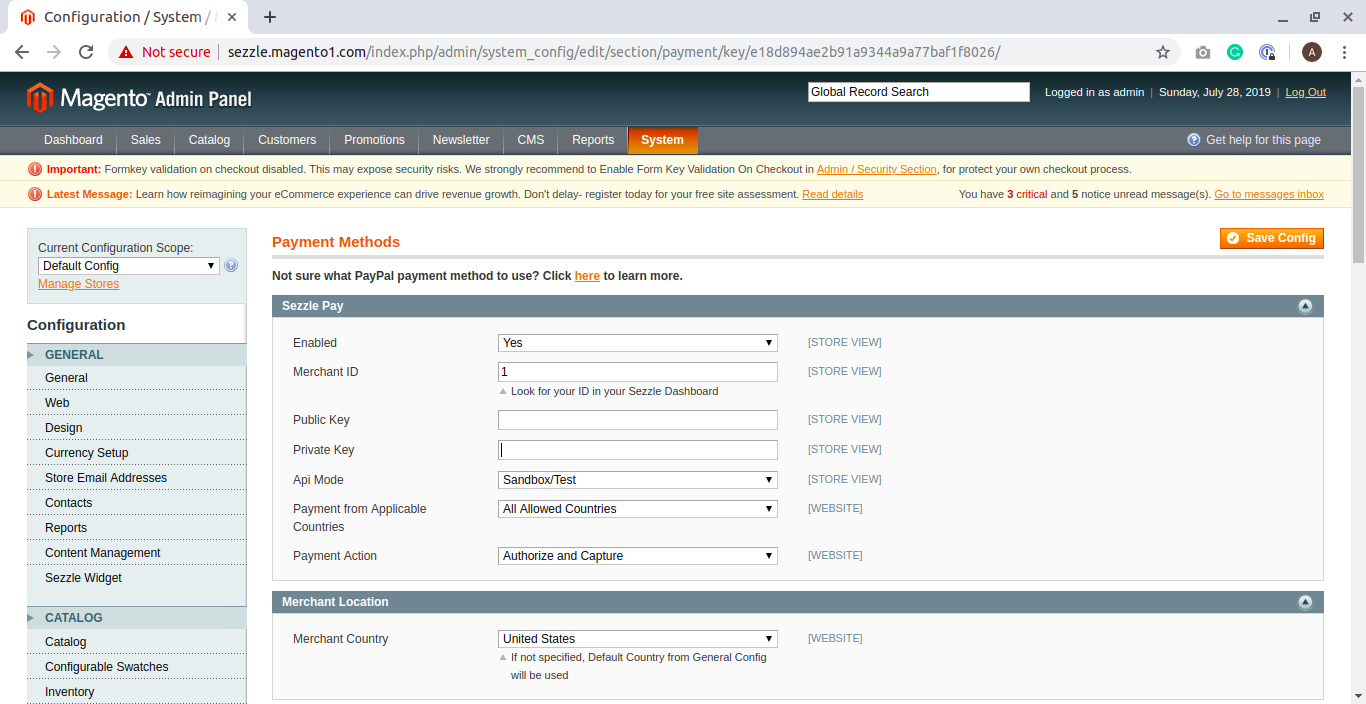
- Set
- Go to
System/Cache Management. - Flush the cache storage by selecting
Flush Cache Storage. - Installation is complete.
Magento 1 Sandbox Testing
- In the Sezzle configuration page of your Magento 1 admin, enter the Sandbox API Keys from your Sezzle Merchant Sandbox Dashboard and set the
API ModetoSandbox/Test, then save the configuration. Make sure you are doing this on yourdev/stagingwebsite. - On your website, add an item to the cart, then proceed to
Checkoutand selectSezzleas the payment method. - Click
ContinuethenPlace Orderand you should be redirected to the Sezzle checkout page. If prompted, sign in.
- Enter the payment details using test data, then click
Complete Order. - After the payment is completed on Sezzle, you should be redirected back to your website and see a successful payment page.
- Sandbox testing is complete. You can log in to your Sezzle Merchant Sandbox Dashboard to see the test order you just placed.
Magento 1 Live Checkout
- In the Sezzle configuration page of your Magento 1 admin, enter the API Keys from your Sezzle Merchant Dashboard and set the
API ModetoLive, then save the configuration. - On your website, add an item to the cart, then proceed to
Checkoutand selectSezzleas the payment method. - Click
ContinuethenPlace Order. - If you are redirected to the Sezzle checkout page, your integration is complete. Congratulations!
- Warning Don't complete the payment. Your checkout is now live, so you will be charged if you complete.
Troubleshooting
If testing was unsuccessful, review the following:
- Sezzle-Magento extension is the most updated version.
- Sezzle extension is enabled.
- Go to
System>Configuration>Sales>Payment Methods>Sezzleand ensureEnableddropdown is reflectingYes.
- Go to
Merchant IDwas entered correctly.- API Keys were entered correctly.
- It is recommended to use the Copy icon in the Sezzle Merchant Dashboard to avoid typos or extra spaces.
- If you have multiple accounts with Sezzle, the merchant ID and API Keys are tied to only one URL.
- Cache Storage was flushed.
- Widget script is present on your website and reflects the
Merchant IDfrom your Sezzle Merchant Dashboard.- Go to a product page on your website.
- Right-click then select
Inspect. - In the
Elementstab, search forwidget.sezzle.
NopCommerce
This guide describes how to integrate Sezzle into your NopCommerce website so that you can provide Sezzle as a payment option for your customers. After integrating Sezzle, your NopCommerce site will:
- Offer Sezzle as a payment option on the checkout page.
- Refund Sezzle payments from your NopCommerce order management system.
- Authorize and capture payments.
- Offer instant and delayed capture.
Integration Steps Overview
- Install and configure the Sezzle NopCommerce extension
- Test your integration
- (Optional) Sandbox Testing
Before You Begin
- You should have a Sezzle merchant account.
- Please visit our signup page if you don't have an account.
- Make sure you have the following Sezzle details handy.
- Familiarize yourself with the transaction flow when buying with Sezzle.
Install the Sezzle NopCommerce Extension
Go to https://www.nopcommerce.com/sezzle and click Get Extension.
Admin Configuration
- Go to
Configuration>Local Plugins. - Click
Upload Plugin or Themeand select the downloaded zipped file per the instructions given. - After the extension has been uploaded, click
Install. - Under
Configuration, go toPayment Methodsand then clickConfigureunderSezzle.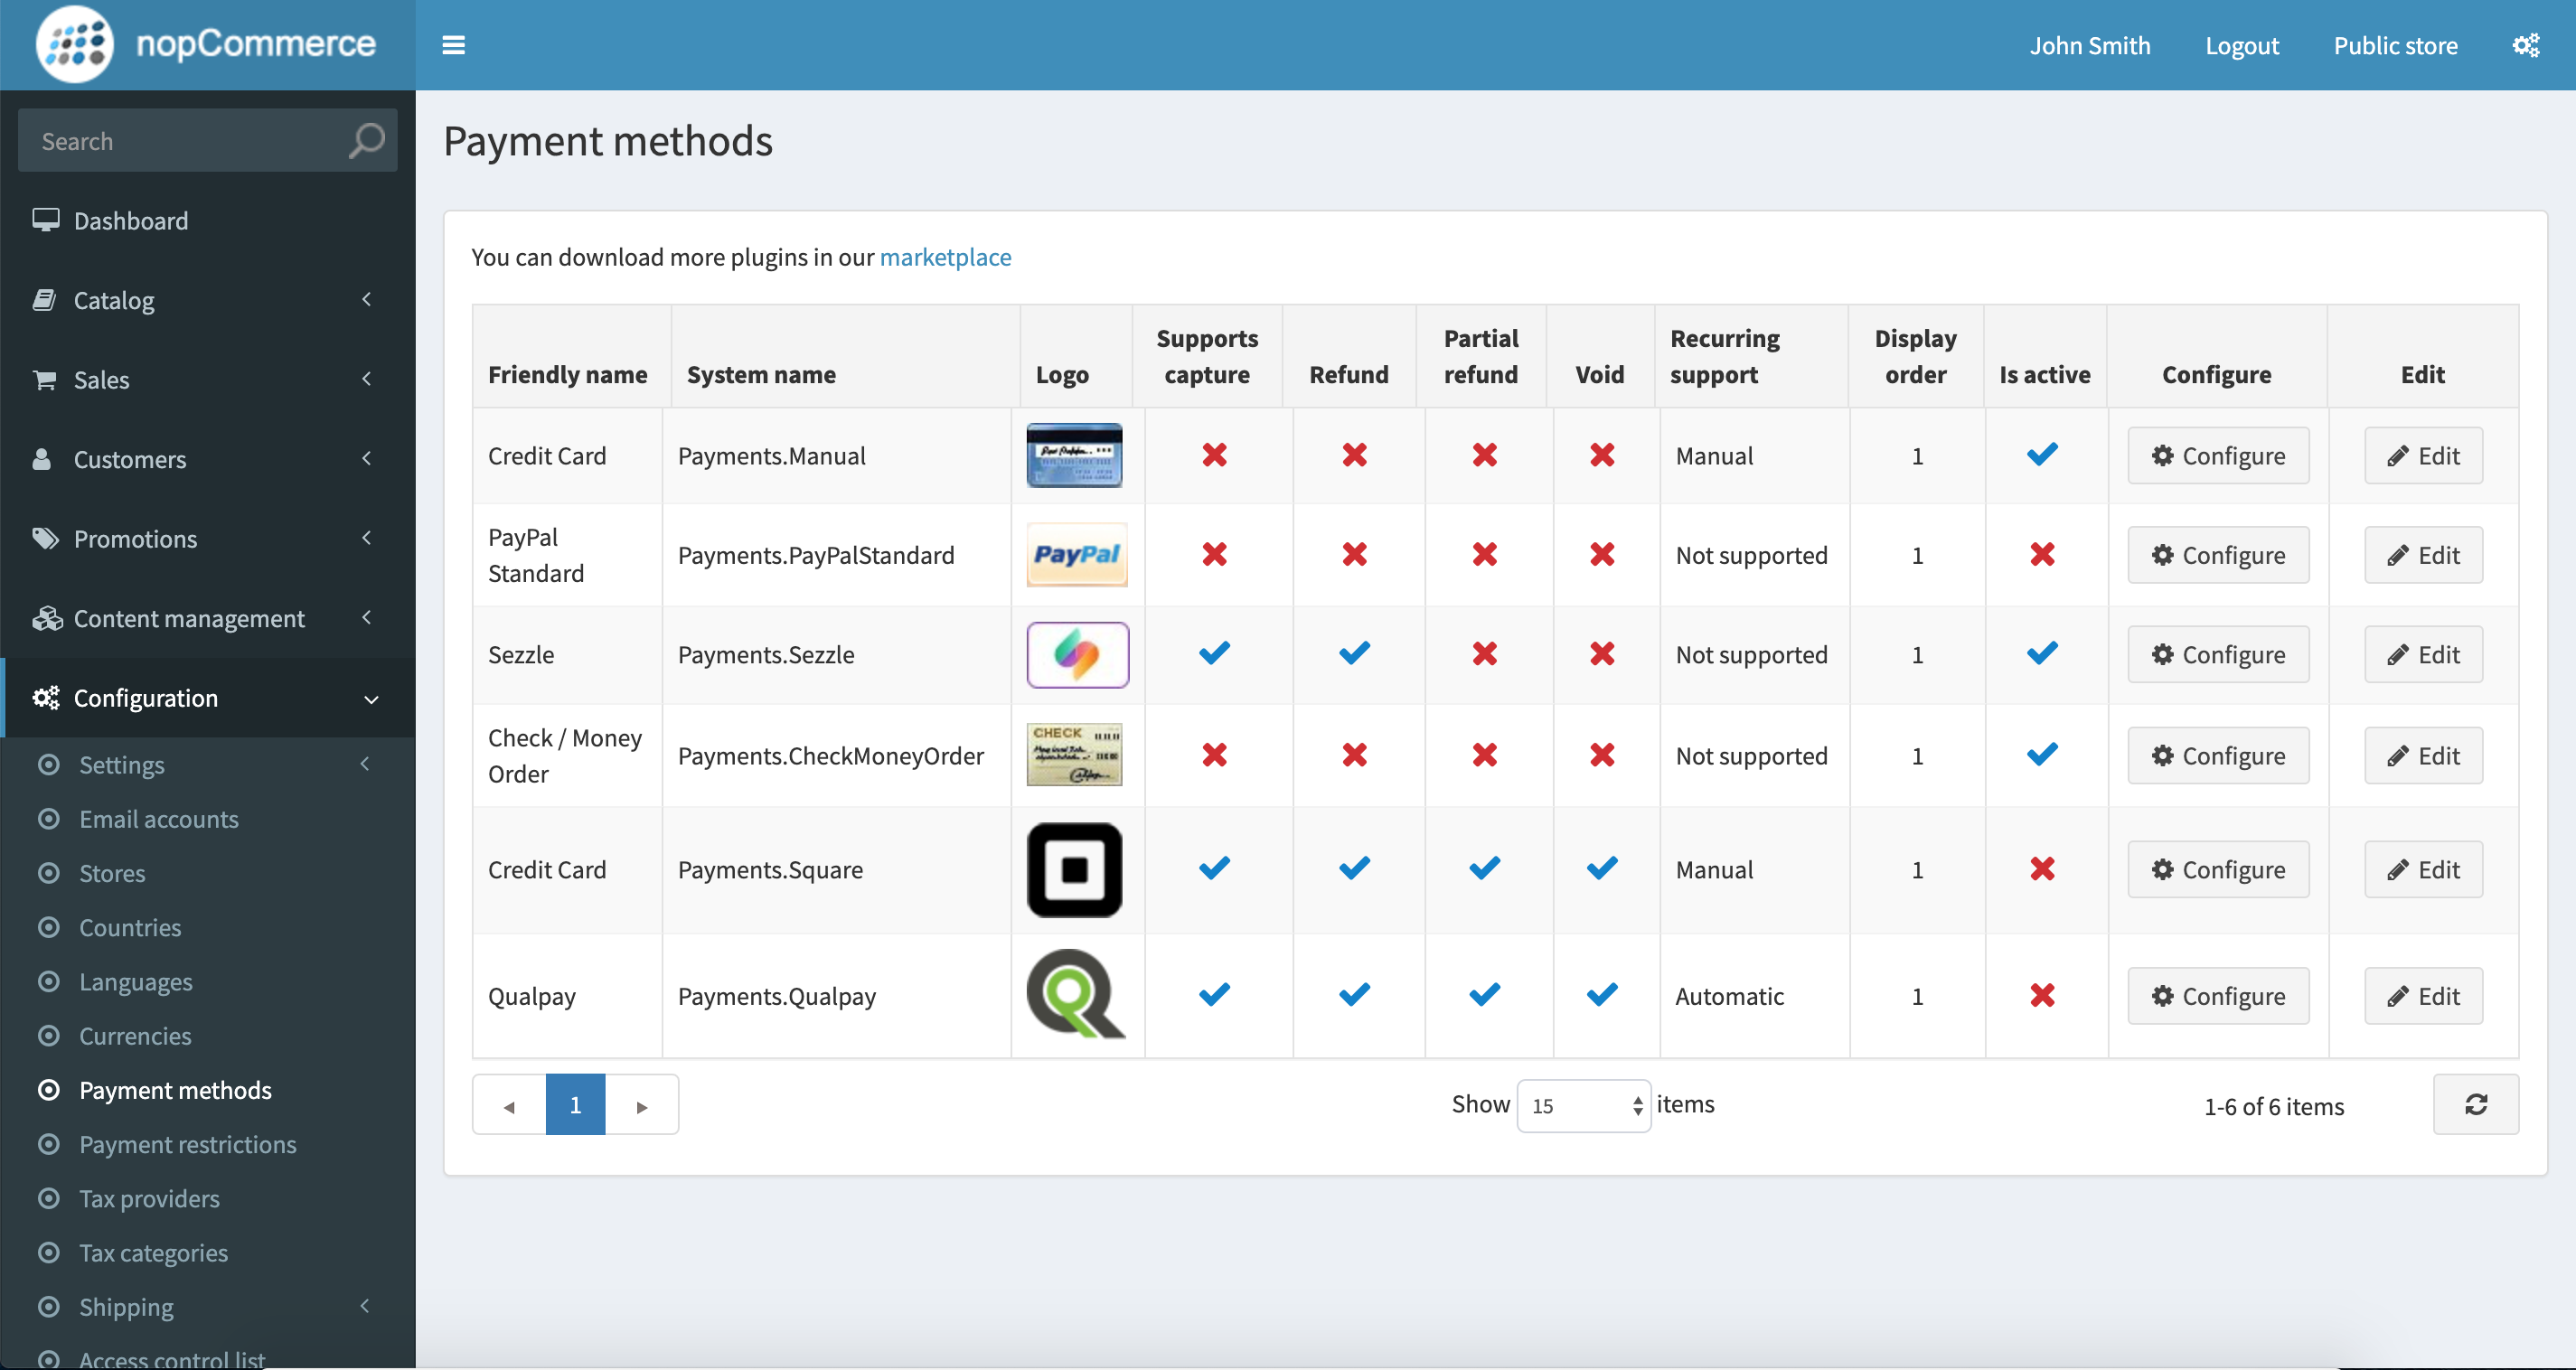
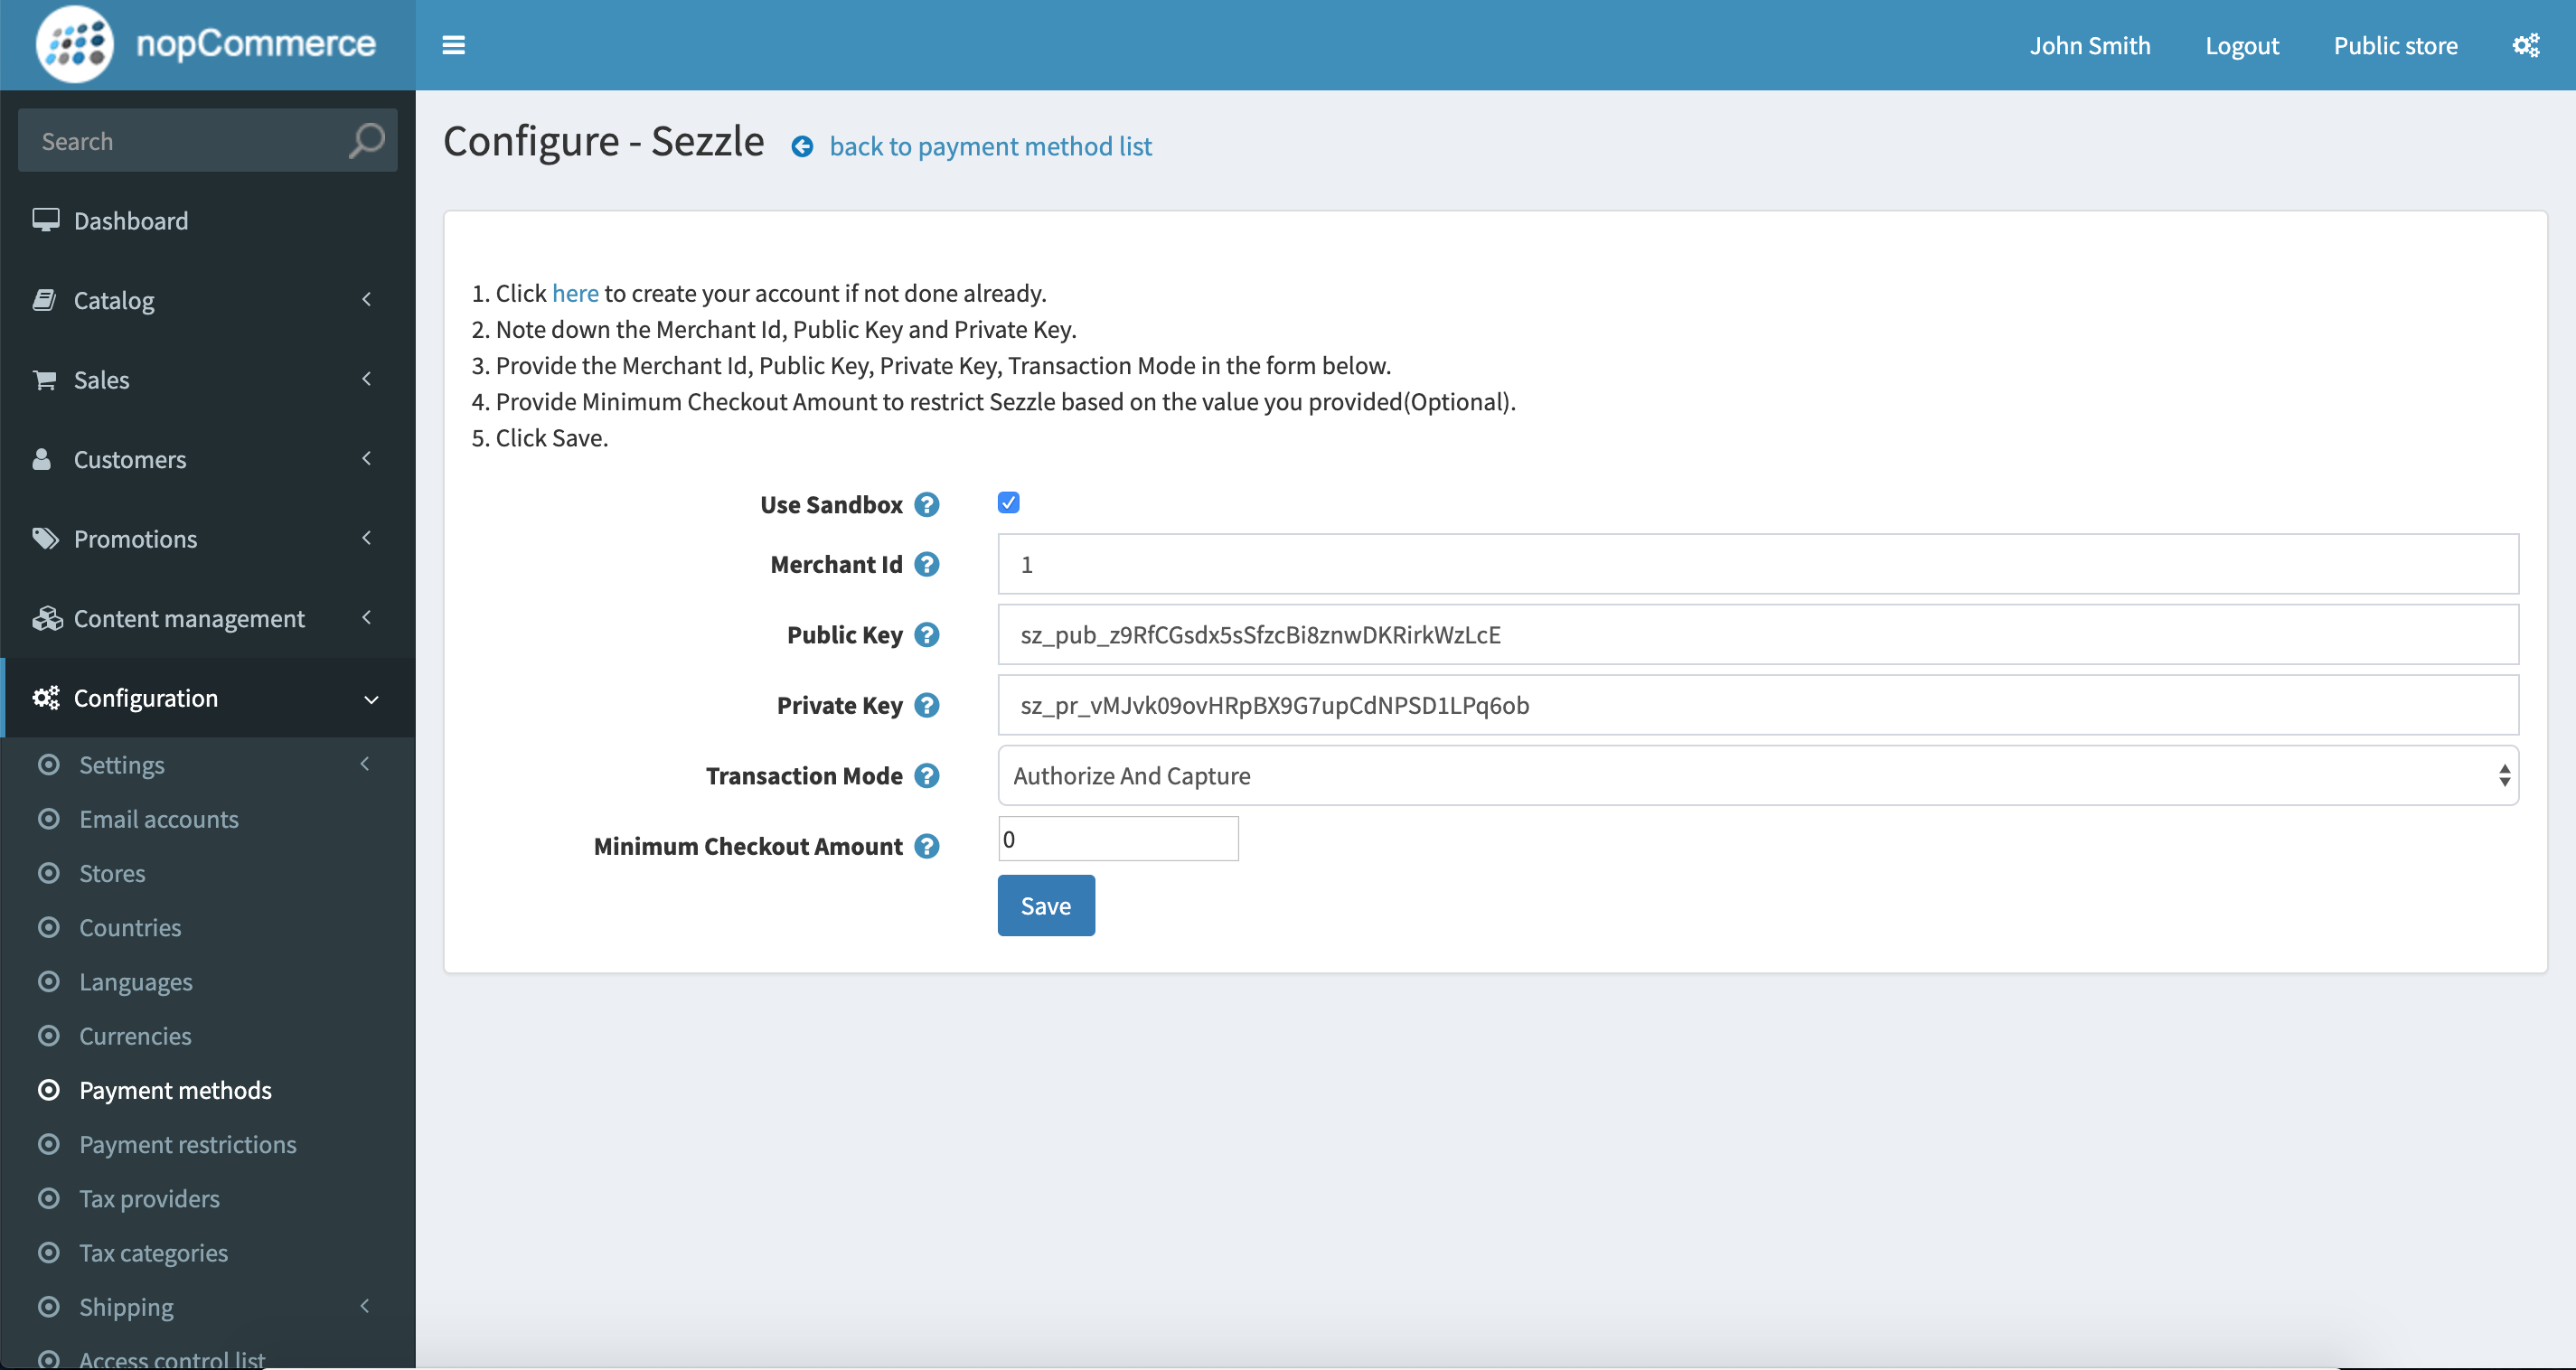
- Click
Editfrom thePayment Methodlist. - Copy your
Merchant IDfrom your Sezzle Merchant Dashboard, and paste it into the corresponding field in the Sezzle configuration page of your NopCommerce admin. - Copy your
Public KeyandPrivate Keyfrom your Sezzle Merchant Dashboard, and paste them into the corresponding fields in the Sezzle configuration page of your NopCommerce admin. - Set
Transaction Modeto eitherAuthorizeorAuthorize and Capture. - Save the configuration.
- To restrict Sezzle usage based on billing country, go to
Configuration>Payment Restrictions. - Choose the country you want to restrict for Sezzle. Please note that Sezzle is currently available for customers from
The United StatesandCanada. You may wish to restrict all countries where Sezzle is not available.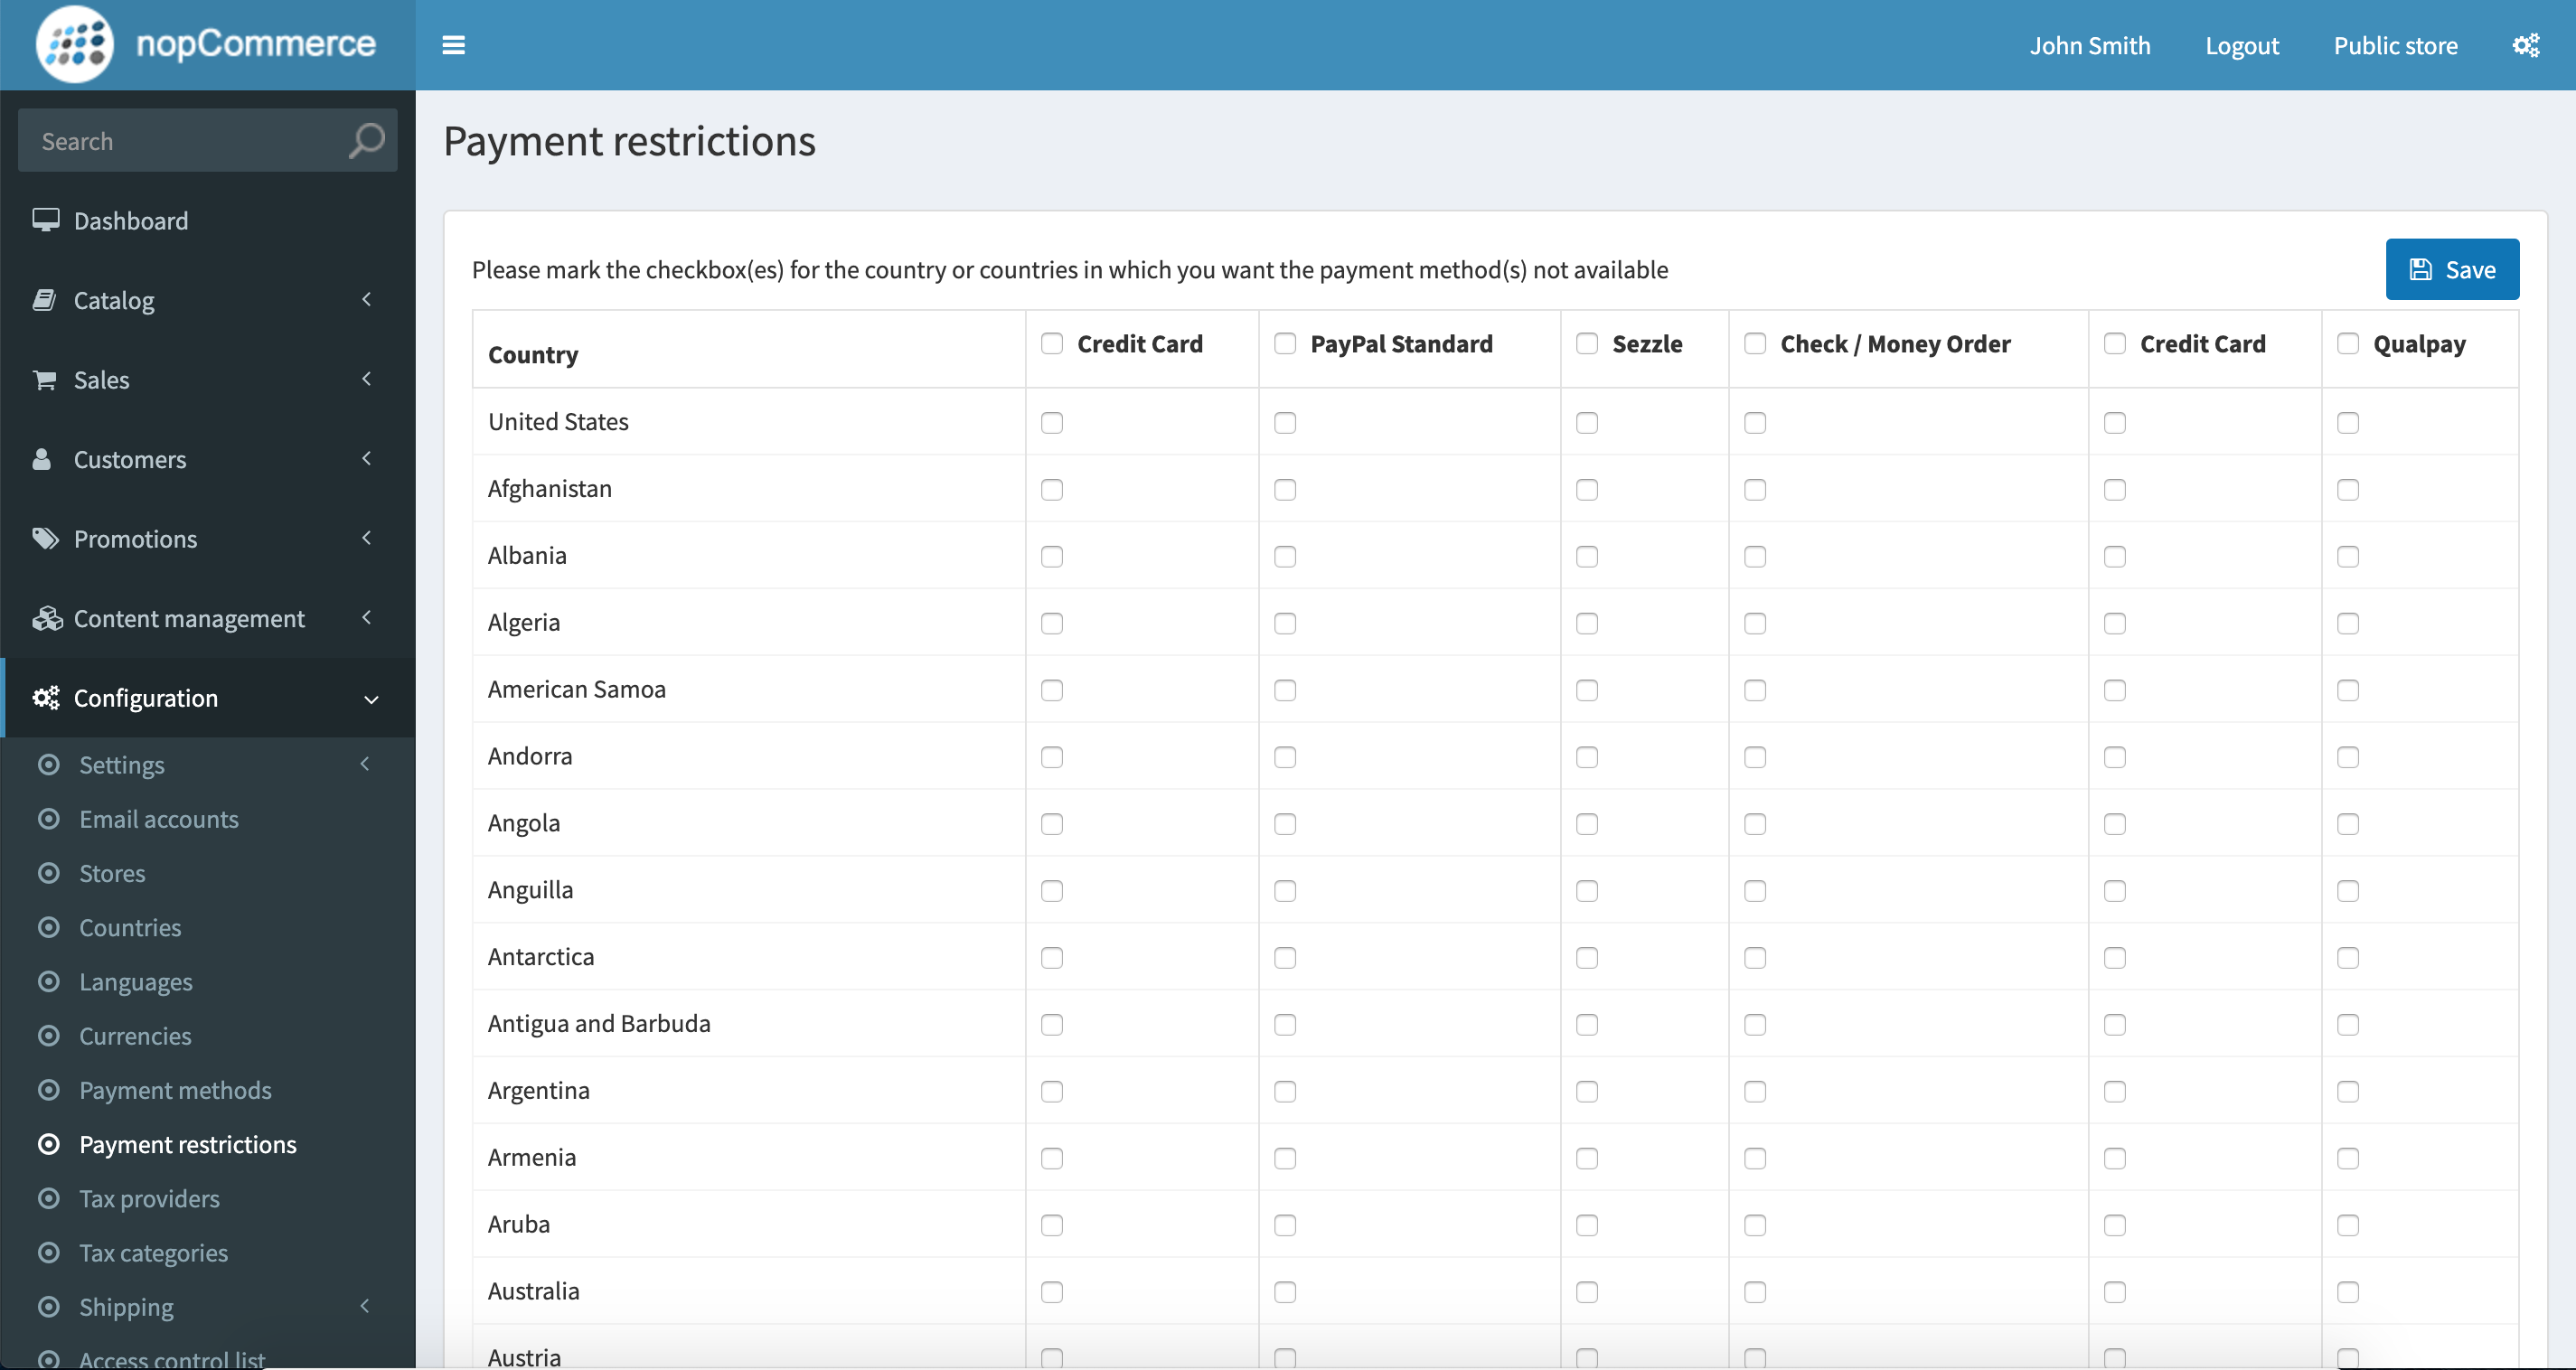
- Integration is complete.
NopCommerce Sandbox Testing
- In the Sezzle configuration page of your NopCommerce admin, enter the Sandbox API Keys from your Sezzle Merchant Sandbox Dashboard and check the
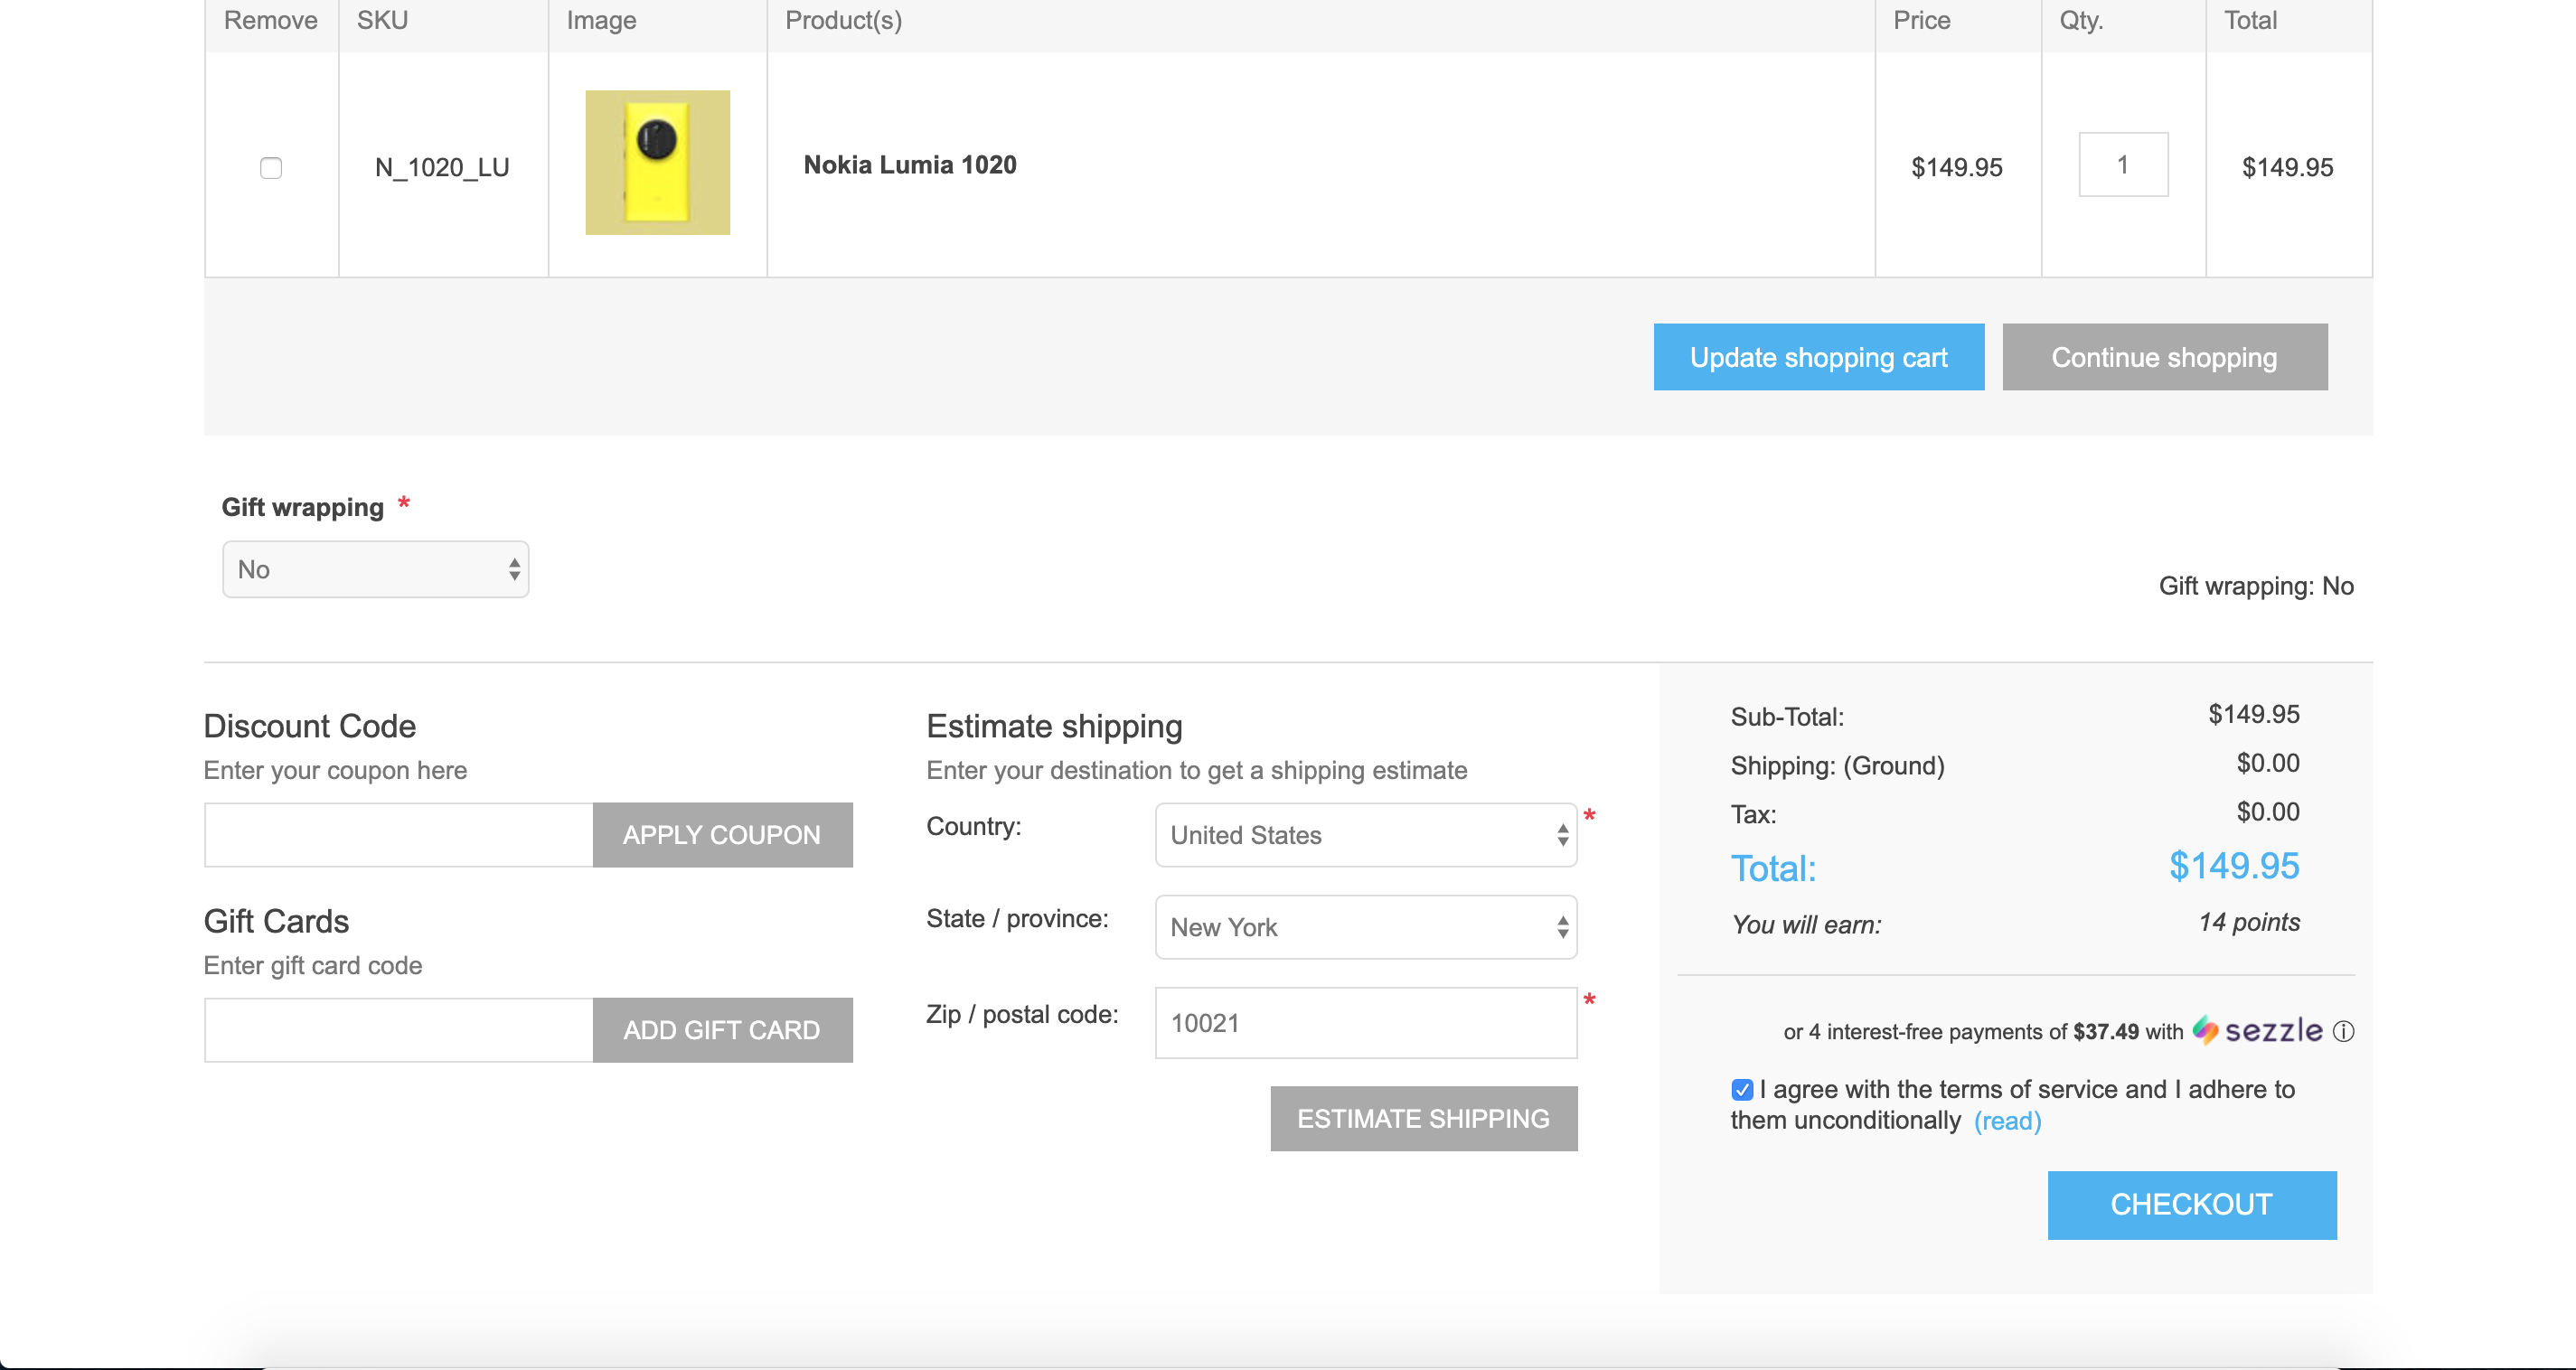
Use Sandboxcheckbox, then save the configuration. Make sure you are doing this on yourdev/stagingwebsite. - On your website, add an item to the cart, then proceed to
Checkoutand selectSezzleas the payment method. - Click
Confirmand you should be redirected to the Sezzle checkout page. If prompted, sign in.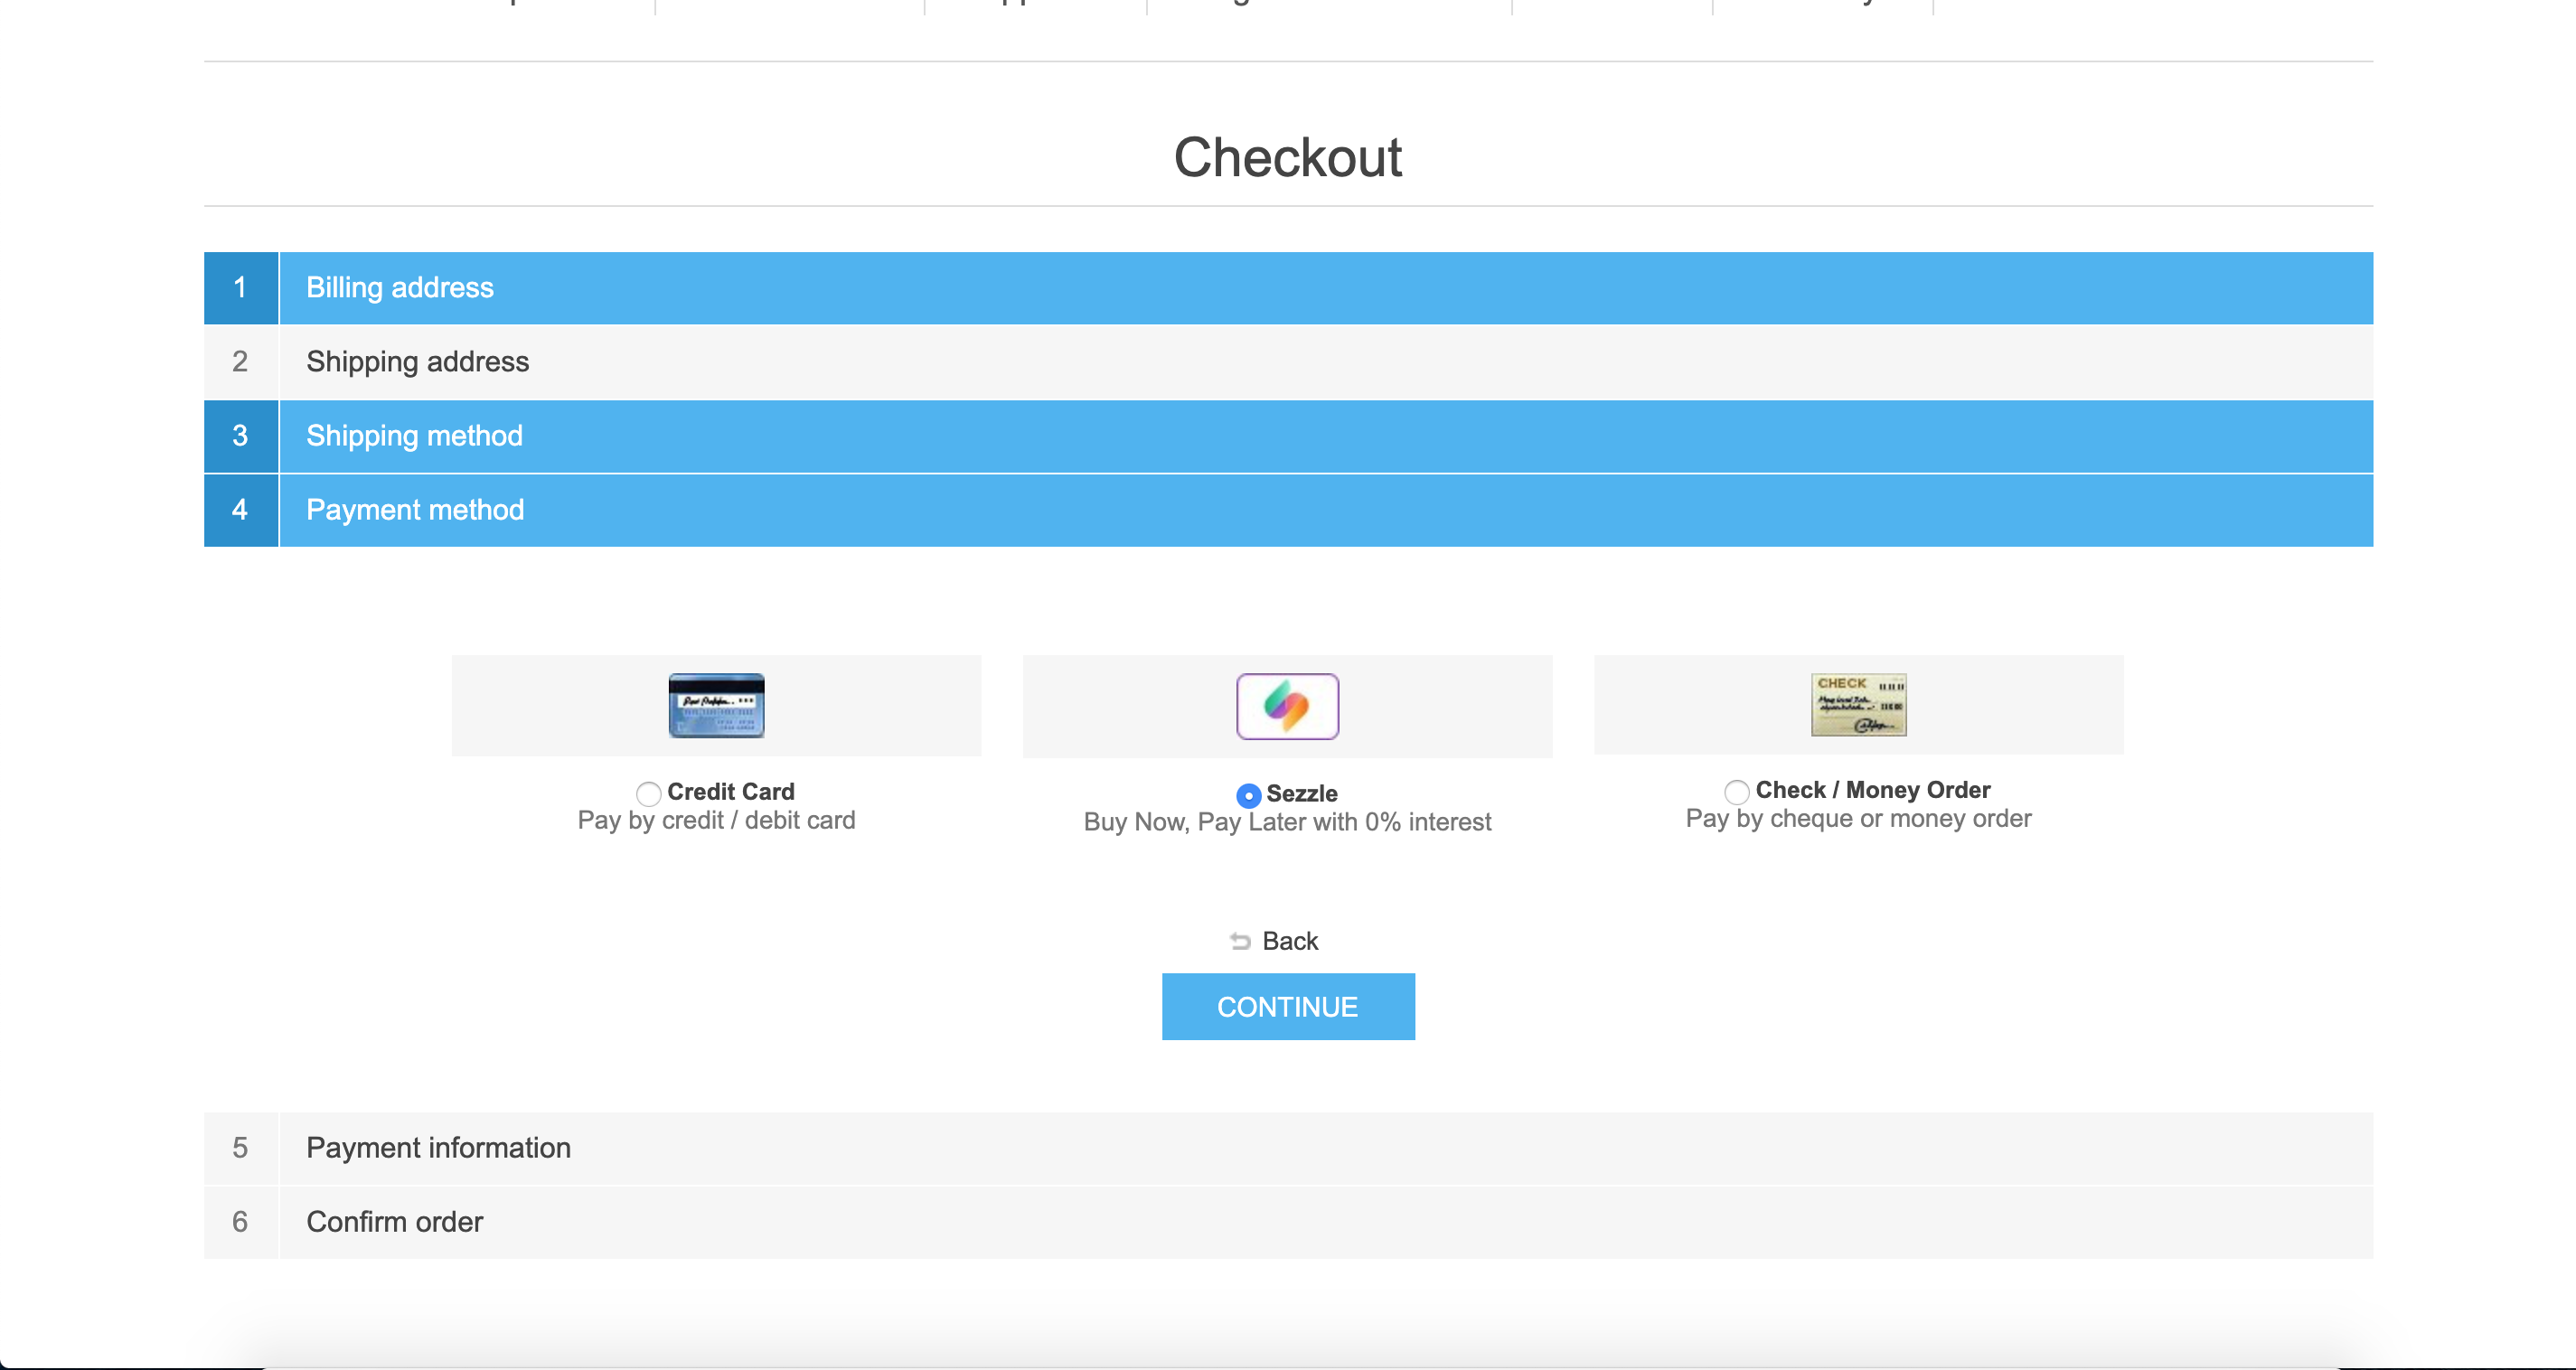
- Enter the payment details using test data, then click
Complete Order. - After the payment is completed on Sezzle, you should be redirected back to your website and see a successful payment page.
- Sandbox testing is complete. You can log in to your Sezzle Merchant Sandbox Dashboard to see the test order you just placed.
NopCommerce Live Checkout
- In the Sezzle configuration page of your NopCommerce admin, enter the API Keys from your Sezzle Merchant Dashboard and uncheck the
Use Sandboxcheckbox, then save the configuration. - On your website, add an item to the cart, then proceed to
Checkoutand selectSezzleas the payment method.
- Click
ContinuethenConfirm. - If you are redirected to the Sezzle checkout page, your integration is complete. Congratulations!
- Warning Don't complete the payment. Your checkout is now live, so you will be charged if you complete.
Shopify
This guide describes how to integrate Sezzle into your Shopify website so that you can provide Sezzle as a payment option for your customers. After integrating Sezzle, your Shopify site will:
- Offer Sezzle as a payment option on the checkout page.
- Refund Sezzle payments from your Shopify order management system.
- Display Sezzle promotional messaging.
- Authorize and capture payments.
Integration Steps Overview
Before You Begin
- You should have a Sezzle merchant account.
- Please visit our signup page if you don't have an account.
- Make sure you have the following Sezzle details handy.
- Familiarize yourself with the transaction flow when buying with Sezzle.
Install the Sezzle Shopify App
- Log in to your website's Shopify admin.
- In your Sezzle Merchant Dashboard Setup Checklist, click
Download Shopify App. - Click
Get the App. - Click
Install App.
Configure Widgets
- Within the Sezzle app, enter your Public API Key and click
link sezzle account.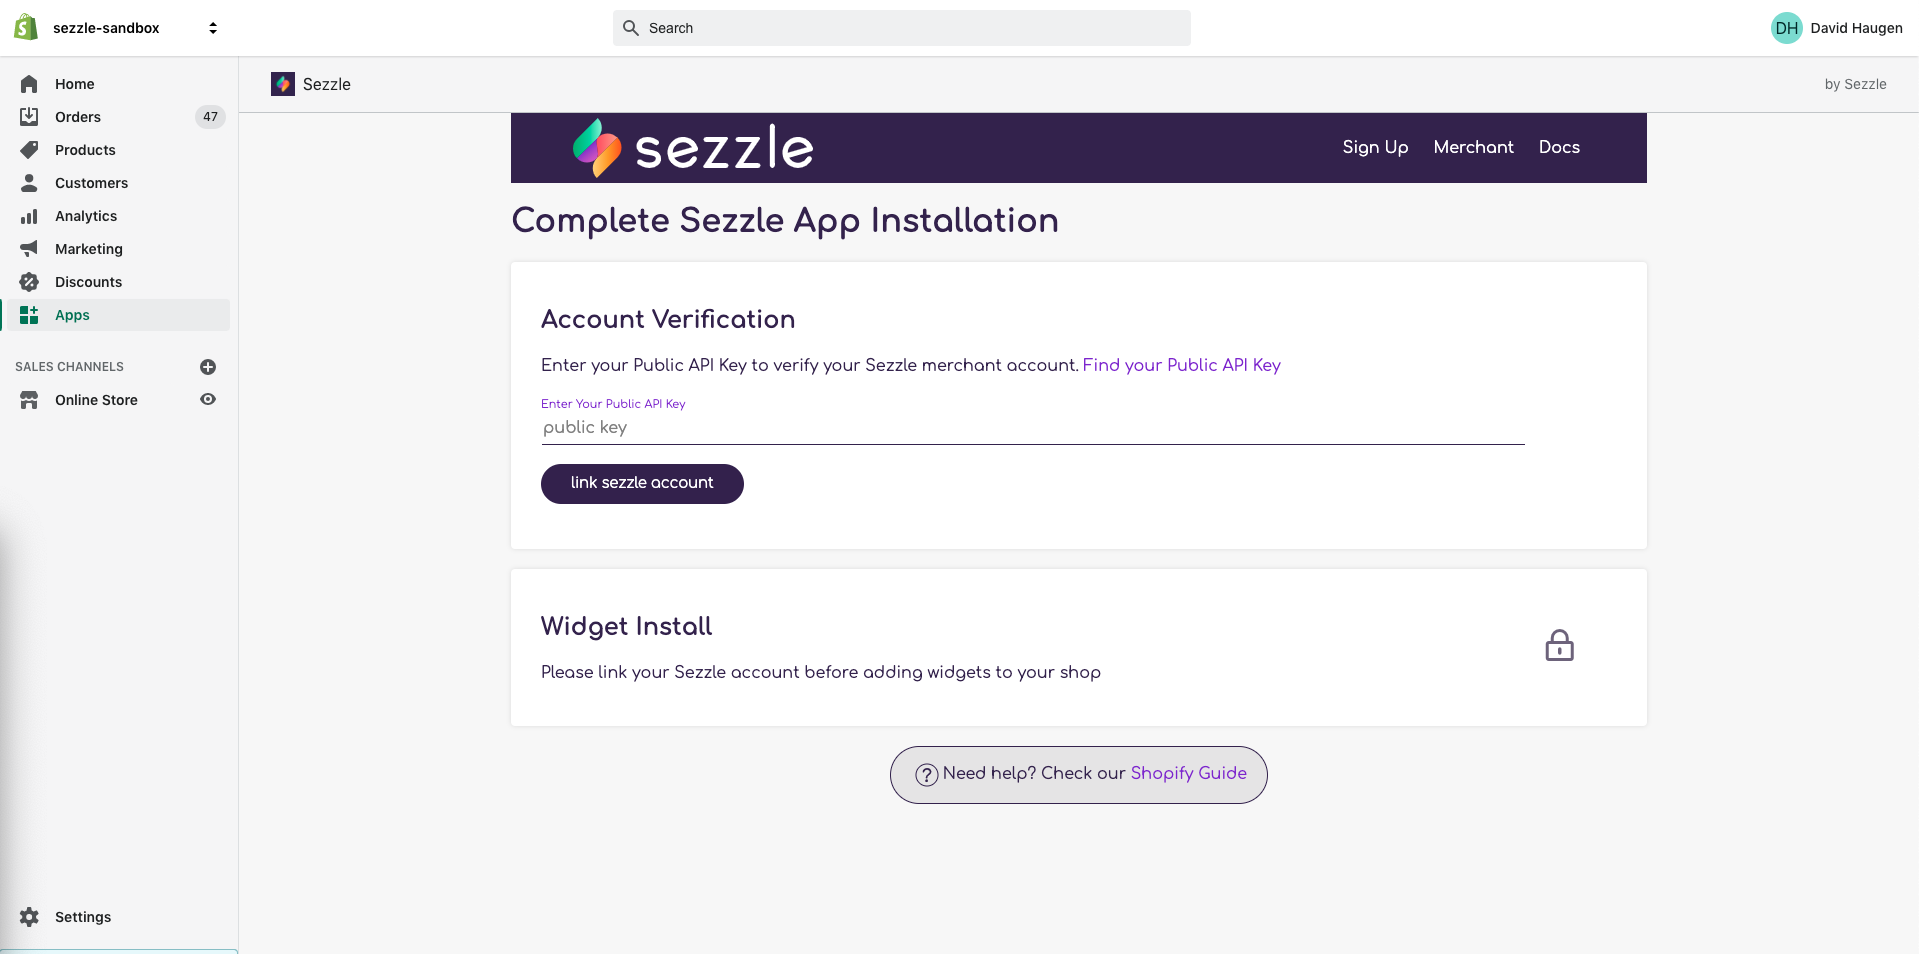
- Once your account is linked, click
add widgetsto add widgets to your shop. This process may take a minute.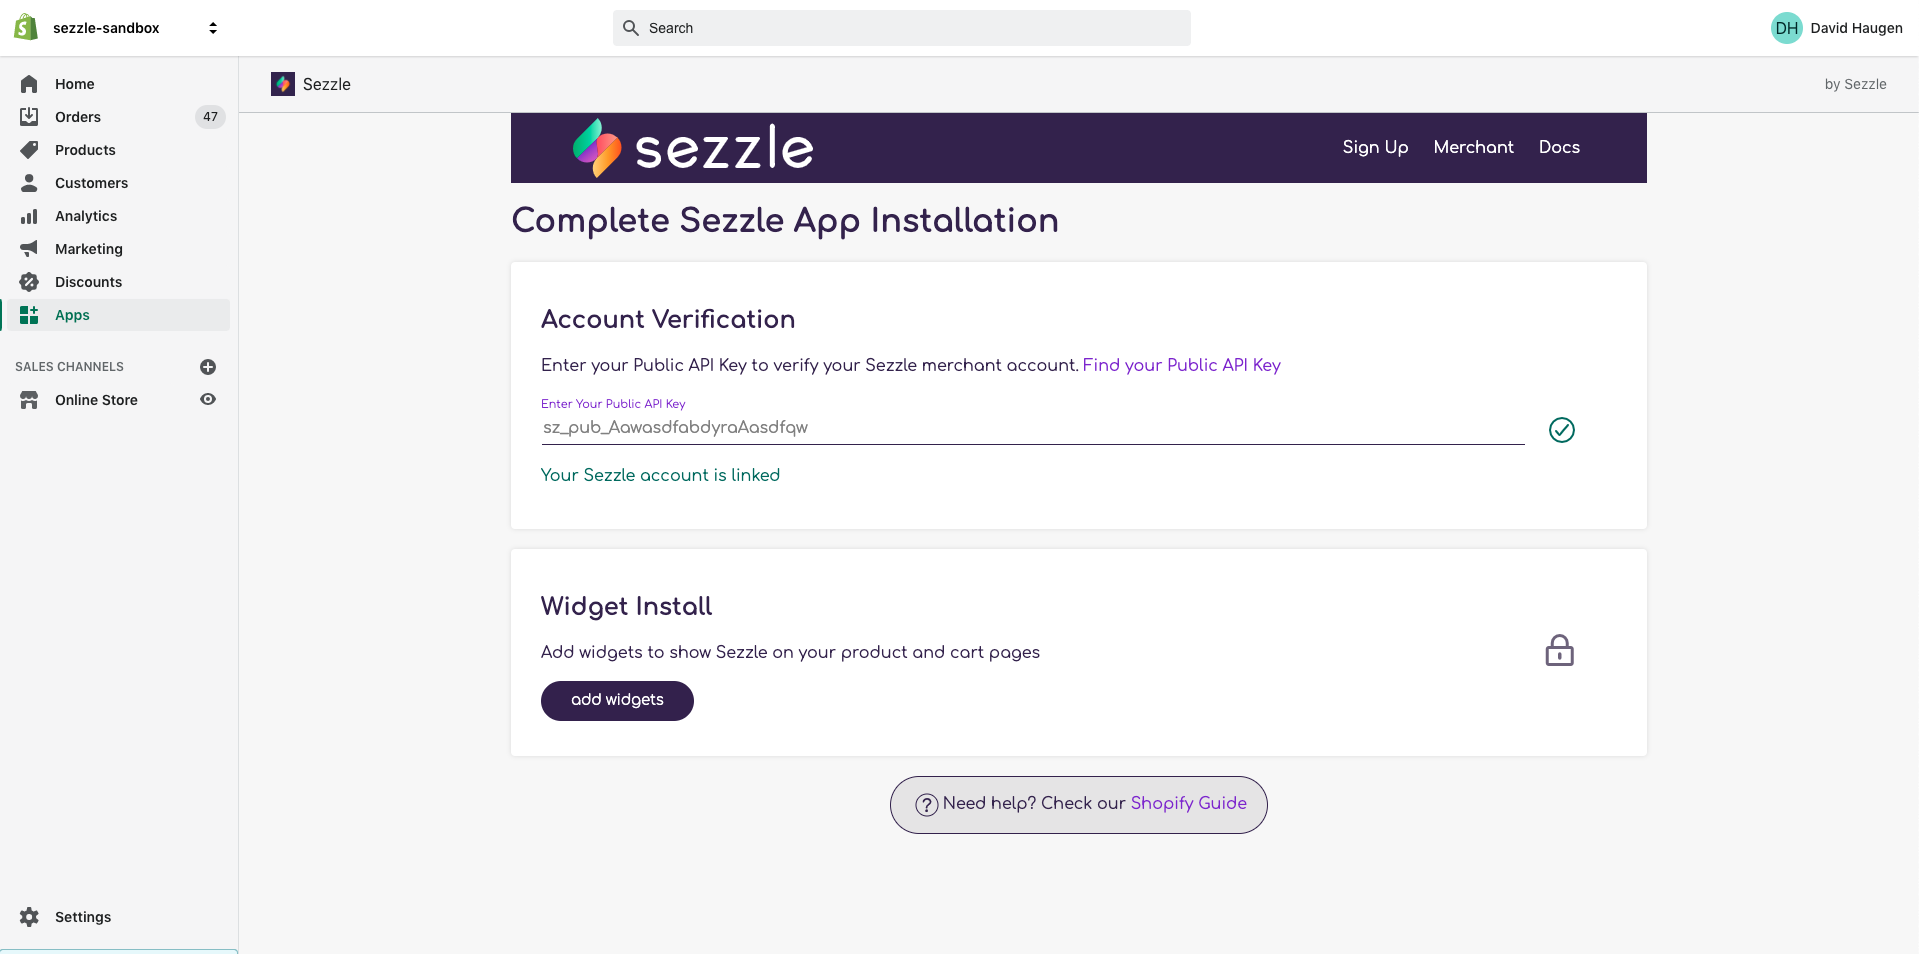
- After widgets have been added, navigate to a product page to confirm that the Sezzle widget has been added.

- If you ever need to remove Sezzle widgets from your shop, click the
remove widgetsbutton within the Sezzle app.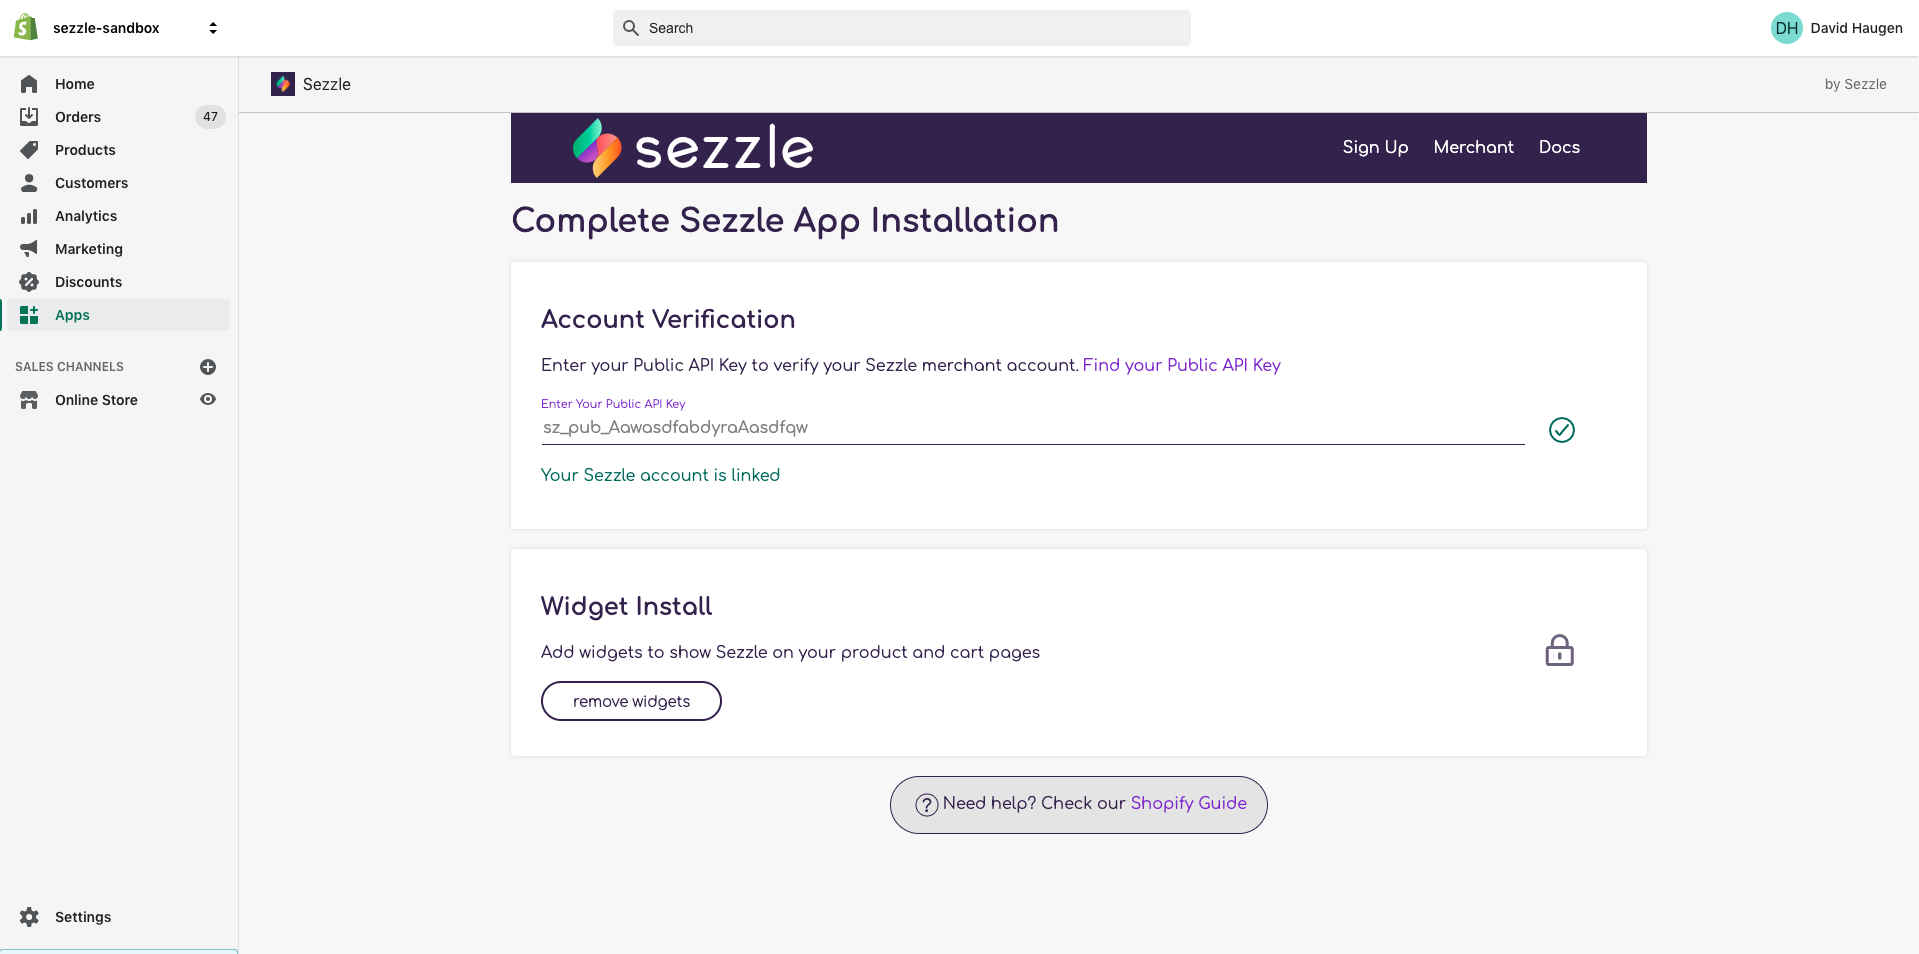
Note: If the Sezzle app is unable to automatically add widgets to your shop, one of our team members will automatically be notified and will work to manually add widgets to your shop within 7 business days.
Install the Sezzle Payment Gateway
- In your Sezzle Merchant Dashboard Setup Checklist, click
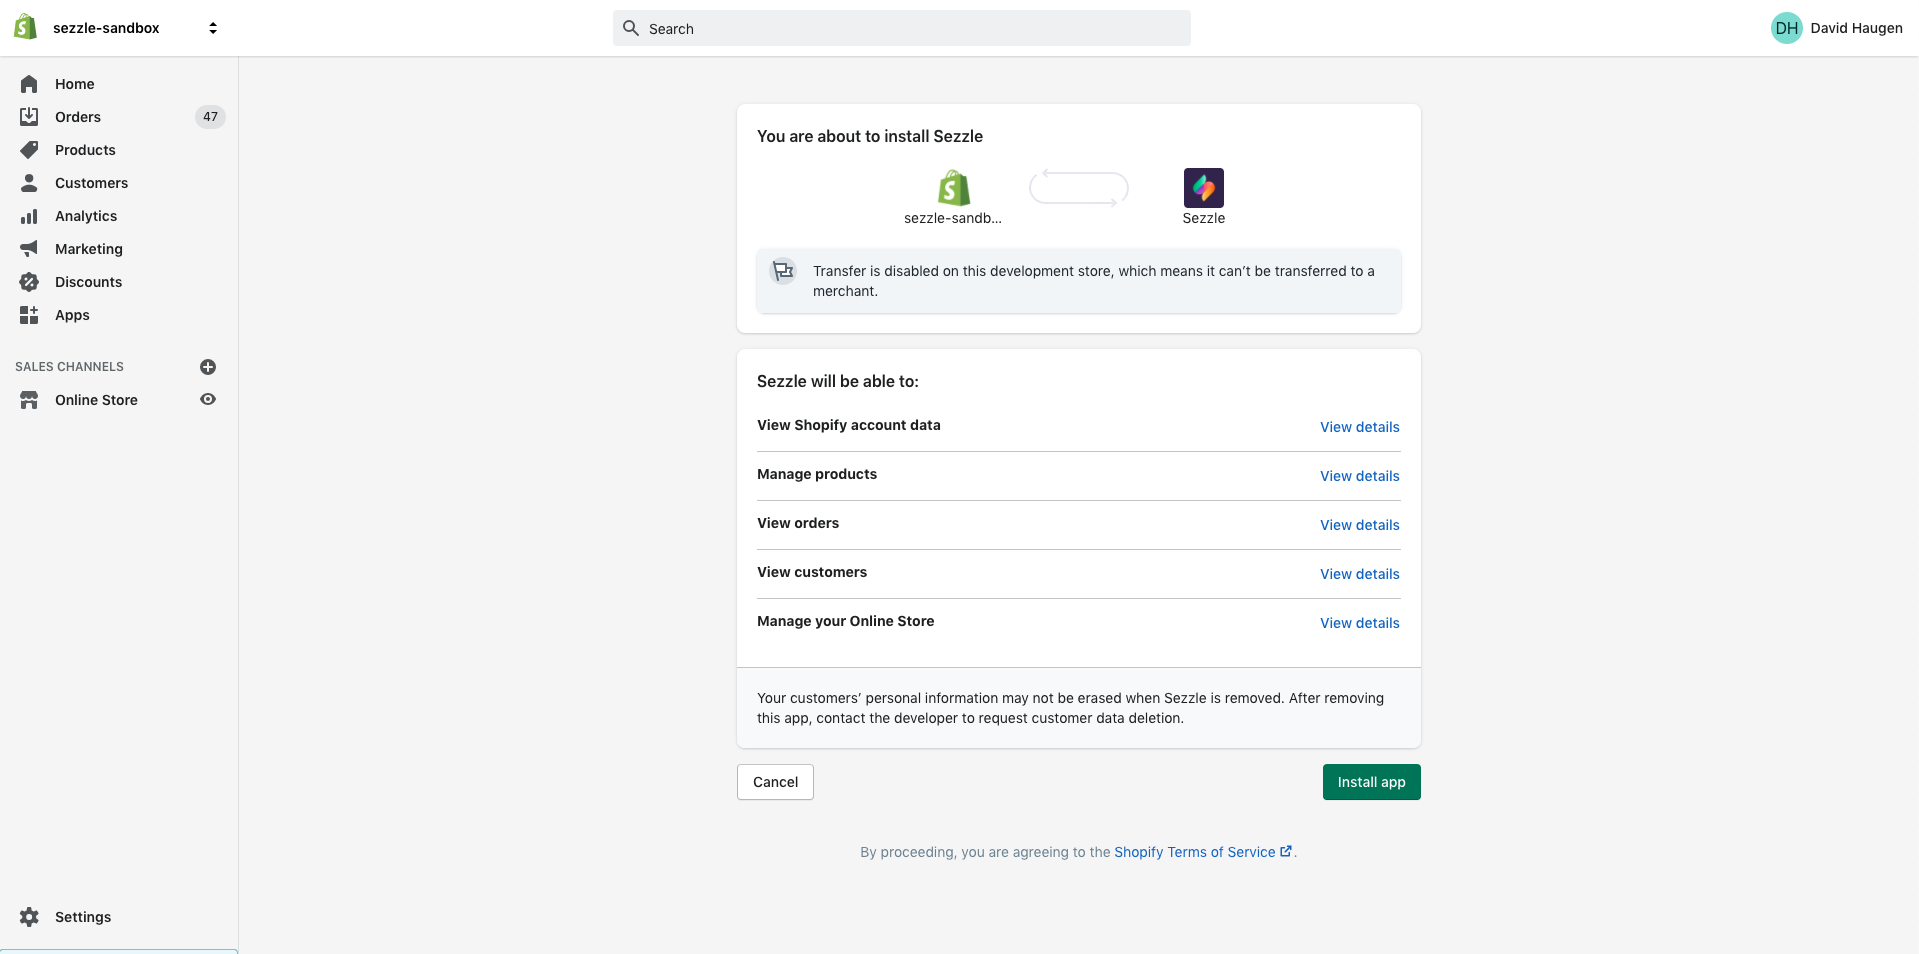
Connect Sezzle to Shopify. - Click
Instructions. - Click the first hyperlink on the new page to enable the gateway for your shop. If prompted, select your Shopify store.
- Click
Install Payment Provider.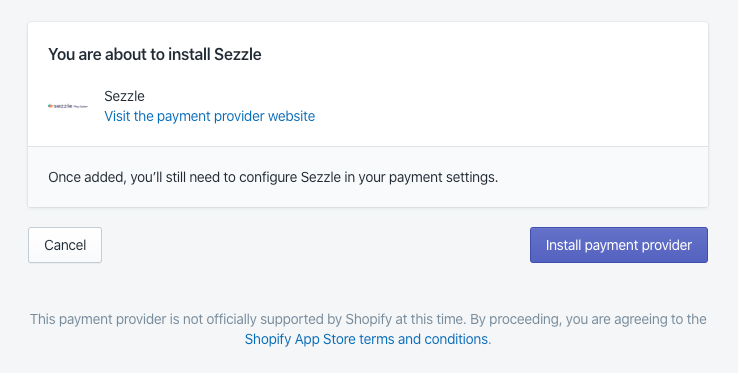
Admin Configuration
- In your Shopify admin, go to
Settings>Payment Providers.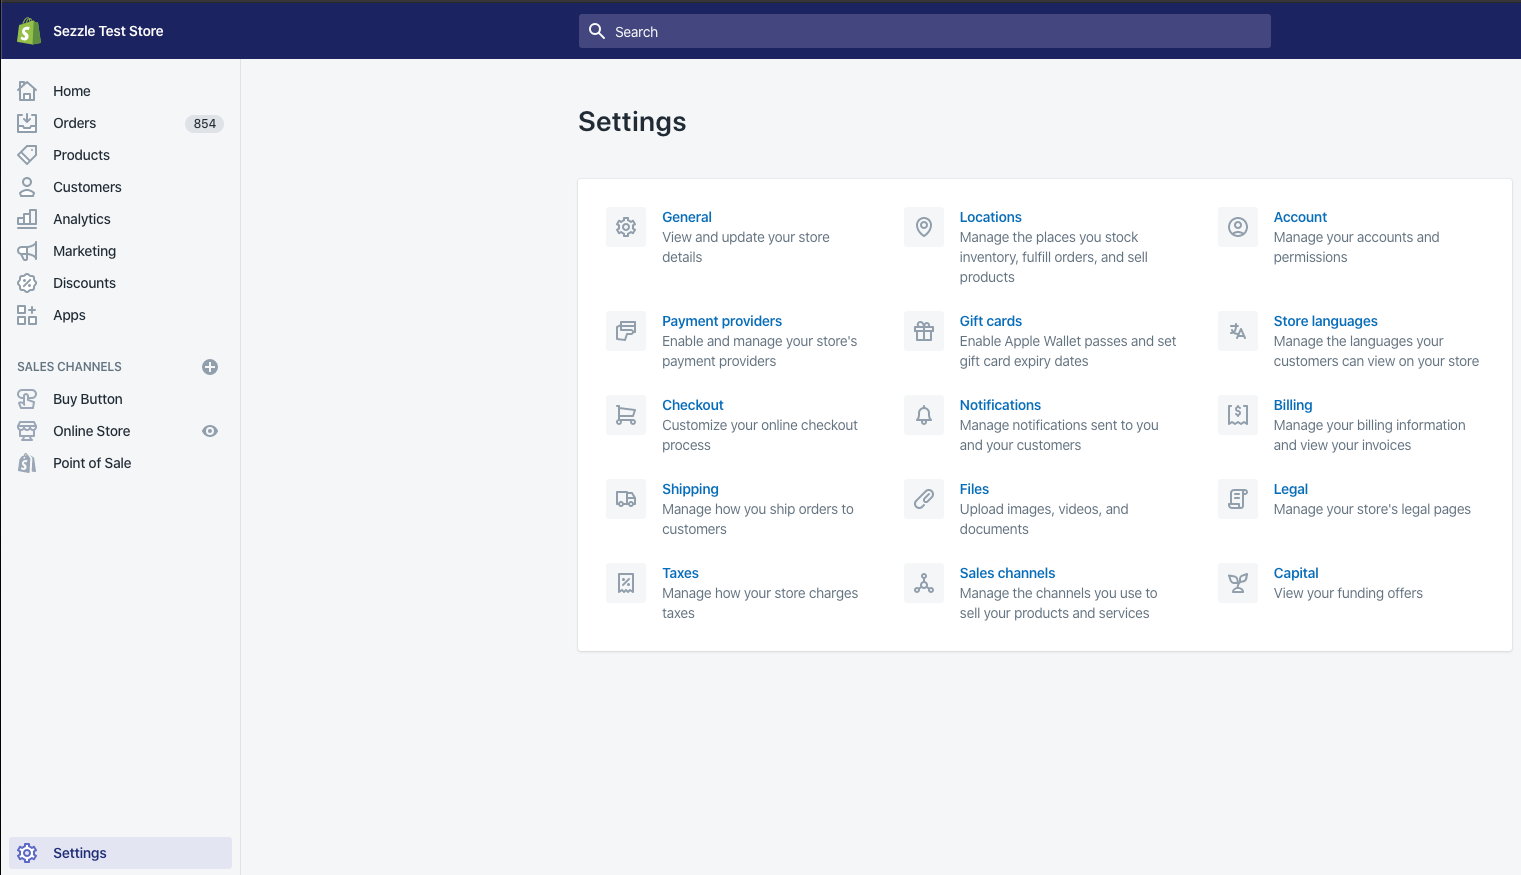
- Under
Alternative Payment Methods, clickChoose Alternative Payment.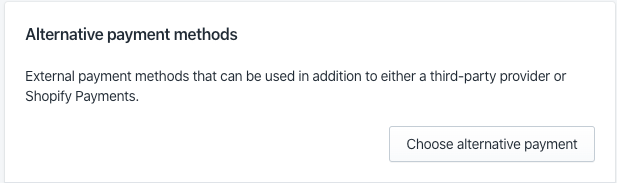
- Search for and click on
Sezzle.
- Copy your
Public KeyandPrivate Keyfrom your Sezzle Merchant Dashboard, and paste them into the corresponding fields in the Sezzle configuration page of your Shopify admin. - Click the
Activate Sezzlebutton.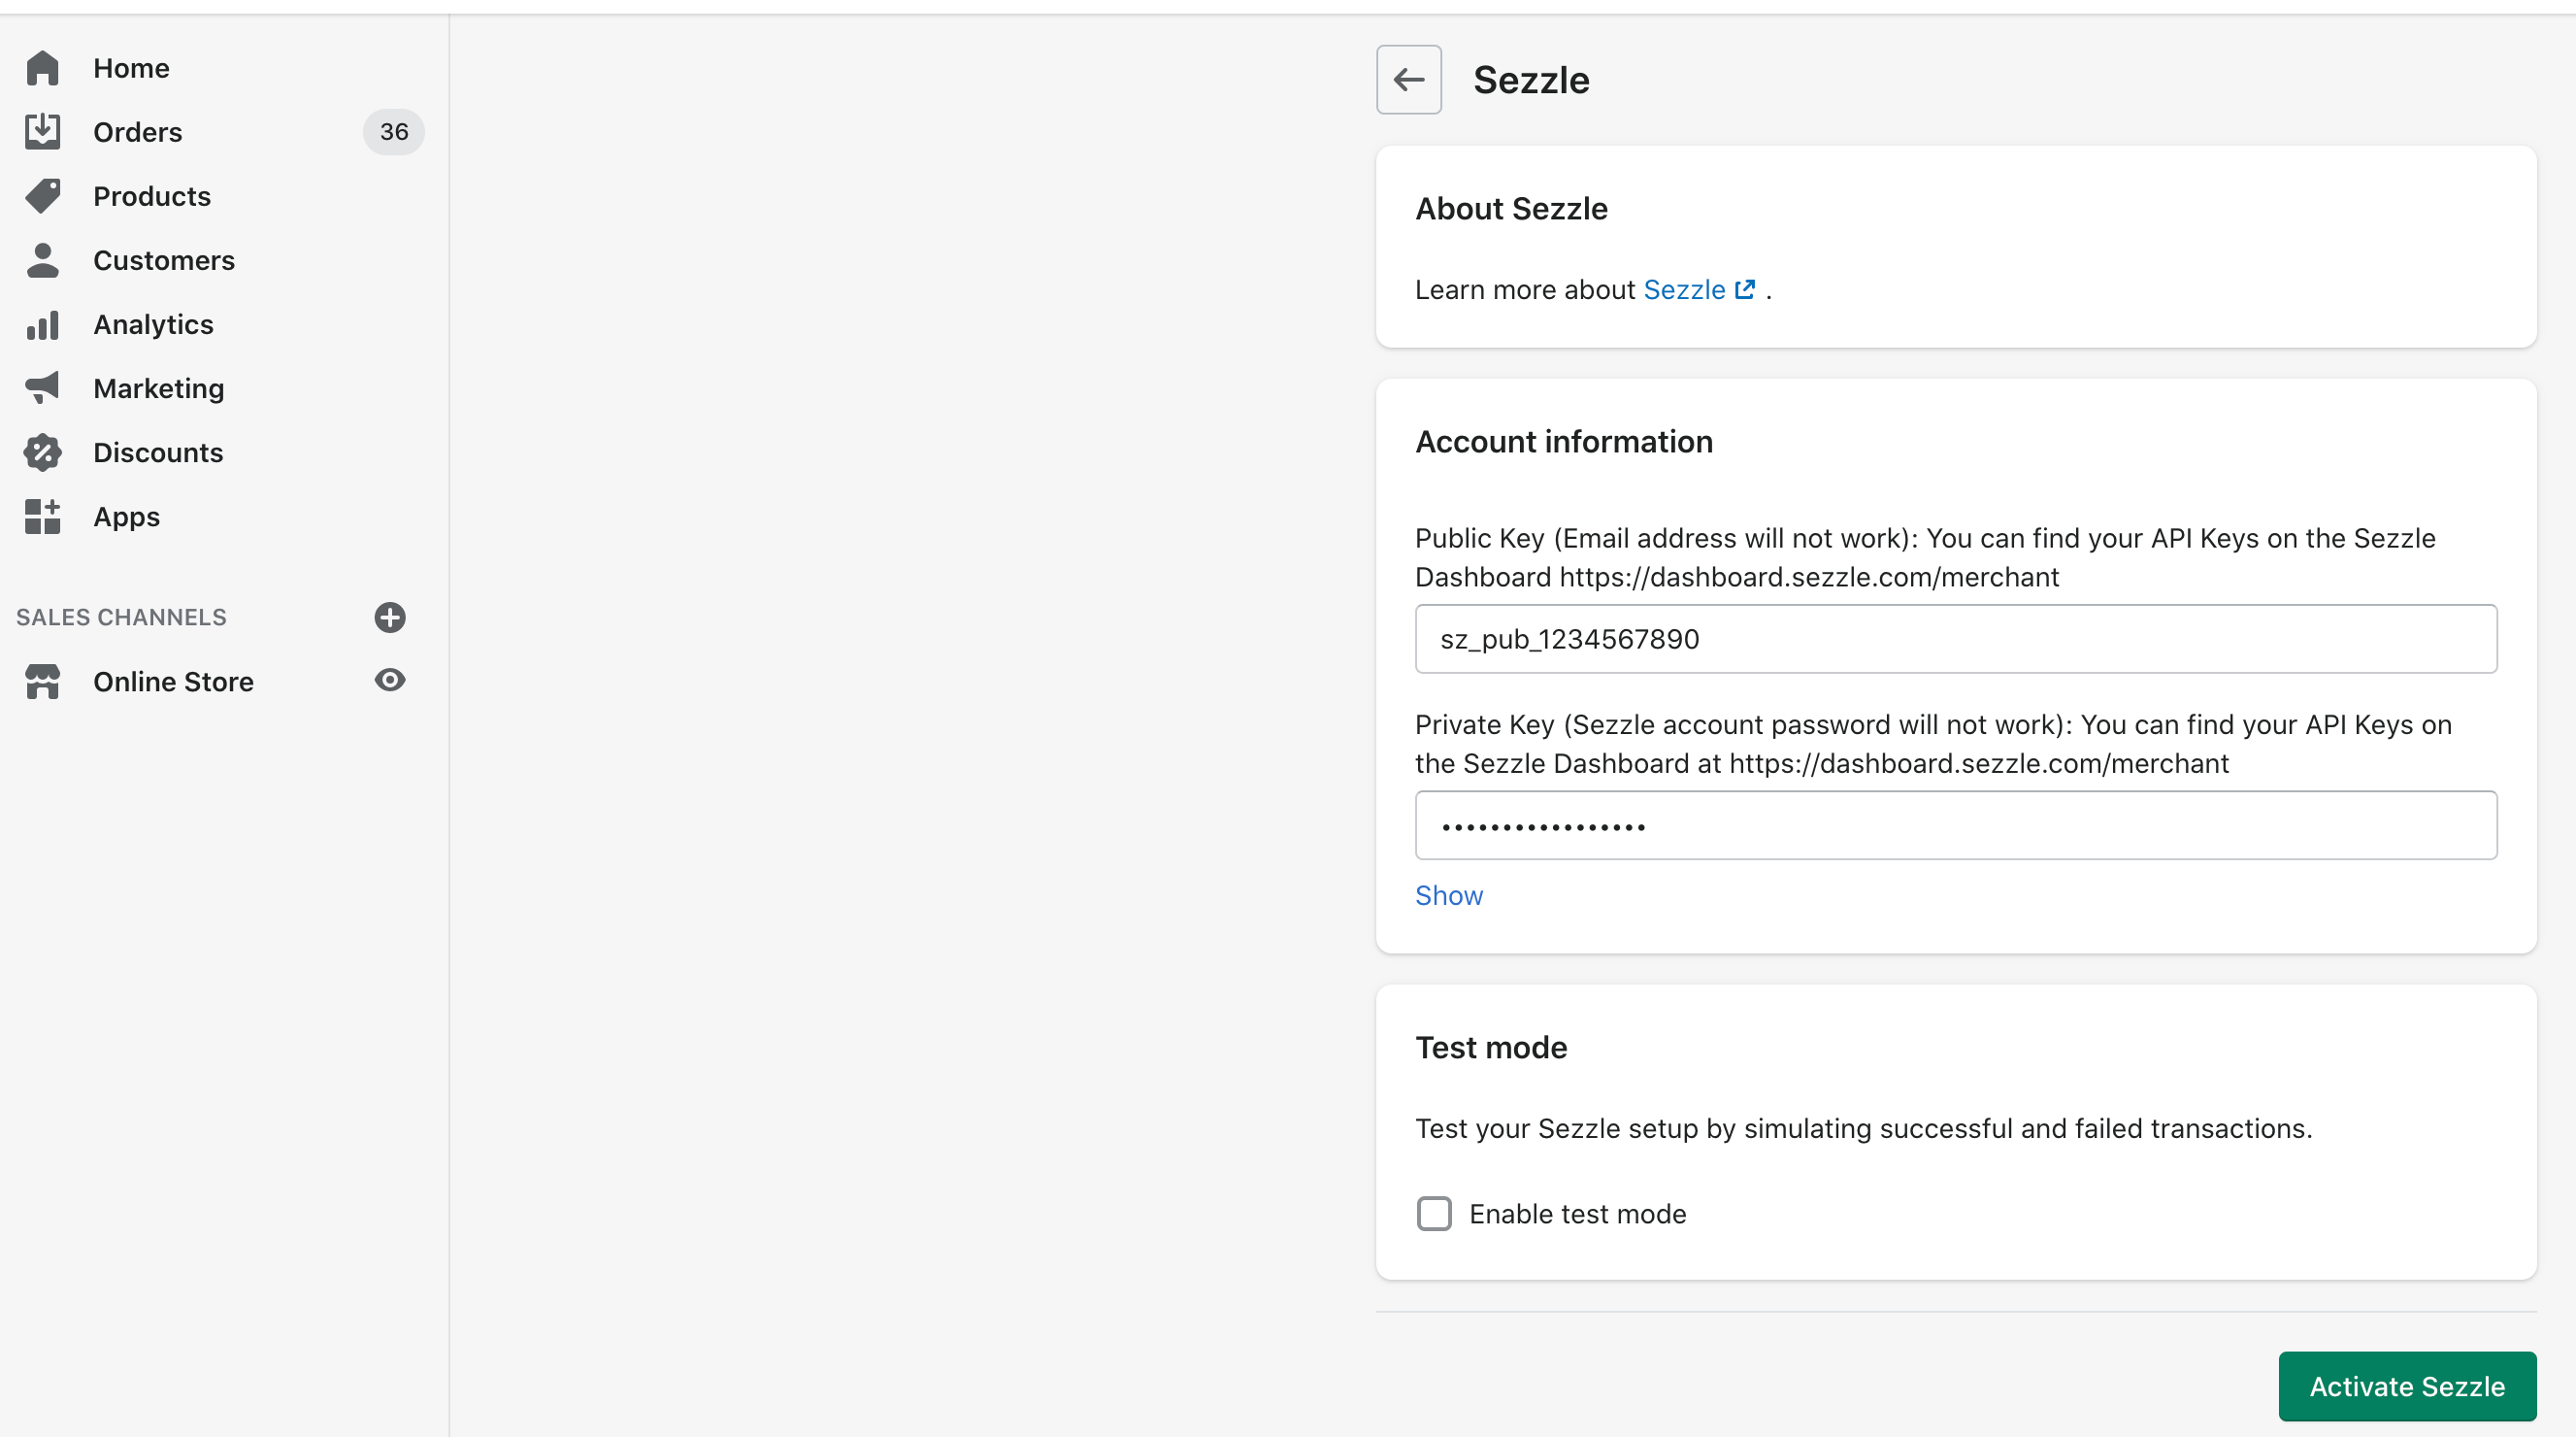
- Installation is complete.
Shopify Live Checkout
- In the Sezzle configuration page of your Shopify admin, enter the API Keys from your Sezzle Merchant Dashboard and uncheck the
Enable Test Modecheckbox, then save the configuration. - On your website, add an item to your cart, then proceed to
Checkoutand selectSezzleas the payment method. - Click
Place Order.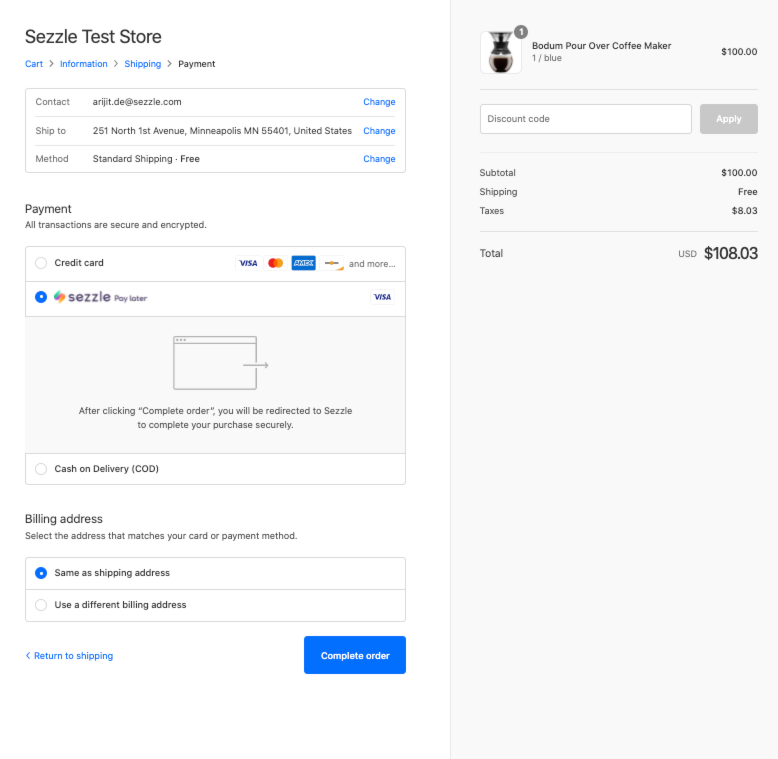
- If you are redirected to the Sezzle checkout page, your integration is complete. Congratulations!
- Warning Don't complete the payment. Your checkout is now live, so you will be charged if you complete.
Troubleshooting
If testing was unsuccessful, review the following:
- Sezzle Shopify extension is the most updated version.
- Go to
Apps>Sezzle, then clickAbout. If there is an option to upgrade, do so now.
- Go to
- Sezzle gateway is activated.
- Go to
Settings>Payment Providersand ensure "Sezzle is active" is listed under theAlternative Payment Methodssection.
- Go to
- API Keys were entered correctly.
- It is recommended to use the Copy icon in the Sezzle Merchant Dashboard to avoid typos or extra spaces.
- If you have multiple accounts with Sezzle, the merchant ID and API Keys are tied to only one URL.
- Widget script is present on your website and reflects the
Merchant IDfrom your Sezzle Merchant Dashboard.- Go to a product page on your website.
- Right-click then select
Inspect. - In the
Elementstab, search forwidget.sezzle.
Manual Theme Integration
If the Shopify app fails to maintain the widget script on the product pages, or to add the script manually for additional pages, complete the following steps:
- Go to
Sales Channels>Online Store>Themes. - Click
Actions, then selectEdit Code. - In the
Code Explorer, go to theTemplatesfolder and select theproduct.liquidfile. - Copy+paste the script to the very bottom of the file, then click
Save.
<script src="https://widget.sezzle.com/v1/javascript/price-widget/initial?uuid=12a34bc5-6de7-890f-g123-4hi5678jk901"></script>
- Repeat the previous step in the
cart.liquidfile.
Note: If you have additional custom product templates, step 4 will need to be repeated for each file, or the script added to a global file, such as layout/theme.liquid.
The script to be inserted into your webpage is as follows:
Template:
<script src="https://widget.sezzle.com/v1/javascript/price-widget?uuid=MERCHANT_UUID"></script>
Update MERCHANT_UUID in the above script template with your site’s Merchant ID (removing the curly brackets), which can be found in the Sezzle Merchant Dashboard
Example:
<script src="https://widget.sezzle.com/v1/javascript/price-widget?uuid=12a34bc5-6de7-890f-g123-4hi5678jk901"></script>
For assistance with widget configuration, click Request Addition of Widgets in the widget step of your Sezzle Merchant Dashboard Setup Checklist.
Uninstall Steps
- Go to
Apps. - Under Sezzle, click
Delete. - Go to
Settings>Payment Providers. - Under
Alternative Payment Methods, findSezzleand clickEdit. - Click
Deactivate Sezzle. - Click
Deactivate Sezzleto confirm.
Inventory Locking
Our Shopify integration has an optional feature to prevent overselling while a customer is checking out with Sezzle. To enable this feature, please reach out to our Merchant Success team at accounts@sezzle.com.
Shopify Sandbox Testing
Sezzle offers an alternate sandbox payment gateway that can be used to test your integration. If you would like to install this gateway for testing, please reach out to our Merchant Success team at accounts@sezzle.com.
WooCommerce
This guide describes how to integrate Sezzle into your WooCommerce website so that you can provide Sezzle as a payment option for your customers. After integrating Sezzle, your WooCommerce site will:
- Offer Sezzle as a payment option on the checkout page.
- Refund Sezzle payments from your WooCommerce order management system.
- Display Sezzle promotional messaging.
- Authorize and capture payments.
Integration Steps Overview
- Install and configure the Sezzle WooCommerce extension
- Test your integration
- (Optional) Sandbox Testing
Before You Begin
- You should have a Sezzle merchant account.
- Please visit our signup page if you don't have an account.
- Make sure you have the following Sezzle details handy.
- Familiarize yourself with the transaction flow when buying with Sezzle.
Install the Sezzle WooCommerce Extension
- Log in to your website's Wordpress admin.
- Ex: your-website.com/wp-admin
- Ex: your-website.com/wp-admin
- In the left sidebar, click
Plugins>Add New. - Search for
Sezzle. - Click
Install Now.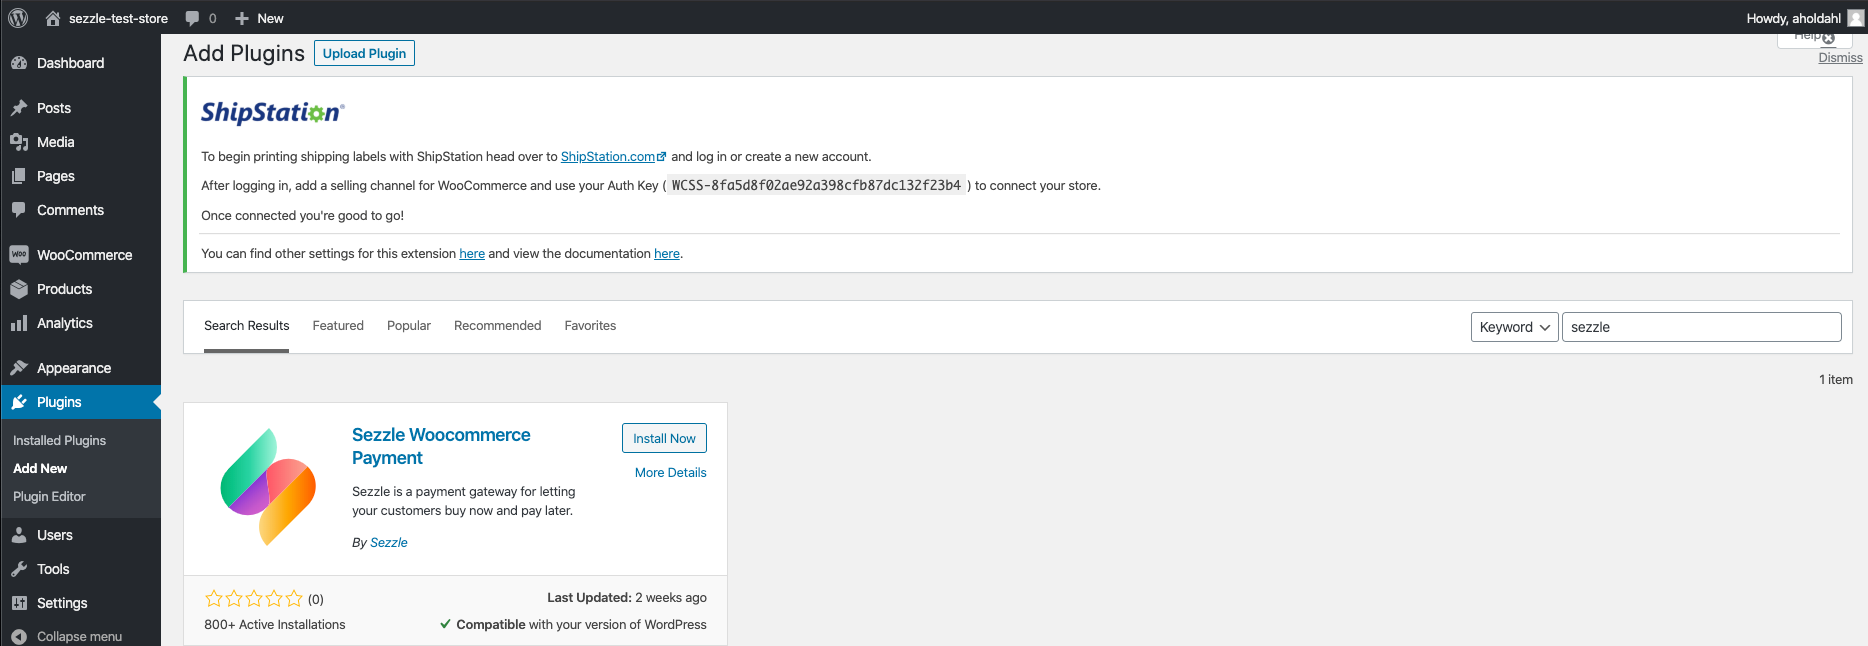
- Click
Activate.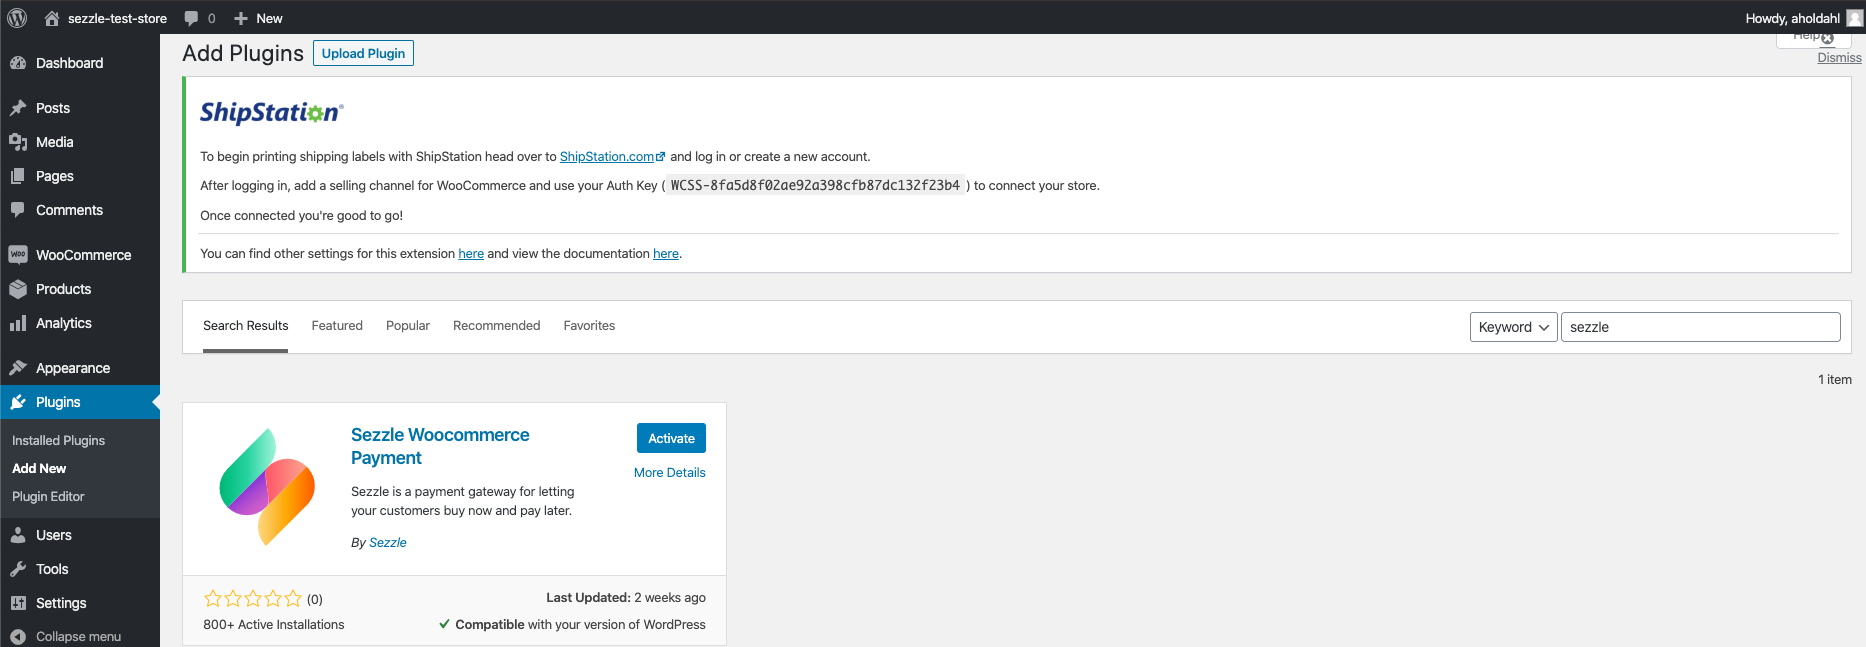
Admin Configuration
- In the left sidebar, click
WooCommerce>Settings. - Select the
Paymentstab.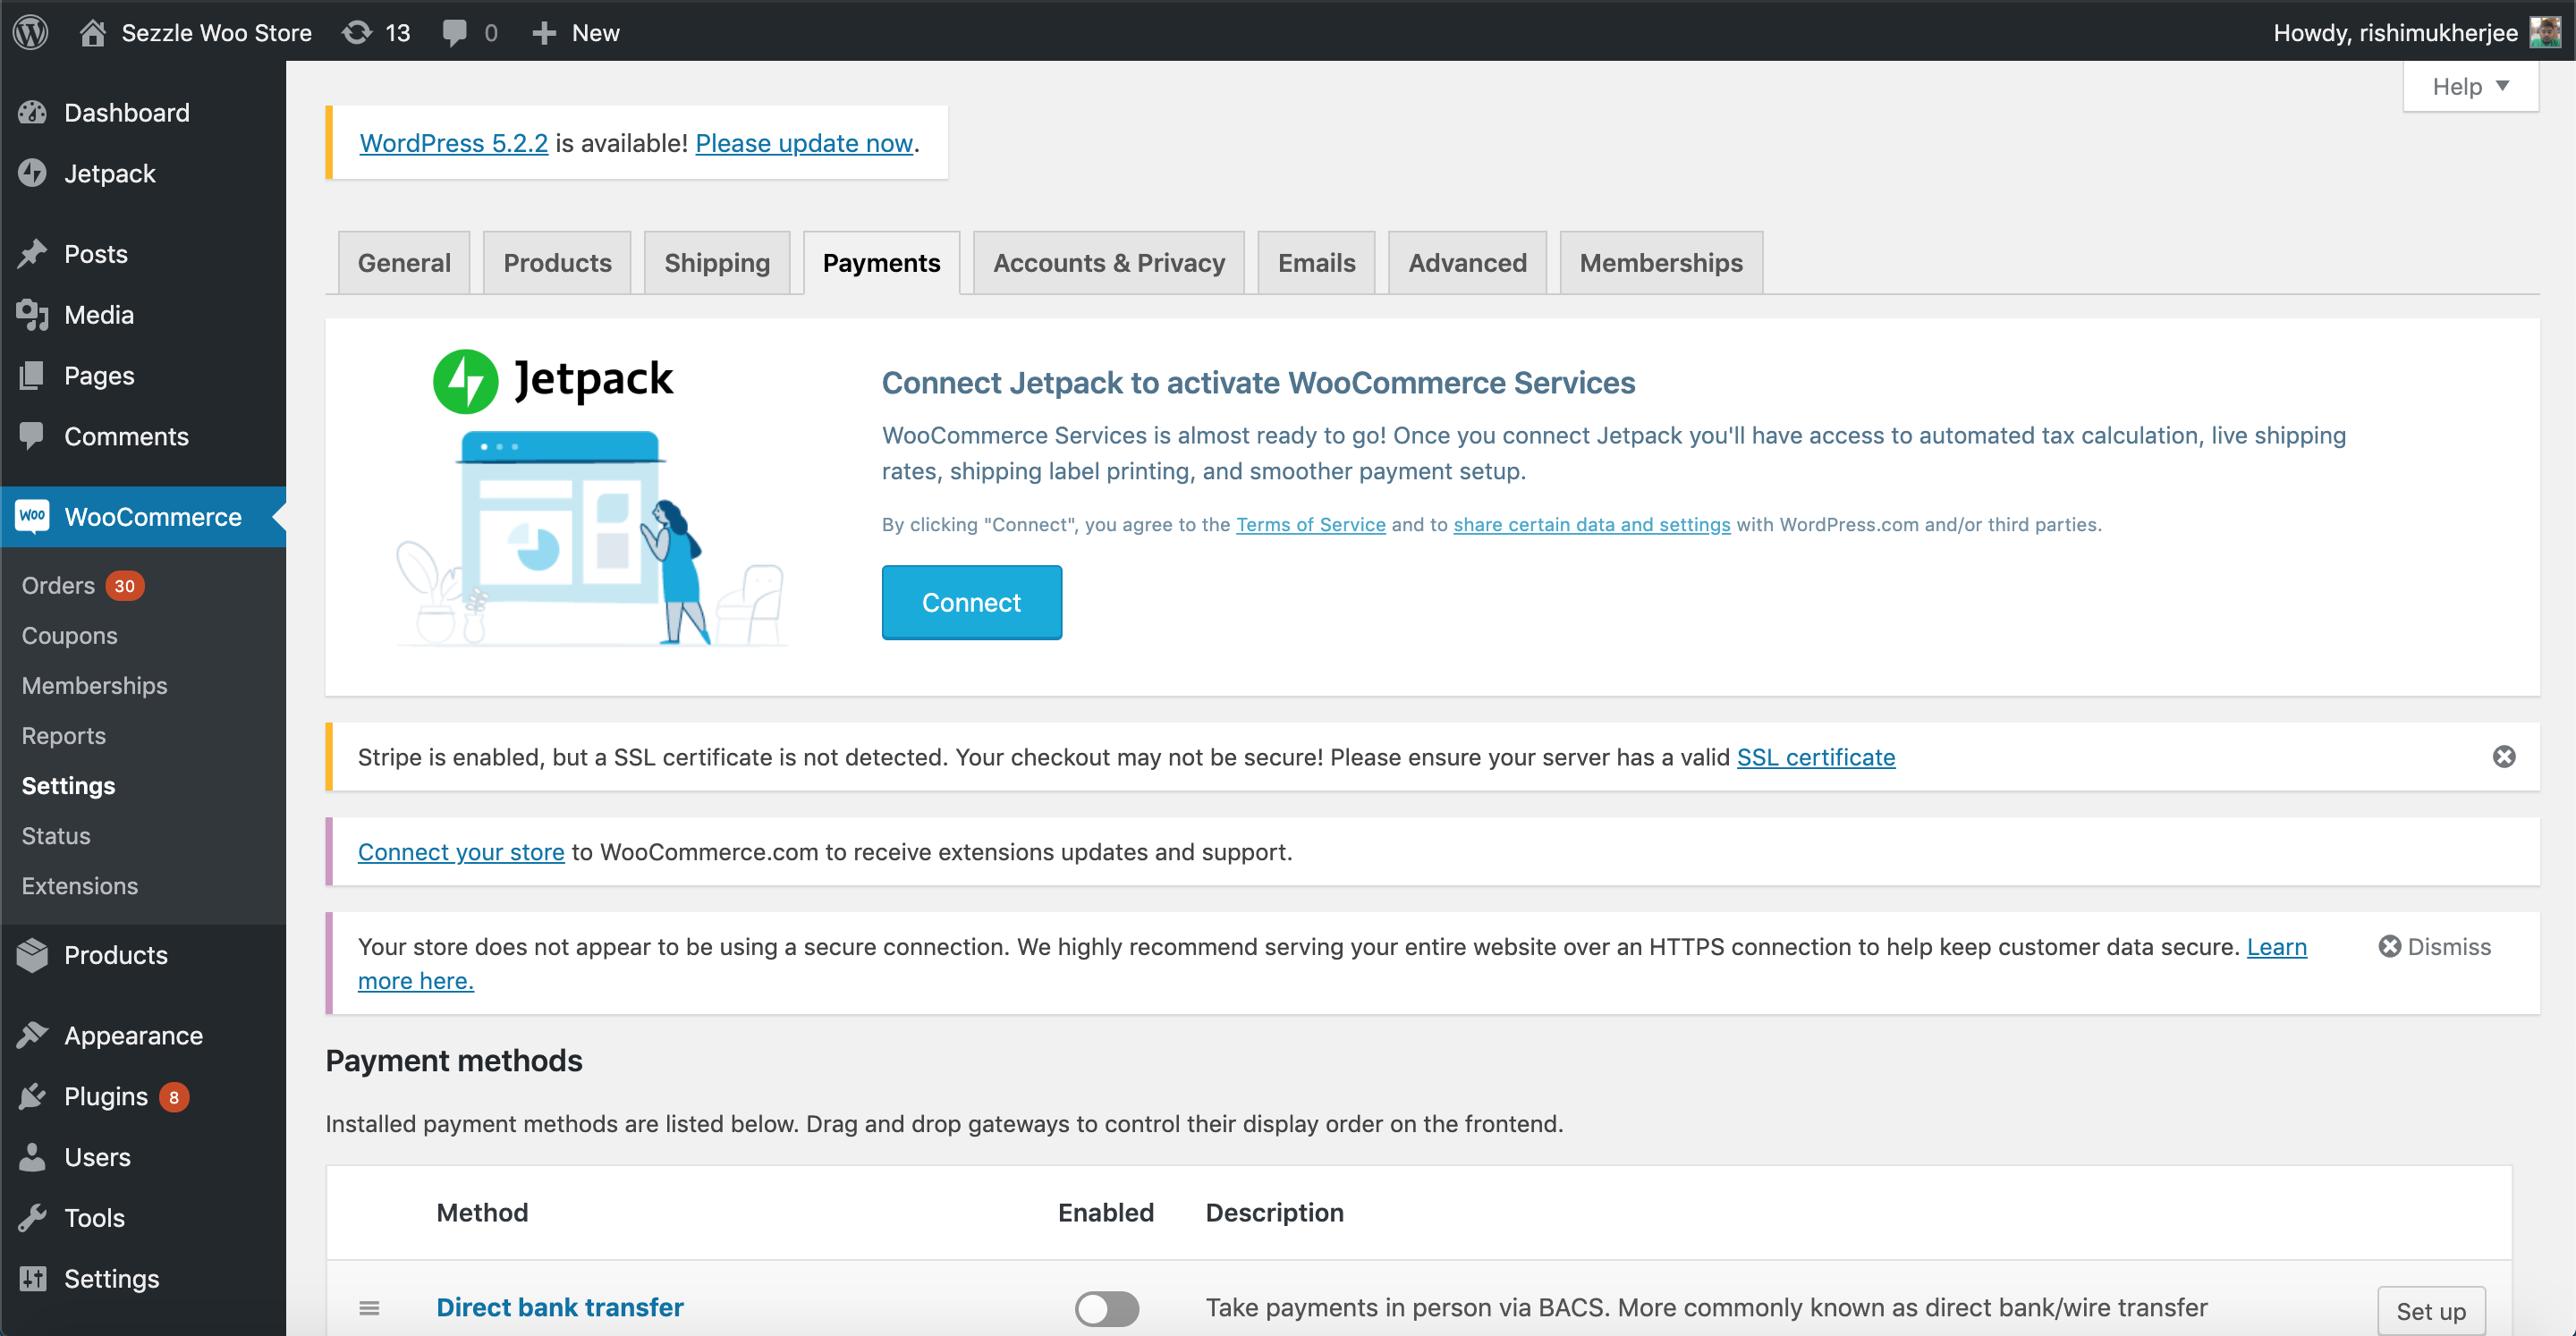
- Click the
Managebutton forSezzle.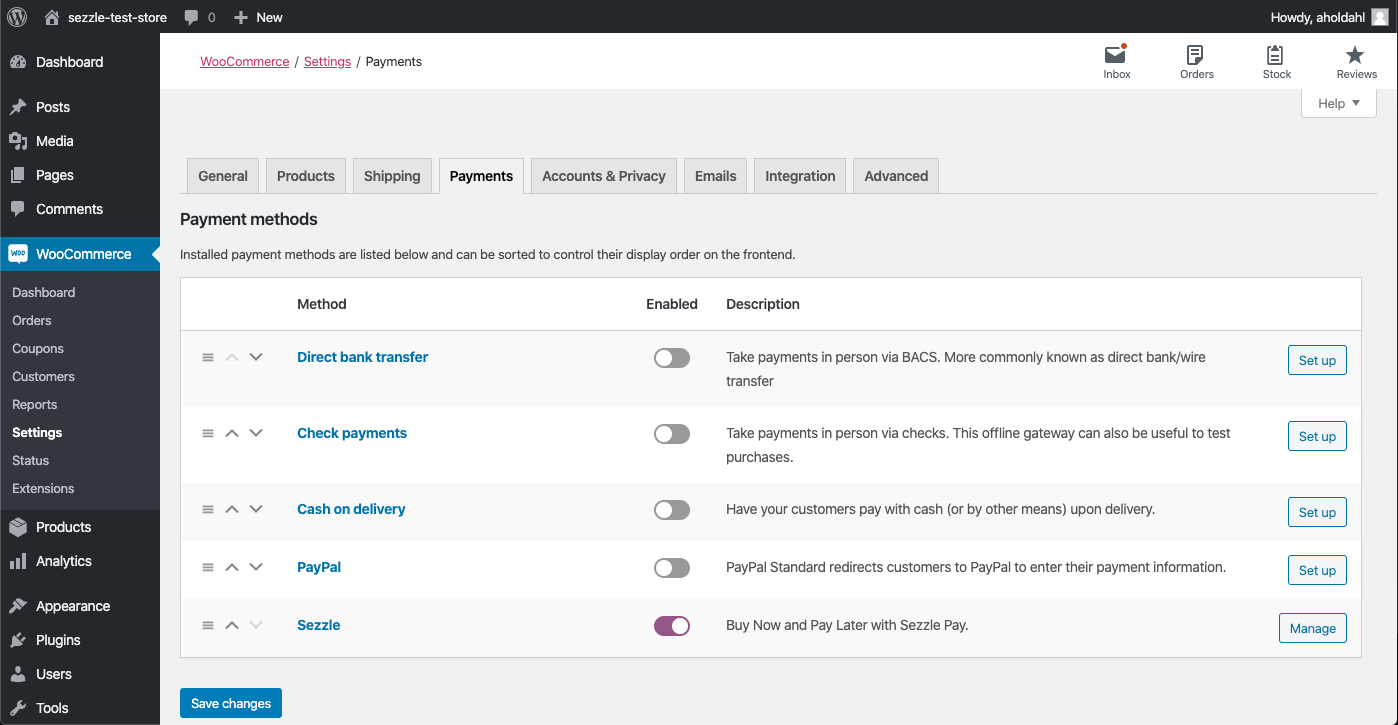
- Check the
Enable/Disablecheckbox for enabling Sezzle. - Check the
Payment option availability in other countriesif you want to allow Sezzle outside ofUSandCanada.- Note, Sezzle operates only in
USandCanada. Be sure to check this option.
- Note, Sezzle operates only in
- Set
Merchant IDas received from theBusinesssection of Sezzle Merchant Dashboard. - Copy your
Private KeyandPublic Keyfrom your Sezzle Merchant Dashboard, and paste them into the corresponding fields. - Set
Minimum Checkout Amountif you want to restrict Sezzle based on a minimum order total. - Set the
Transaction ModeasLivefor production andSandboxfor sandbox testing mode. - Check the
Show Sezzle widget in product pagescheckbox for adding widget script in the Product Display Page, which allows enabling Sezzle Widget Modal in PDP. - Configure the installment plan widget under
Installment Plan Widget Configurationsettings- Check the
Enable Installment Widget Plan in Checkout pagecheckbox for enabling installment widget plan. - Set the
Order Total Container Class Name. Default iswoocommerce-Price-amount. - Set the
Order Total Container Parent Class Name. Default isorder-total.
- Check the
- Check the
Enable Loggingcheckbox for logging Sezzle checkout related data. This is helpful for debugging issues, if encountered.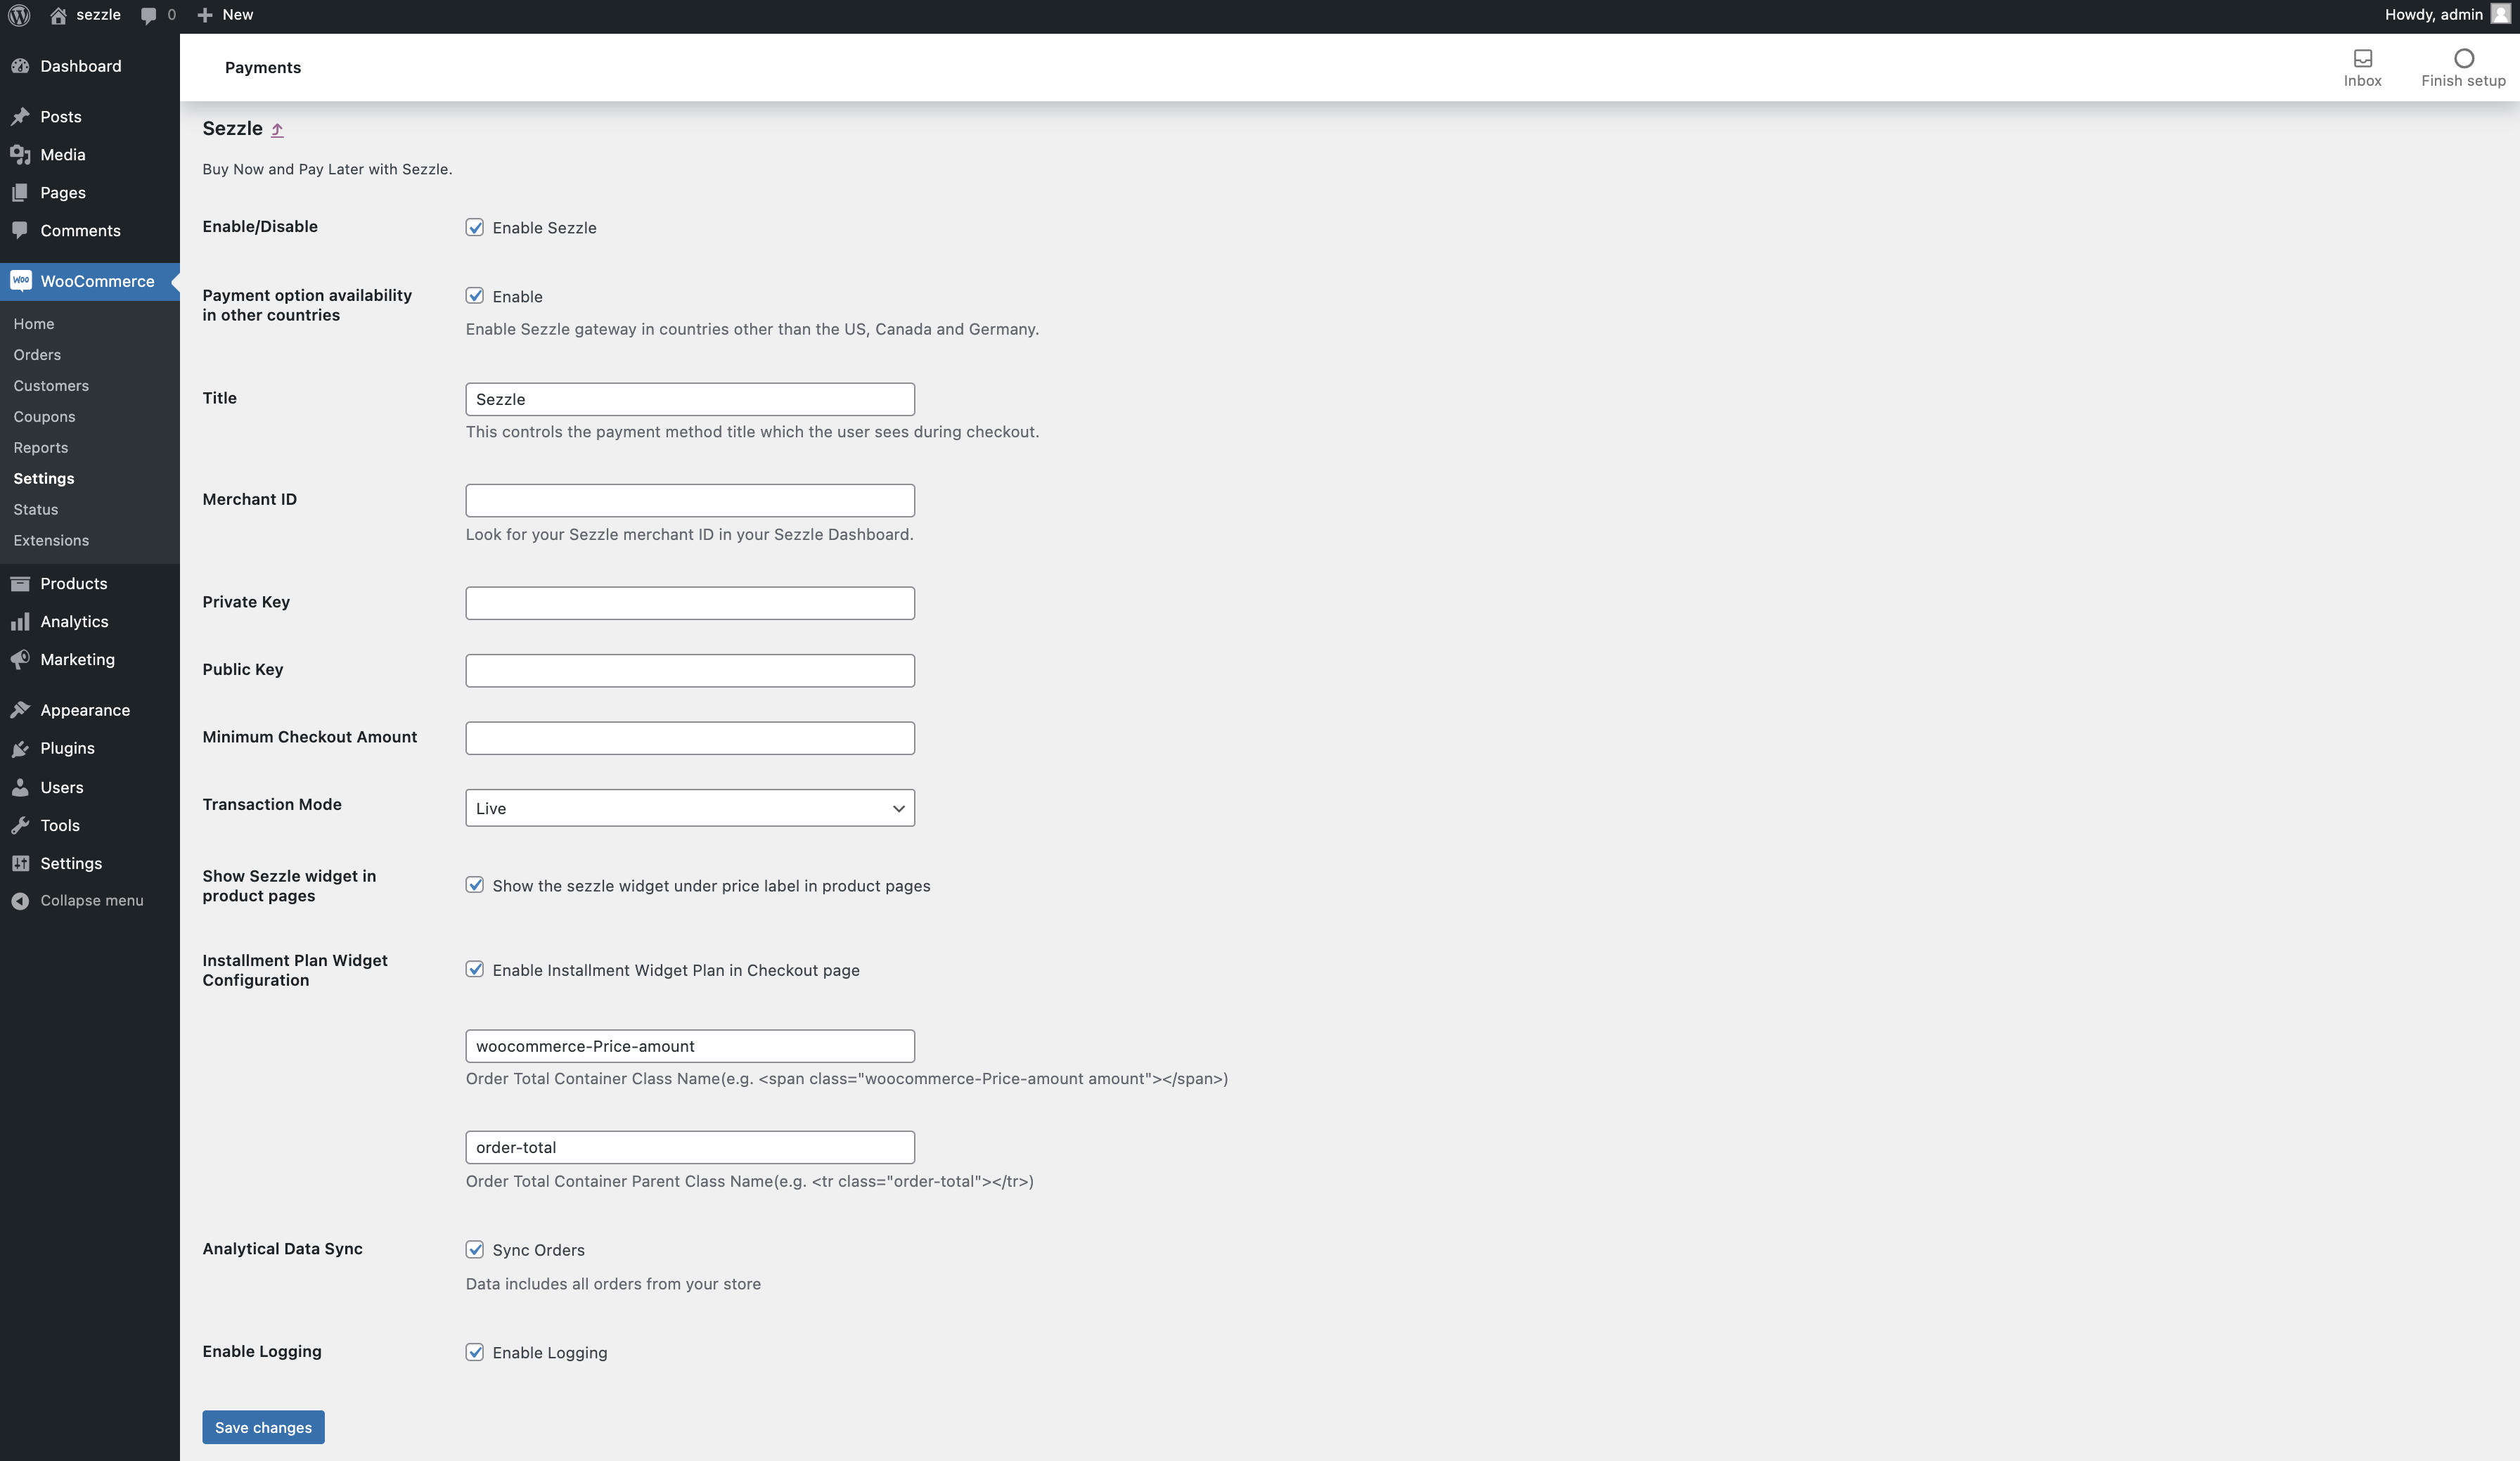
- Click
Save Changes.
WooCommerce Sandbox Testing
- In the
Sezzleconfiguration page of your WooCommerce admin, enter the Sandbox API Keys from your Sezzle Merchant Sandbox Dashboard and set theTransaction ModetoSandbox, then save the configuration. Make sure you are doing this on yourdev/stagingwebsite. - On your website, add an item to the cart, then proceed to
Checkoutand selectSezzleas the payment method. - Click
Place Order, and you should be redirected to the Sezzle checkout page. If prompted, sign in.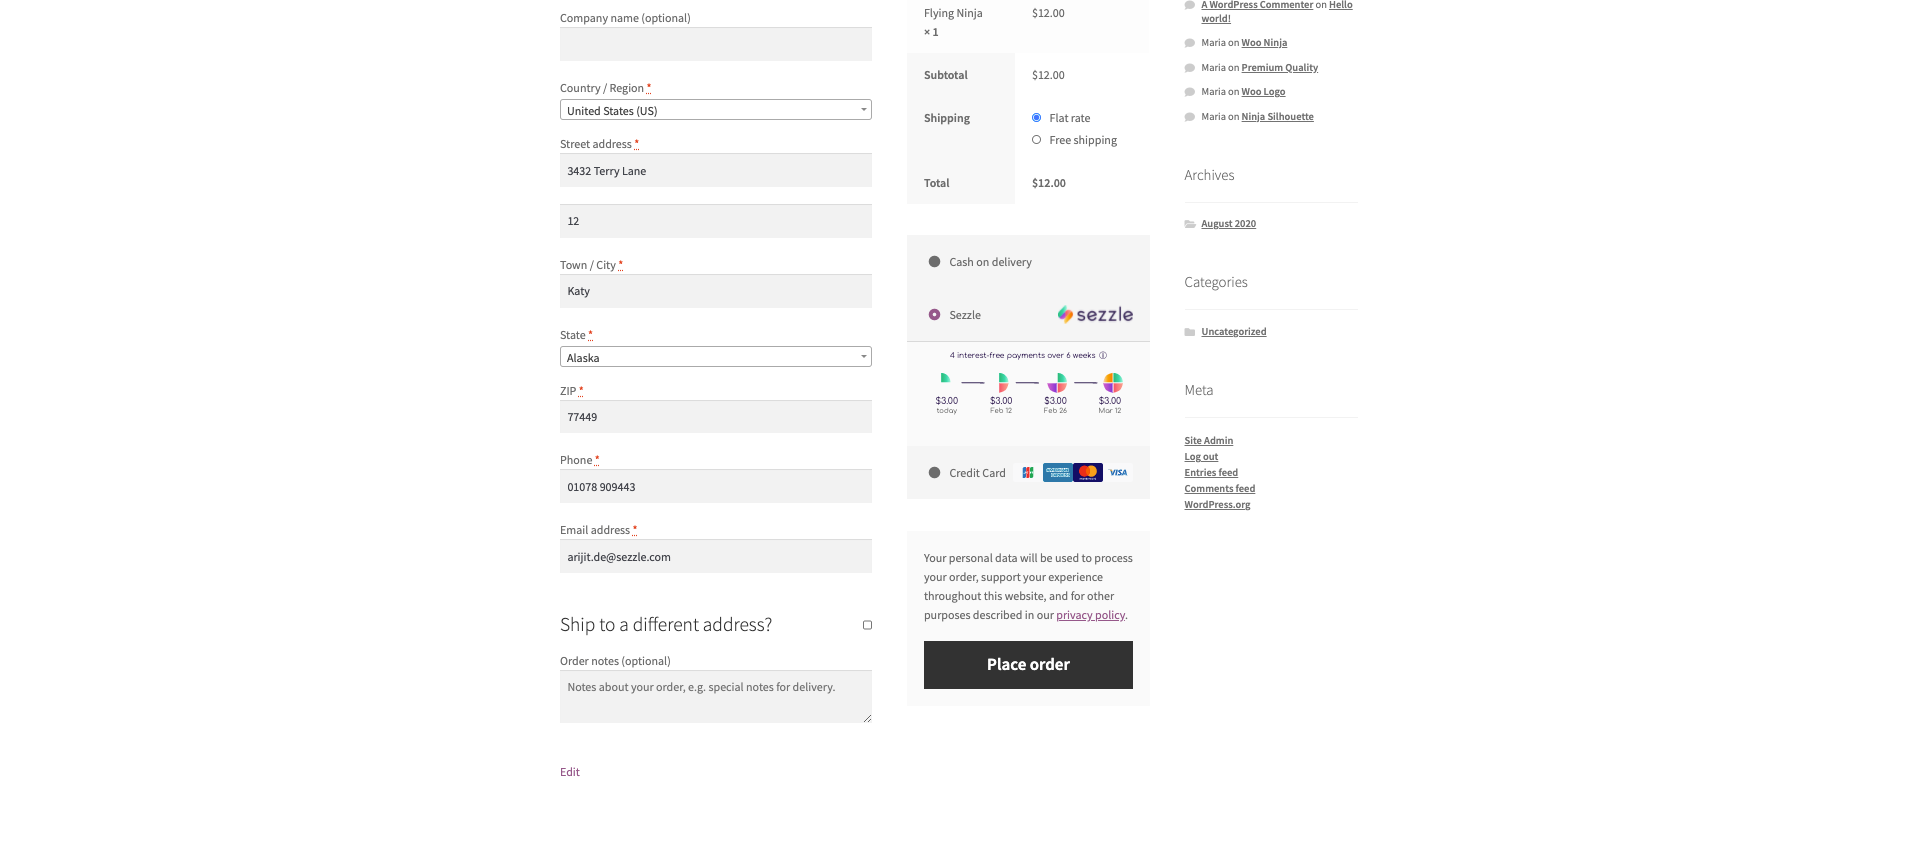
- Enter the payment details using test data, then click
Complete Order. - After the payment is completed on Sezzle, you should be redirected back to your website and see a successful payment page.
- Sandbox testing is complete. You can log in to your Sezzle Merchant Sandbox Dashboard to see the test order you just placed.
WooCommerce Live Checkout
- In the
Sezzleconfiguration page of your WooCommerce admin, enter the API Keys from your Sezzle Merchant Dashboard and set theTransaction ModetoLive, then save the configuration. - On your website, add an item to the cart, then proceed to
Checkoutand selectSezzleas the payment method. - Click
Place Order. - If you are redirected to the Sezzle checkout page, your integration is complete. Congratulations!
- Warning Don't complete the payment. Your checkout is now live, so you will be charged if you complete.
Important Note on Order Fulfillment
Before shipping the order, ensure that the Order Notes in the WooCommerce interface show the order status is Processing and include Payment approved by Sezzle. When these notes exist, you know that the customer completed the checkout at Sezzle, and you will be paid for the order.
WooCommerce will create an order regardless of whether the customer completes the checkout at Sezzle. Check the Order Notes and do not fulfill orders where the Sezzle checkout is not completed.
Troubleshooting
If testing was unsuccessful, review the following:
- Sezzle WooCommerce extension is the most updated version.
- Go to
Plugins>Installed Plugins, then clickView Detailsnext to theSezzle WooCommerce Payment. If there is an option to upgrade, do so now.
- Go to
- Sezzle extension is activated.
- Go to
WooCommerce>Settingsand ensure the switch is turned On.
- Go to
Merchant IDwas entered correctly.- API Keys were entered correctly.
- It is recommended to use the Copy icon in the Sezzle Merchant Dashboard to avoid typos or extra spaces.
- If you have multiple accounts with Sezzle, the merchant ID and API Keys are tied to only one URL.
Show Sezzle widget in product pagesbox is checked.- Widget script is present on your website and reflects the
Merchant IDfrom your Sezzle Merchant Dashboard.- Go to a product page on your website.
- Right-click then select
Inspect. - In the
Elementstab, search forwidget.sezzle.
Uninstall Steps
- Go to
Plugins>Installed Plugins. - Under
Sezzle WooCommerce Payment, clickDeactivatethen clickDelete.
Zoey
This guide describes how to integrate Sezzle into your Zoey website so that you can provide Sezzle as a payment option for your customers. After integrating Sezzle, your Zoey site will:
- Offer Sezzle as a payment option on the checkout page.
- Refund Sezzle payments from your Zoey order management system.
- Authorize and capture payments.
Integration Steps Overview
Before You Begin
- You should have a Sezzle merchant account.
- Please visit our signup page if you don't have an account.
- Make sure you have the following Sezzle details handy.
- Familiarize yourself with the transaction flow when buying with Sezzle.
Install the Sezzle Zoey Extension
Go to https://www.zoey.com/apps/sezzle/ and click Get App.
Admin Configuration
- Go to
Set-up>Payment Methods>Sezzle. - Click
Configure.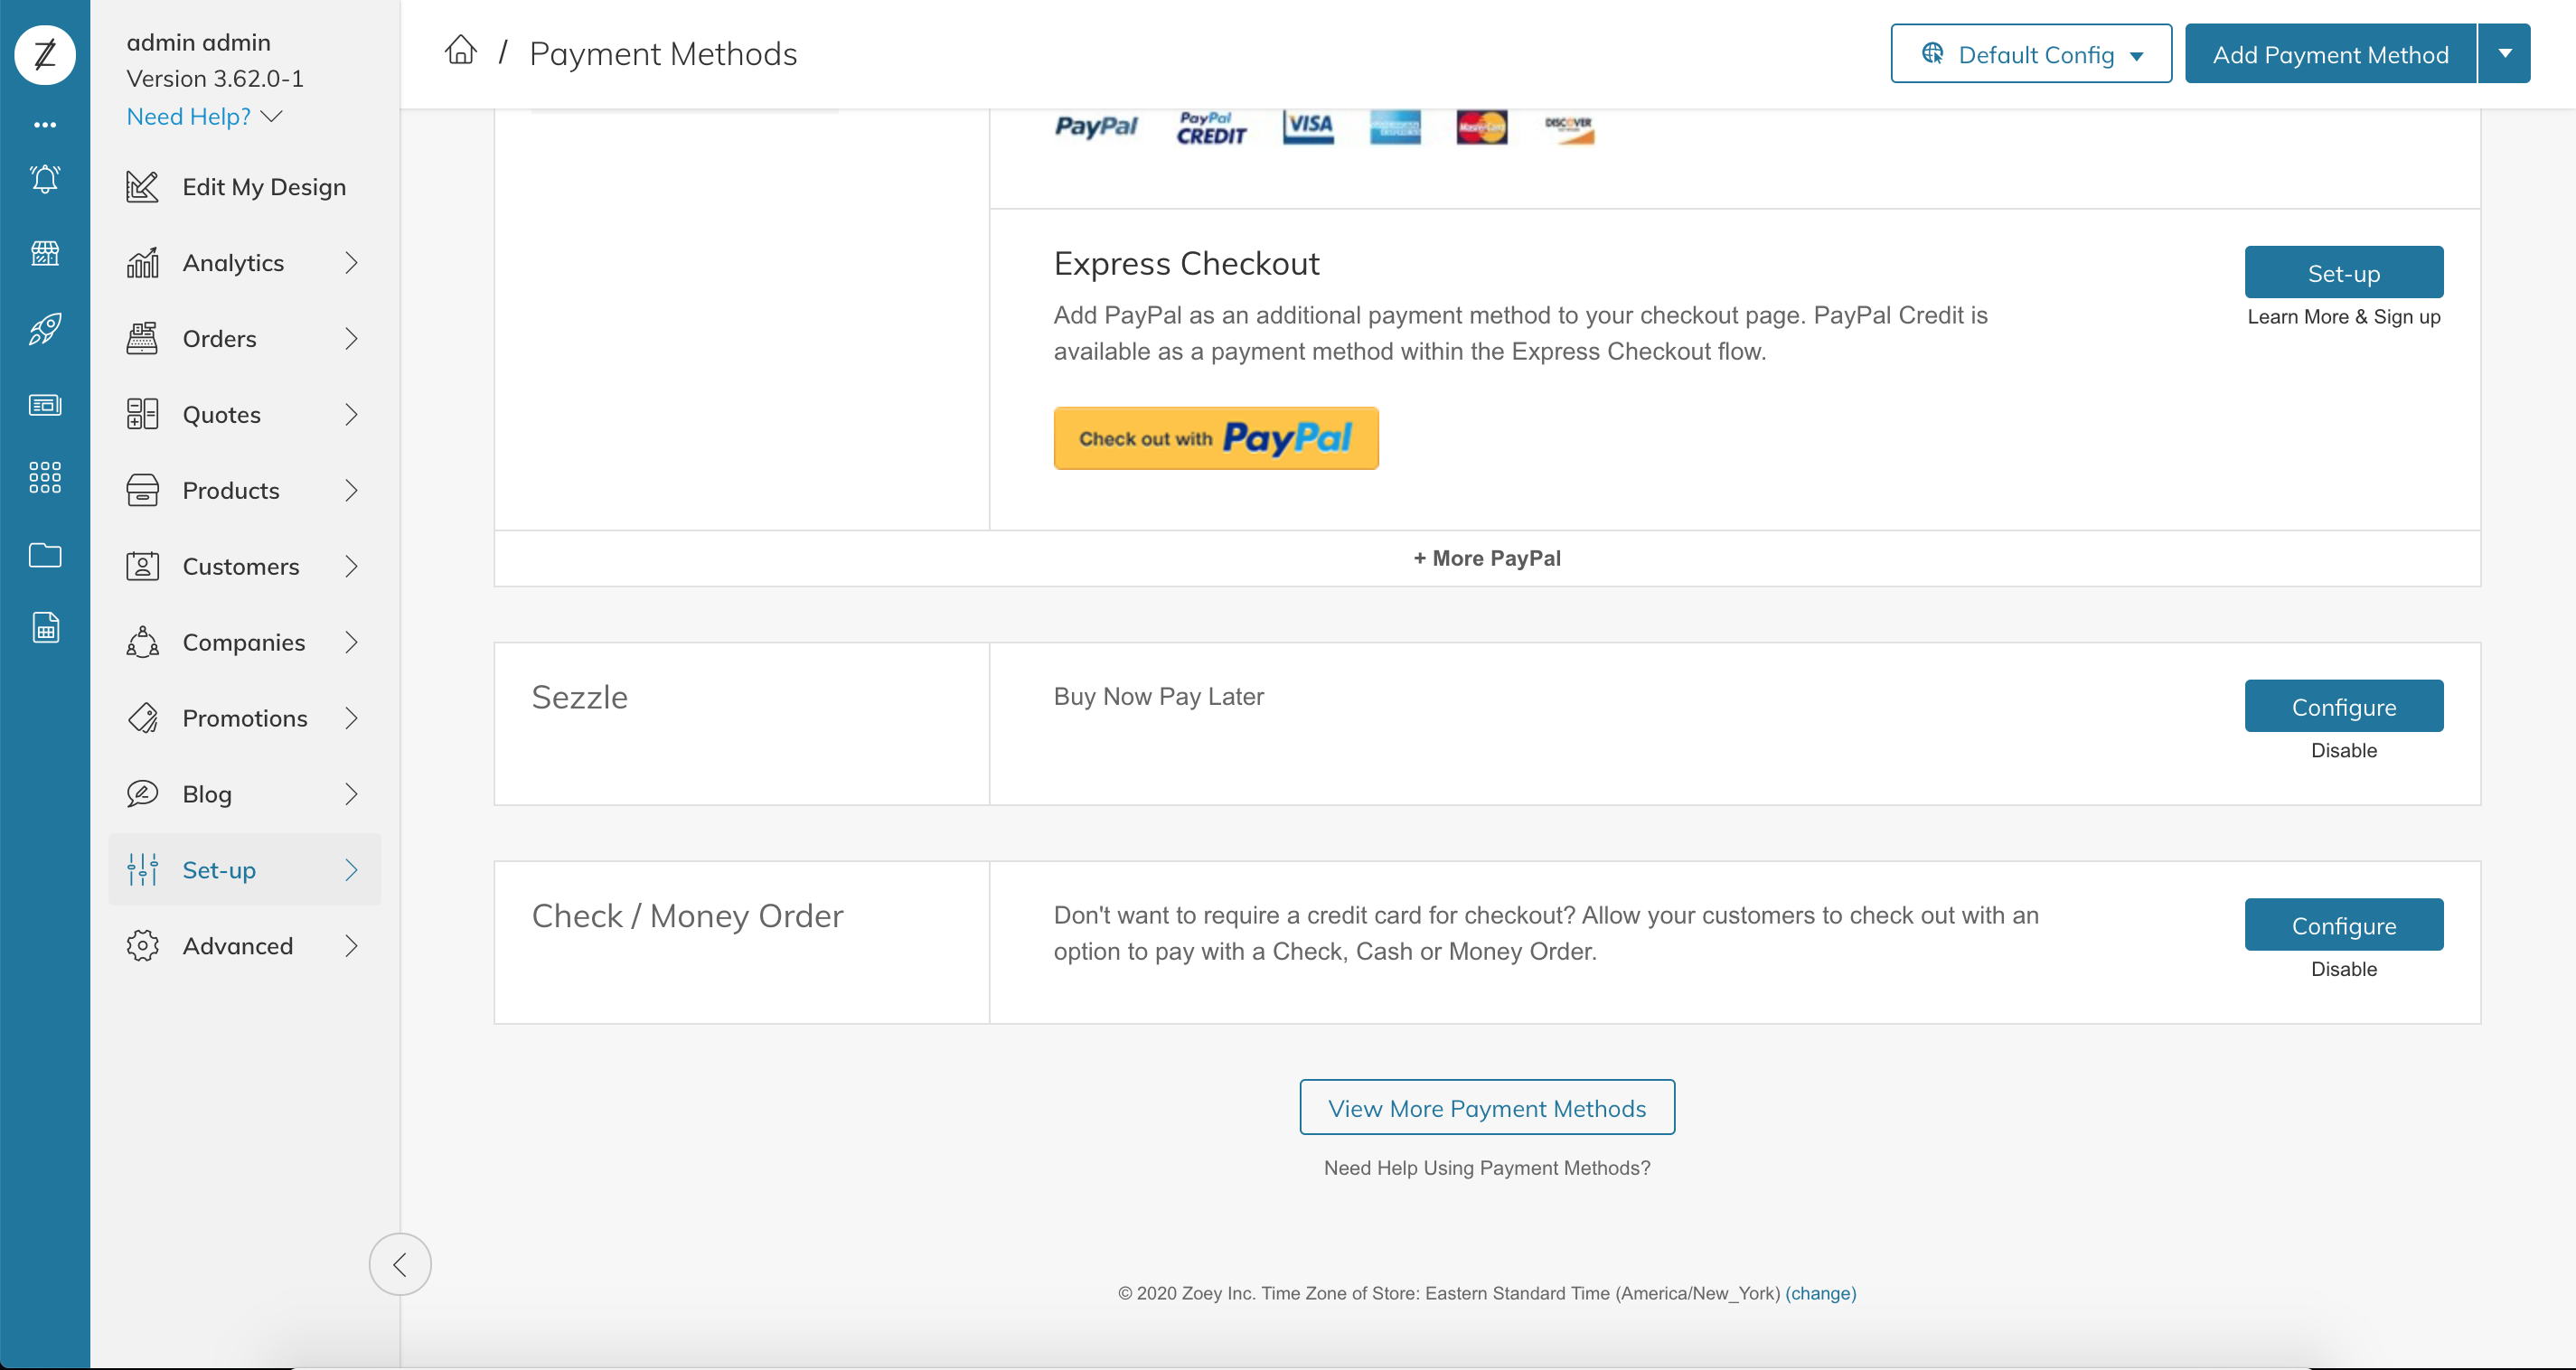
- Configure the extension as follows:
- Set
EnabledtoYes. - Copy your
Merchant IDfrom your Sezzle Merchant Dashboard, and paste it into the corresponding field in the Sezzle configuration page of your Zoey admin. - Copy your
Public KeyandPrivate Keyfrom your Sezzle Merchant Dashboard, and paste them into the corresponding fields in the Sezzle configuration page of your Zoey admin. - If you want the widget script added to the Product Display Page, set
Add Widget Script in PDPtoYes - If you want the widget script added to the Cart Page, set
Add Widget Script in Cart PagetoYes - Set
Payment from Applicable CountriestoSpecific Countries. - Set
Payment from Specific CountriestoUnited StatesorCanadaas applicable. - Save the configuration.
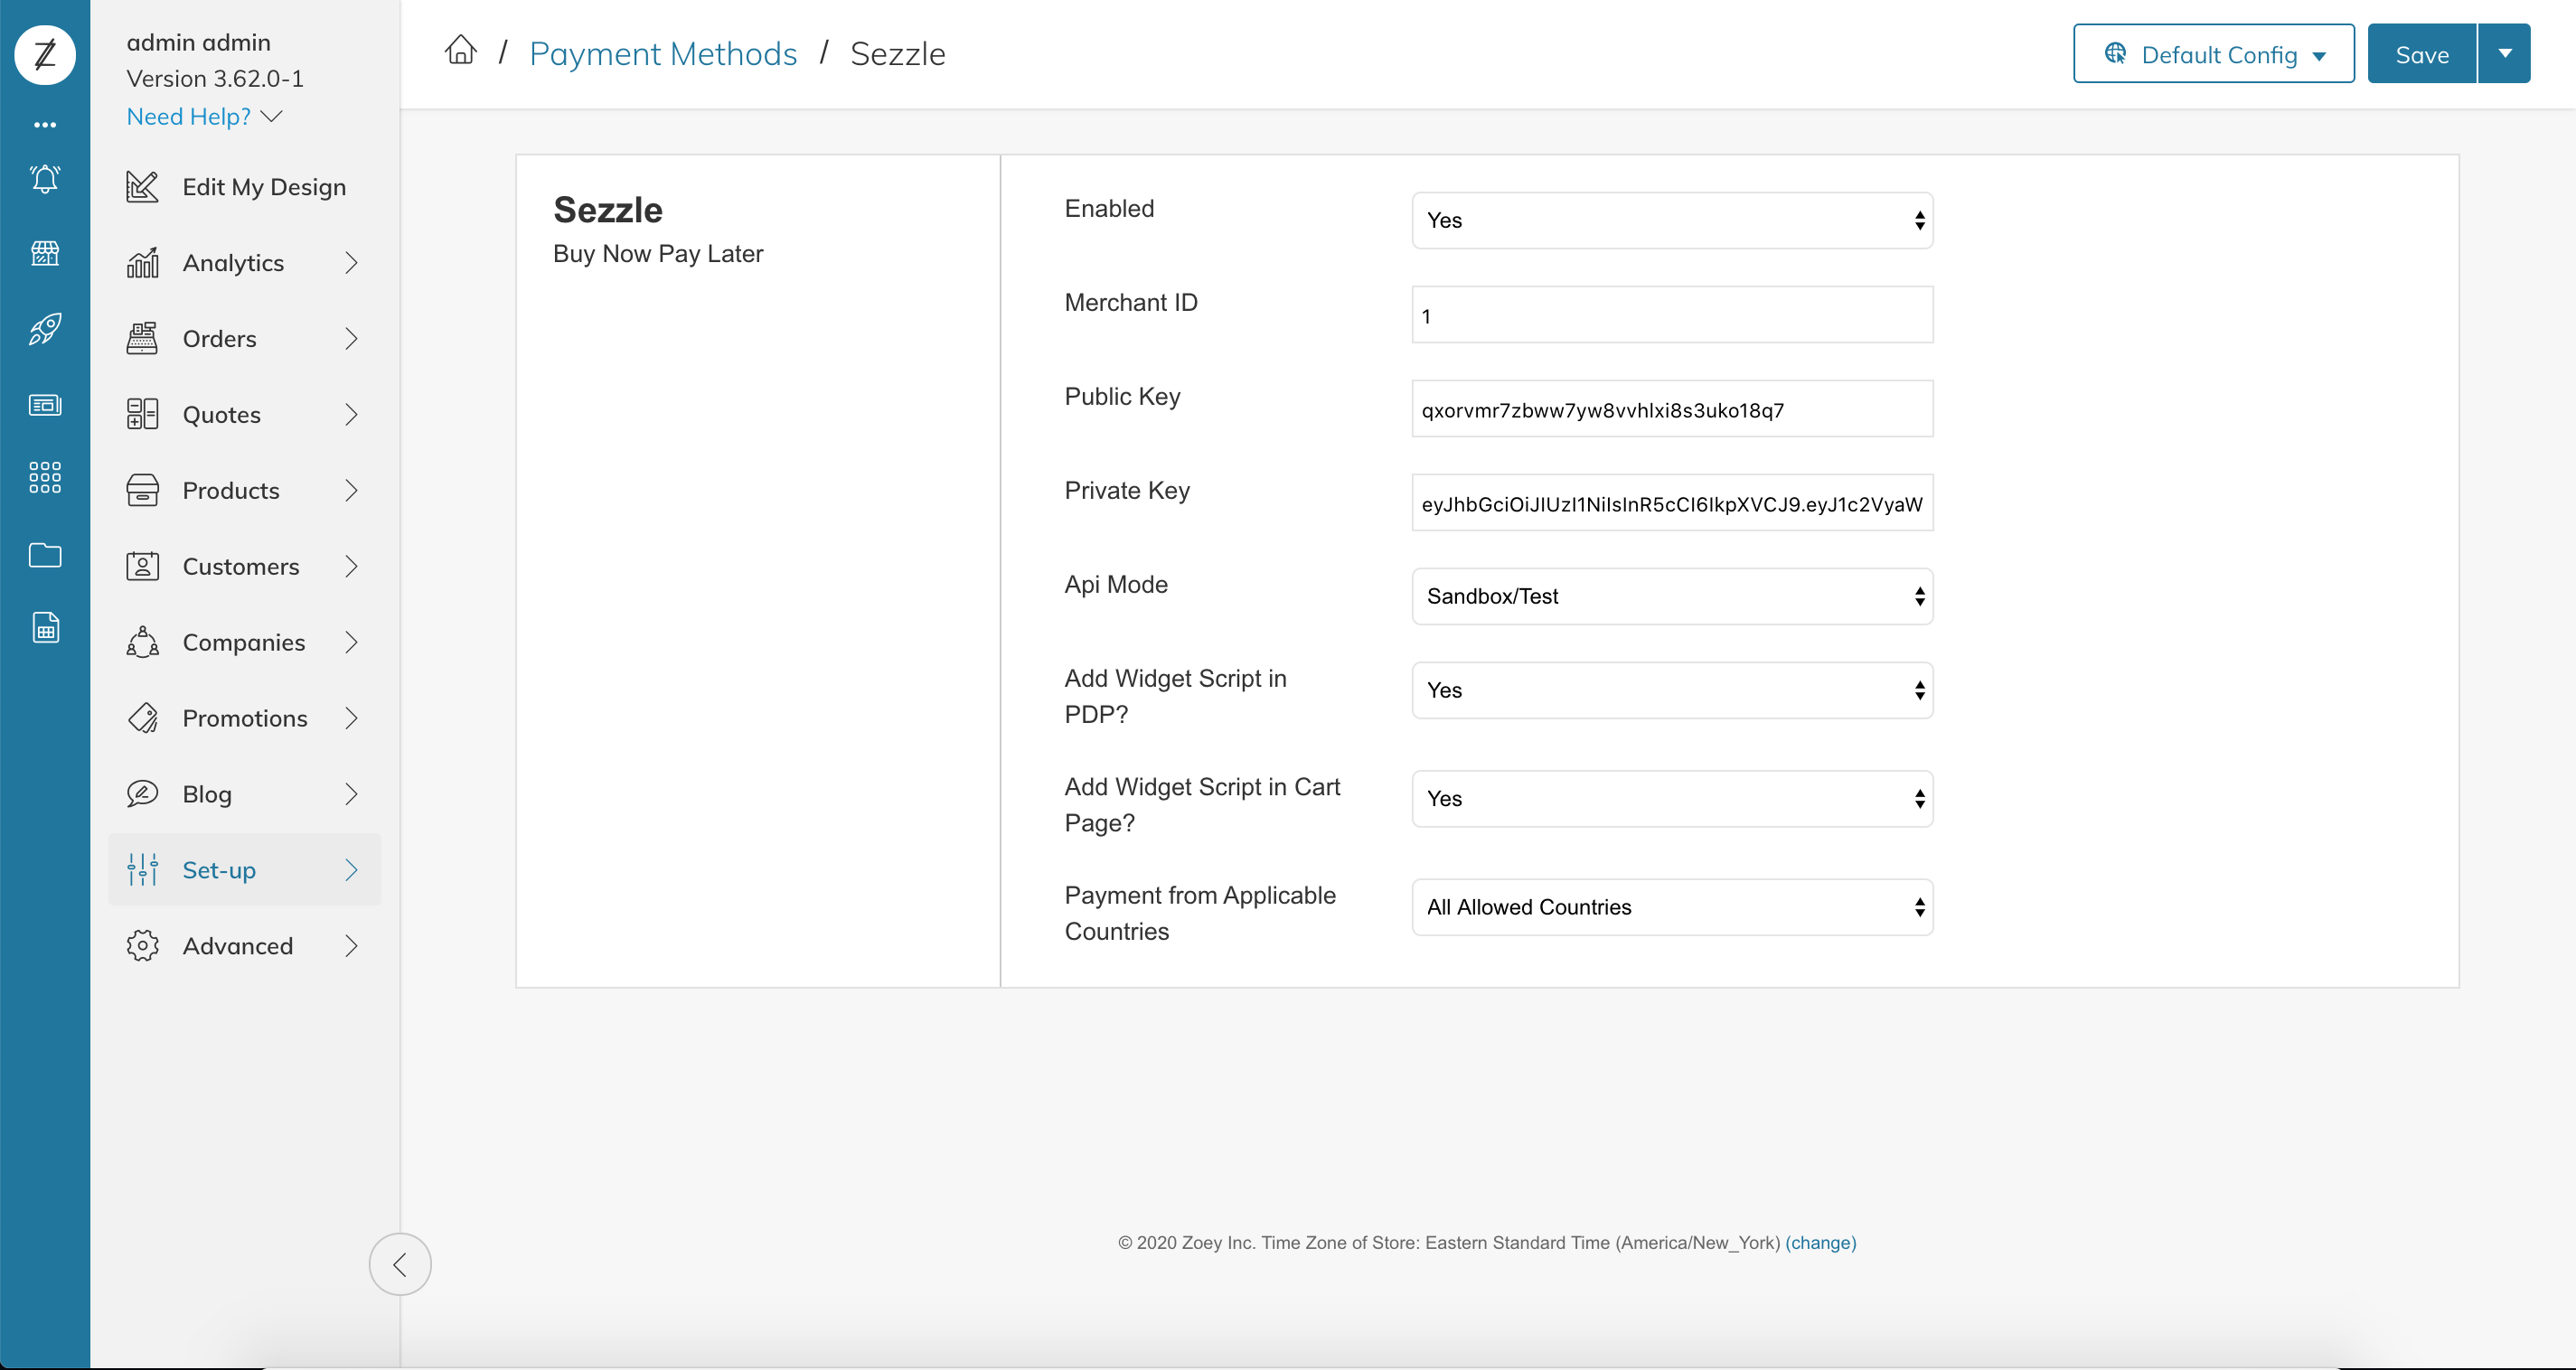
- Set
- Click
Advanced/Refresh Your Store. - Installation is complete.
Zoey Sandbox Testing
- In the Sezzle configuration page of your Zoey admin, enter the Sandbox API Keys from your Sezzle Merchant Sandbox Dashboard and set the
API ModetoSandbox/Test, then save the configuration. Make sure you are doing this on yourdev/stagingwebsite. - On your website, add an item to the cart, then proceed to
Checkoutand selectSezzleas the payment method. - Click
ContinuethenPlace Orderand you should be redirected to the Sezzle checkout page. If prompted, sign in.
- Enter the payment details using test data, then click
Complete Order. - After the payment is completed on Sezzle, you should be redirected back to your website and see a successful payment page.
- Sandbox testing is complete. You can log in to your Sezzle Merchant Sandbox Dashboard to see the test order you just placed.
Zoey Live Checkout
- In the Sezzle configuration page of your Zoey admin, enter the API Keys from your Sezzle Merchant Dashboard and set the
API ModetoLive, then save the configuration. - On your website, add an item to your cart, then proceed to
Checkoutand selectSezzleas the payment method. - Click
ContinuethenPlace Order. - If you are redirected to the Sezzle checkout page, your integration is complete. Congratulations!
- Warning Don't complete the payment. Your checkout is now live, so you will be charged if you complete.