Get Started with Sezzle
Select the integration option that works best for your store.Direct Integration
Utilize our APIs to integrate Sezzle into your custom online store.
Ecommerce Platforms
Integrations for Shopify, Magento 2, Wix, WooCommerce, and more.
Virtual Card
- Accept Sezzle payments as credit card transactions.
In Store
Empower your customers to pay with Sezzle at your physical store location.
Conversion Boosters
Increase sales with these additional Sezzle products.On-Site Messaging Widgets
Showcase Sezzle as a payment method on product pages.
Express Checkout
Increase conversion rates and enhance customer satisfaction.
Additional Resources
These will speed up your Sezzle integration.API Reference
Accept web and in-app payments through our expansive API integration.
Merchant Support
Contact our Merchant Support team to get help with integrating Sezzle.
How Sezzle Works
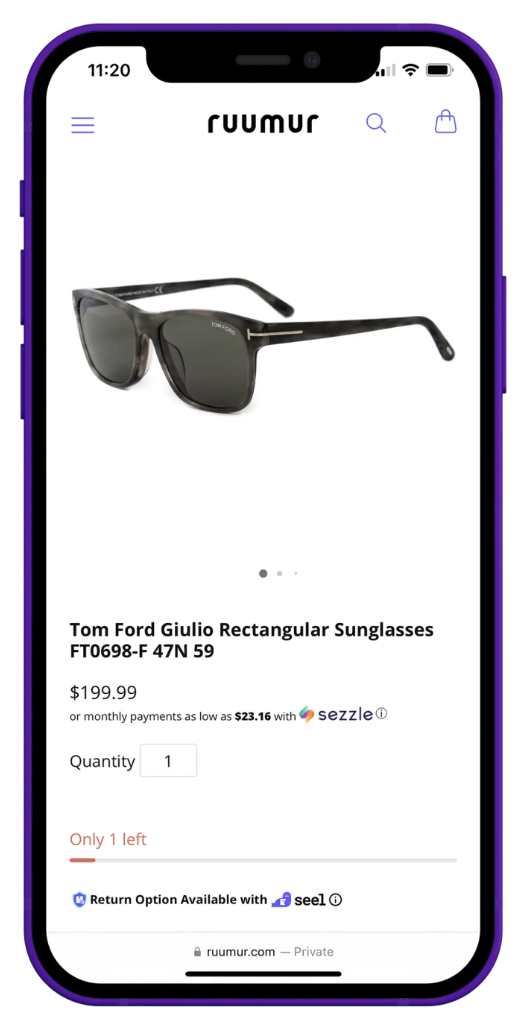
The shopper adds your product to their cart.
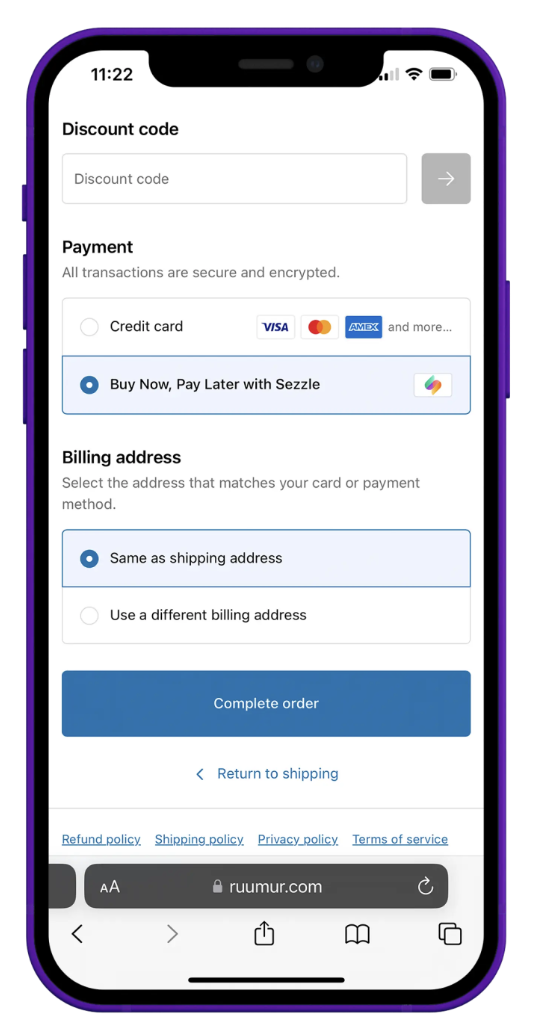
The shopper selects “Buy Now, Pay Later with Sezzle” at checkout.
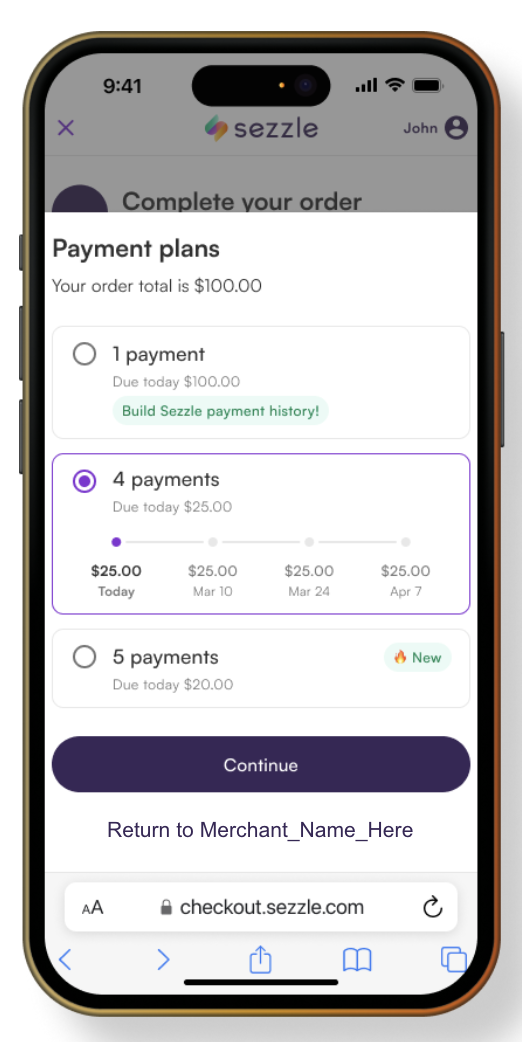
The shopper selects their preferred installment plan.
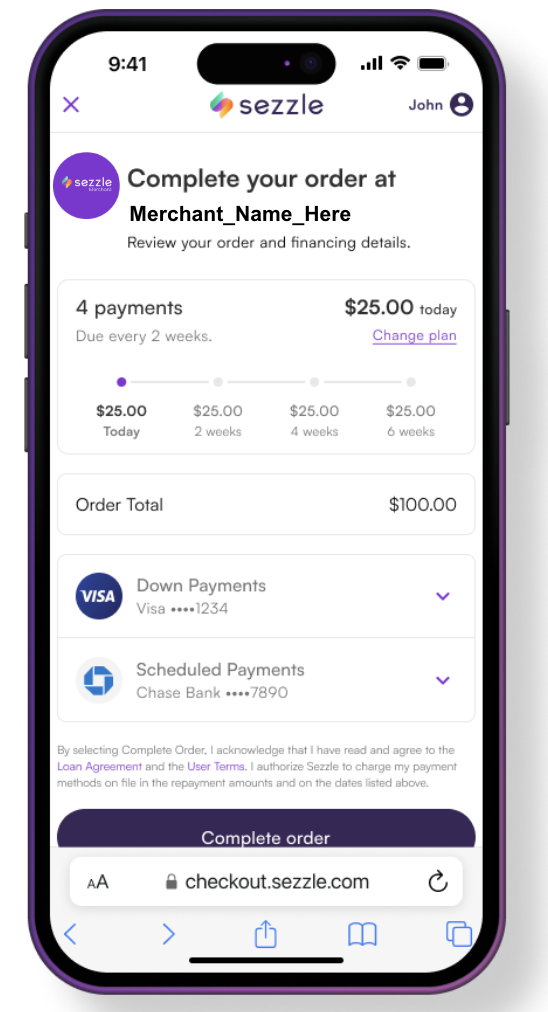
The shopper completes their Sezzle order.
Popular Integrations