- Click
<> Code - Select
Download ZIP - Open the downloaded zip file, rename the unpacked folder to
sezzle, then re-zip it
The main folder inside the zip file must be named
sezzle for the module upload to be accepted by Prestashop - simply renaming the zip file will not work.Installation
- In your PrestaShop back office, go to
Modules>Module Manager - Select
Upload a module, then select the .zip file that you downloaded on your computer - Go to
Payment>Payment methods - Find
Sezzle, and selectEnable Module- The plugin is now ready to be configured
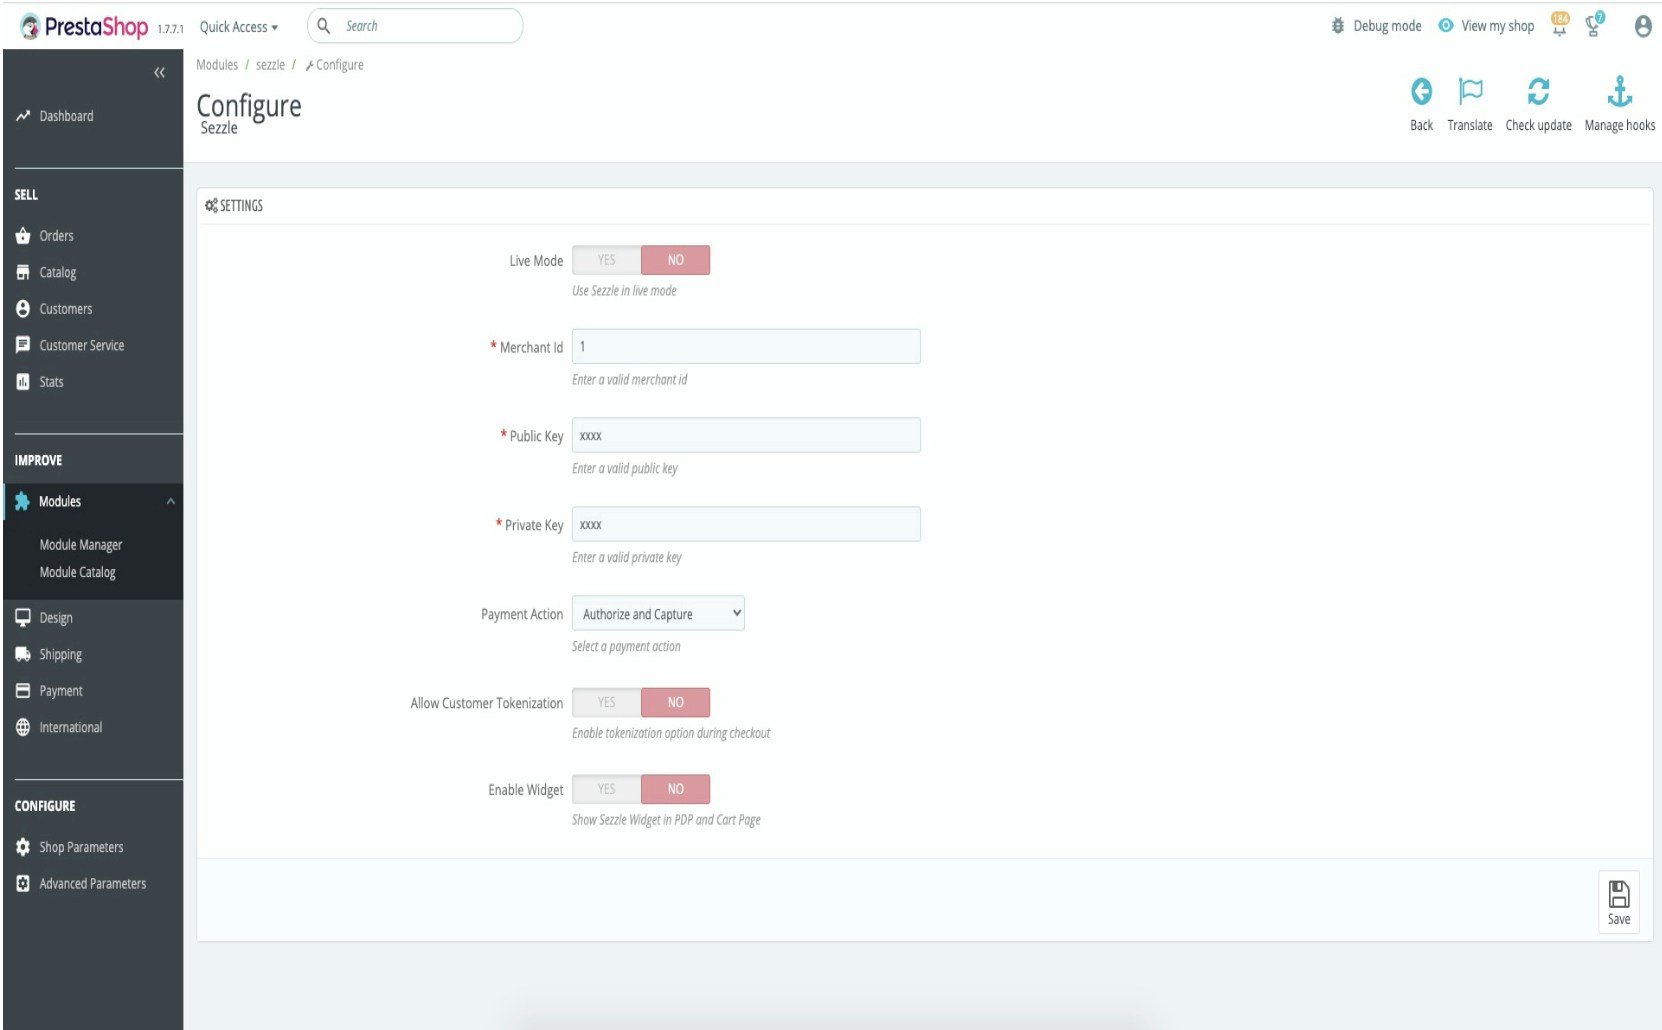
Configuration
-
In your PrestaShop back office, go to
Modules>Module Manager -
In the
Paymentsection, findSezzleand selectConfigure- Fill out the following fields:
After saving if you don’t see the widget in PDP, contact merchantsupport@sezzle.com.
Payment Capture
Payment Action set as Authorize and Capture
- Payment will automatically be captured during the checkout process.
Payment Action set as Authorize Only
-
- In your Opencart backoffice, go to
Orders>Orders
- In your Opencart backoffice, go to
-
- Select the order for which you want to capture the payment
-
- In the
Paymentsection right below, enter the below information and clickAdd -
- Date
-
- Payment method
-
- Amount
-
- Change the
Order StatustoPayment Acceptedif capture is successful
- Change the
- In the
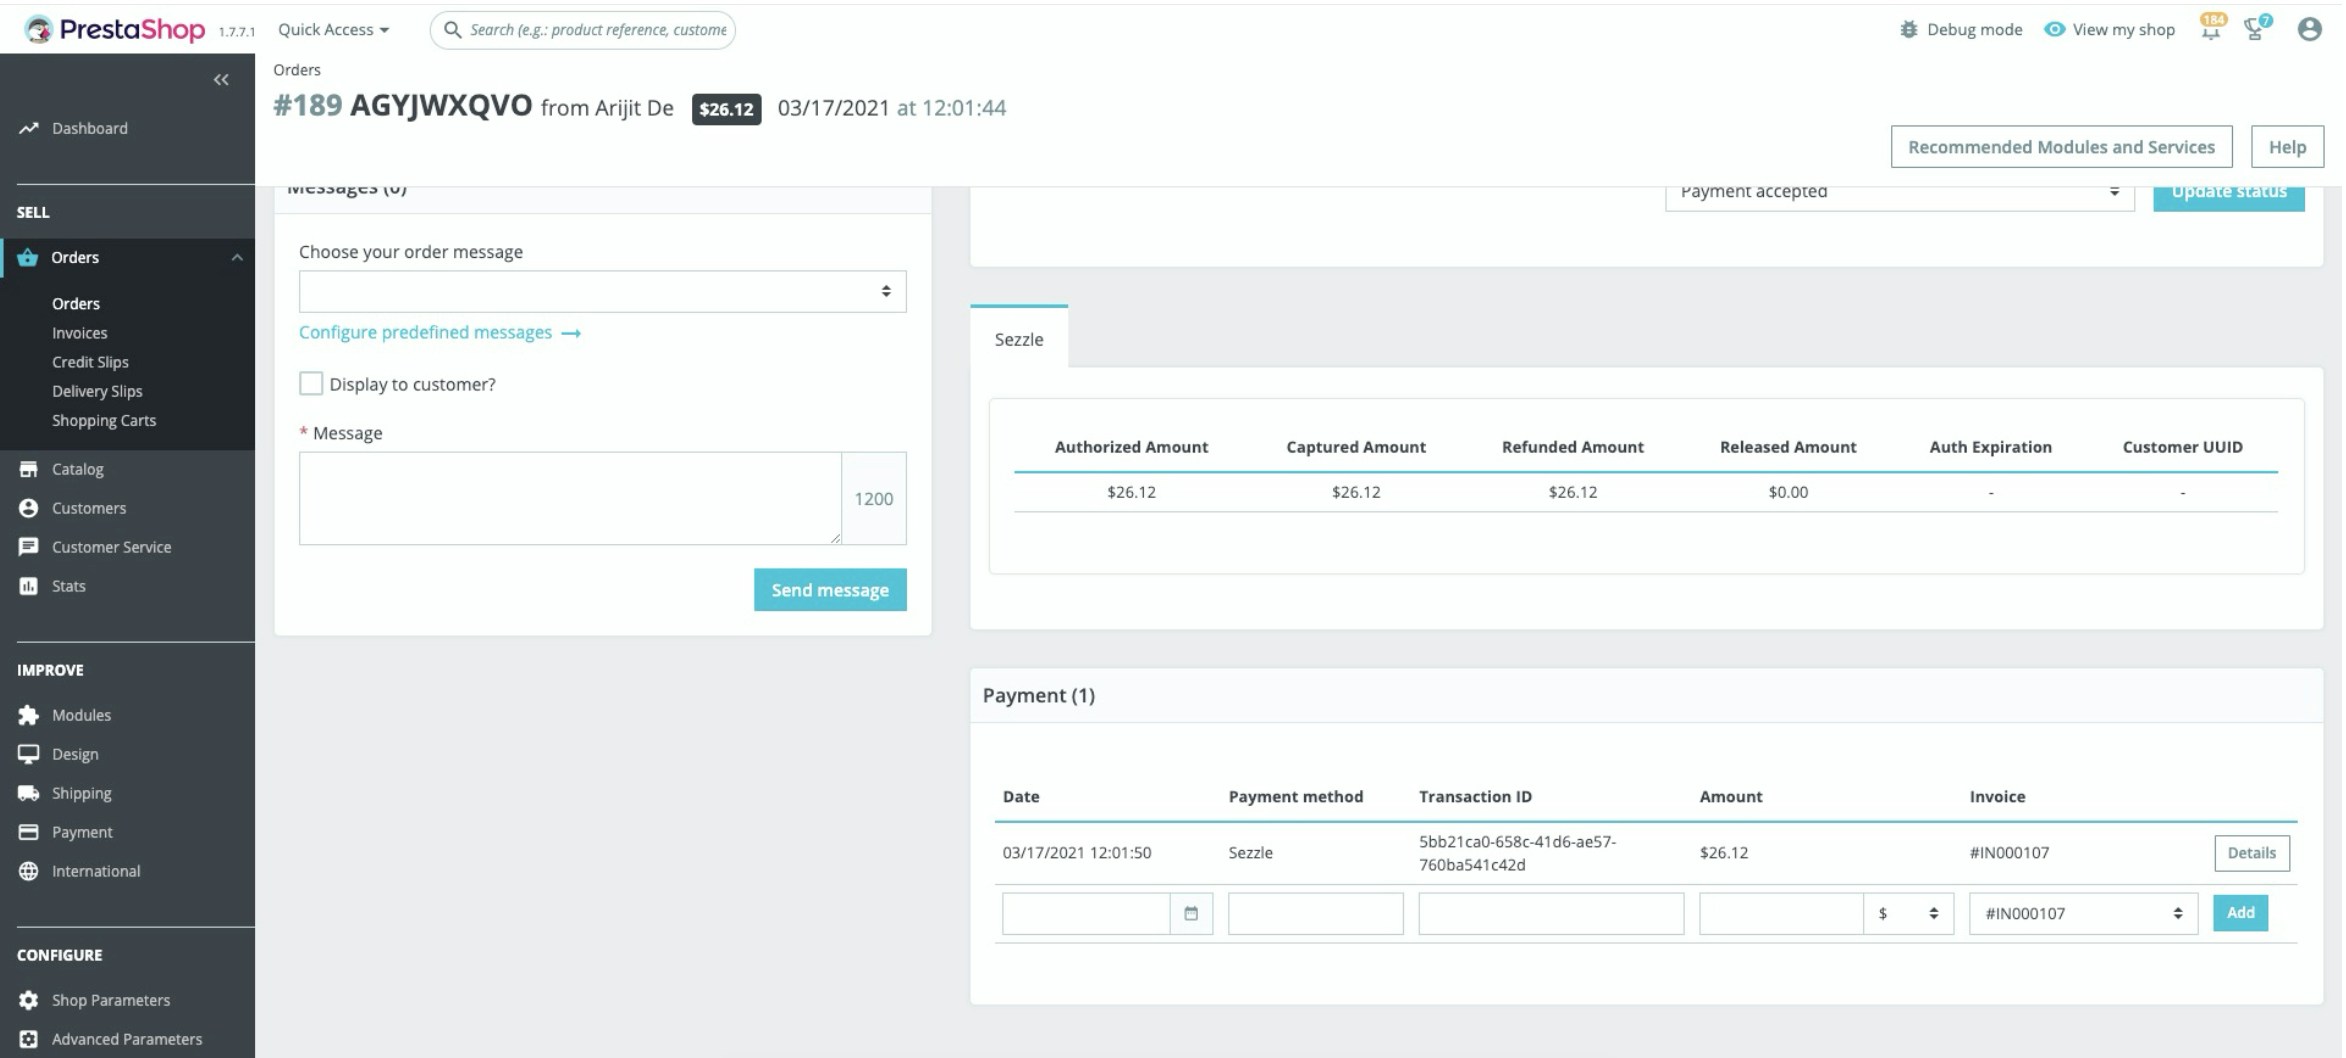
Payment Refund
- In your PrestaShop backoffice, go to Orders > Orders
- Select the order for which you want to refund the payment
- Click on Partial Refund, enter the amount and click on Partial Refund right below
- For Full Refund, you have to fill up all the order related amounts in respective places
-
Change the Order Status to Refunded only if full refund is successful

Payment Release
-
In your PrestaShop backoffice, go to
Orders>Orders - Select the order for which you want to refund the payment
-
Change the
Order statustoCancelledand clickUpdate Status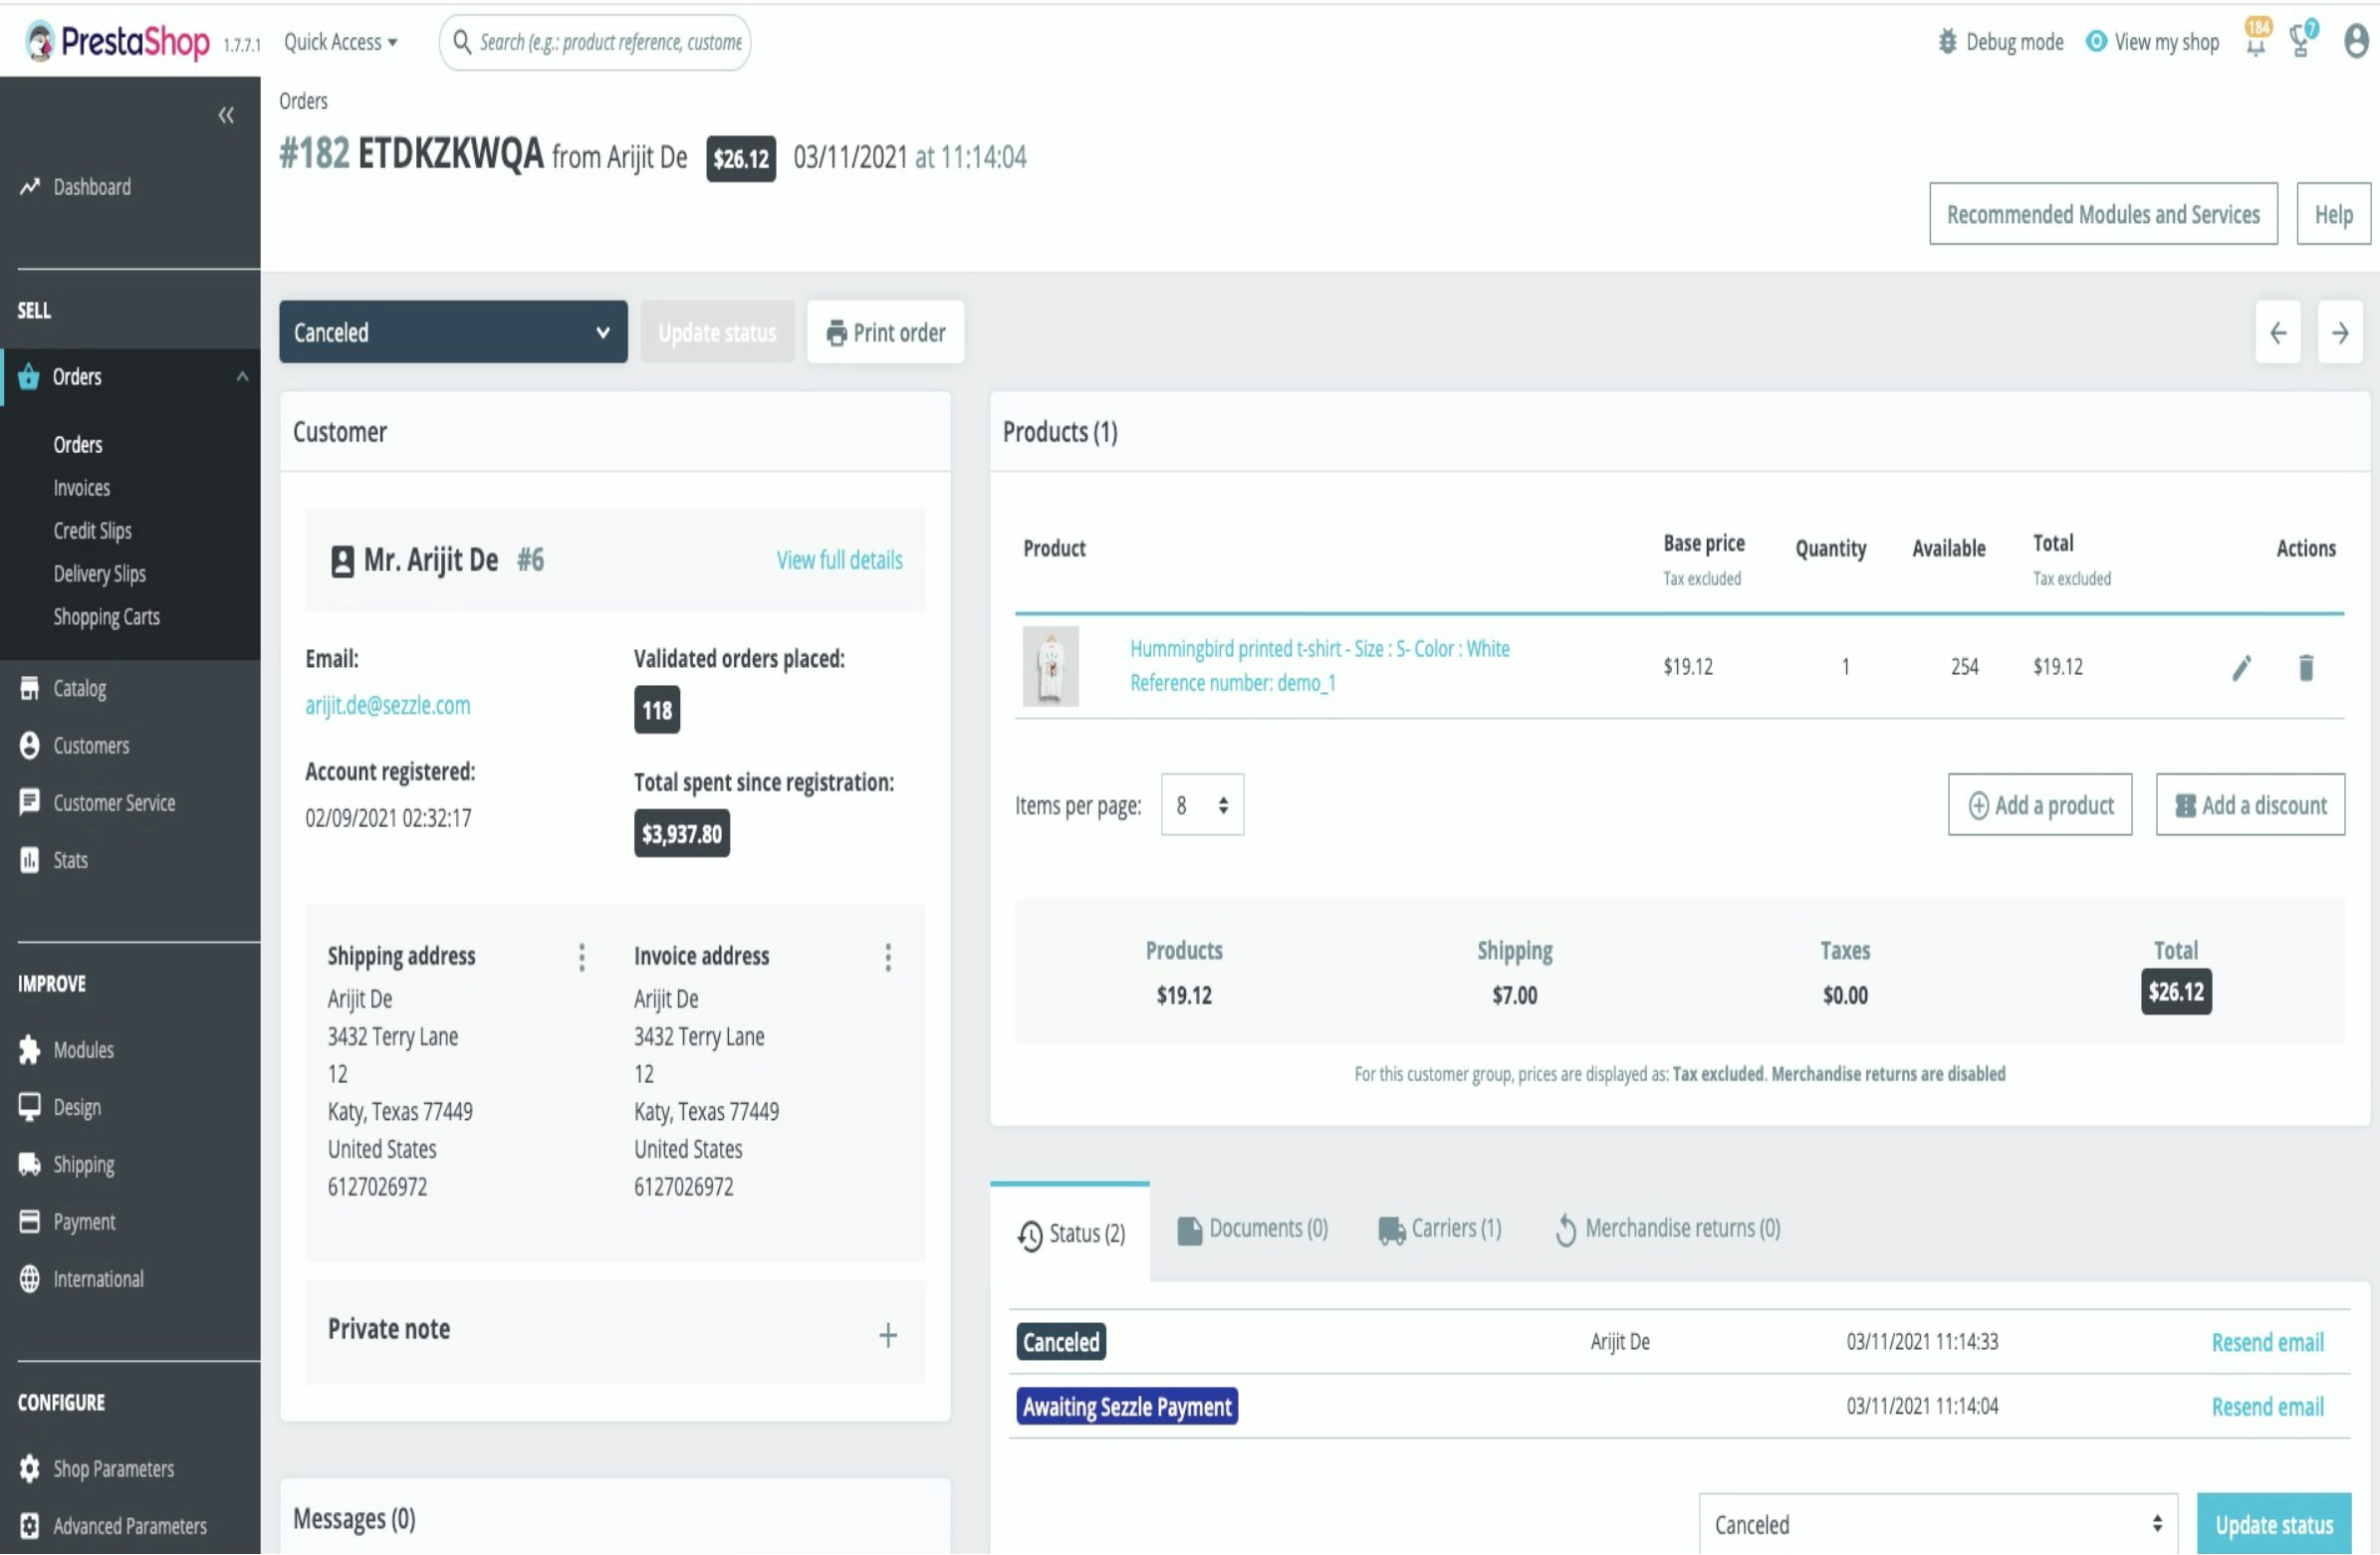
Upgrading the module
If you have an existing Sezzle PrestaShop module installed and want to upgrade a new version, proceed as follows:- Uninstall the existing Sezzle module
-
In the Upgrade drop-down menu select
UninstallManually remove the/sezzlefolder from the/modulesfolder (if not removed during uninstall action) - Install the latest plugin version
- Configure the latest plugin version
Reinstallation
When you reinstall the plugin, the plugin takes care of most of its configurations and functions except for the items listed below. We recommend that you follow the steps here to make sure that when you reinstall the plugin, it won’t pick up settings from a previous installation. Order status- The plugin keeps the
Awaiting Sezzle Paymentorder status because existing orders might still use them. If you would also like to remove these statuses, first make sure that these are no longer in use. - To check if the status is in use:
- Go to the
Orderspage in your Prestashop admin panel - Filter the orders for the
Awaiting Sezzle Paymentorder status - If there are any, move them to another status that you would like to use
- When there are no more orders using this status, you can delete the status from your order status list
- Go to the
AWAITING_SEZZLE_PAYMENT configuration fields in your database in case there are still orders in your system with the corresponding statuses. If you have already removed the status, you can also remove these leftover configurations.