Install the Sezzle NopCommerce Extension
Go to https://www.nopcommerce.com/sezzle and click
Get Extension.Admin Configuration
-
Go to
Configuration>Local Plugins -
Click
Upload Plugin or Themeand select the downloaded zipped file per the instructions given -
After the extension has been uploaded, click
Install -
Under
Configuration, go toPayment Methodsand then clickConfigureunderSezzle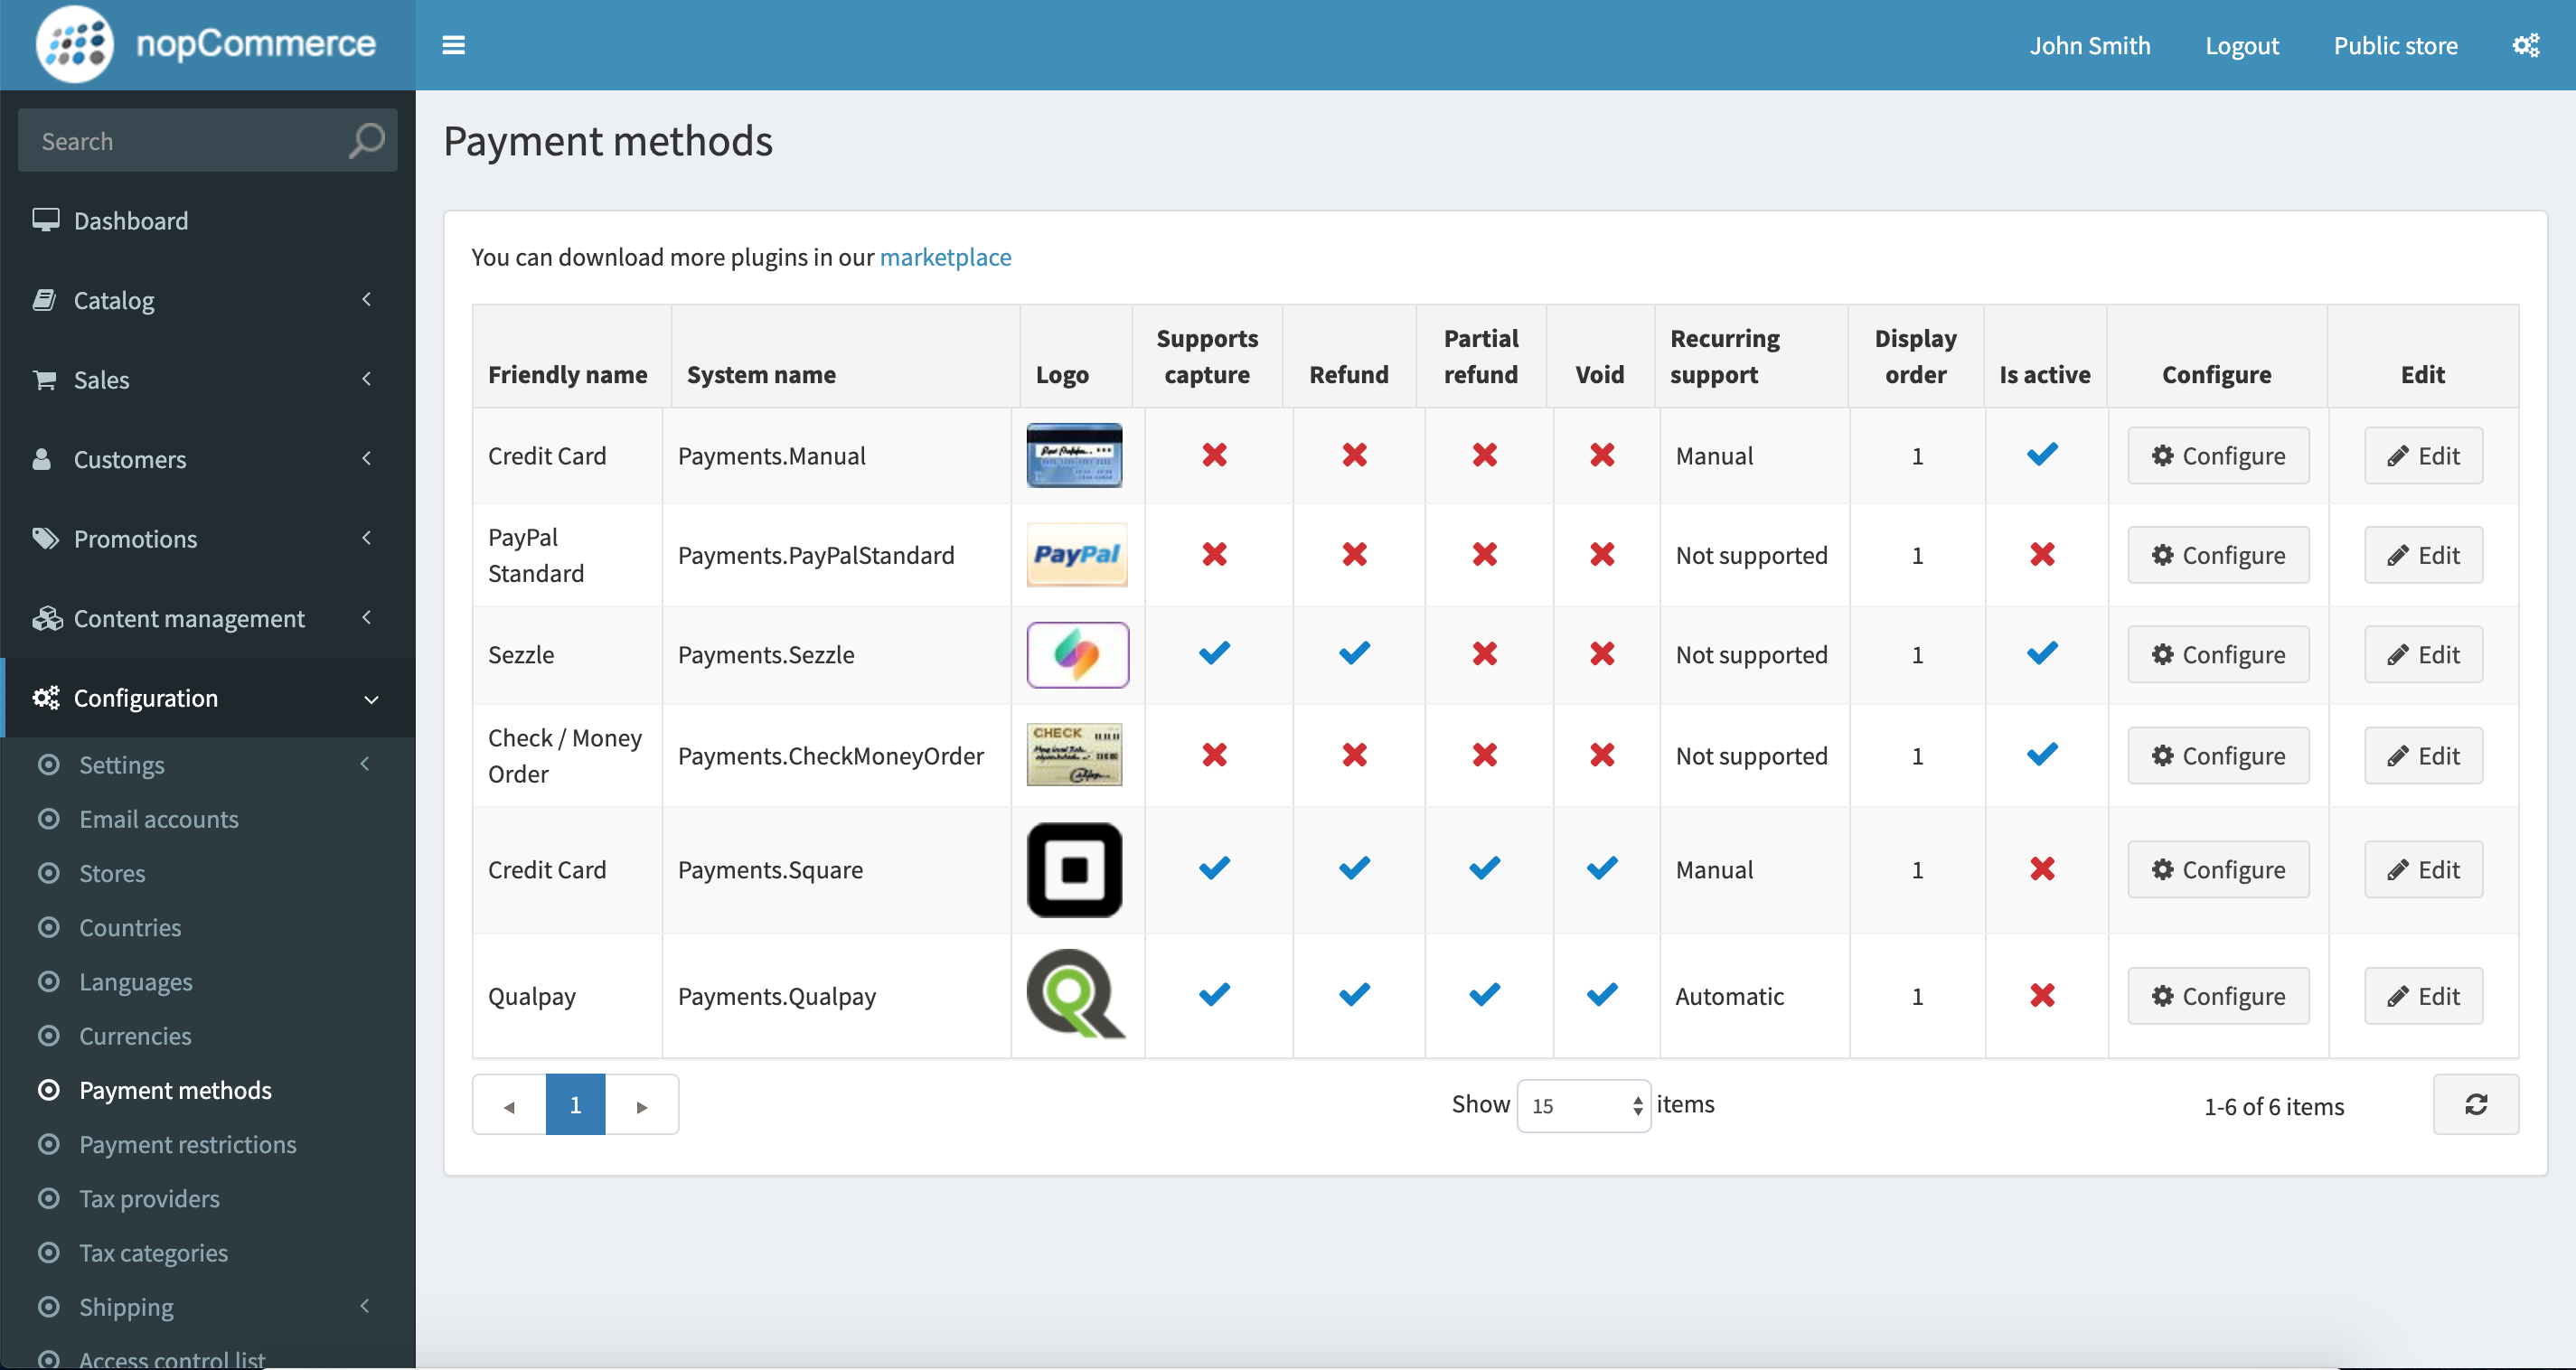
-
Click
Editfrom the Payment Method list -
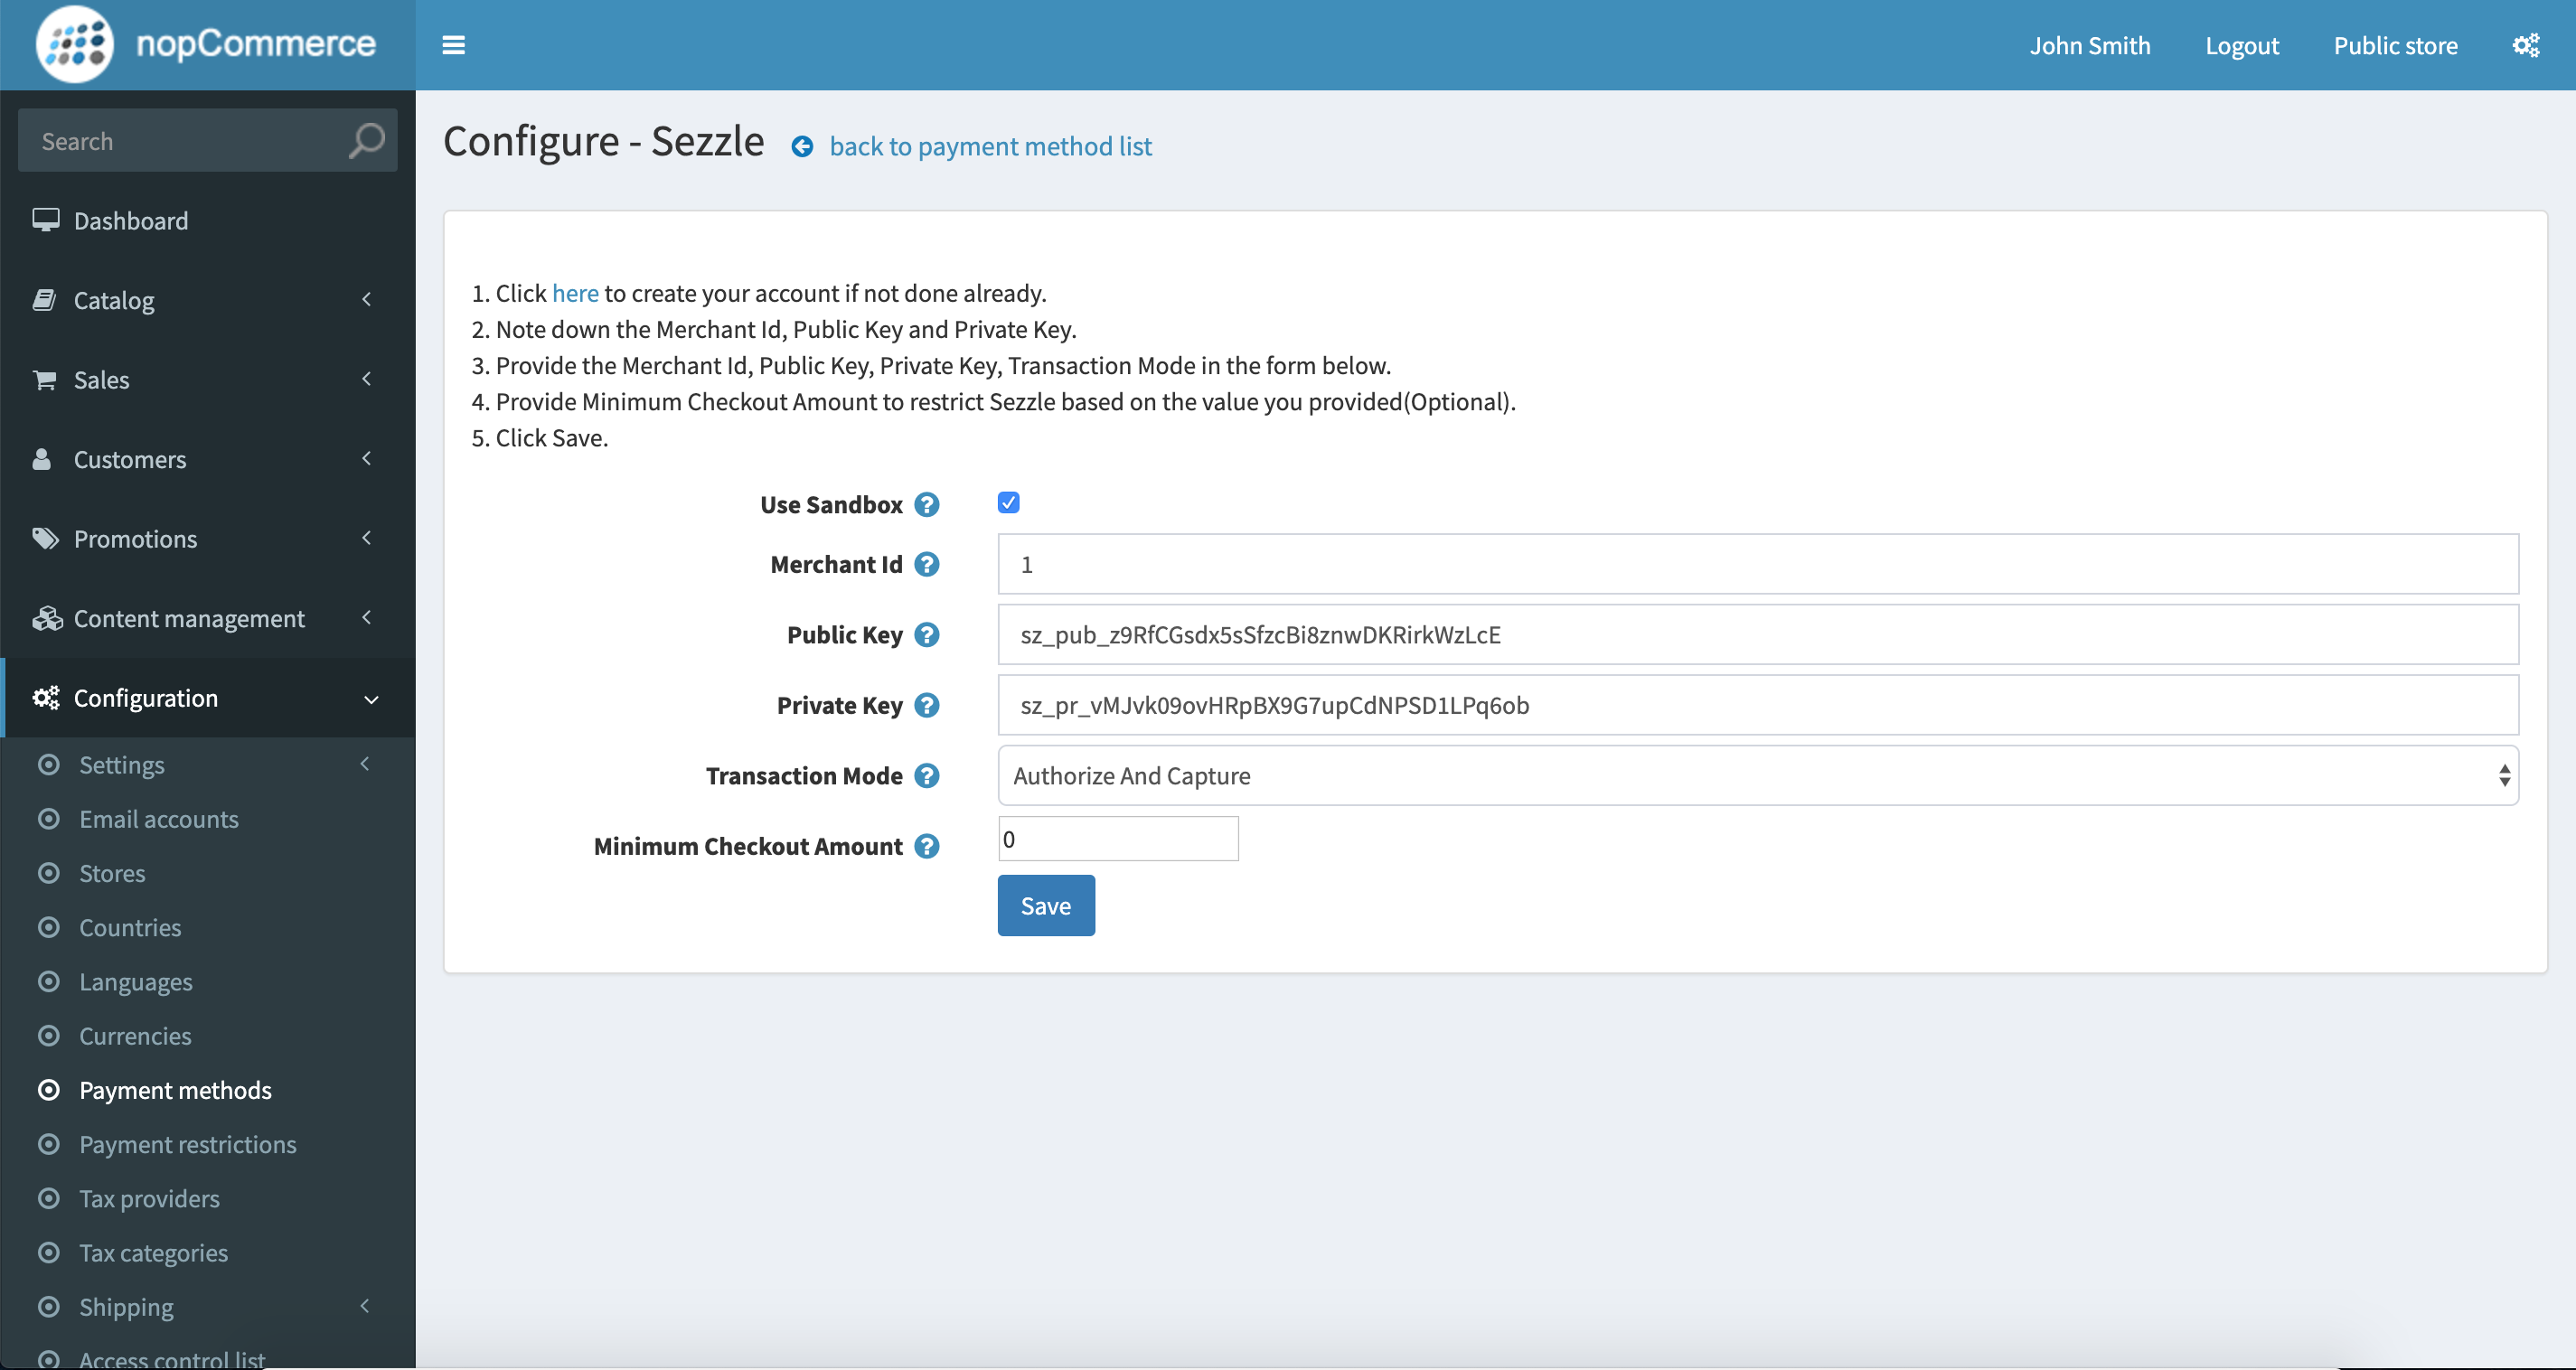
Copy your Merchant ID from your Sezzle Merchant Dashboard
- Paste it into the corresponding field in the Sezzle configuration page of your NopCommerce admin
-
Copy your Public Key and Private Key from your Sezzle Merchant Dashboard
- Paste it into the corresponding field in the Sezzle configuration page of your NopCommerce admin
-
Set
Transaction Modeto eitherAuthorizeorAuthorize and Capture -
Save the configuration
-
To restrict Sezzle usage based on billing country, go to
Configuration>Payment Restrictions -
Choose the country you want to restrict for Sezzle
Sezzle is currently available for customers from
The United StatesandCanada.You may wish to restrict all countries where Sezzle is not available.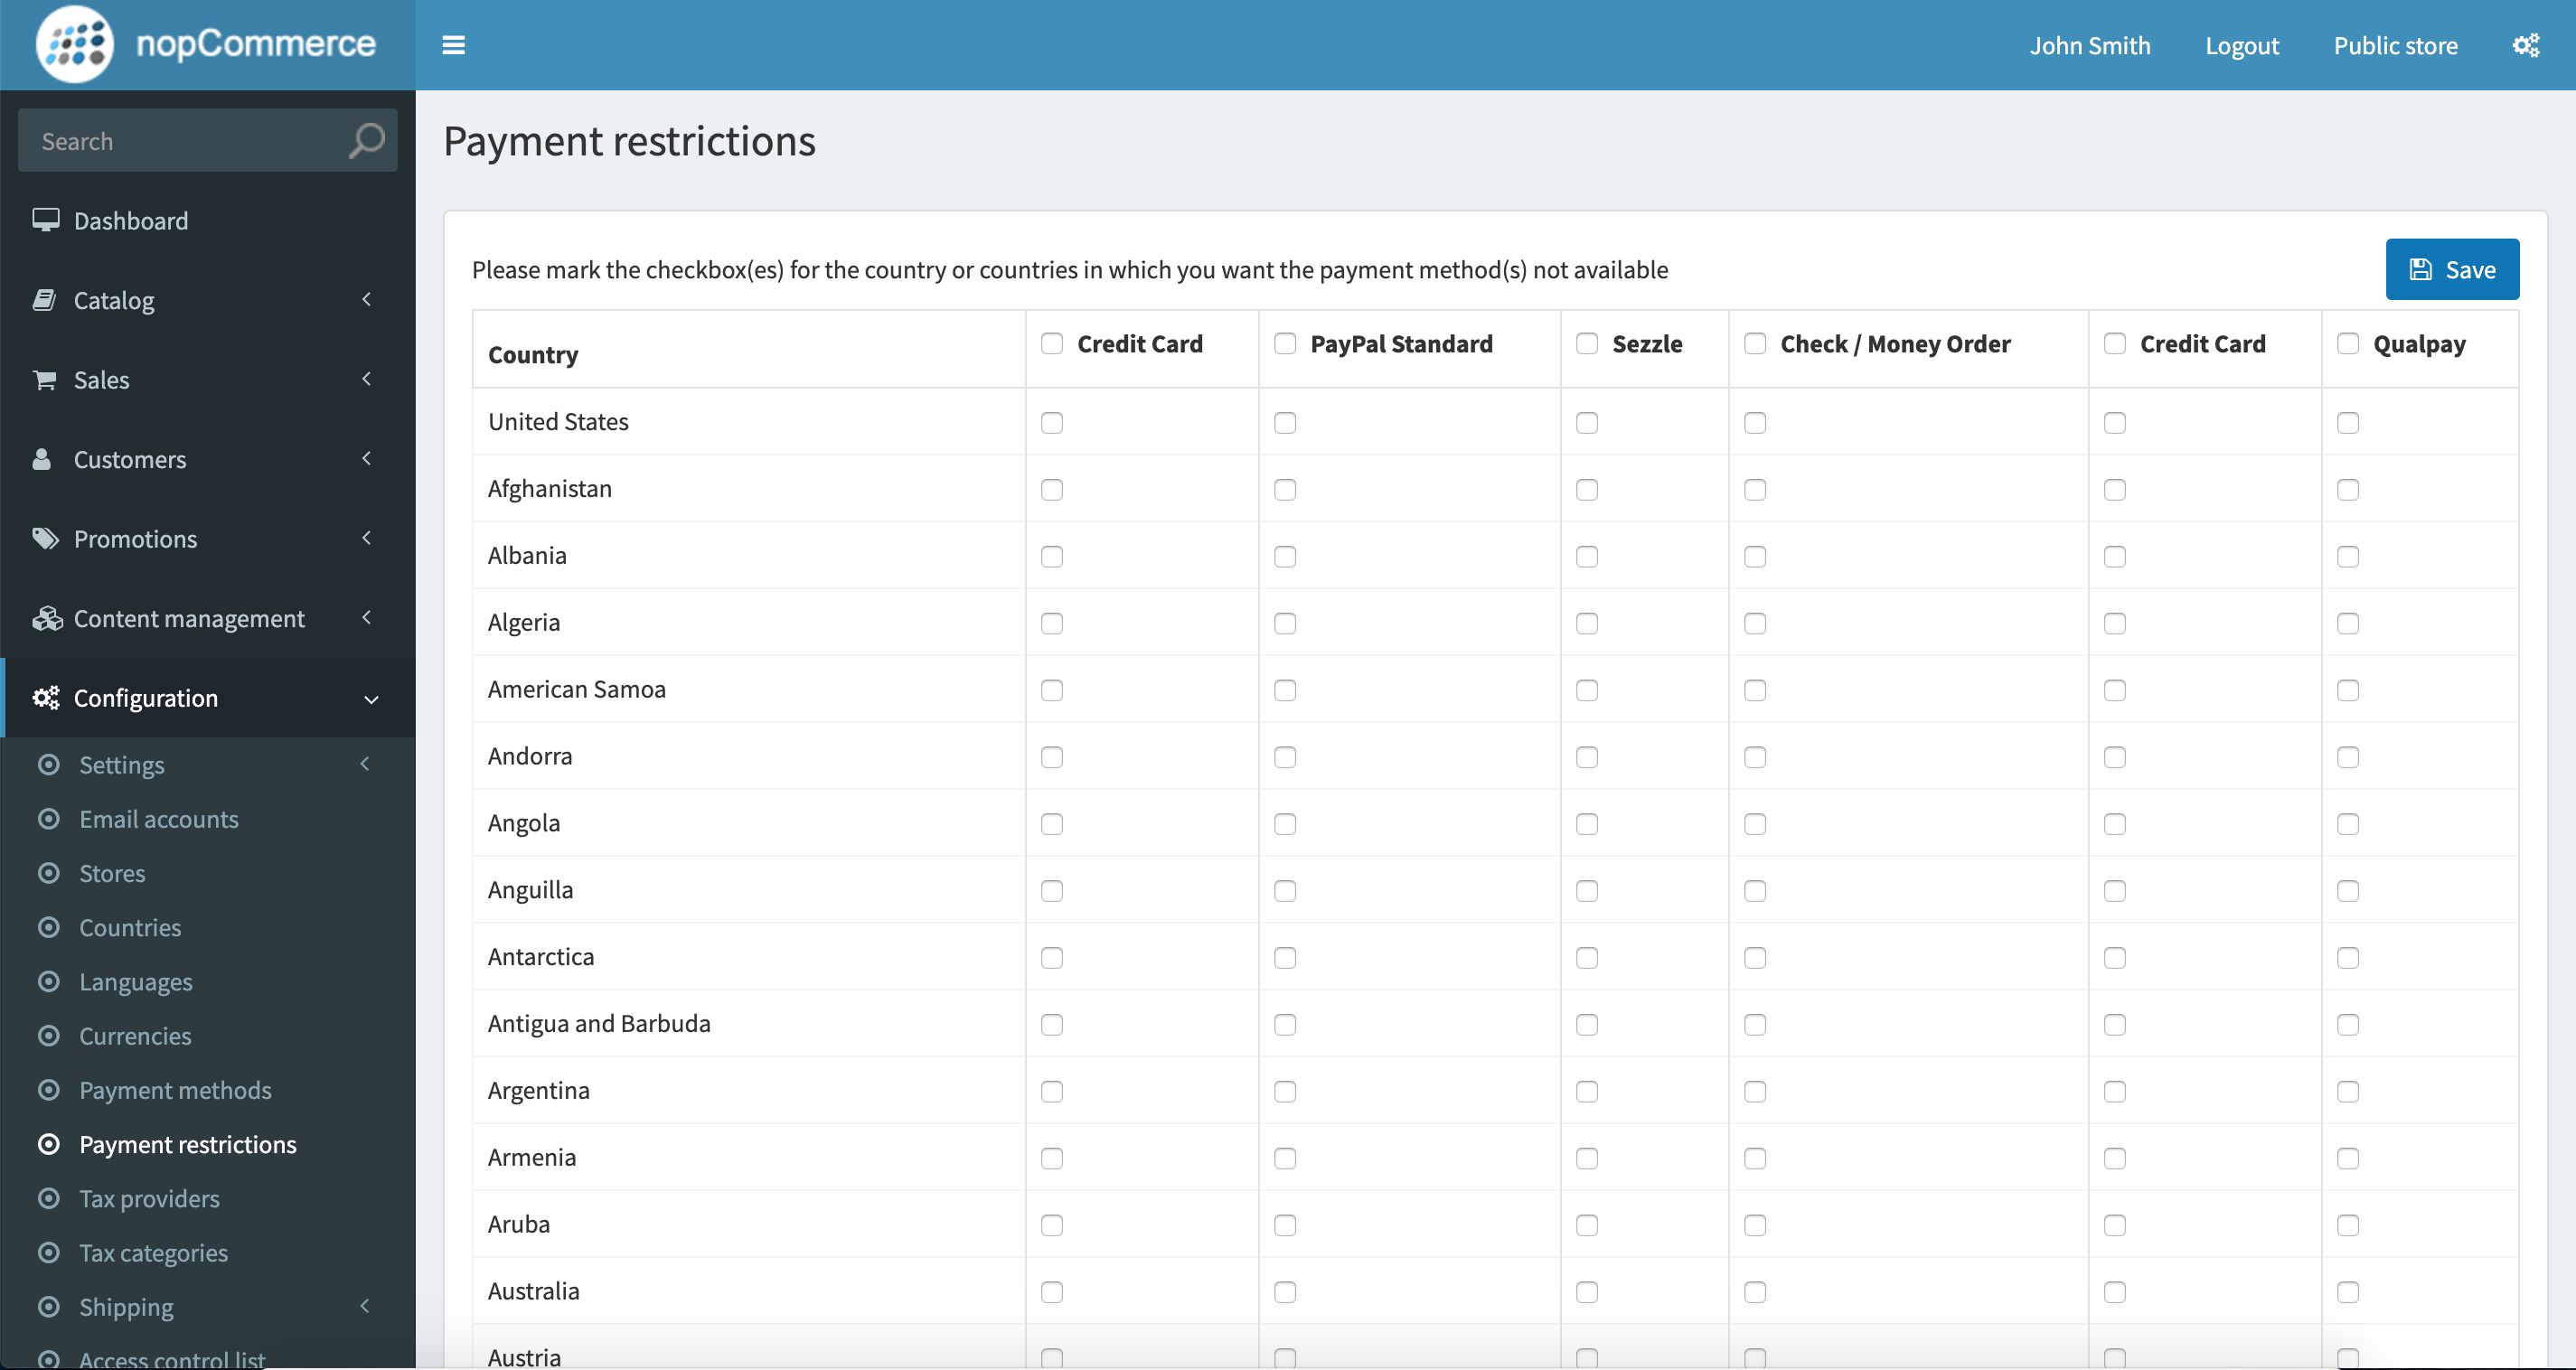
- Integration is complete