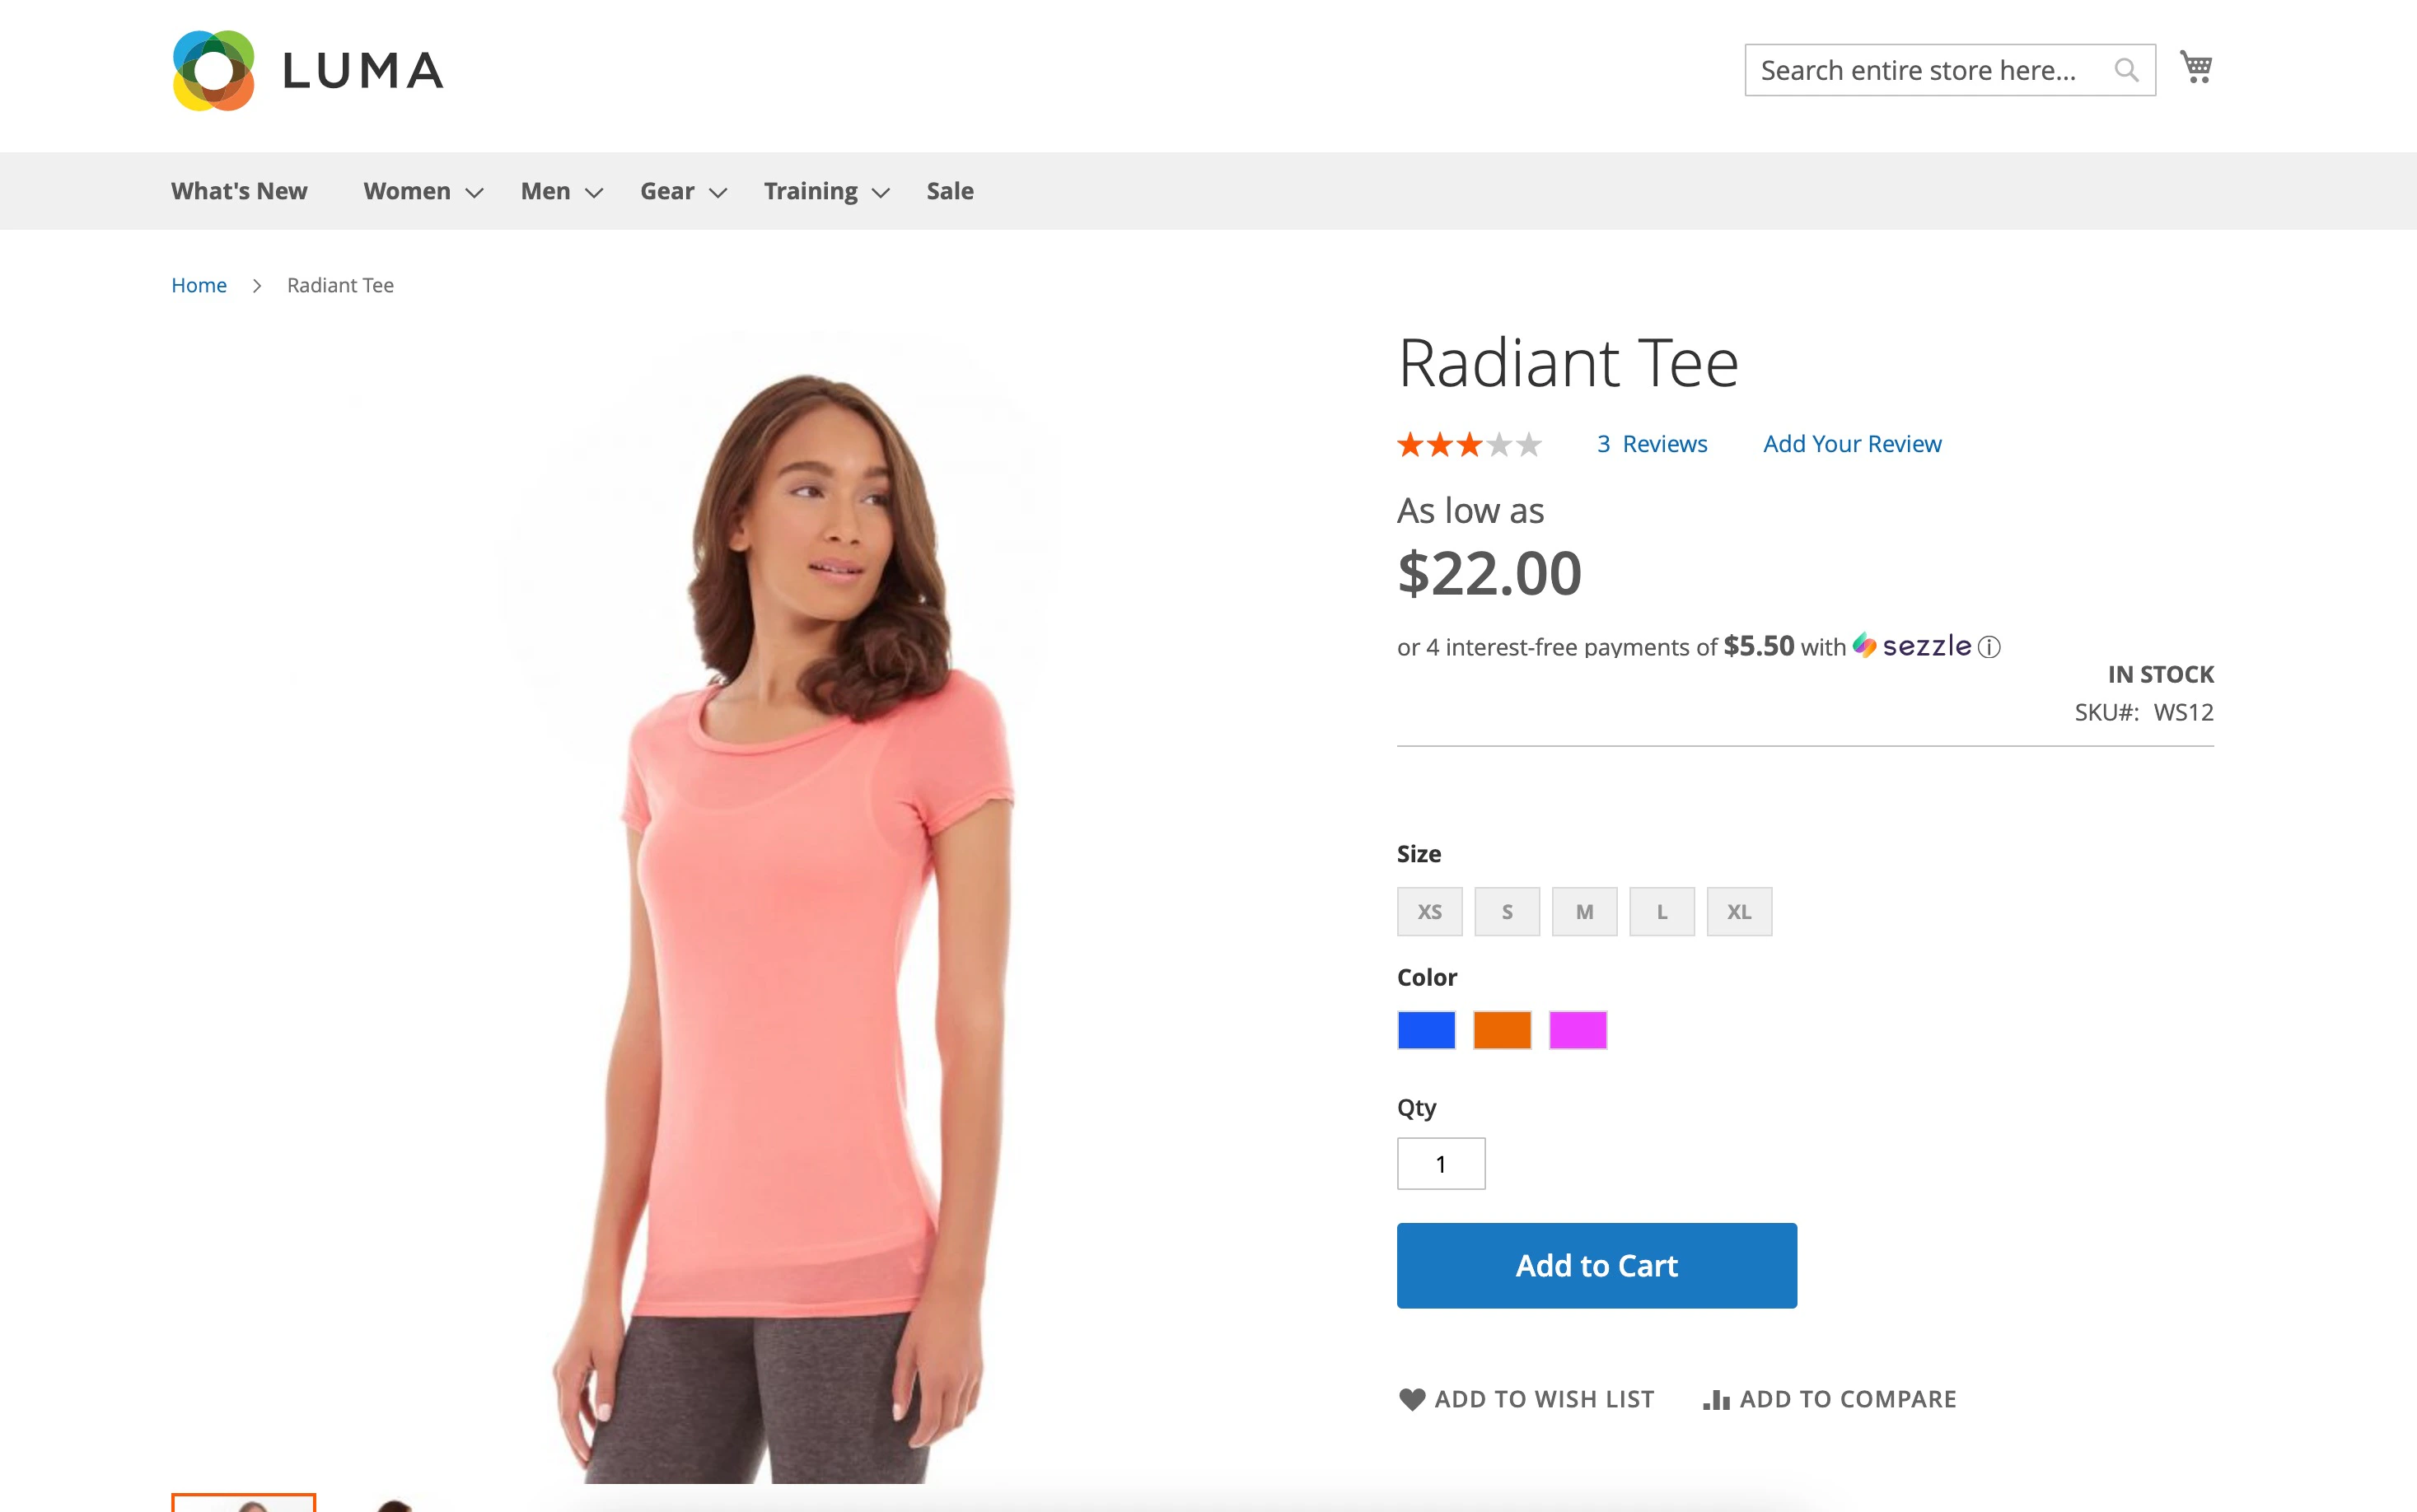
In-Context Solution opens Sezzle payment processing in an iframe or pop-up. When disabled, shoppers will be redirected to Sezzle for payment processing, then returned to the merchant site upon completion.
Set Enable In-Context Solution to Yes to enable In-Context Checkout.
Set In-Context Checkout Mode
IFrame will open Sezzle in a modal over the merchant site
For security reasons, Sezzle must whitelist site URL(s) wishing to use this option.
Pop Up will open Sezzle in a new window
This option works without additional configuration from Sezzle’s end.
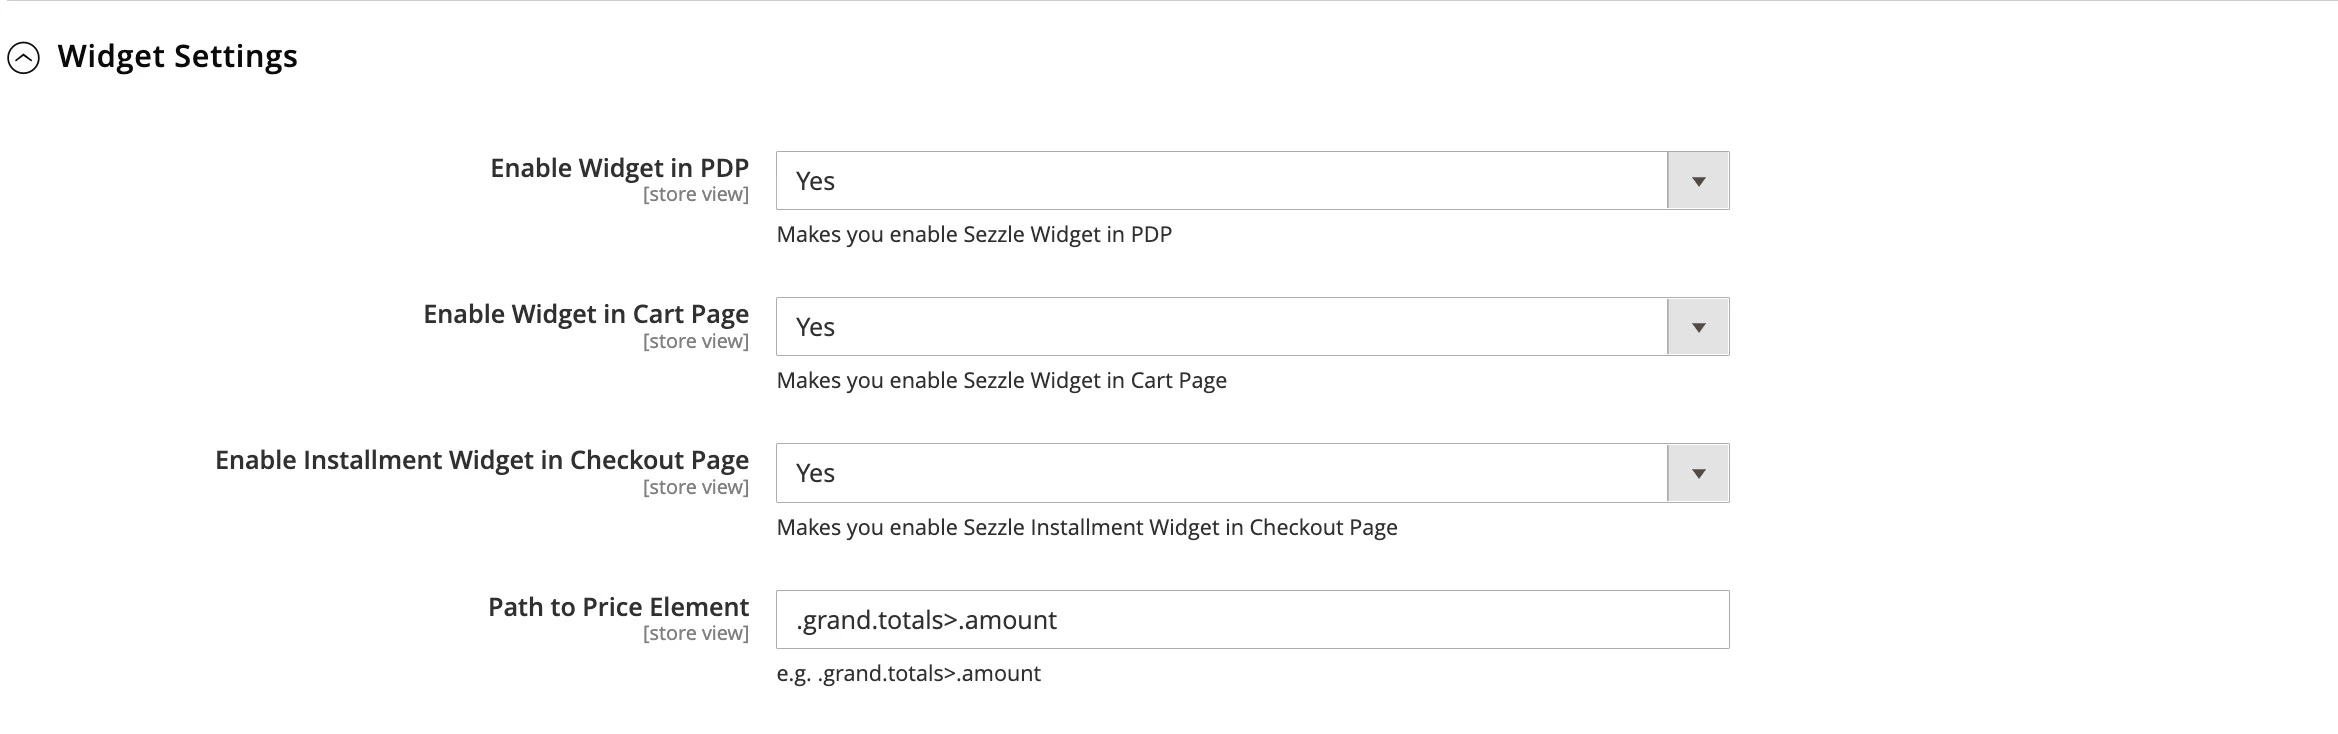
If widgets do not appear on the PDP and/or cart page after enabling the Widget Settings, click the Request button in this section to contact the Sezzle Widget team for assistance.
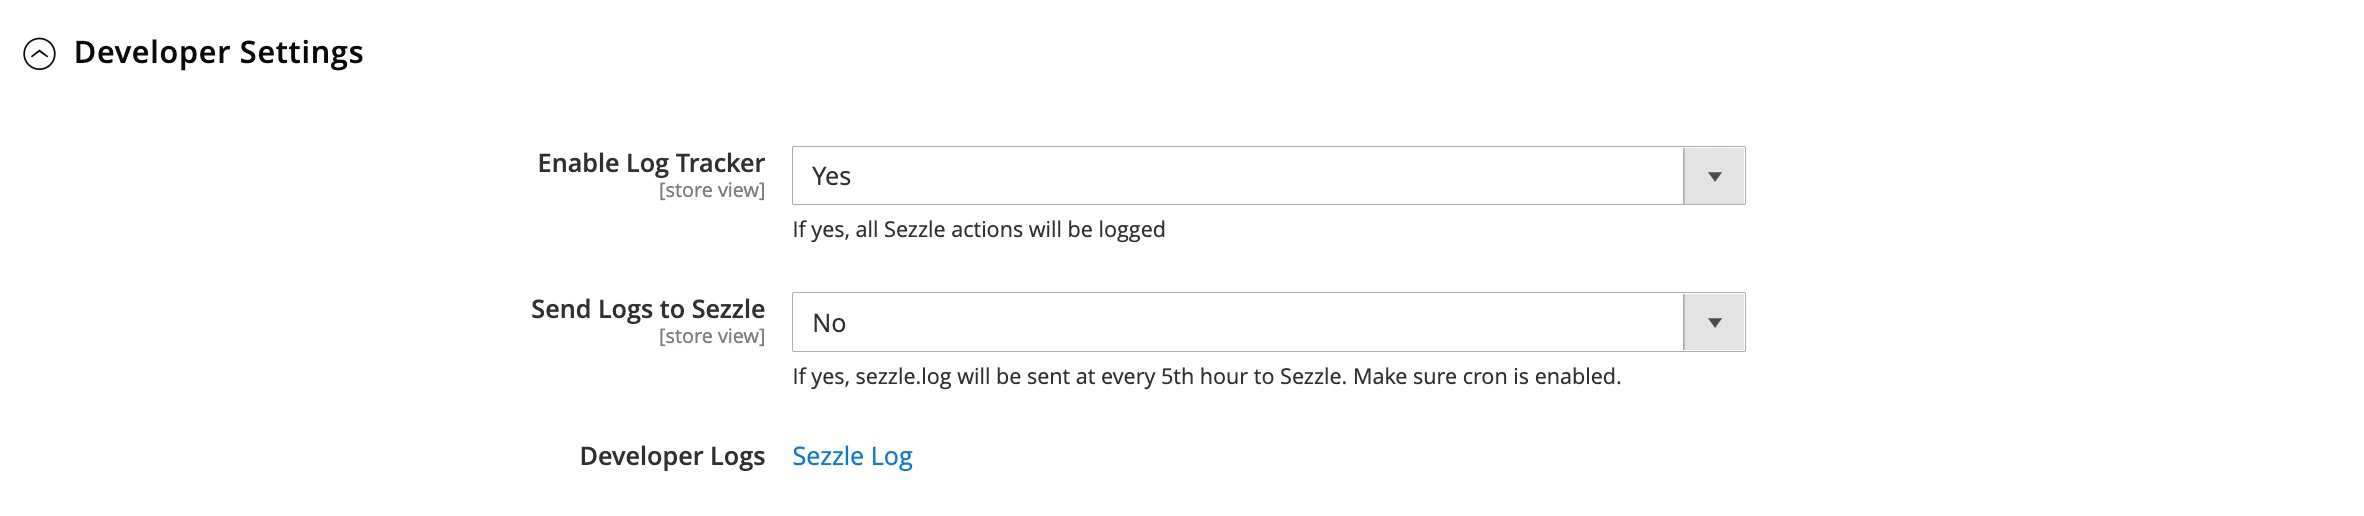
Set Enable Log Tracker to Yes to trace the Sezzle checkout process
Set Send Logs to Sezzle to Yes to send the logs to Sezzle automatically
This requires cron to be enabled in Magento. In your Magento root folder, run php bin/magento cron:run
If this feature is disabled, please provide a copy of the logs with any support request related to the request.
You may download the latest logs any time by clicking on Developer Logs: Sezzle Log
This button will only download the log file for the current date. To retrieve logs for a past date, go to <magento root>/var/log/sezzlepay-YYYY-MM-DD.log
Navigate to Sales > Orders, find the order to release, and click View
In the upper-right of the form, click Cancel or Void then OK to confirm your action
This will release the payment amount in Sezzle and update the Magento order status to Canceled if the Sezzle authorization has been released successfully or has already expired
According to Magento, Void should be used to release the current payment authorization and a new invoice can be generated, whereas Cancel both voids the authorization and places the order into a read-only state.However, in Sezzle’s case, both buttons operate the same way
If testing was unsuccessful, review the following:
Sezzle-Magento2 extension is the latest version
Sezzle extension is enabled
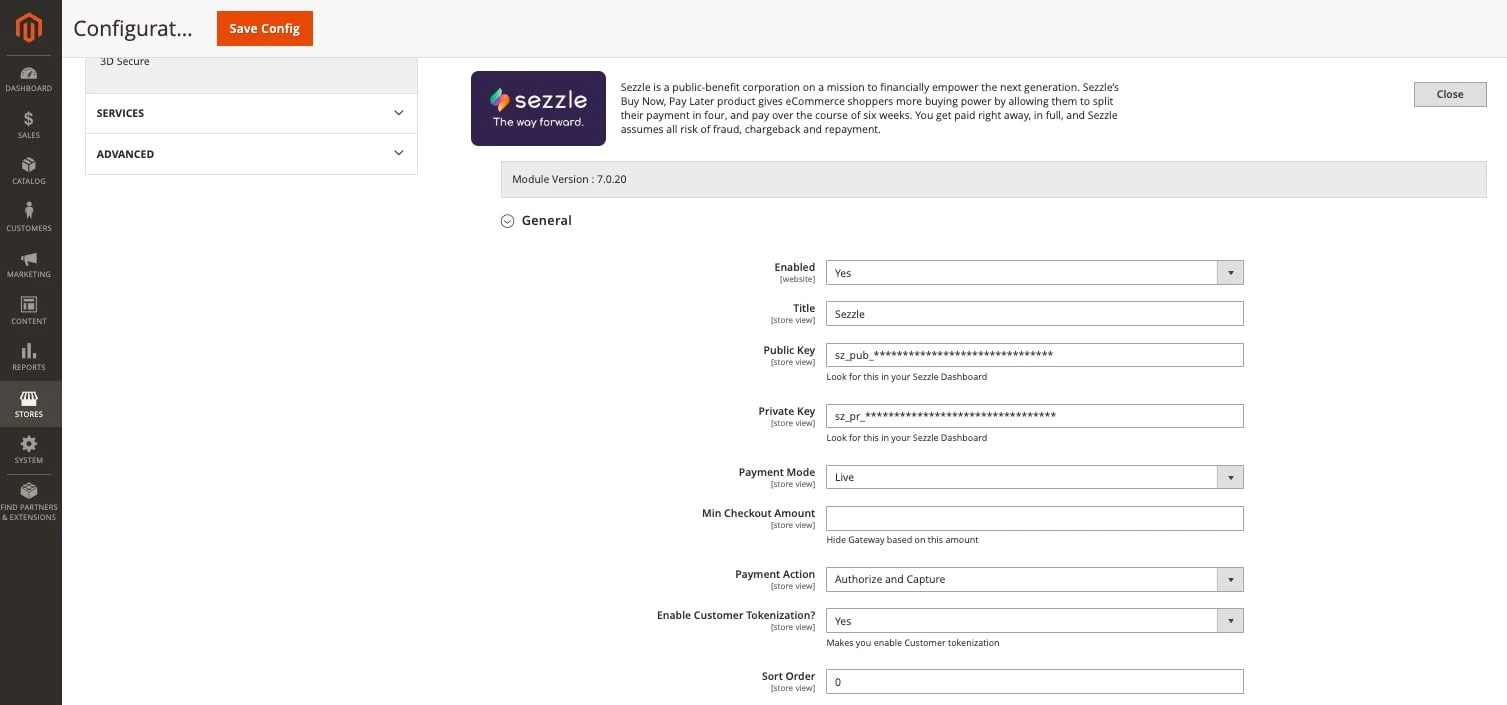
Go to Stores > Configuration > Sales > Payment Methods > Additional Payment Solutions
Next to Sezzle, click Configure
Ensure Enabled is set to Yes
API Keys were entered correctly, and for the correct environment
It is recommended to use the Copy icon in the Sezzle Merchant Dashboard to avoid typos or extra spaces
Cache Storage was flushed
Widget script is present on your website and reflects the Merchant UUID from your Sezzle Merchant Dashboard
Go to a product page on your website
Right-click then select Inspect
In the Elements tab, search for widget.sezzle
If all the above checks failed, the merchant can forward the <magento root>/var/log/sezzlepay-YYYY-MM-DD.log to the Sezzle team at merchantsupport@sezzle.com
It is always recommended to also send the system.log and exception.log for better tracing of issues