Purpose
Increase AOV and conversions by promoting Sezzle on your storefront. Easily install assets to product and cart pages with the Sezzle Widget app at no additional cost!Prerequisites
- You should have a Sezzle merchant account
- Please visit our signup page if you don’t have an account
- Install and configure the Sezzle Payments App
Getting Started
- Log in to your website’s Shopify admin
-
Install the Sezzle Widget app
- Alternatively, click the
Get the Widgets Appbutton under theAdd Sezzle to your product and cart pagesstep of the Sezzle Merchant Dashboard Setup Checklist
- Alternatively, click the
-
Click
Install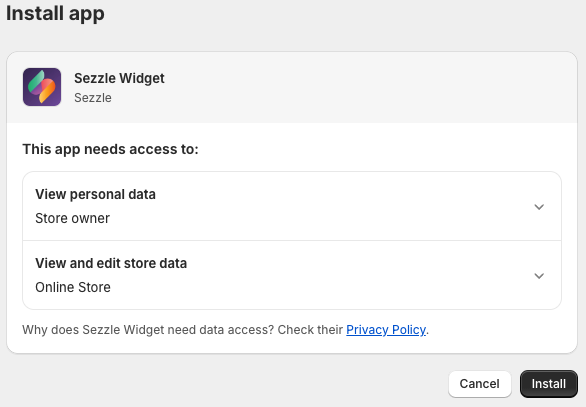
-
Within the Sezzle Widget app, enter your Public API Key and click
Link Sezzle Account- For most merchants, we are able to pre-fill the public API key based on the Shopify store URL
-
To enter the API key manually, copy from the API Keys page within the Sezzle Merchant Dashboard Settings

Installation
Please select ONE of the following installation methods:Installation Wizard
Embed Blocks (manual)
App Blocks (2.0 themes only)
Installation Wizard
-
Select the theme you wish to edit, then click
Next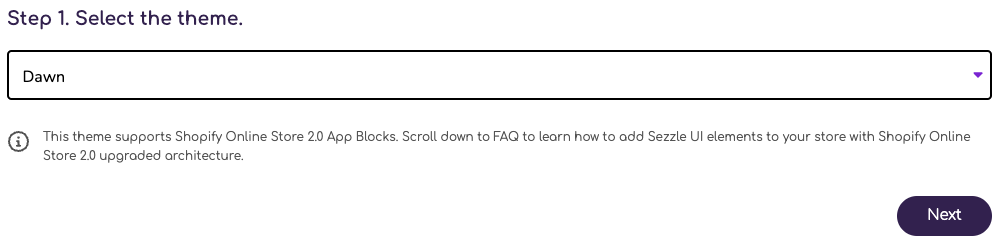
-
Select the asset you wish to install, then click
Next
-
Select the page you wish to install on, then click
Finish
-
Click the
Activatebutton -
Customize as desired, then click
Save
Widgets not rendering correctly? Request Help
Installing as Embed Blocks (manual)
If you are not already in the app, you can alternatively enable the Sezzle products directly from your theme customizer window.-
Within Shopify Admin, go to
Sales ChannelsthenOnline Store -
Under
Themes, clickCustomizefor the theme you wish to edit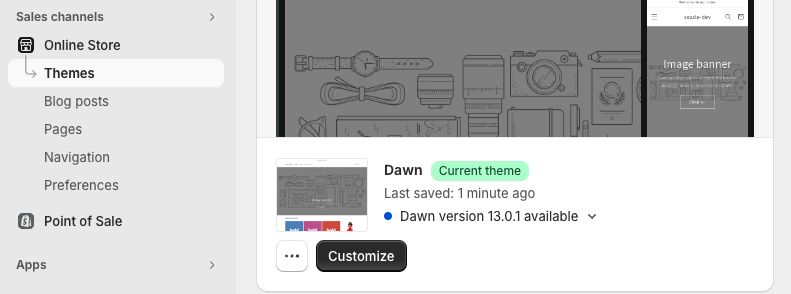
-
In the upper-left corner, click the third icon
App Embeds -
Search for Sezzle and activate the product(s) you wish to install
-
Customize as desired and click
Save
-
Customize as desired and click
Installing as App Blocks
App blocks allow merchants to control product placement. Compatible with 2.0 themes only.-
Within
Shopify Admin, go toSales ChannelsthenOnline Store -
Under
Themes, clickCustomizefor the theme you wish to edit -
In the top toolbar, ensure the third icon
Activate Inspectoris activated
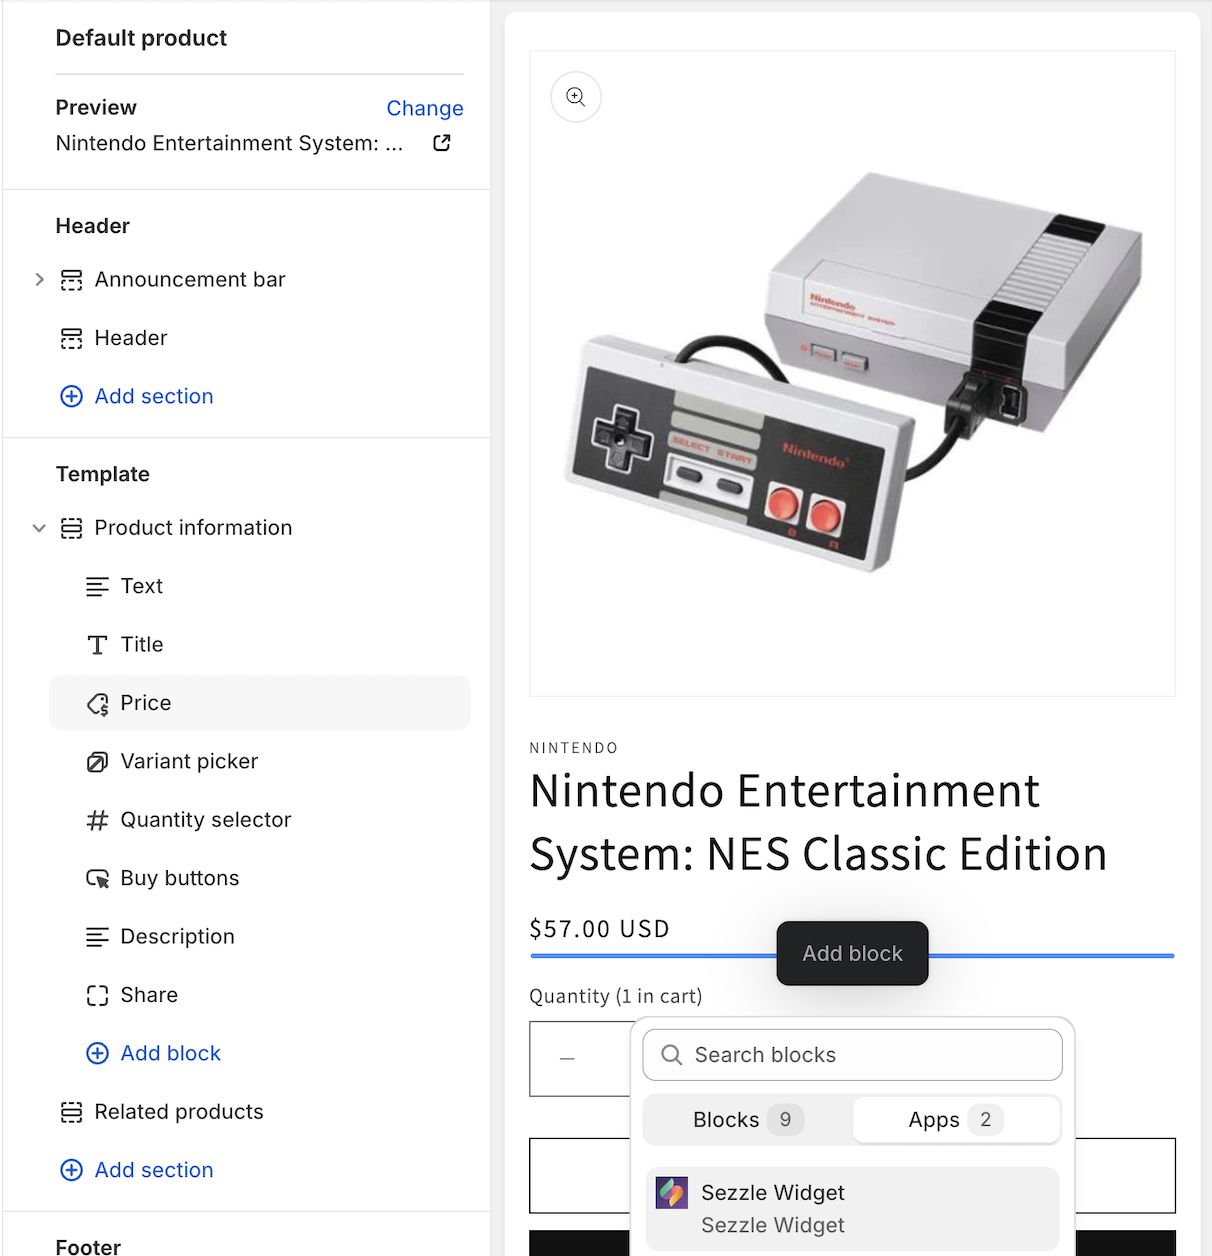
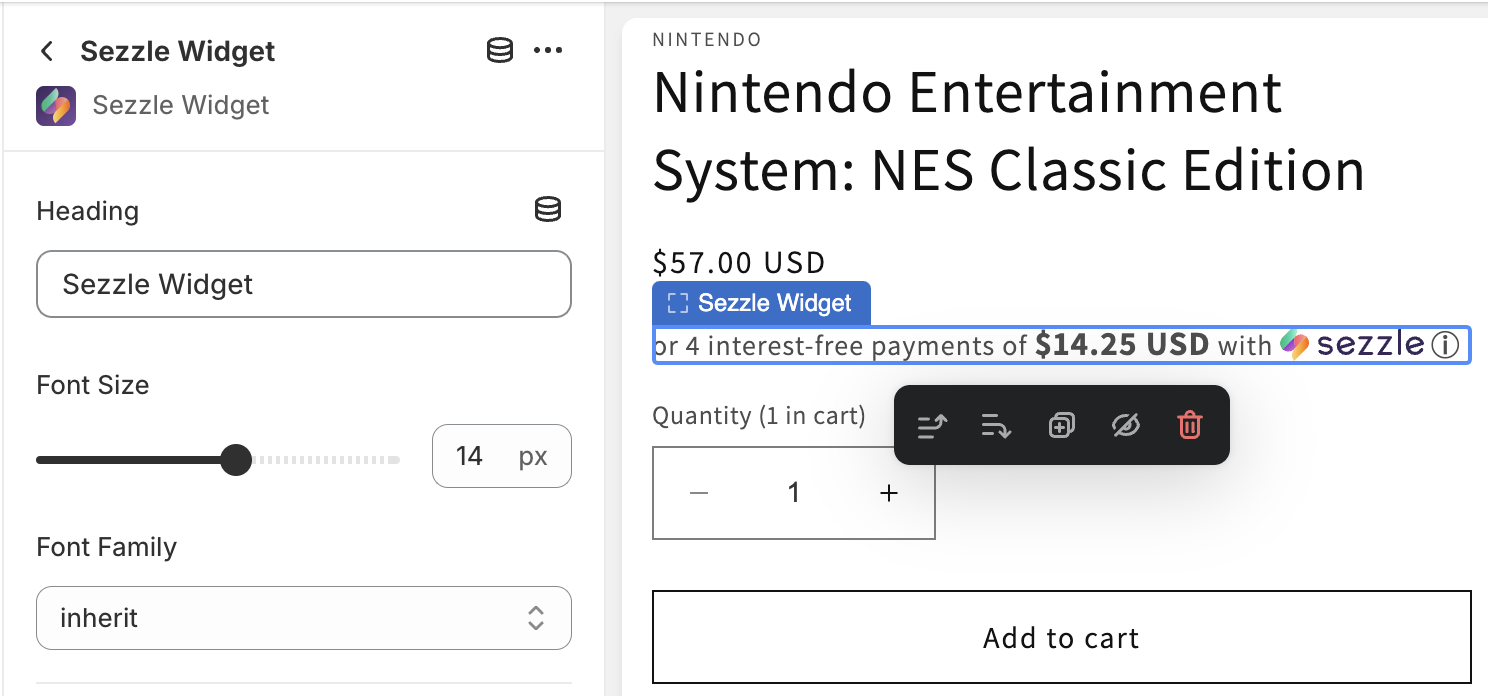
Installing Widget App Block on Product Page
- Navigate to a product page
- Hover over the area where you wish to display the widget
- If app blocks can be placed there,
+orAdd blockwill appear. Click, then selectSezzle Widgetunder theAppstab-
Alternatively, open the
Sectionstab and clickAdd Block -
Under the
Appstab, selectSezzle Widget -
Drag & drop the block to the desired location in the contents menu
-
Alternatively, open the
- Customize as desired, then click
Save
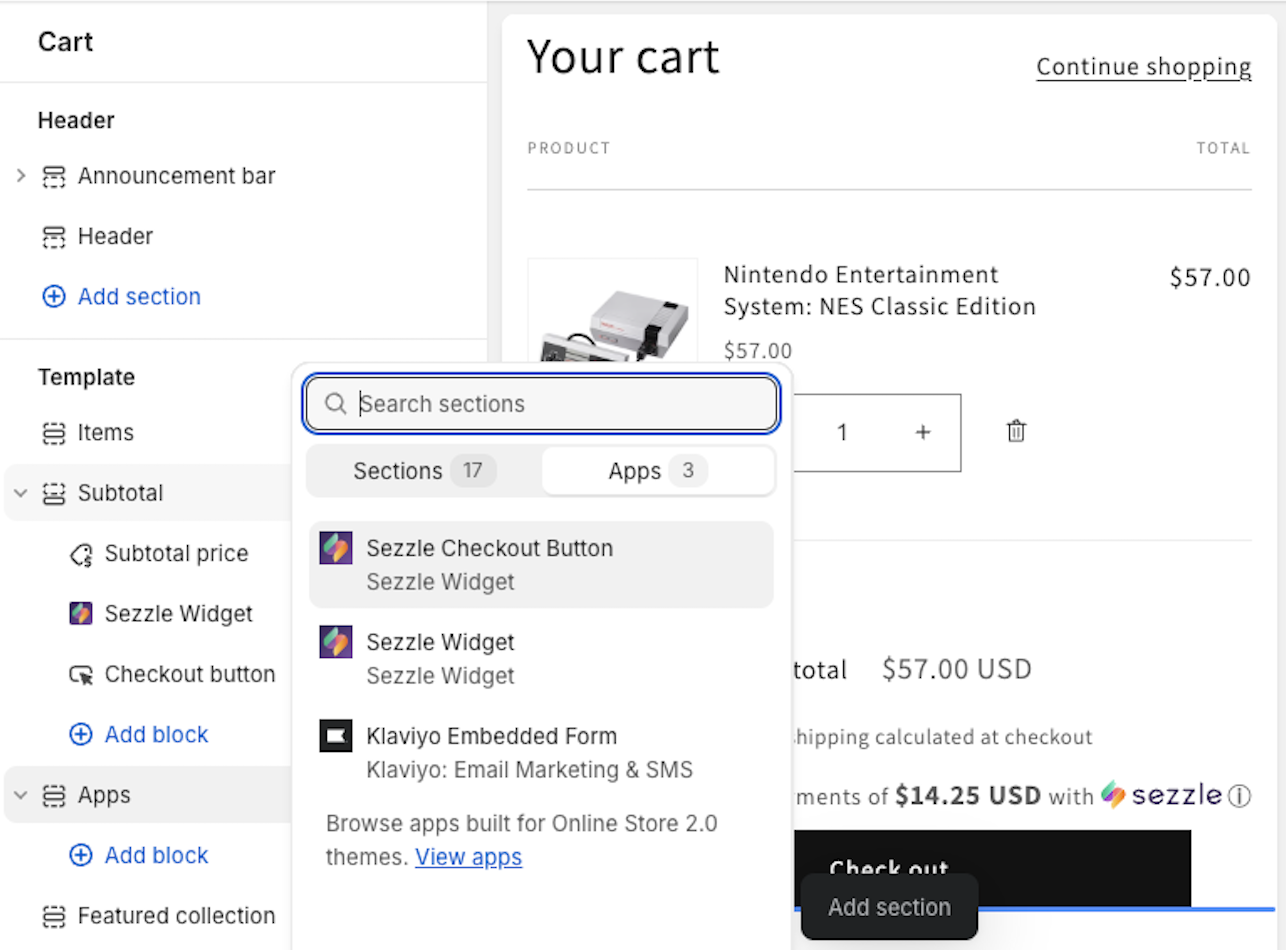
Installing Widget App Block and Checkout Button on Cart Page
- Add a product to the cart
- Navigate to the cart page
- Hover over the area where you wish to display a Sezzle product
-
If app blocks can be placed there,
+orAdd blockwill appear- Click, then under the
Appstab, select the product - Alternatively, open the
Sectionstab and clickAdd Block- Under the
Appstab, selectSezzle Widget - Drag & drop the block to the desired location in the contents menu
- Under the
- Click, then under the
-
Repeat the previous two steps for the other product, if desired
-
Customize as desired, then click
Save
Customizations
The following section covers customization options that are available through the app.Widget Customization Options
Checkout Button Customization Options
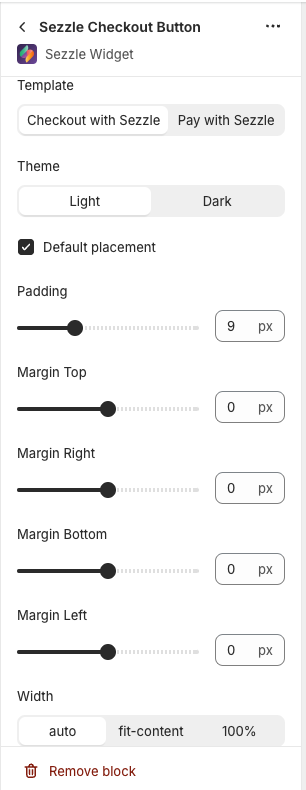
Default Placement
If Checked- The Sezzle Checkout Button will be placed after the native checkout button and inherit page styles
- The button will be placed as indicated by the app block placement
- Styles may also be affected, based on the placement selected
Custom CSS
If you are familiar with CSS and would like additional style customizations, you can write them directly to your theme.-
In the upper-left corner, click the second icon
Theme Settings -
Expand Custom CSS section and write your custom snippet, then click
Save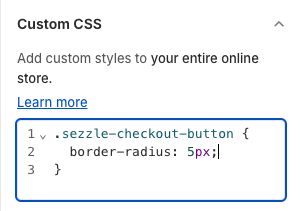
Troubleshooting
Need to update API key
Need to update API key
You will need to uninstall and re-install the app.
Widgets duplicating
Widgets duplicating
If you are using app blocks and there are multiple price elements on the page, all the corresponding widgets will cluster at the app block placement.
Cannot see widget
Cannot see widget
- Widgets will only show for IP addresses in US and CA. If you are viewing from a different country, please use a VPN.
- By default, widgets only show on products up to $2500.
- Confirm that only one installation method is in use. Additionally, only use one app block of each product per page.
If you are using app blocks
Check that the widget was not placed further down on the page.
If you are using a custom theme or pagebuilder
- App blocks might work where embed blocks do not.
- Otherwise, contact Sezzle support for a custom configuration.
If you previously had widgets implemented with a config override
- Please contact Sezzle support to update the override.
If you have ever added custom CSS or Javascript to hide or remove the Sezzle widget
- Remove these snippets from your theme.
Content or placement issues
Content or placement issues
If you have noticed a bug in the widget or checkout button, please contact Sezzle support to notify us of the issue. We can then determine whether this is an issue for all merchants or your specific theme and work to resolve accordingly.
Customization
- We offer a few select customization options. Please contact Sezzle support to request any of the following:
- Grayscale logo
- Reflect checkout minimum in widget
- Reflect Sezzle/Afterpay dual widget
- Style & position changes
- For position changes, you must use the embed block option.
- Conditional rendering for subscription, gift cards, etc.
- Conditional rendering above a certain price threshold
Implementing customizations may prevent widgets from showing on unpublished
themes and will require help from the Sezzle team to update widgets when a
new theme is published.
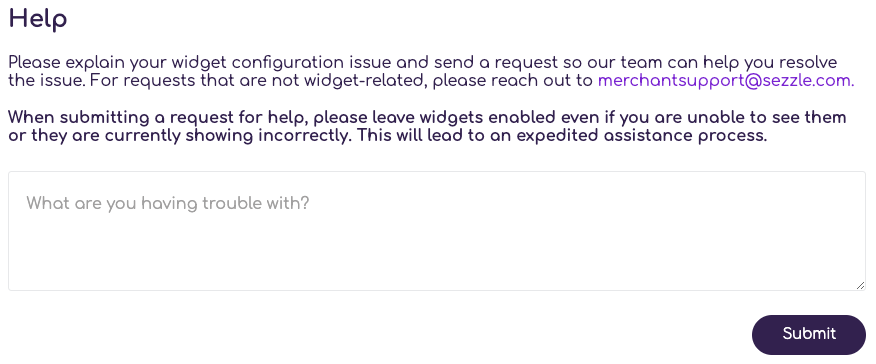
Request Help
If theSezzle Widget app is not able to automatically install the Sezzle widget or checkout button on your storefront, please use the Request Help form within the app to contact the Sezzle Merchant Integrations team.
The Request Help form in the Sezzle Widget app is for widget and checkout button help only. For questions regarding your account or issues with the Sezzle payment option at checkout, please reach out to merchantsupport@sezzle.com.
The Sezzle Merchant Integrations team does not respond to inquiries. If you
request a response or if we need to contact you regarding your request, we
will forward the response through our Merchant Support team.
Manual Theme Code Snippet Installation
Installations that require code changes directly to the theme are not recommended unless your site uses a headless CMS, and should be used as a last resort.Widget Manual Theme Code Snippet Installation
-
Within
Shopify Admin, go toSales ChannelsthenOnline Store -
Under Themes, click
...thenEdit Codefor the theme you wish to edit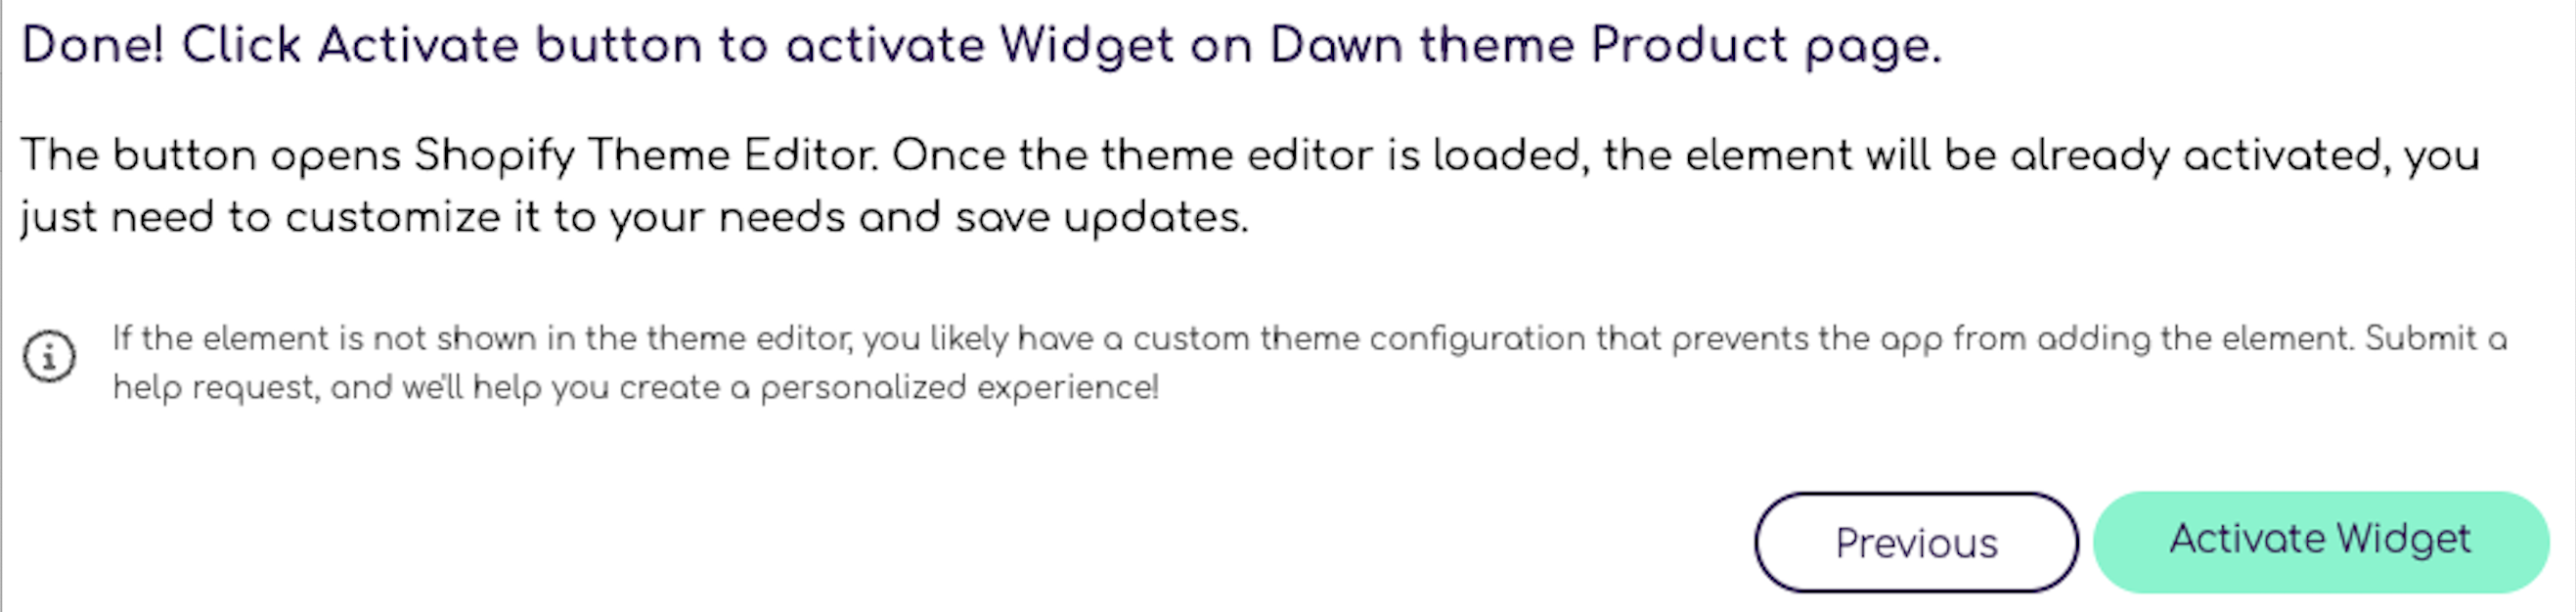
-
In the
Code Explorer, go to theLayoutfolder and select thetheme.liquidfile -
Copy and paste the script to the very bottom of the file
-
Script template to be inserted into your webpage:
-
Script template to be inserted into your webpage:
-
Replace
{sezzle_merchant_uuid}(including the curly brackets) in the script template with your site’s Merchant ID- This can be found in the Sezzle Merchant Dashboard Business Settings
-
Example with Merchant ID value updated:
-
Click
Save
Checkout Button Manual Theme Code Snippet Installation
To install the checkout button directly to your theme code, please refer to the documentation and snippet on GitHub.Uninstalling
Uninstalling Embed Blocks
-
Within
Shopify Admin, go toSales ChannelsthenOnline Store -
Under
Themes, clickCustomizefor the theme you wish to edit -
In the upper-left corner, click the third icon
App Embeds -
Toggle the desired embed block(s) to the
OFFposition, then clickSave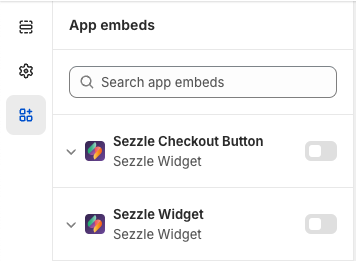
Uninstalling App Blocks
-
Within
Shopify Admin, go toSales ChannelsthenOnline Store -
Under
Themes, clickCustomizefor the theme you wish to edit - Navigate to a product page
-
In the upper-left corner, click the first icon
Sections -
Next to the
Sezzle Widgetblock, click theDeletetrash can icon, then clickSave -
Navigate to the cart page, and repeat the previous step for each product, then click
Save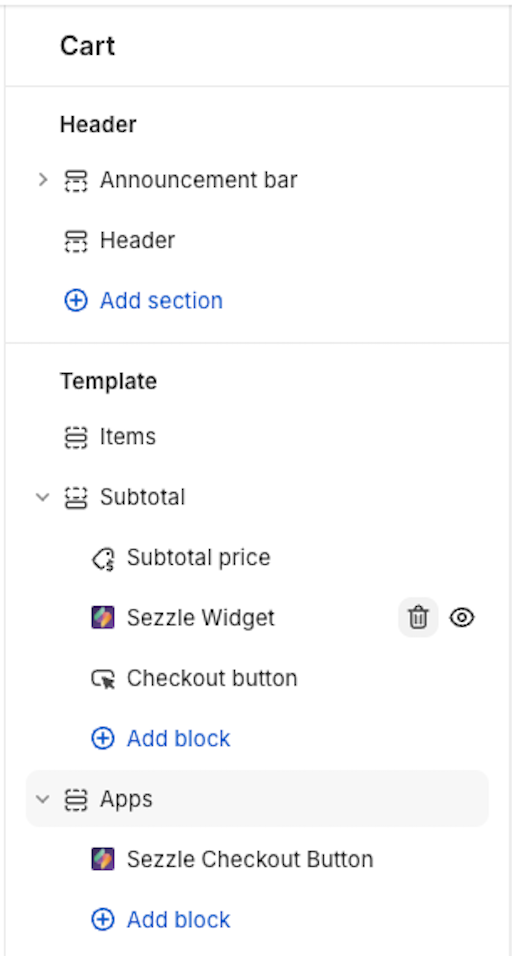
Uninstalling Manual Theme Code Snippet
You should only need to perform this step if you had the old
Sezzle private app installed, or if you installed products manually-
Within
Shopify Admin, go toSales ChannelsthenOnline Store -
Under
Themes, click...thenEdit Codefor the theme you wish to edit -
Review the layout/theme.liquid file for any Sezzle code snippets
- Remove them, then click
Save - Repeat for any files containing product and cart in the name
- Remove them, then click
- Once all references are removed, search for files containing sezzle in the name, and delete
Uninstalling the App
-
Go to
AppsthenSezzle Widget -
In the top-right corner, click the
Menuicon, then selectApp Settings -
Click
Delete App