Install the Sezzle Payments App
- Log in to your website’s Shopify admin
-
Install the Sezzle Payments app
- Go to
Settings>Payments - Under
Additional Payment Methods, clickAdd Payment Method - Search for
Sezzle - Click the result in the dropdown, then click
Sezzle Payments - Click
Manage Account - Click
Install
- Go to
-
Enter your production Sezzle public and private API keys
- For most merchants, we are able to pre-fill the public and private API keys based on the Shopify store
- If we cannot uniquely identify the merchant based on the Shopify store, you will be required to fill in the keys
-
Click
Saveto verify your Sezzle account- You will be redirected to the payment settings page, where you will need to activate Sezzle Payments for your store
-
Click
Activate -
Verify Sezzle is available as a payment method for your store
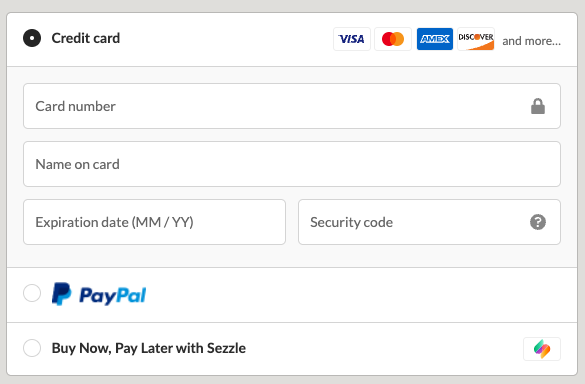
You should see
Sezzle Payments installed in your Settings > Payments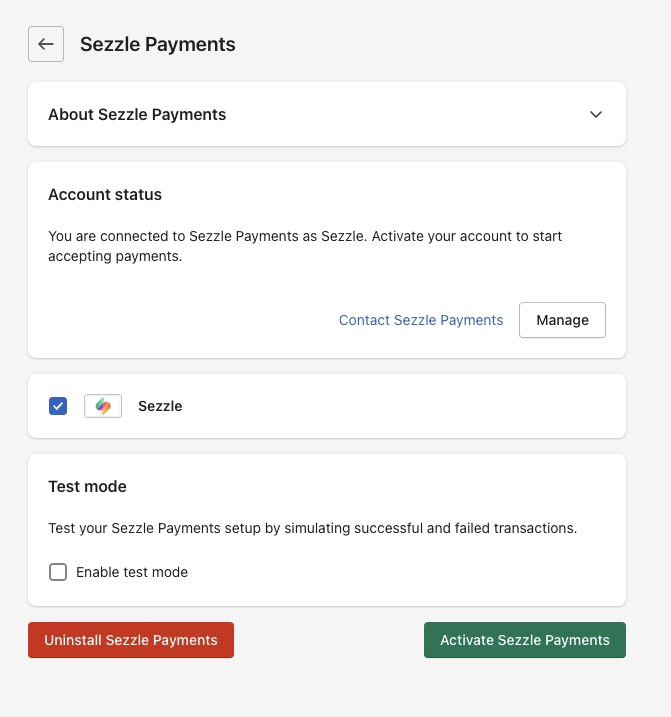
Validate
For Sandbox testing, do this step first- Navigate to
Settings>Payments>Sezzle Payments - Click
Manage, checkEnable test mode, and clickSave - Click the
Managebutton in Sezzle Payments, enter your sandbox API keys in the test tab - Click
Update settings
- In the Sezzle configuration page of your Shopify admin, enter the API keys from your Sezzle Merchant Dashboard
- Uncheck the
Enable Test Modecheckbox - Save the configuration
Adding the Sezzle Tile to Accepted Payment Methods Footer
The Shopify “Accepted Payment Methods” footer widget does not support third-party payment apps by default. To show Sezzle in this section, follow the instructions provided by Shopify, adding'sezzle' to the list.
Troubleshooting
If testing was unsuccessful, review the following: Sezzle Payments Shopify extension is the most updated version- Go to
Apps>Sezzle Payments, then clickAbout - If there is an option to upgrade, do so now
- Go to
Settings>Payment Providersand ensure “Sezzle is active” is listed under theAlternative Payment Methodssection
- Use the Copy icon in the Sezzle Merchant Dashboard to avoid typos or extra spaces
- If you have multiple accounts with Sezzle, the merchant ID and API keys are tied to only one URL
Uninstall the Sezzle Payments App
-
Go to
Apps -
Find
Sezzle Paymentsand clickDelete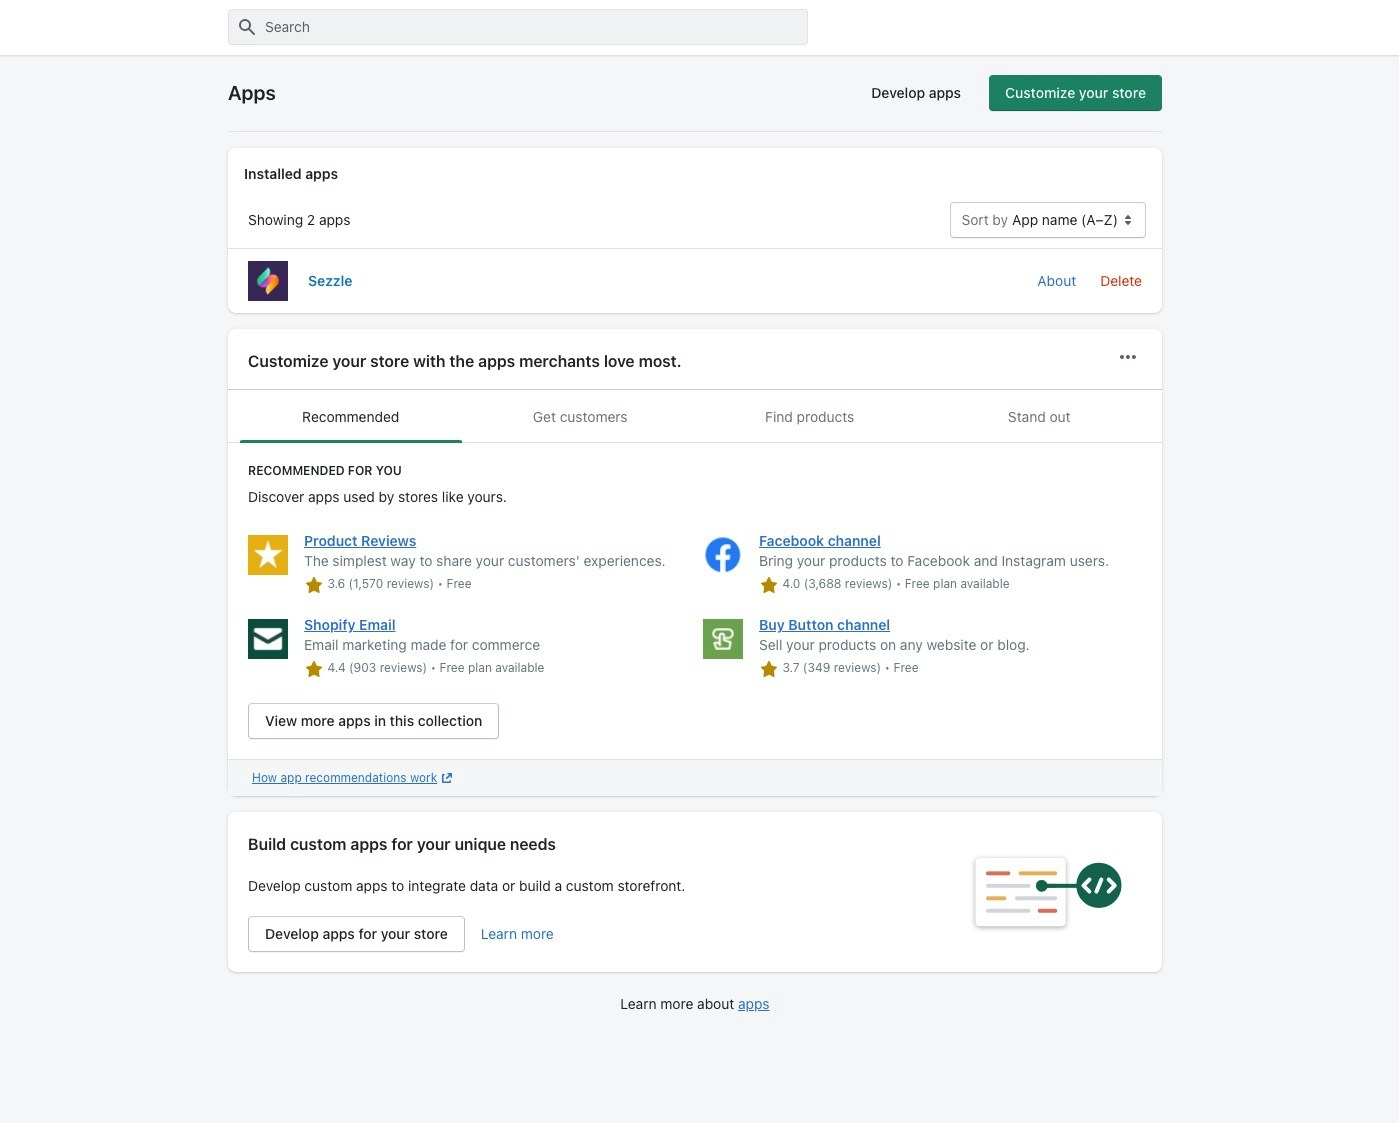
FAQs
I have my Shopify Payment Capture set to Manual. What do I need to do?
I have my Shopify Payment Capture set to Manual. What do I need to do?
Sezzle aligns with your Shopify
Payment Capture settings. If set to Manual, you must manually capture payments for Sezzle orders. Authorization periods differ by merchant, so check the expiration in the Sezzle Merchant Dashboard under Settings > eCommerce and adjust as needed.I have multiple stores on Shopify. What do I do?
I have multiple stores on Shopify. What do I do?
Install using an incognito browser. Go to
https://your-store.myshopify.com/admin/settings/payments/alternative-providers/1057901, replacing your-store.myshopify.com with your store’s URL. Log in and follow the steps to complete installation. For another store, close and start a new incognito session.The order number in Shopify appeared in the merchant dashboard on Sezzle. I don't see it anymore?
The order number in Shopify appeared in the merchant dashboard on Sezzle. I don't see it anymore?
In Shopify, open the order and select 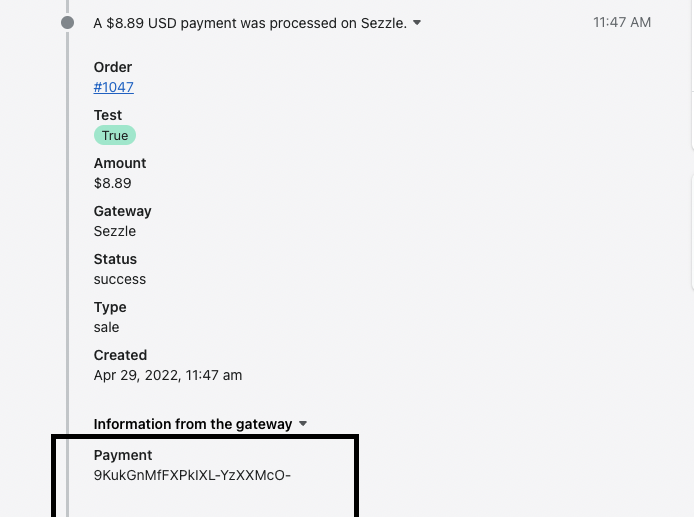

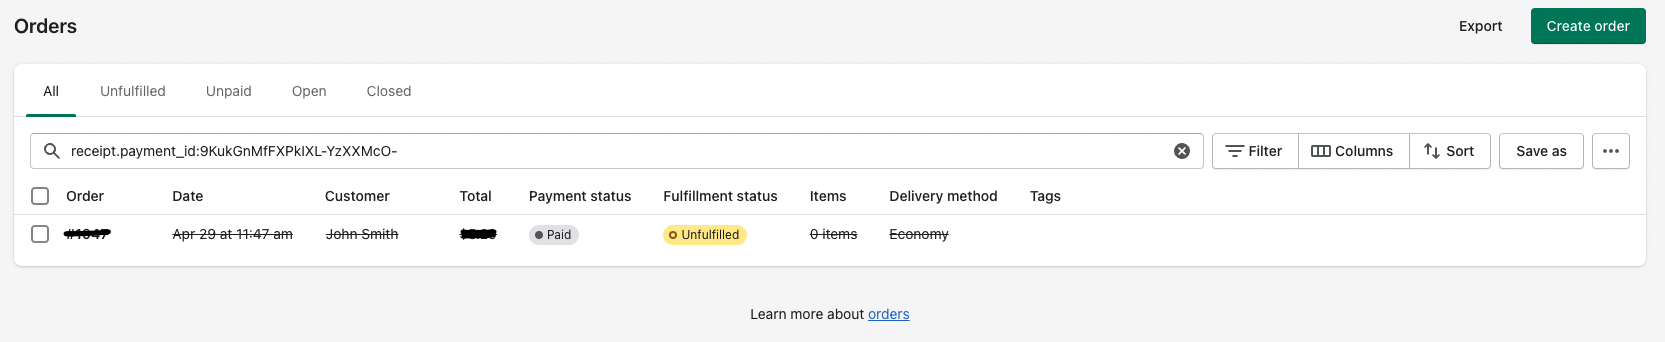
Information from the gateway. The payment ID will match the Reference-ID in the Sezzle Merchant Dashboard.receipt.payment_id:<payment_id>.I have the Sezzle inventory locking feature enabled today. Will this be enabled with the new app?
I have the Sezzle inventory locking feature enabled today. Will this be enabled with the new app?
No, Sezzle lacks permissions to view or modify Shopify inventory, so this feature is not supported with the new payment app.