
Mojo

This guide describes how to integrate Sezzle into your Mojo website so that you can provide Sezzle as a payment option for your customers. After integrating Sezzle, your site will:

  • offer Sezzle as a payment option on the checkout page.
  • refund Sezzle payments from your Mojo order management system.
  • display Sezzle promotional messaging.
  • authorize and capture payments.

Integration Steps Overview

  1. Add Sezzle to your store as a payment method
  2. Test your integration

Before You Begin

  1. You should have a Sezzle merchant account.
  2. Make sure you have the following Sezzle details handy.
  3. Familiarize yourself with the transaction flow when buying with Sezzle.

Add Payment Method

  1. Log into your Mojo admin account and navigate to the Integrations tab.
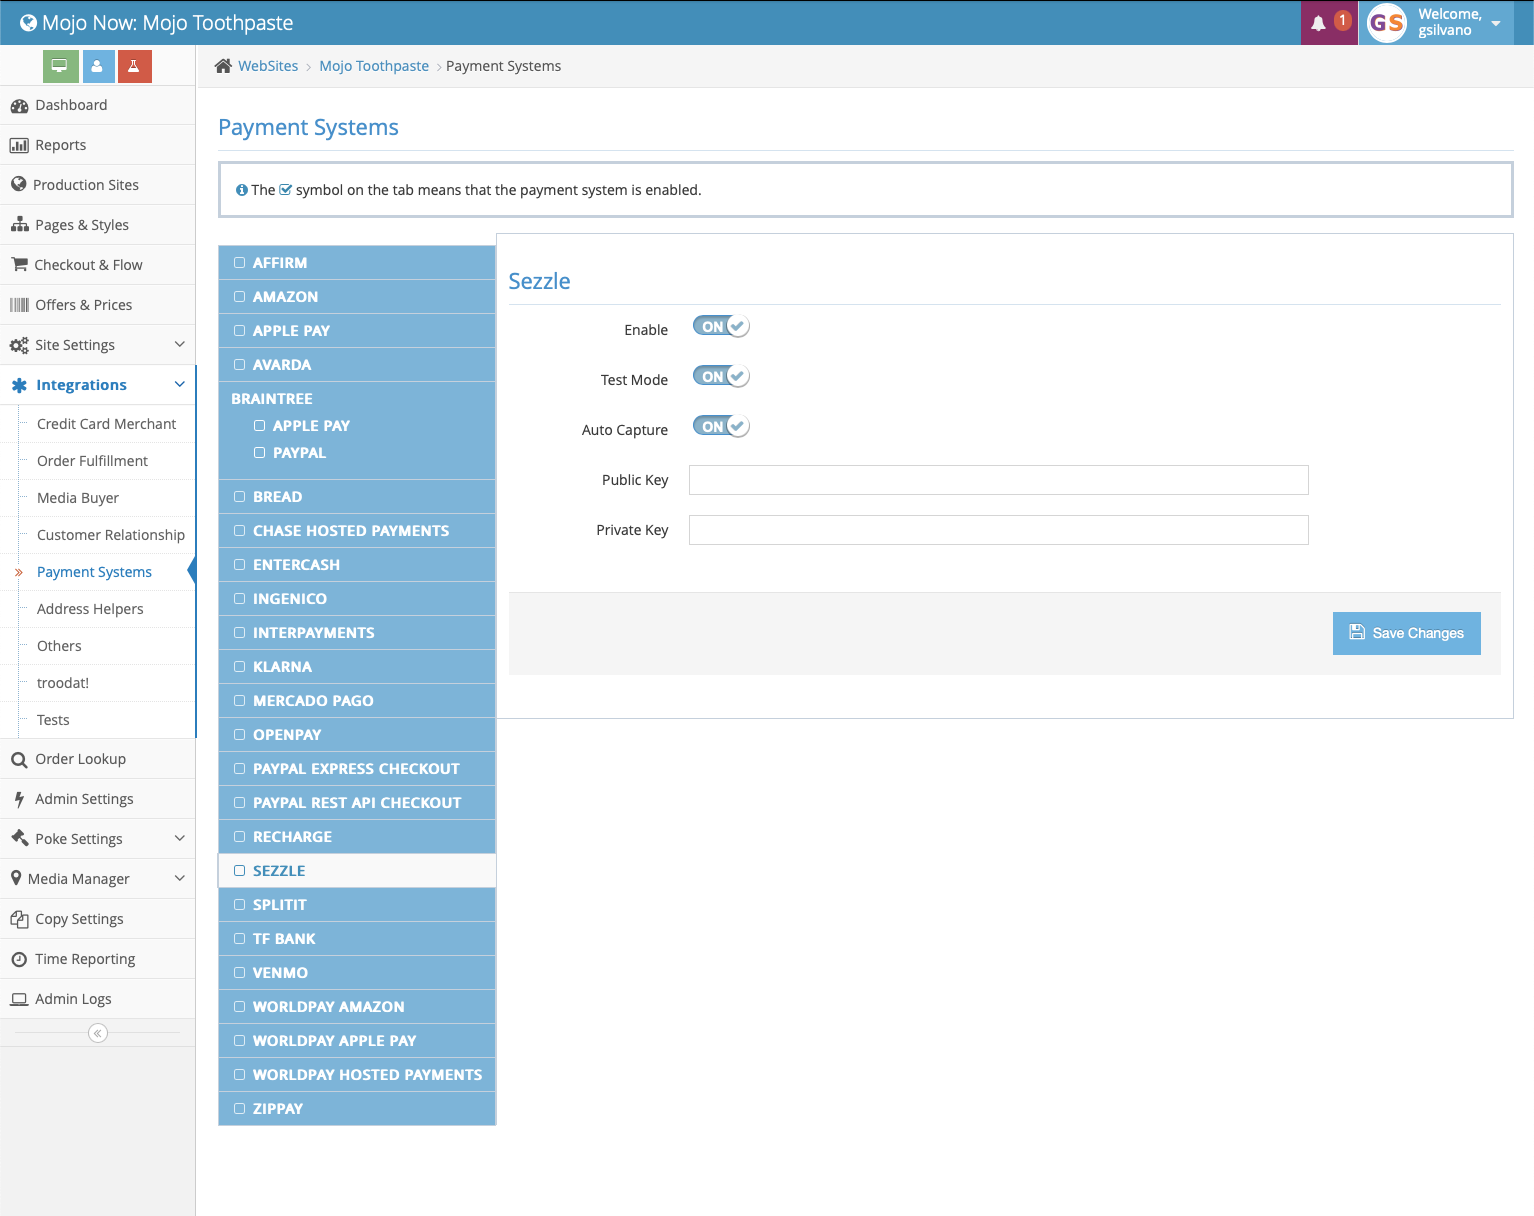
  2. Select Payment Systems in the dropdown menu and click on Sezzle in the next window.

  3. Toggle Enable to ‘ON’.

  4. Next, toggle Test Mode to ‘OFF’ unless you are testing your integration in Sandbox. For Sandbox testing instructions, see Mojo sandbox testing.

  5. Next, enter your Sezzle Public and Private Key within the appropriate fields. mojo-integration

  6. In order to ensure consistency between your webpage offers and payment options upon final checkout, take a moment to navigate to your Site Settings to enable or disable those features that you want enabled with Sezzle.

  • NOTE: the Hide pay-over-time solutions switch will be automatically hidden for those customers that choose the multi-pay order option.
  1. Once satisfied with your transaction flow, click the blue Save Changes button.

Validate

Step through a test checkout to validate the integration is properly installed.